Closing Financial Periods and Closing Entries
You can add and close financial periods so that closing entries are automatically generated, helping clarify the profits and losses for that period. You can also add a specific closed period without linking it to a financial period, without generating any closing entries as a result. This guide explains the difference between closing financial periods and closed periods, how to add each, and the operations available for each.
Closing a Financial Period
Through the system, you can control your financial periods by creating them, setting their dates, and closing them when needed.
Creating a new financial period requires closing the currently open financial period, and closing the current financial period results in creating a new one. In short, there must always be exactly one open financial period in the system at any time.
To close a financial period:
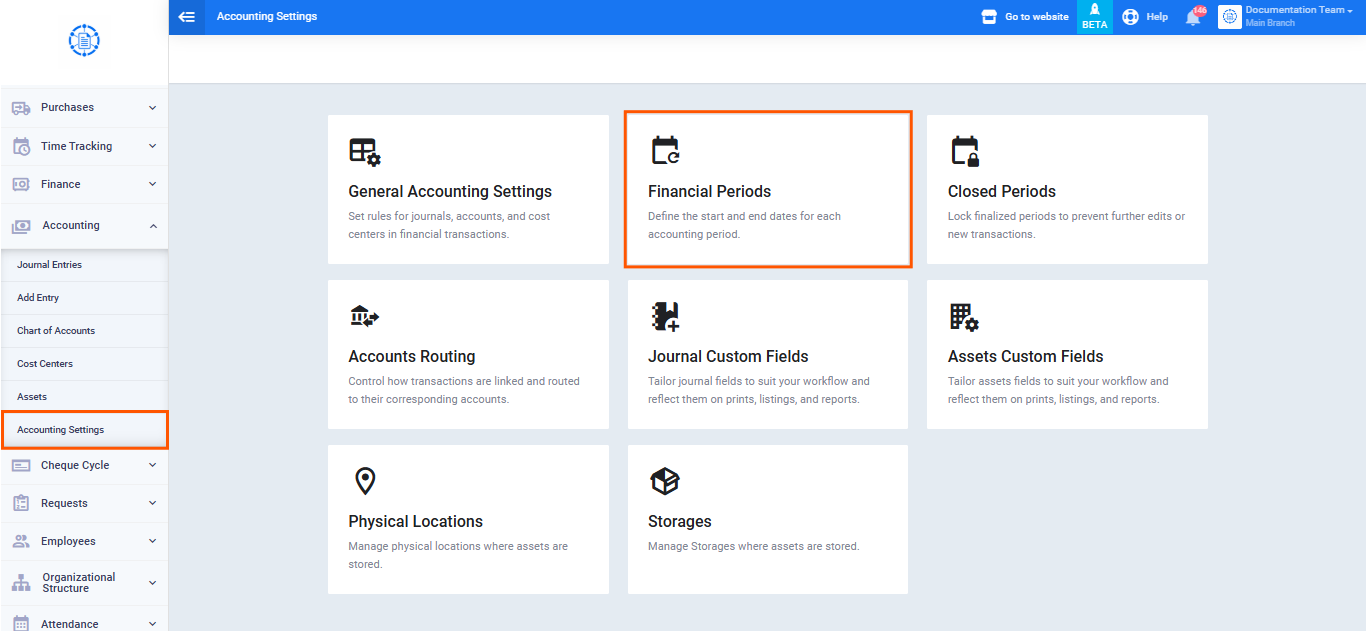
- Go to “Accounting Settings” under the “Accounting” dropdown in the main menu.
- Click “Financial Periods.”
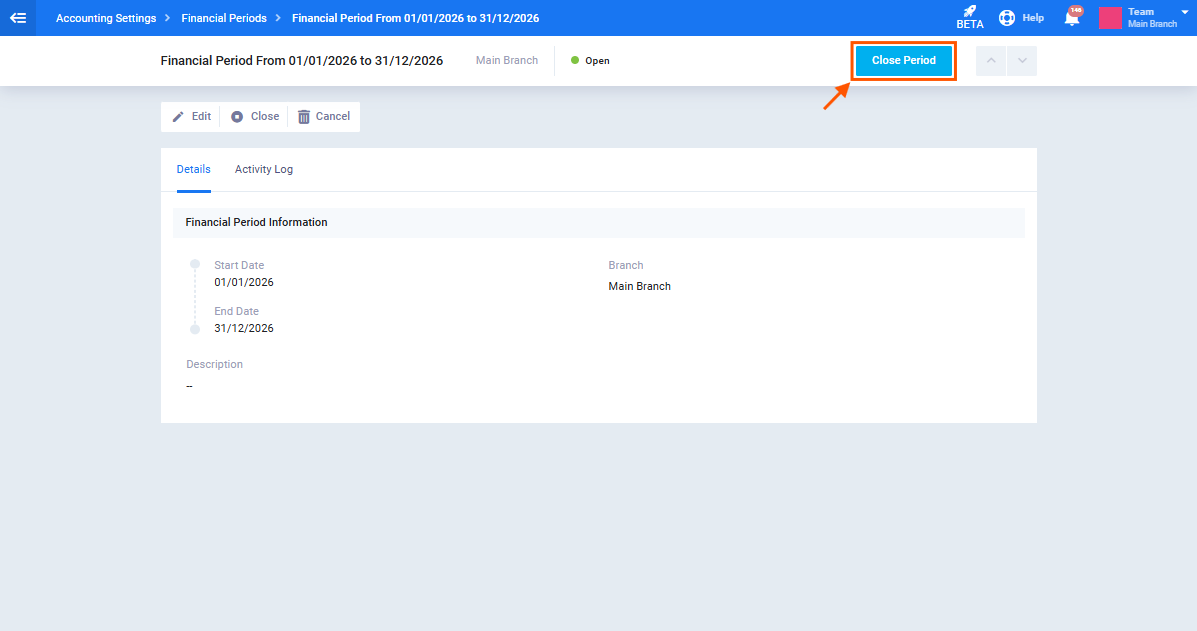
All your financial periods appear, whether closed or open. To close the open period, click the three dots next to it, then click “Close.”
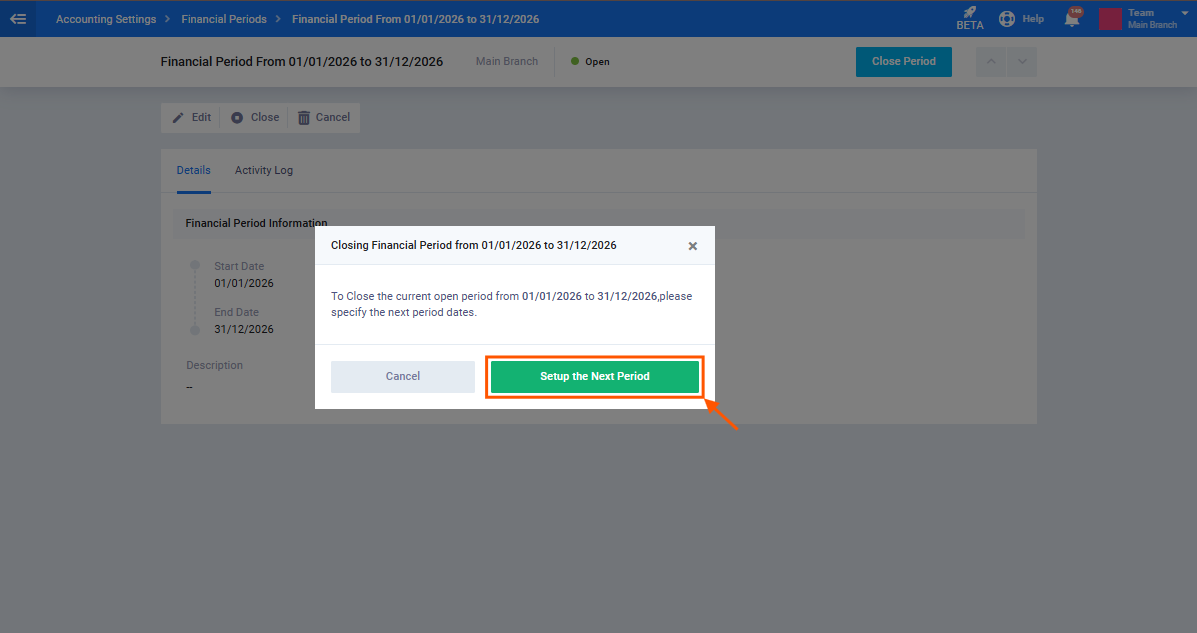
A message appears notifying you that a new financial period must be created in order to close the current one.
To create it, click “Set Up Next Period” to enter the new financial period’s details.
- The start and end dates of the new financial period are set automatically, with the start date matching the end date of the period being closed.
- You control the end date by selecting the fiscal period duration from the dropdown next to the “Period” field, which automatically sets the end date based on that duration.
- You can also choose “Custom” from the Period field to enter the end date manually.
- In the “Description” field, you can enter any information you’d like to record for the financial period.
Set the details, then click “Save.”
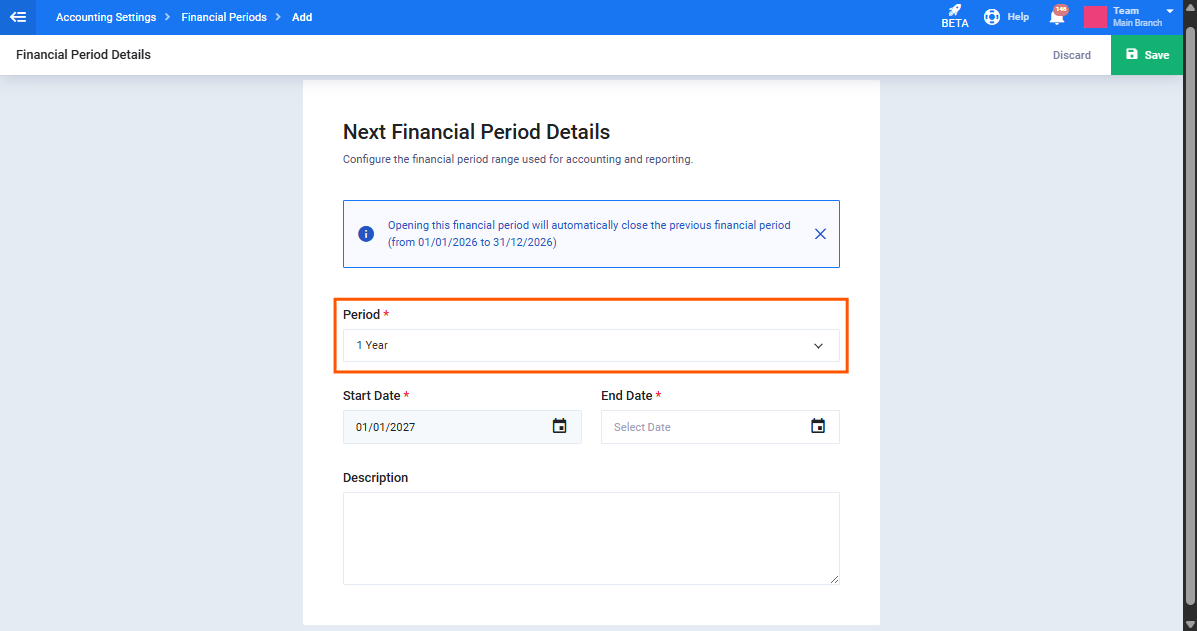
Once the new financial period is saved, the period you wanted to close is closed automatically. You can return to the financial periods list to view the closed period.
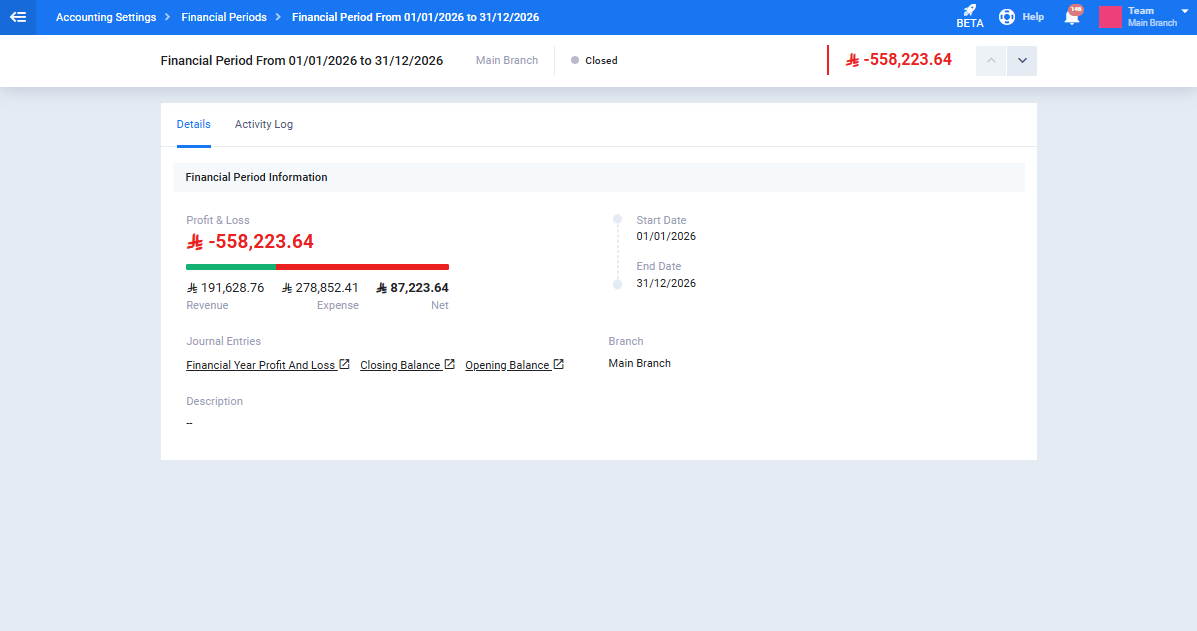
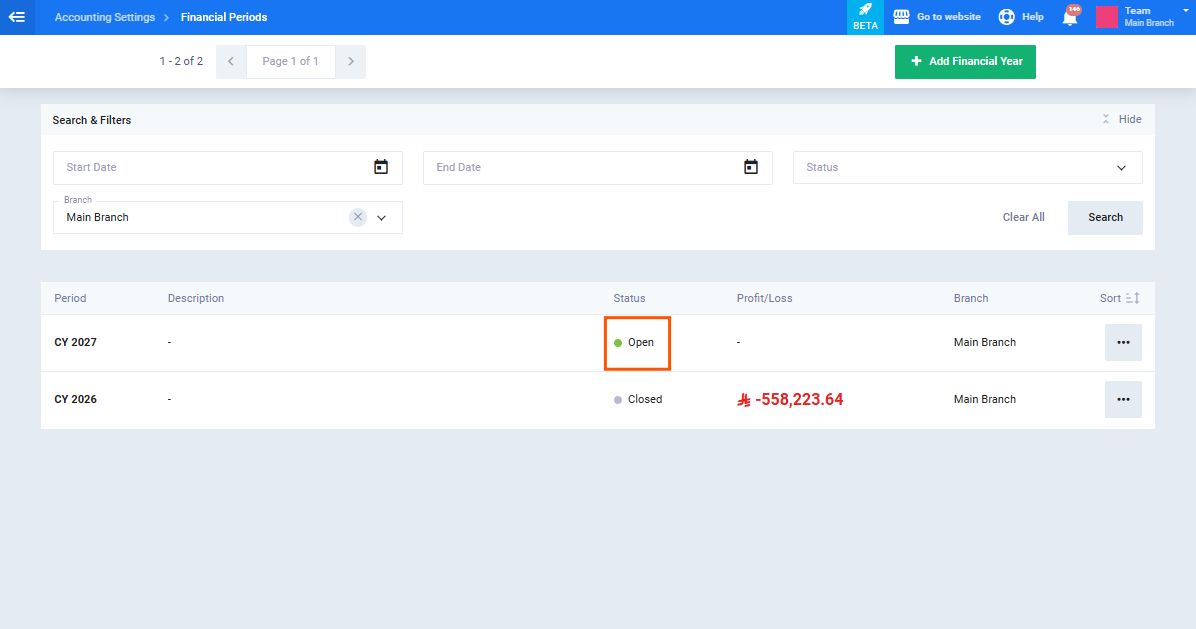
Notice that when viewing the financial period, its status now shows “Closed,” along with the total profit or total loss resulting from that closed period.
Reopening or Cancelling a Financial Period
Financial periods follow the usual chronological order, and older financial periods must be closed to open a new one.
Similarly, to reopen an old financial year, you must cancel the current financial period.
For example, if you have the following financial years:
- 2026: Closed.
- 2027: Open.
And you want to reopen the 2023 financial year, you must cancel the currently open financial year — 2024 — which automatically reopens 2023.
Steps to reopen a closed financial year:
- Click “Accounting” from the main menu.
- Click “Accounting Settings.”
- Click the “Financial Years” card.
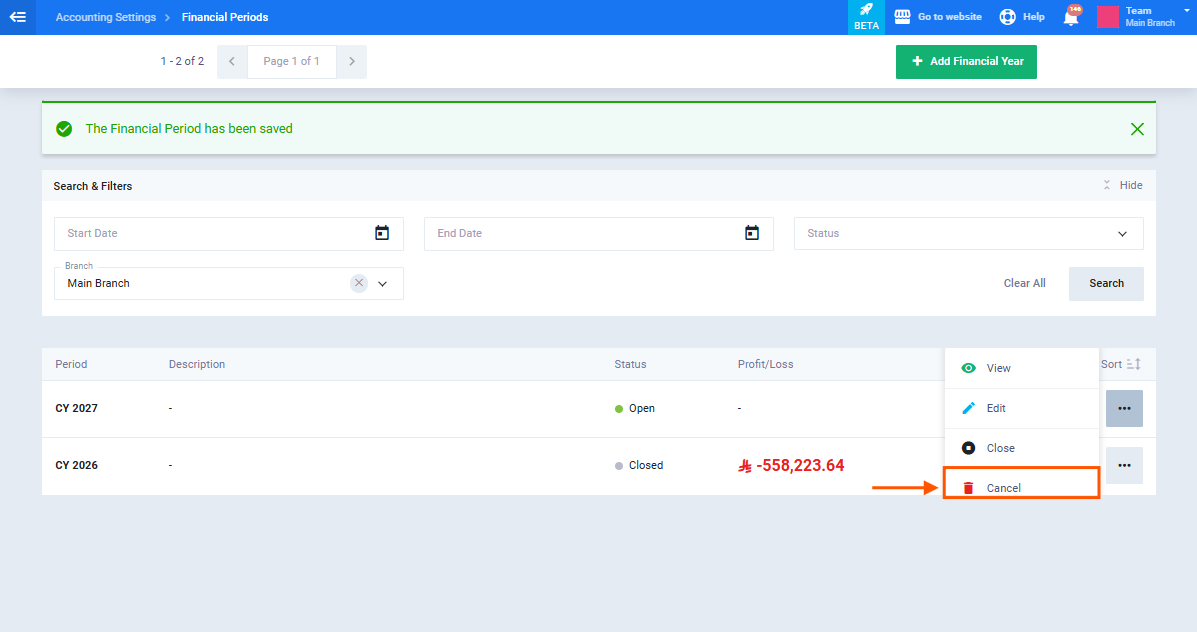
- Click the three dots next to the current financial year — in this example, 2024.
- Select “Cancel” from the menu.
Click “Yes” when the confirmation message appears.
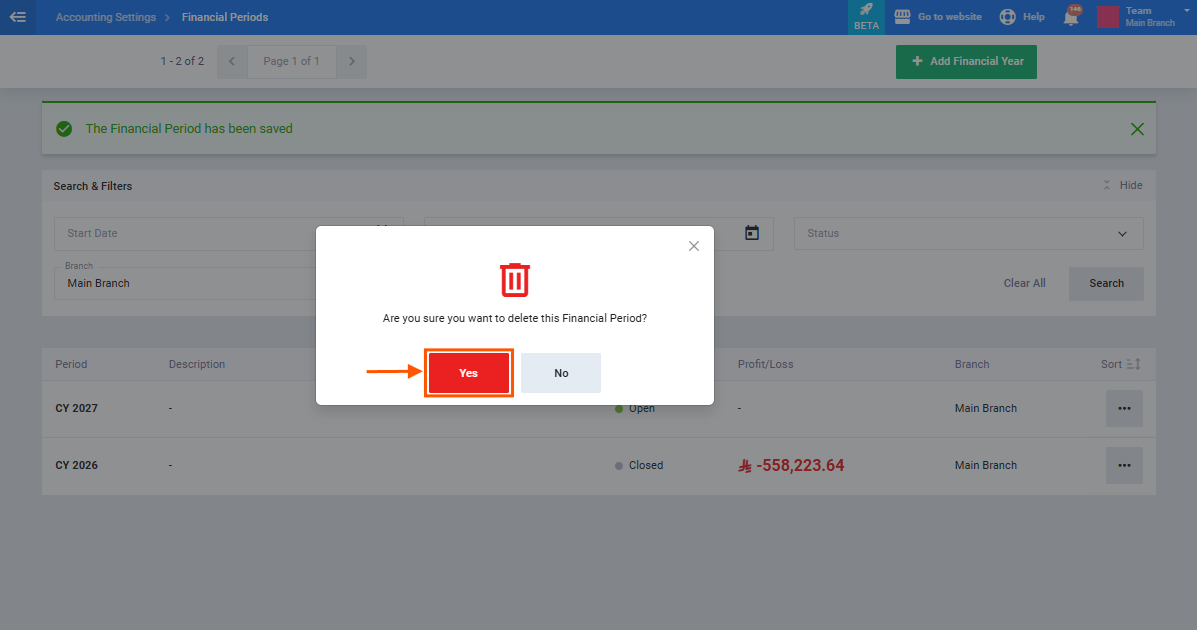
The system will cancel the current financial year and reopen the previous one — that is, cancelling 2024 and reopening 2023, based on the example above.
Accounting Period Closing Entries
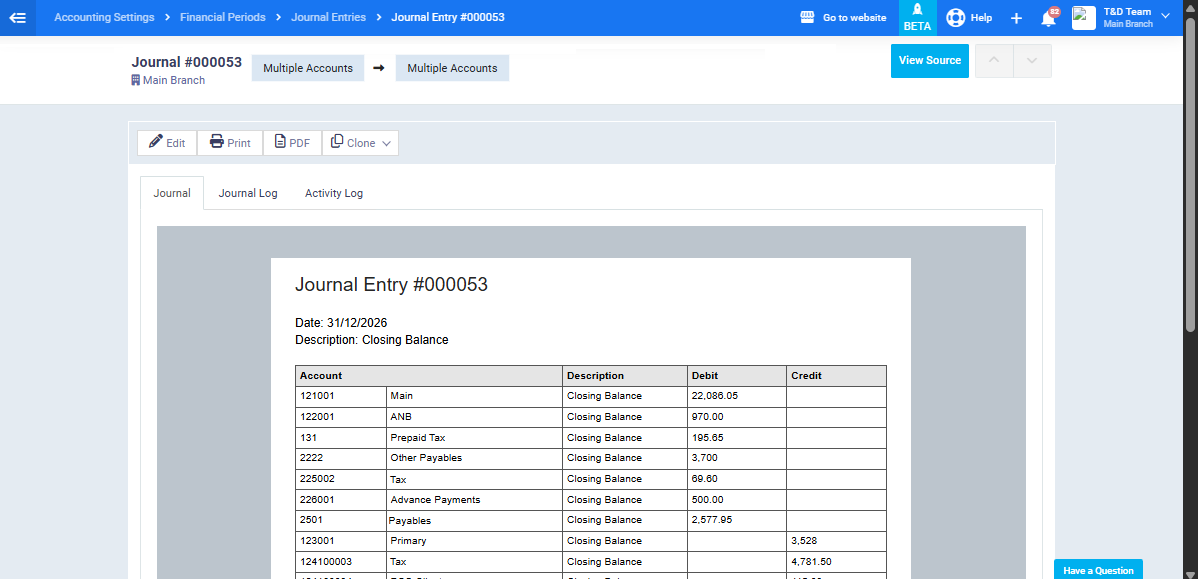
Closing entries are automatically generated as soon as a financial period is closed. You can view them directly from within the closed financial period itself.
Closed Periods
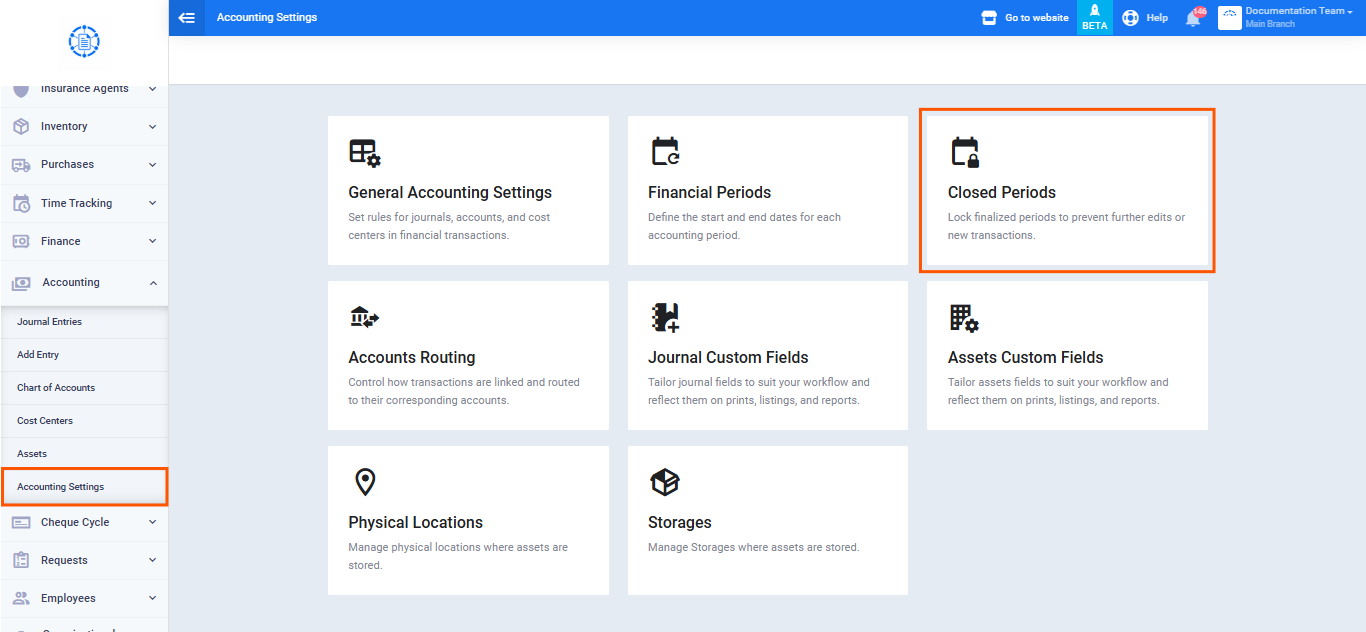
Click “Accounting Settings” under the “Accounting” dropdown in the main menu, then click “Closed Period.”
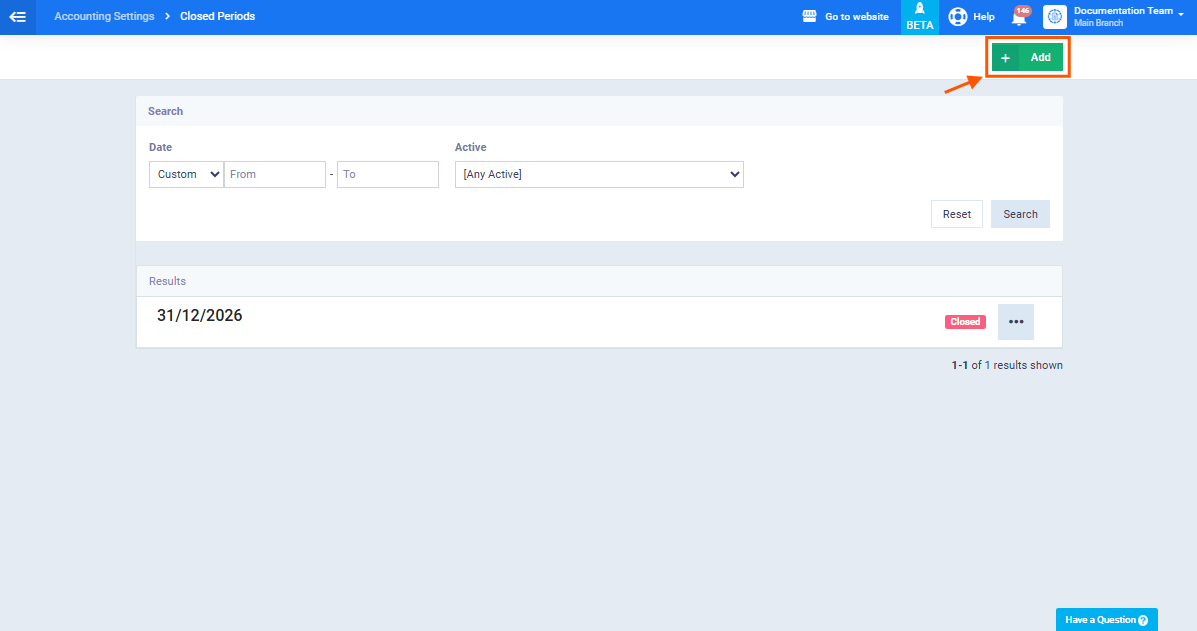
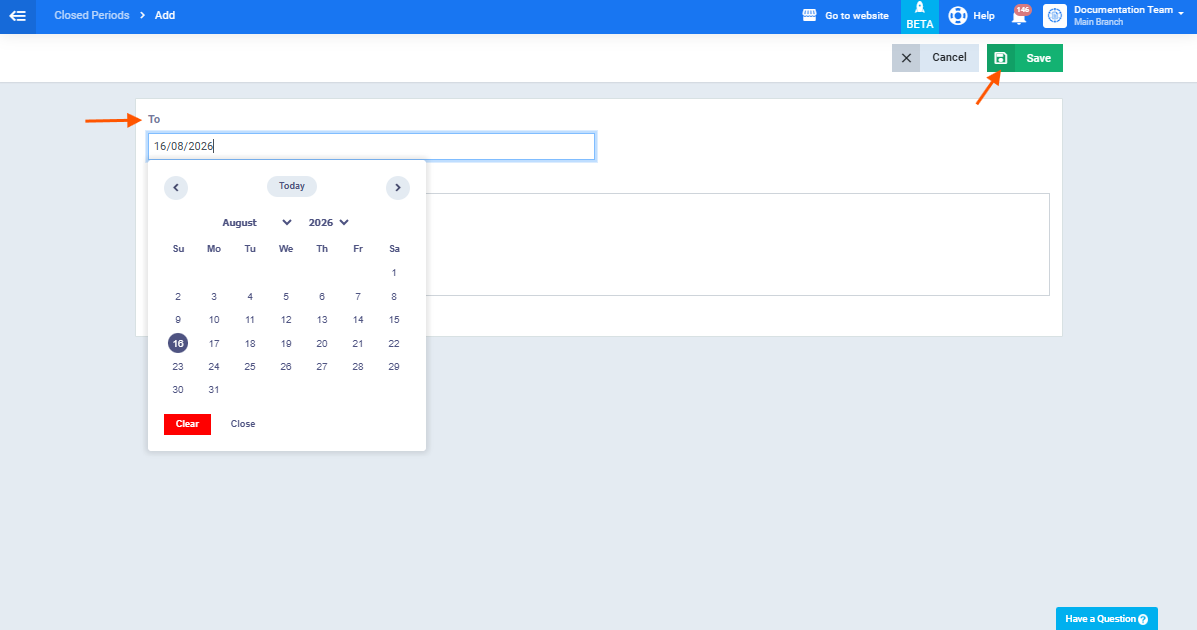
To add a new closed period, click “Add.”
Set the end date of the period in the “To” field.
Enter the required “Description.”
Click “Save.”
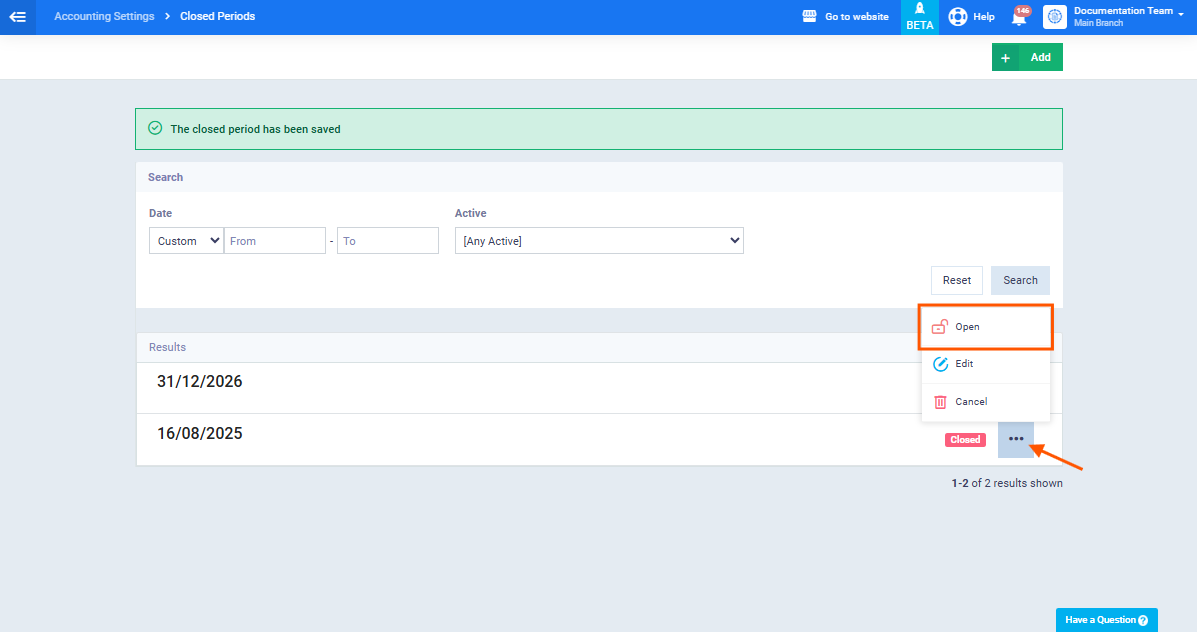
The added period appears within the list of closed periods. You can reopen a closed period by clicking the three dots next to the required period, then clicking “Open.”
Notice the closed period’s status changes to “Open.”
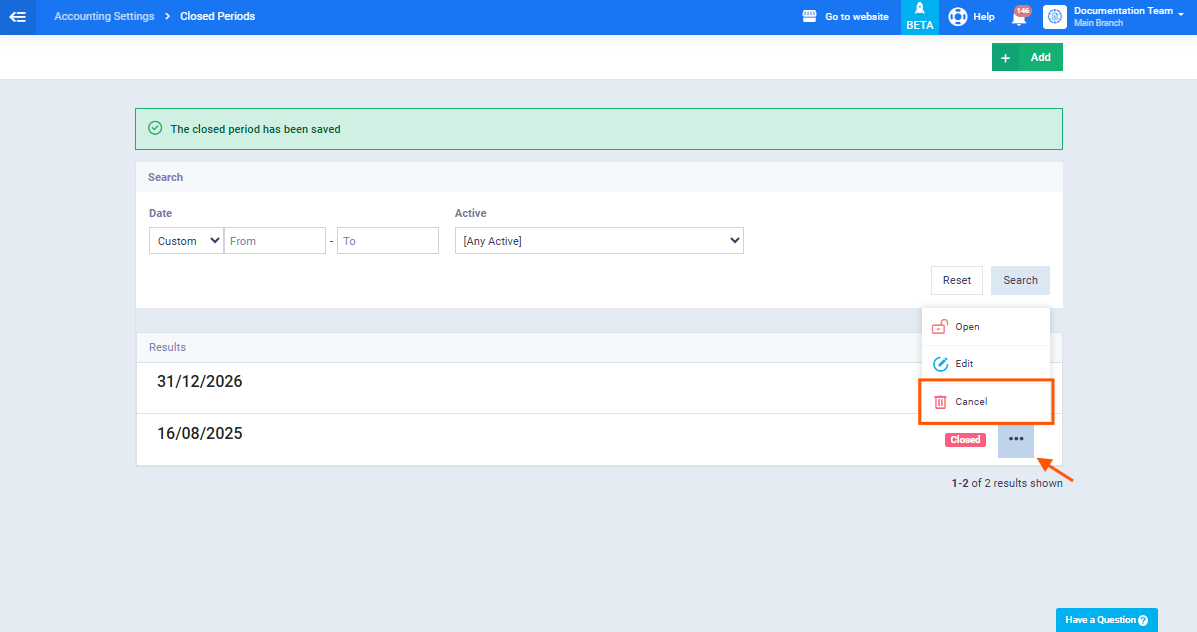
You can also cancel the closed period entirely instead of reopening it, by clicking the three dots next to the period, then clicking “Cancel.”
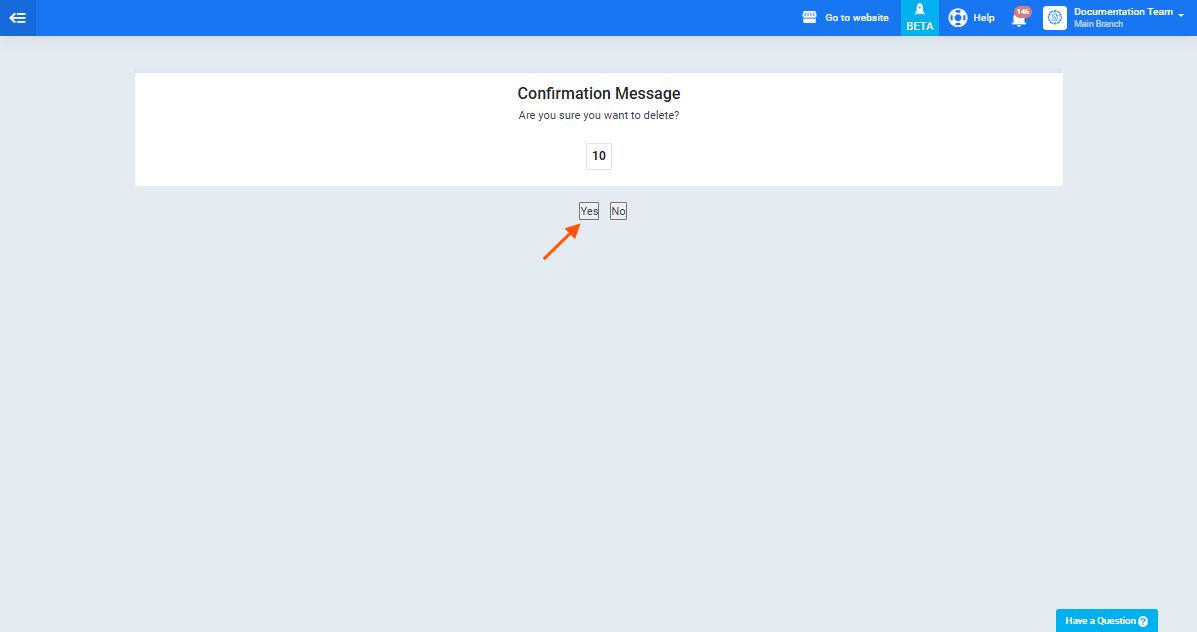
A confirmation message appears requesting you confirm the cancellation. Click “Yes” to permanently cancel the closed period.
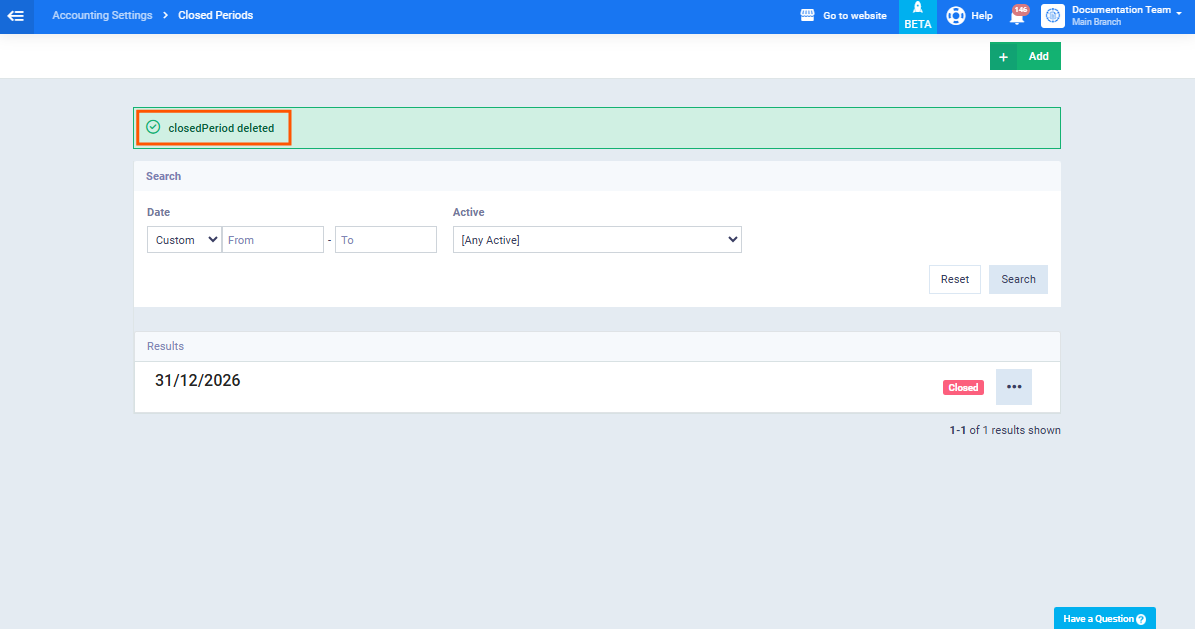
A message appears: “Closed period deleted” to confirm the cancellation of the requested period.