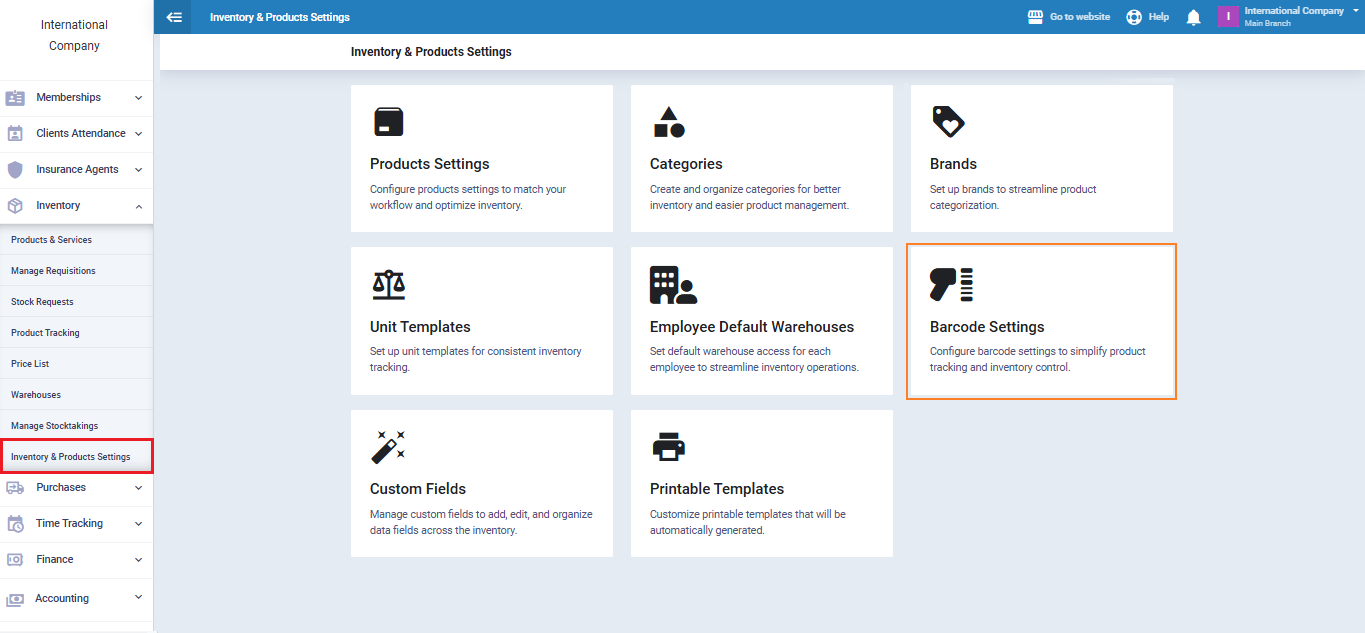
Inventory and Products Settings Comprehensive Guide
This comprehensive guide explains the inventory and product settings and how to leverage them to efficiently manage items. It covers all the essential tools for controlling product data, organizing them through categories and brands, setting up barcodes and units, and customizing permissions and documents associated with inventory.
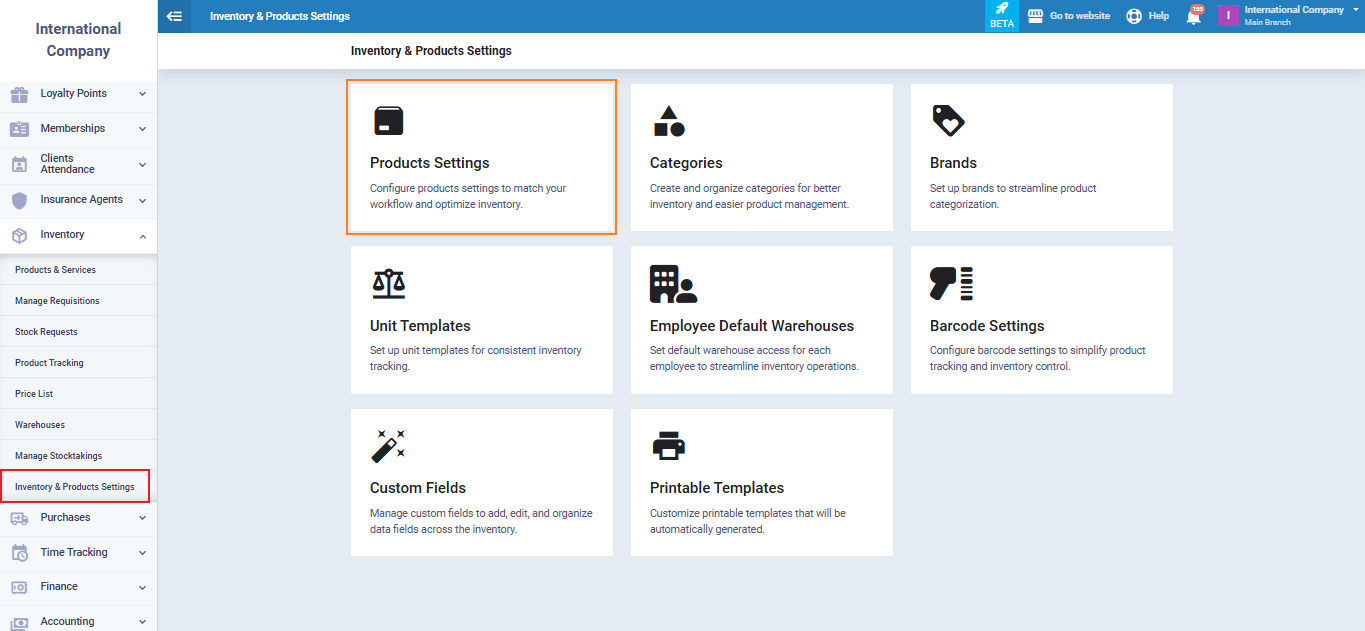
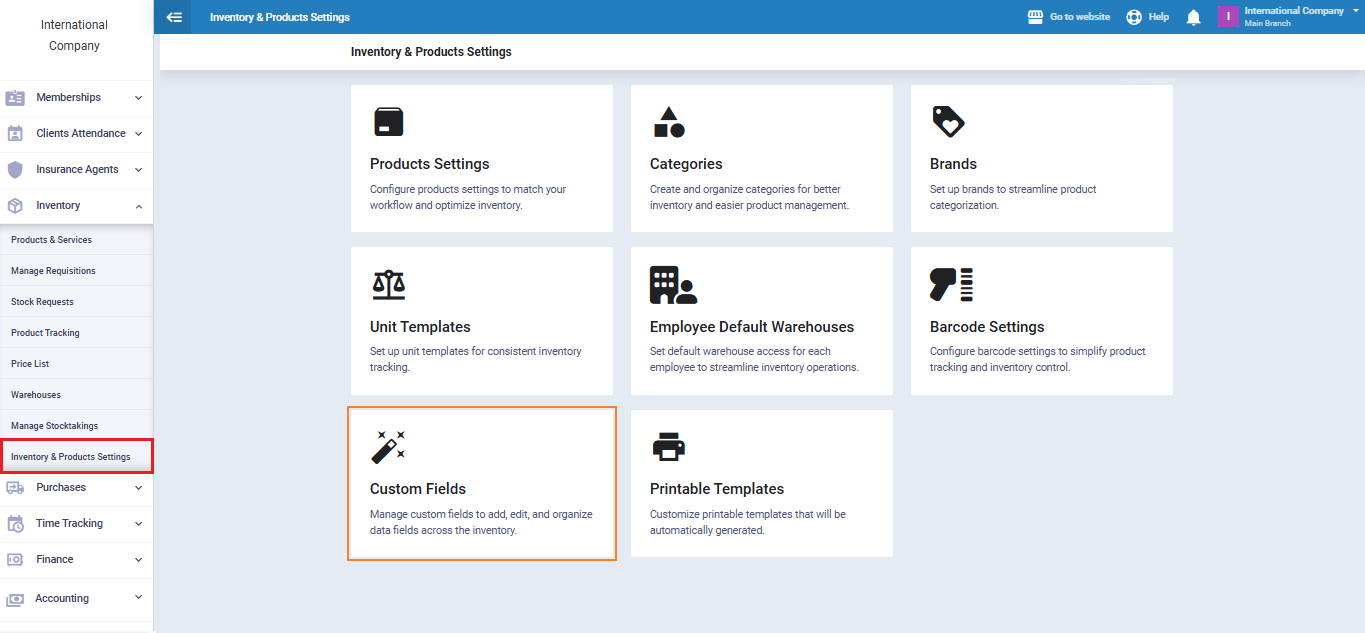
Main Settings Include:
Product Settings: Manage product behavior, tracking, stocktaking, and warehouse permissions.
Categories: Create multi-level categories to facilitate grouping and filtering.
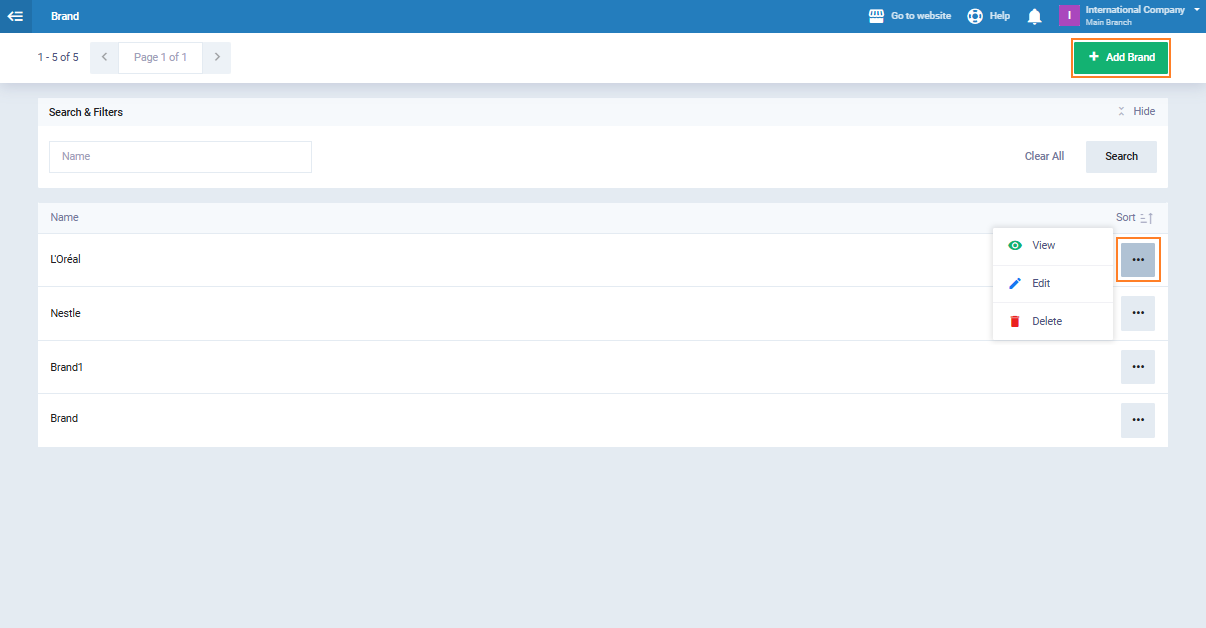
Brands: Add an unlimited number of brands to classify products and link them to reports.
Unit Templates: Define base units and conversion ratios for buying and selling in different units.
Employee Default Warehouses: Assign warehouses to each employee to monitor permissions and stock movement.
Barcode Settings: Configure barcode formats for accurate scanning and weight-based pricing.
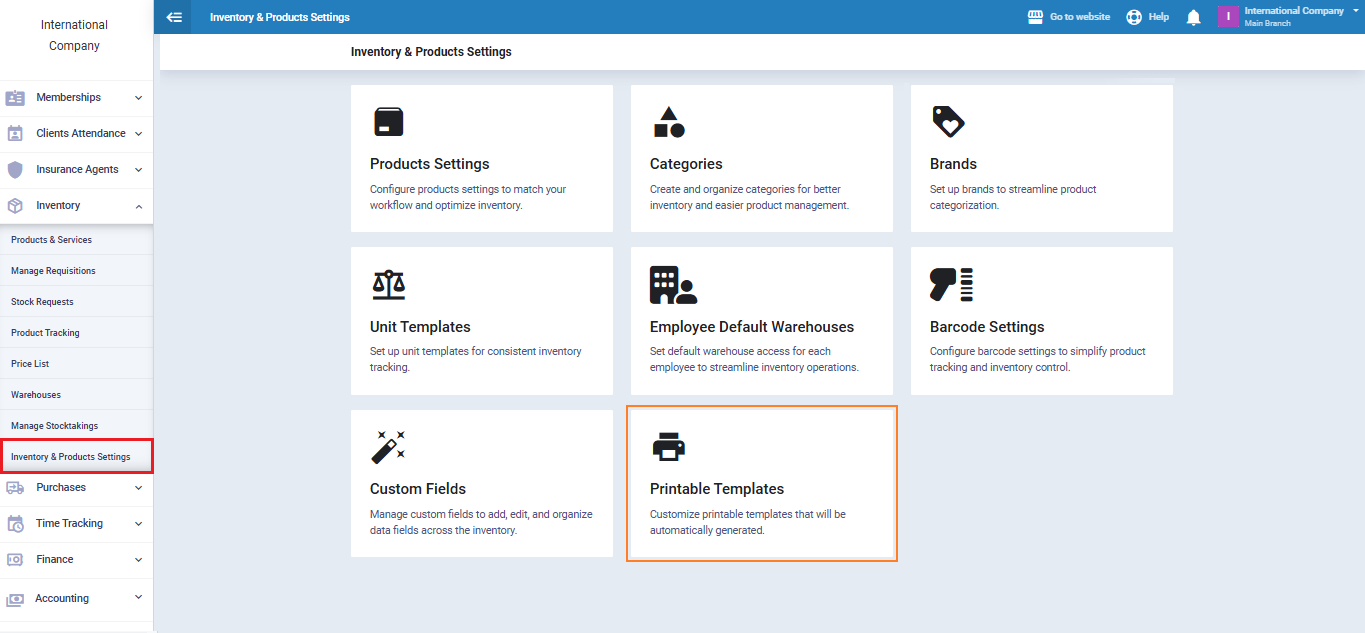
Custom Fields: Add custom fields for extra product data in products, lists, and reports.
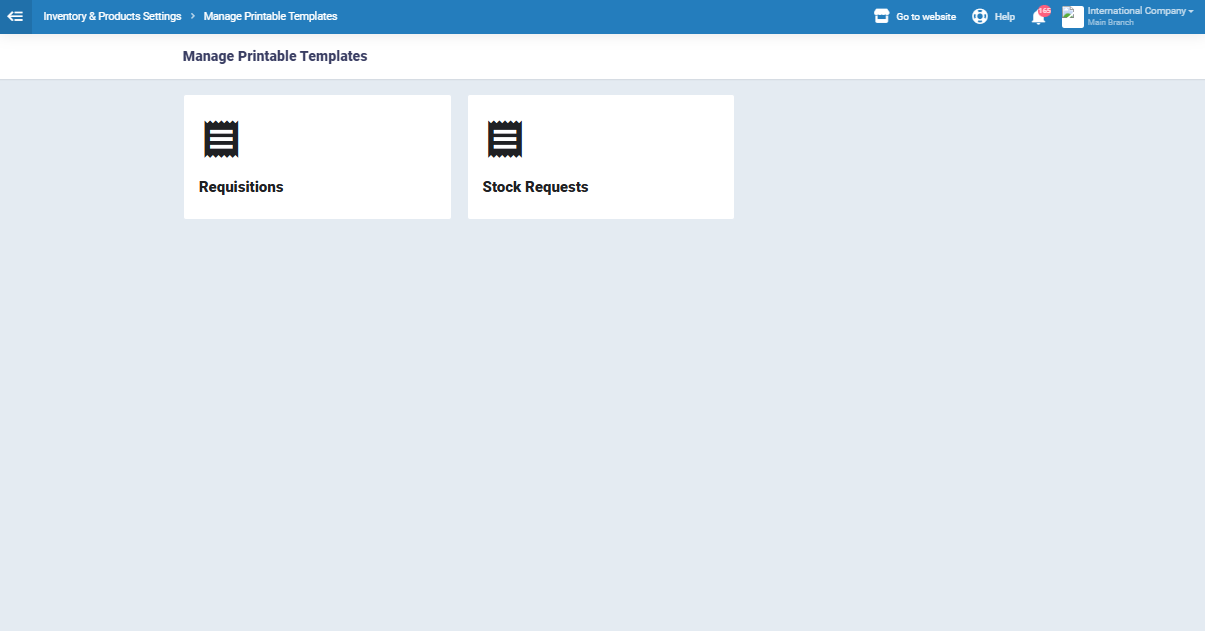
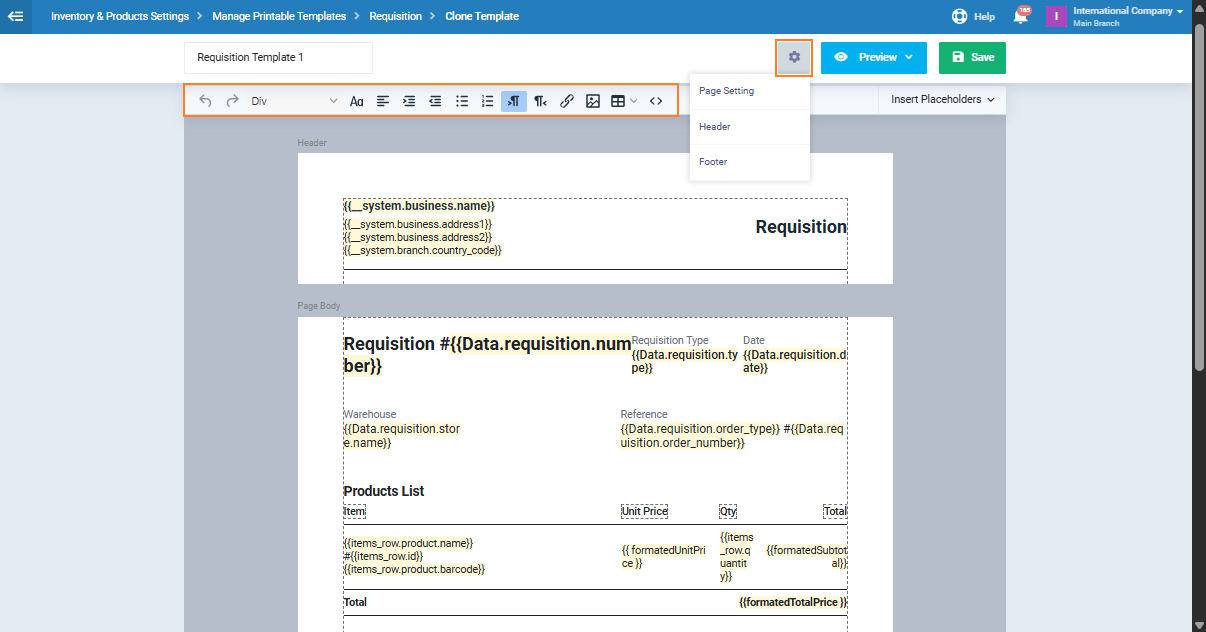
Printable Templates: Design and customize templates for displaying and printing inventory documents and permissions.
Product Settings
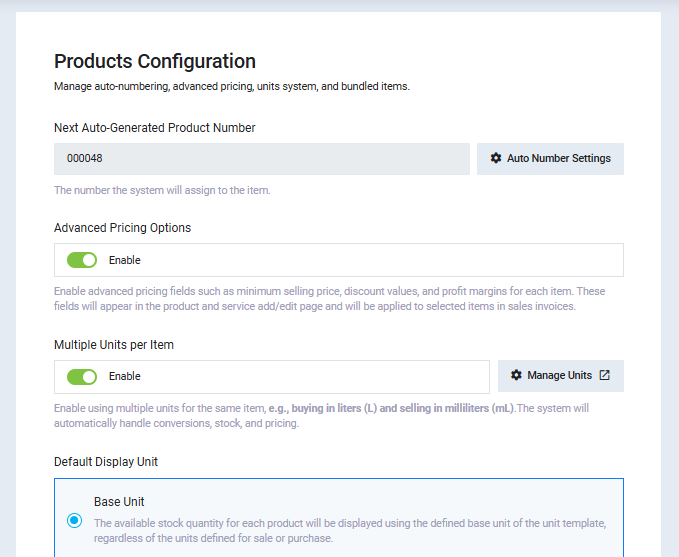
- Product Configuration
This includes the basic settings for creating and managing products:
- Next Auto-Generated Product Number: Determines the automatically generated number for the next product.
- Advanced Pricing Options: Enable discount fields, minimum price, and profit margins.
- Multiple Units per Item: Allow purchase and sale in different units (e.g., kg/g) with automatic conversion.
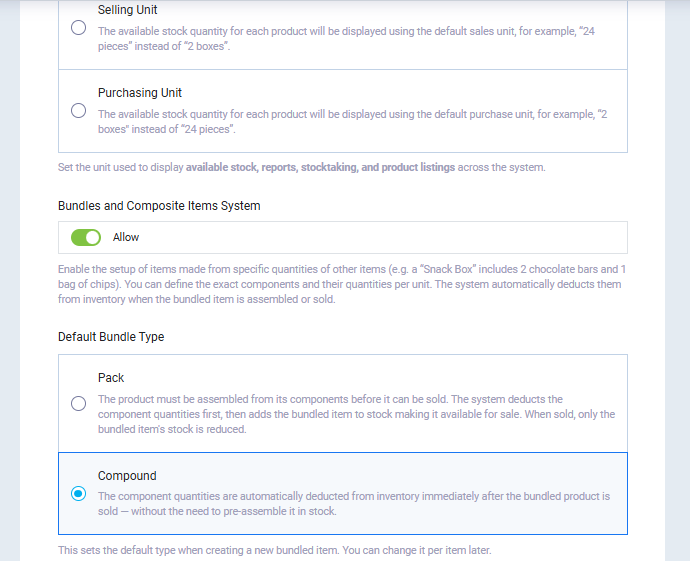
- Bundles and Composite Units System: Create products composed of multiple items.
- Default Bundle Type: Specify how discounts are applied (pre-assembled or direct discount at sale).
2. Product Tracking
Defines how products are tracked and system behavior when stock runs out:
- Product Tracking: Track by serial number, batch number, or expiration date.
- Negative Inventory: Control whether operations are allowed when stock is depleted.
- Allow Negative Inventory for Bundle Products: Allow only components of composite products to run out.
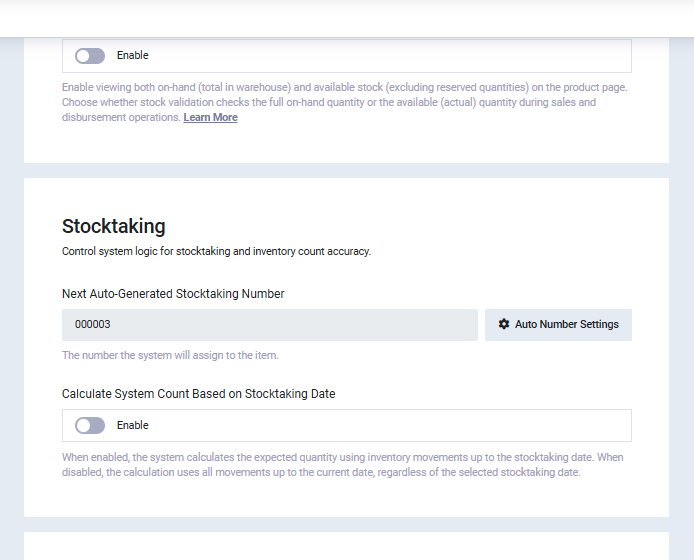
- Display On-Hand and Available Stock: Show total quantity and available quantity after reservations.
![]()
3. Stocktaking Sheet
Settings related to stocktaking operations, including:
- Automatic numbering of stocktaking sheets.
- Calculate stock quantities based on the stocktaking date or the current date.
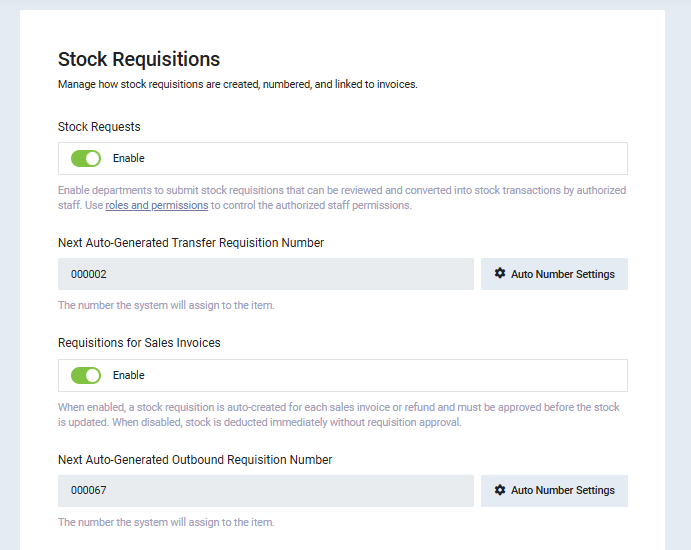
4. Stock Requisitions
Control the creation and linking of warehouse documents, including:
- Stock Requests
- Next Auto-Generated Transfer Requisition Number
- Requisitions for Sales Invoices
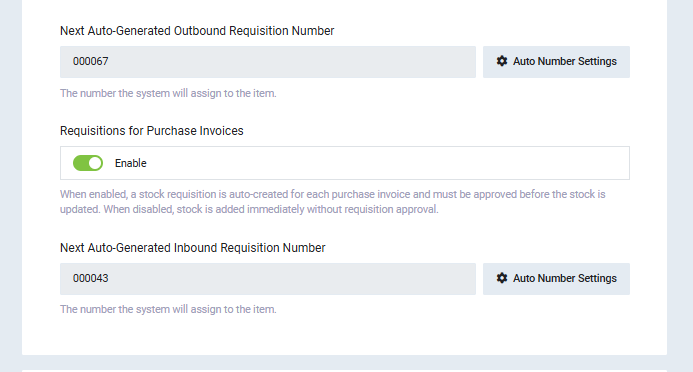
- Next Auto-Generated Outbound Requisition Number
- Requisitions for Purchase Invoices
- Next Auto-Generated Inbound Requisition Number
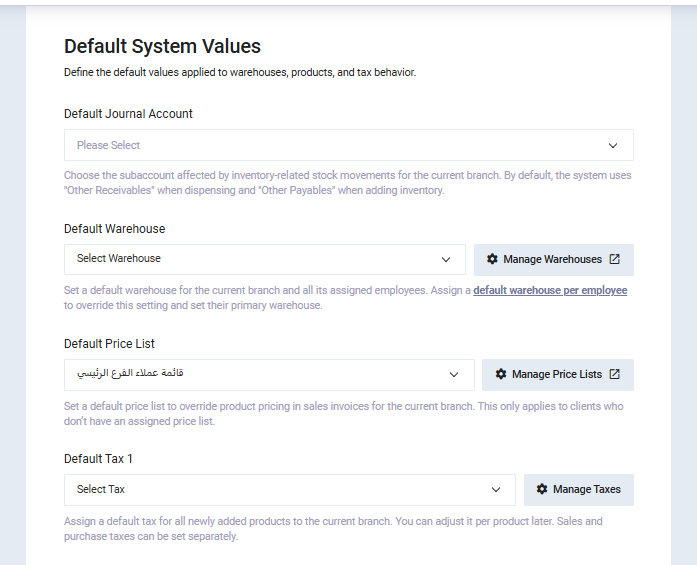
5. Default System Values
Set default settings applied to products and inventory, such as:
- Default Journal Account: Define the accounting account for inventory movements.
- Default Warehouse: Automatically assign a warehouse in transactions.
- Default Price List: Apply default pricing to sales invoices.
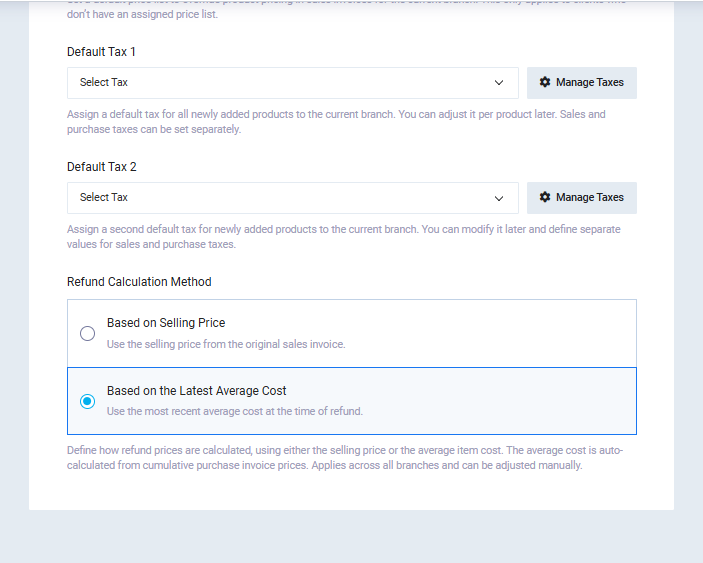
- Default Tax 1: Set the primary tax for new products.
- Default Tax 2: Add a secondary default tax if needed.
- Return Calculation Method: Determine whether returns are calculated at sale price or average cost.
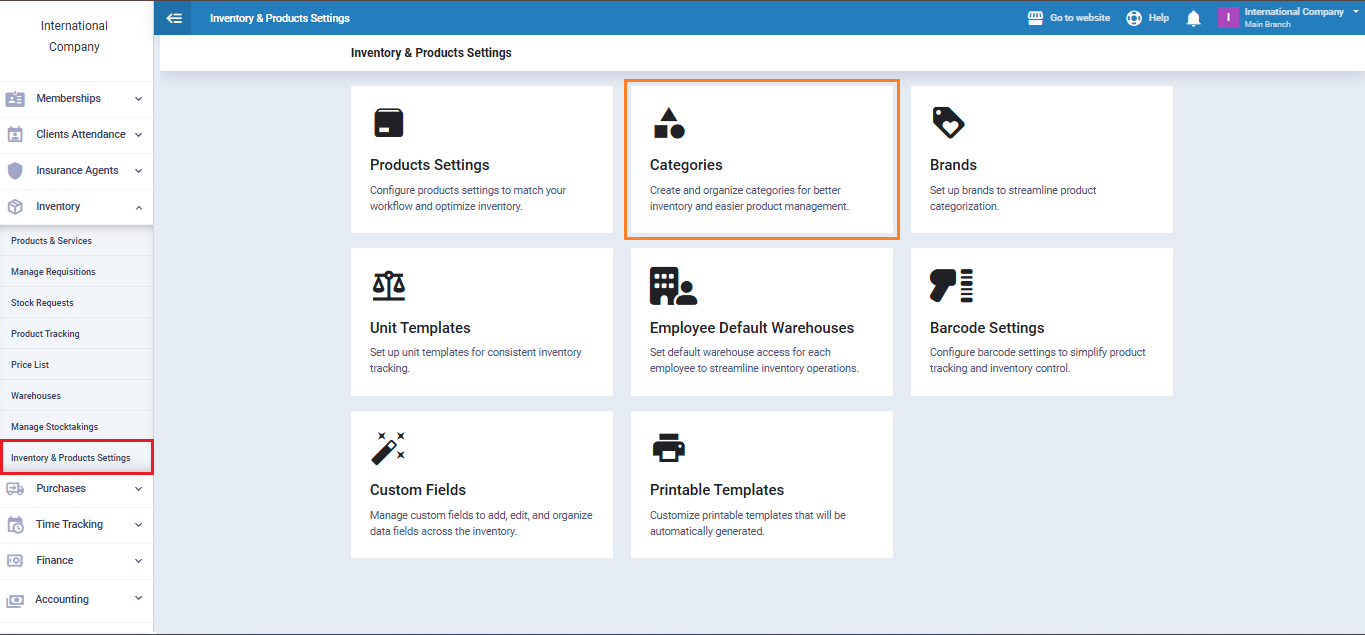
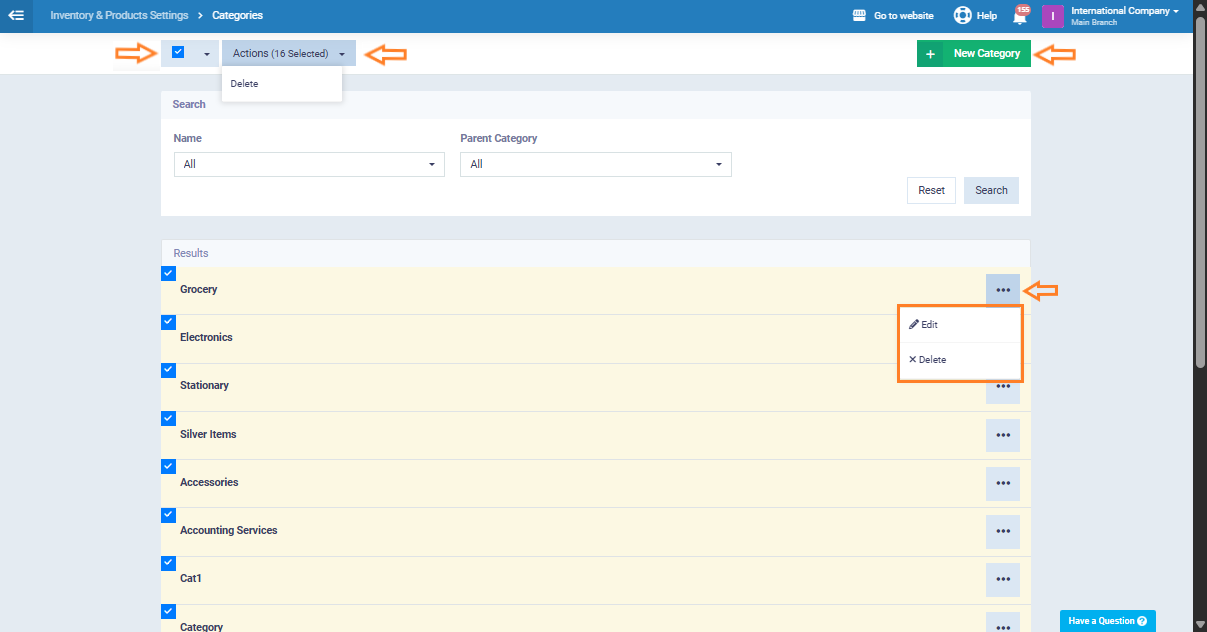
Categories
Categories are essential for organizing products within the system and simplifying their management. You can create custom categories and link products to them, helping logically organize items, speed up access, and improve their display in lists and reports. Categories also facilitate search, filtering, and more efficient inventory management.
Brands

Unit Templates
The “Unit Templates” setting allows you to define base units for products and conversion ratios, such as selling by kilogram and purchasing by gram. This ensures accurate inventory management, pricing consistency, and smooth operations for products with multiple measurement units.
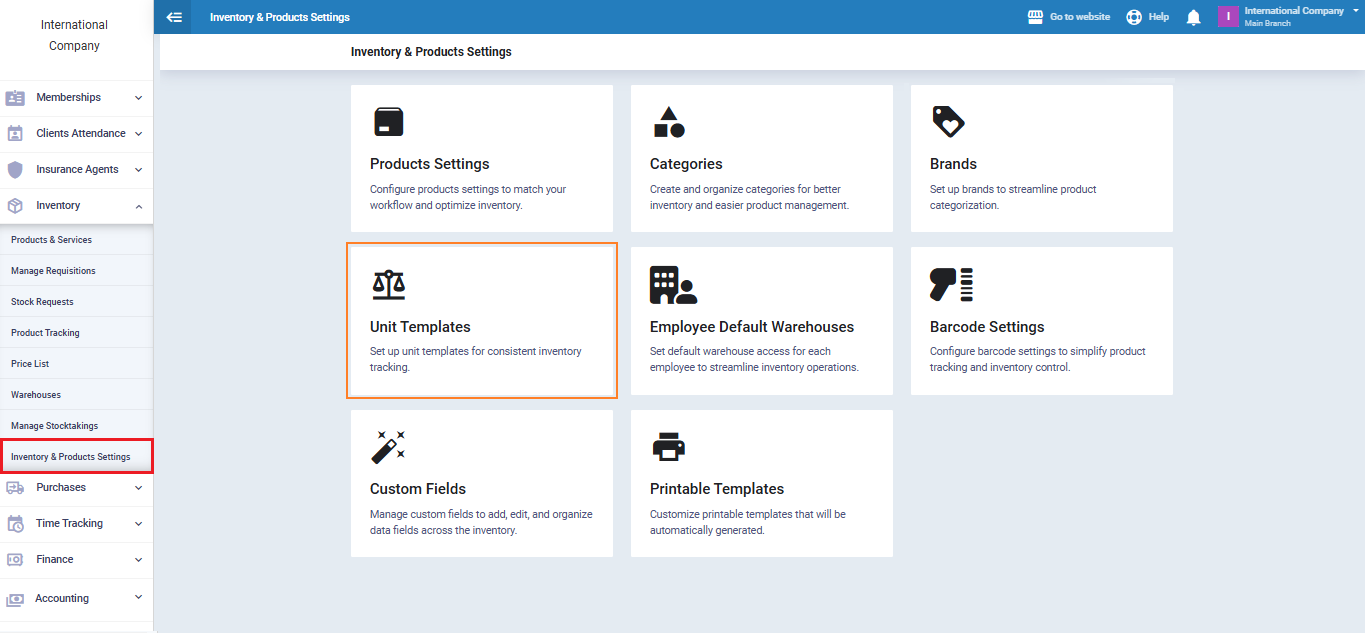
Click “Add Unit Template” to add a new unit, specifying its name and conversion ratios. Use the three dots next to any unit to view, edit, or delete it.

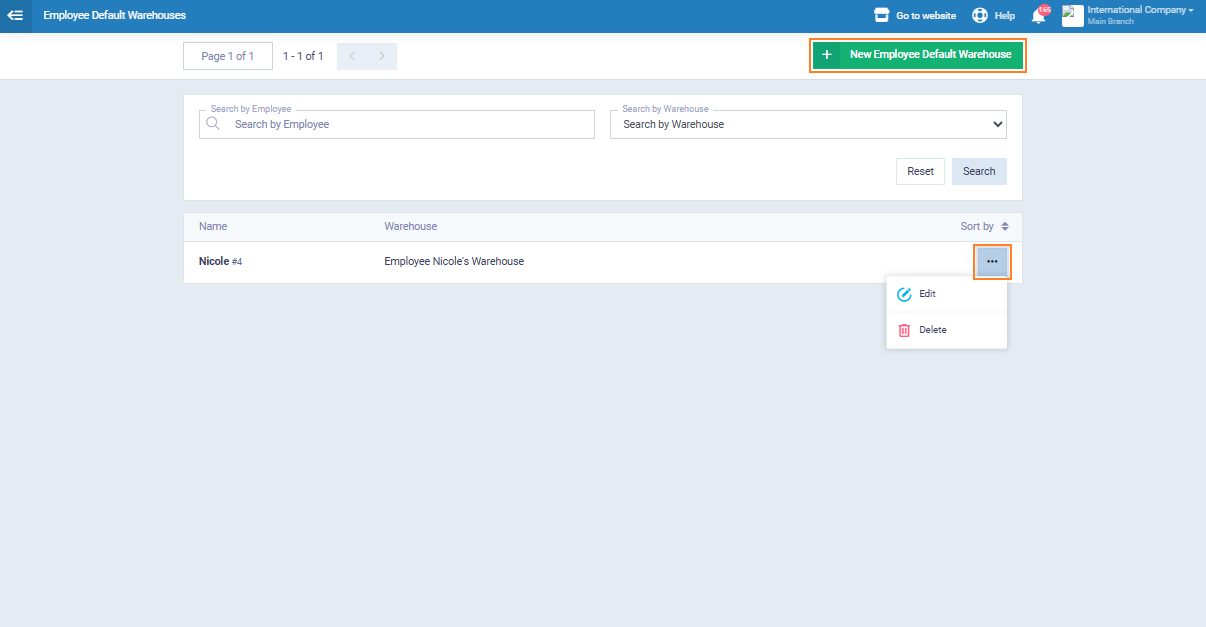
Employee Default Warehouses

Add a default warehouse for an employee and link it to their profile. Existing warehouses can be edited or deleted as needed to ensure accurate and flexible inventory management.
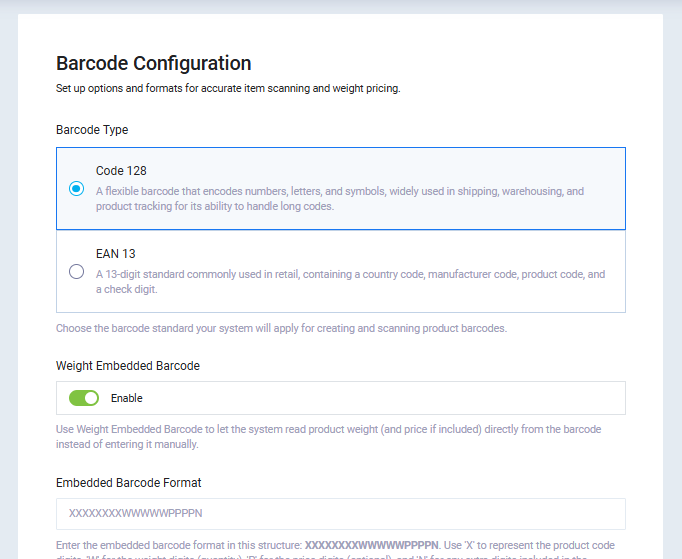
Barcode Settings
Barcode Configuration
Barcode ensures accurate scanning and weight-based pricing.
Options include:
- Barcode Type: Select the barcode format (e.g., Code 128, EAN 13).
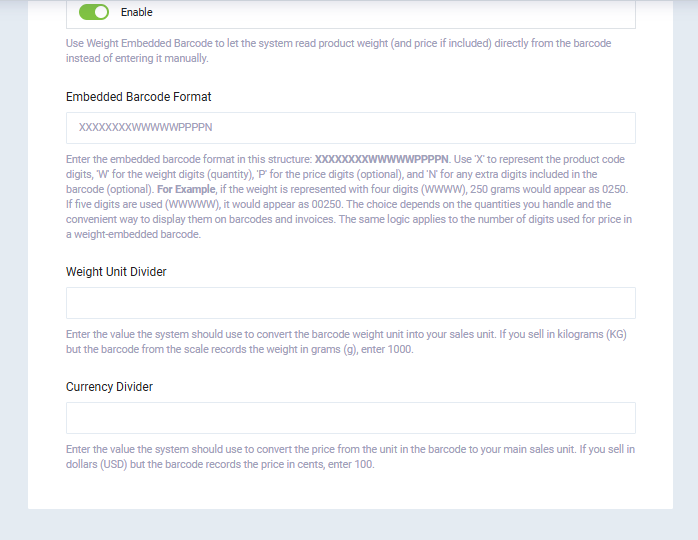
- Weight-Embedded Barcode: Enable reading weight directly from the barcode for weighted products.
- Embedded Barcode Format: Define the structure of custom barcodes, specifying weight and serial number positions.
- Weight Unit Divider: Specify conversion when scanning weighted products.
- Currency Divider: Set the currency for price determination based on barcode scanning.
These settings enable precise inventory management, product tracking, and automatic pricing based on weight or quantity.
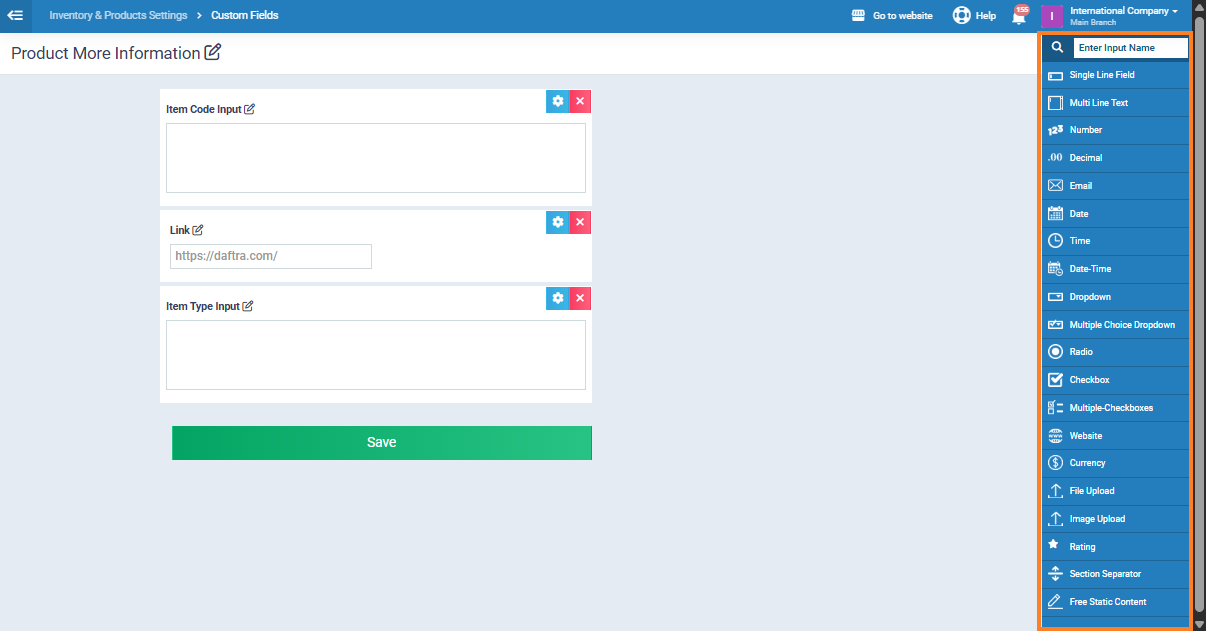
Custom Fields
Custom Fields allow you to add additional fields to record extra product data according to your business needs. These fields expand product information, organize it better, and display it in product pages, lists, and reports.
Select fields from the sidebar menu and customize properties such as field name, type, and display method to ensure proper data entry and organization.