Client Self-Booking Online
Your clients can book appointments for the desired services, including all booking details. They can also pay the booking amount online, which will be transferred to your account, allowing you to confirm payments and manage bookings easily.
What’s the difference between appointments clients can book and regular system appointments?
In the system, there are usually two ways to book appointments, each with its own characteristics:
- “Appointments” under “Clients” in the main menu
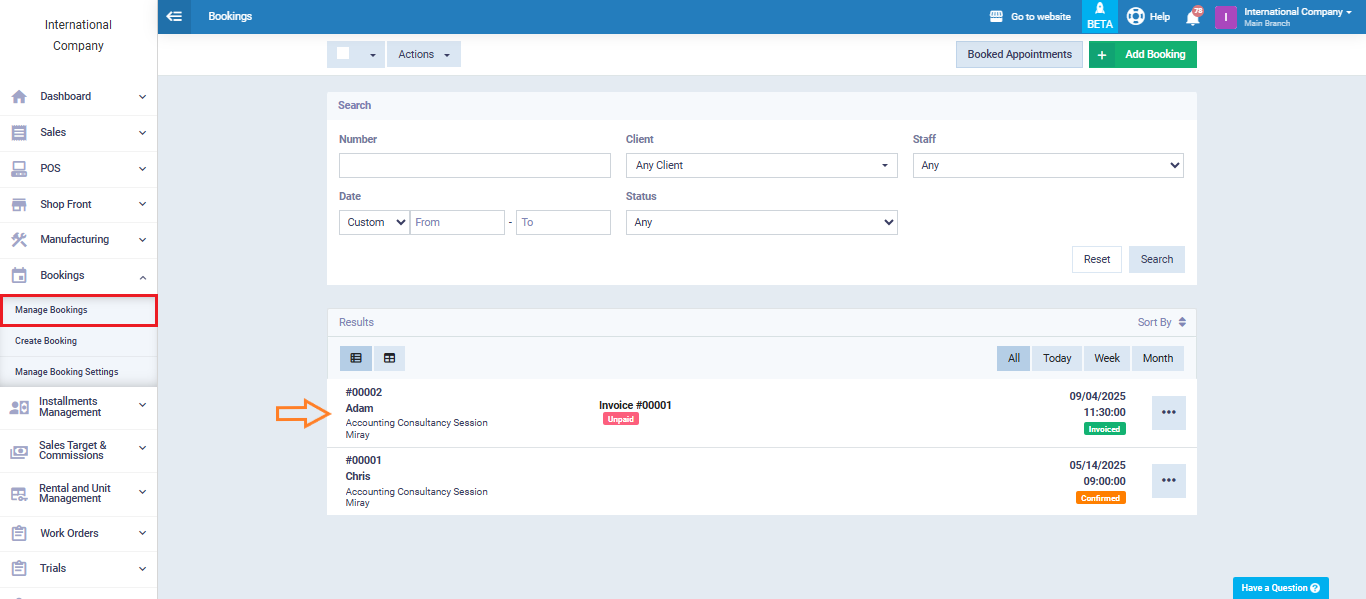
- “Manage Bookings” under “Bookings” in the main menu
When clients book their own appointments online, only the “Bookings” method is available. The differences between bookings and regular appointments are:
- Appointments are linked to actions, while Bookings are linked to services.
- Bookings generate invoices, automatic journal entries, and appear in the “Chart of Accounts“, while “Appointments” do not.
- In the “Appointments“, you can select any time and assign it to any employee, while “Bookings” are restricted to the employee’s work shifts, and the service must be assigned to that employee to book it.
- Clients can book services themselves online, but they cannot set appointments; they can only view their scheduled appointments.
- The interface and layout of the “Appointments” screen differ from the “Bookings” screen.
Viewing the system as a client
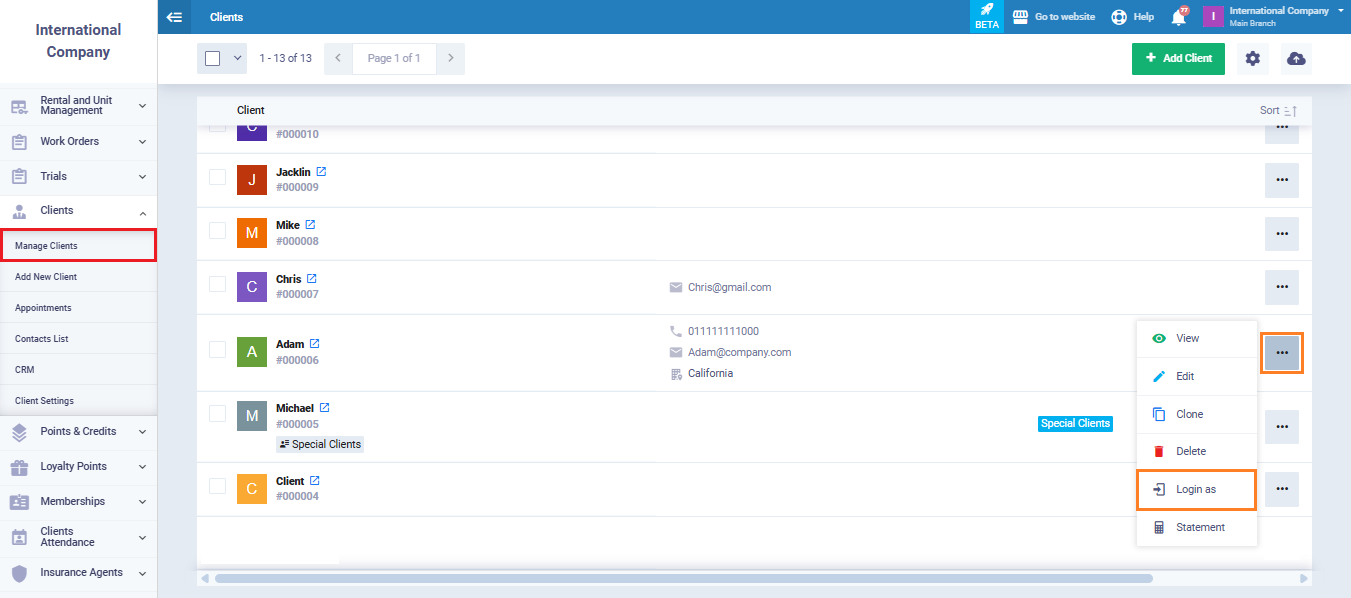
To preview the steps as they appear to the client, go to “Manage Clients” under “Clients” in the main menu. Click the three dots next to the desired client and select “Login as“.
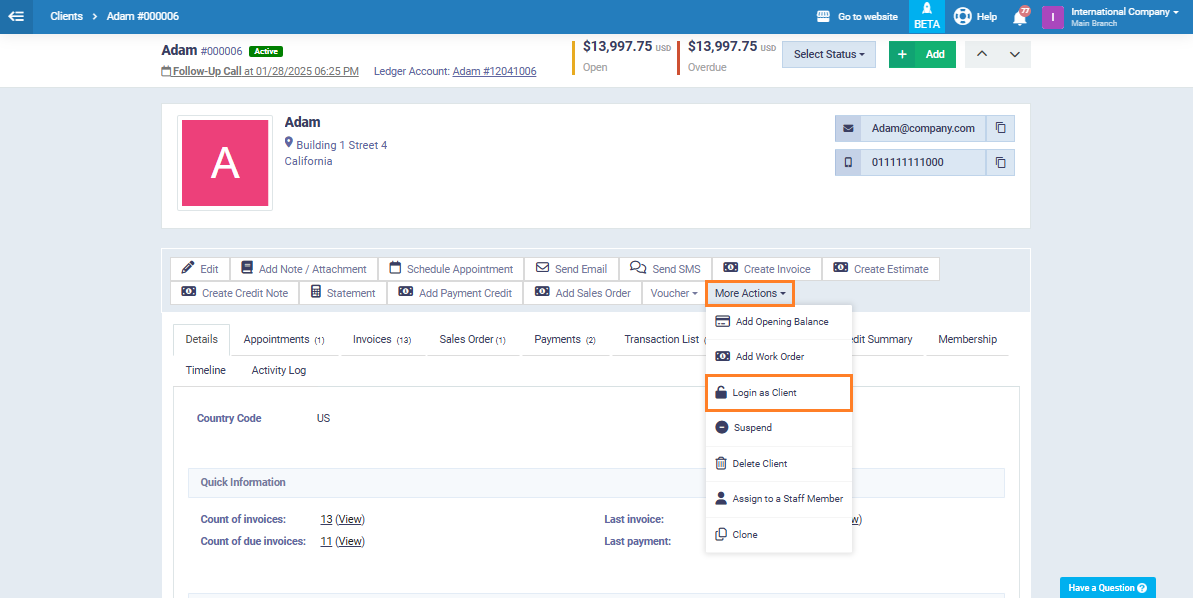
Or, open the client’s profile and click “More Actions“, then choose “Login as Client“.
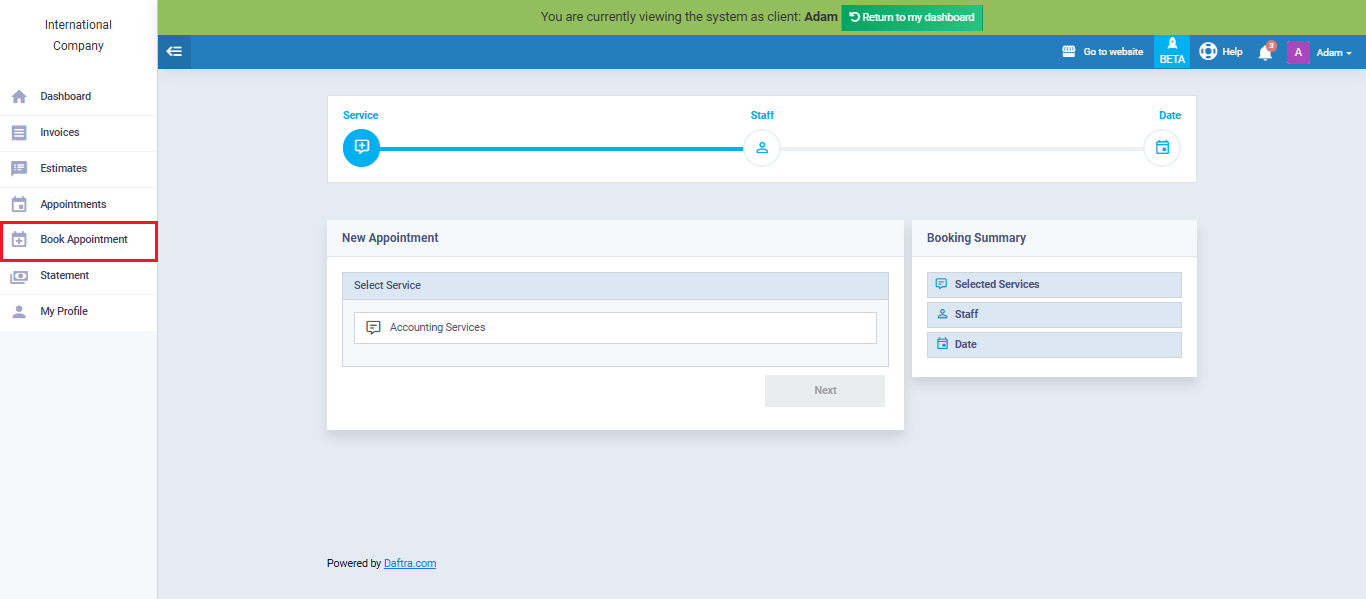
The system will now display the screen as it appears to the client. From the side menu, click “Book Appointment” to begin scheduling appointments.
Steps for client to book appointments online
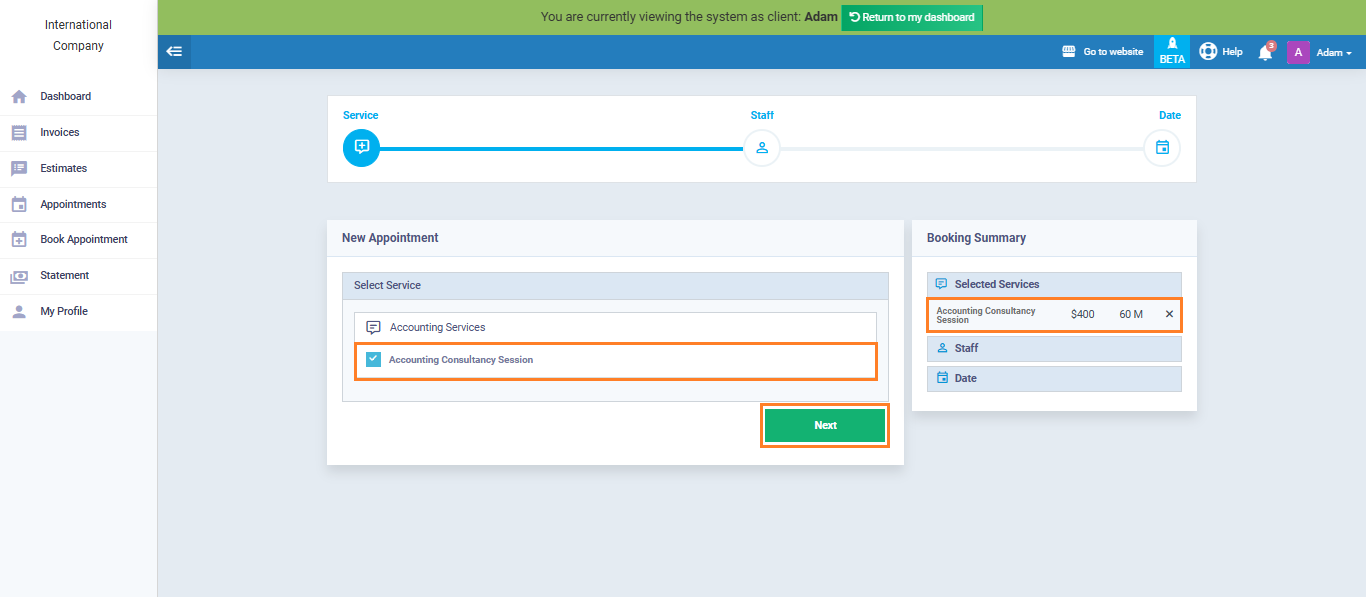
From the client’s screen, click “Book Appointments” from the main menu.
Click “Select Service“, then choose the desired service (e.g., Accounting consultancy session).
The booking price and duration will appear in “Selected Services” under “Booking Summary“.
Click “Next“.
Choose the employee, then click “Next“.
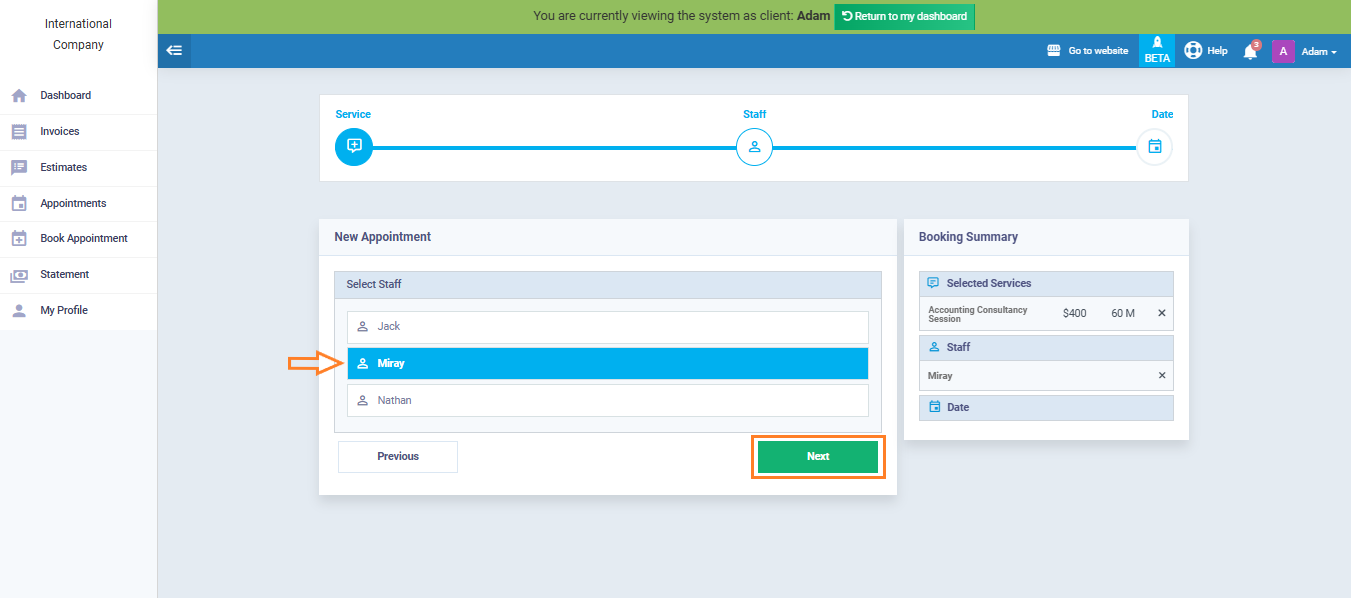
To change employee or service, click the “❌” icon next to the name.
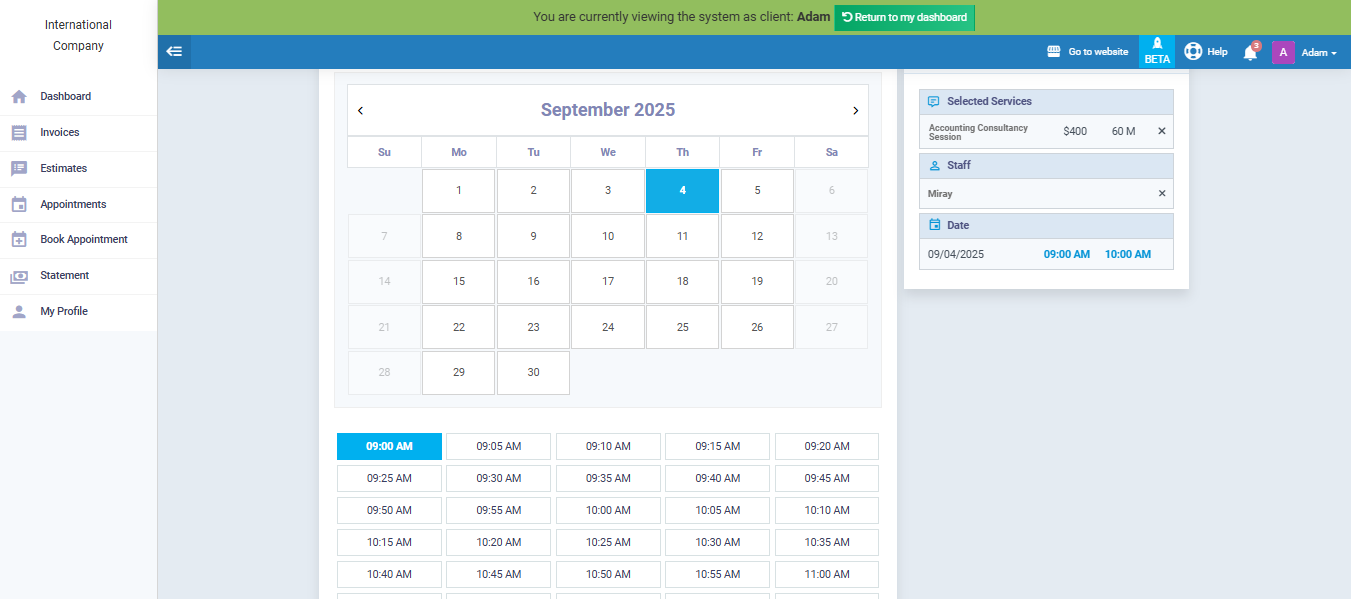
Select the booking date and time, then click “Next“.
If payment is required, enter payment details and select the payment method.
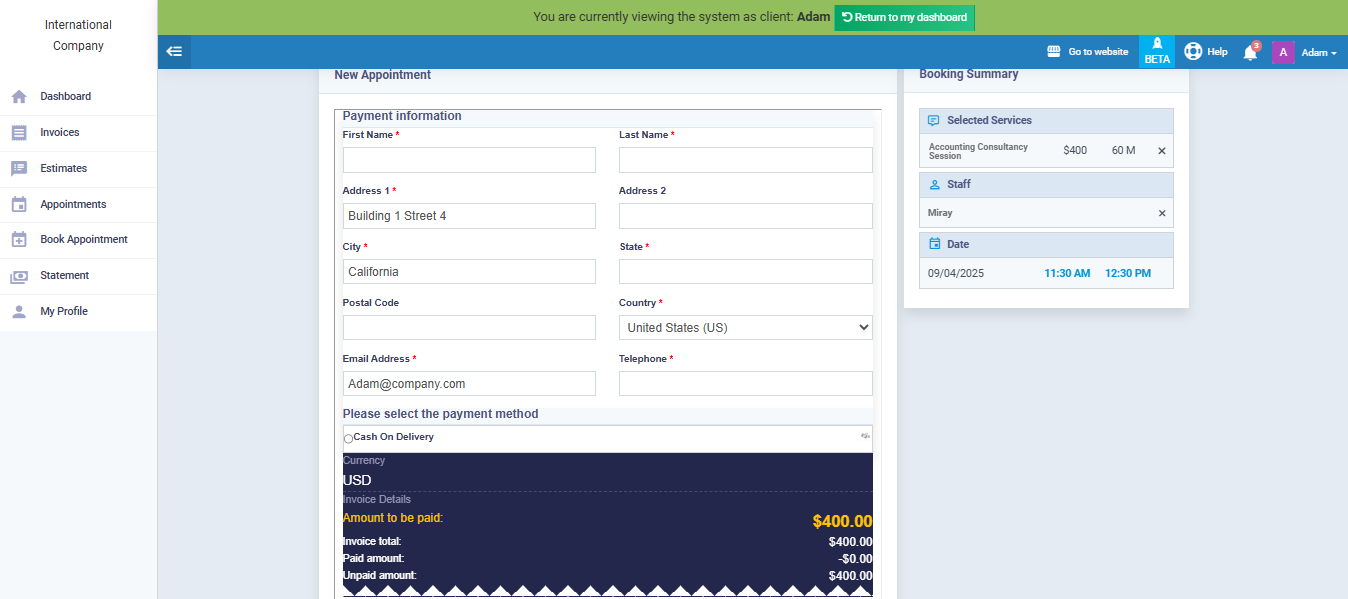
Complete the process by clicking “Pay Invoice“.
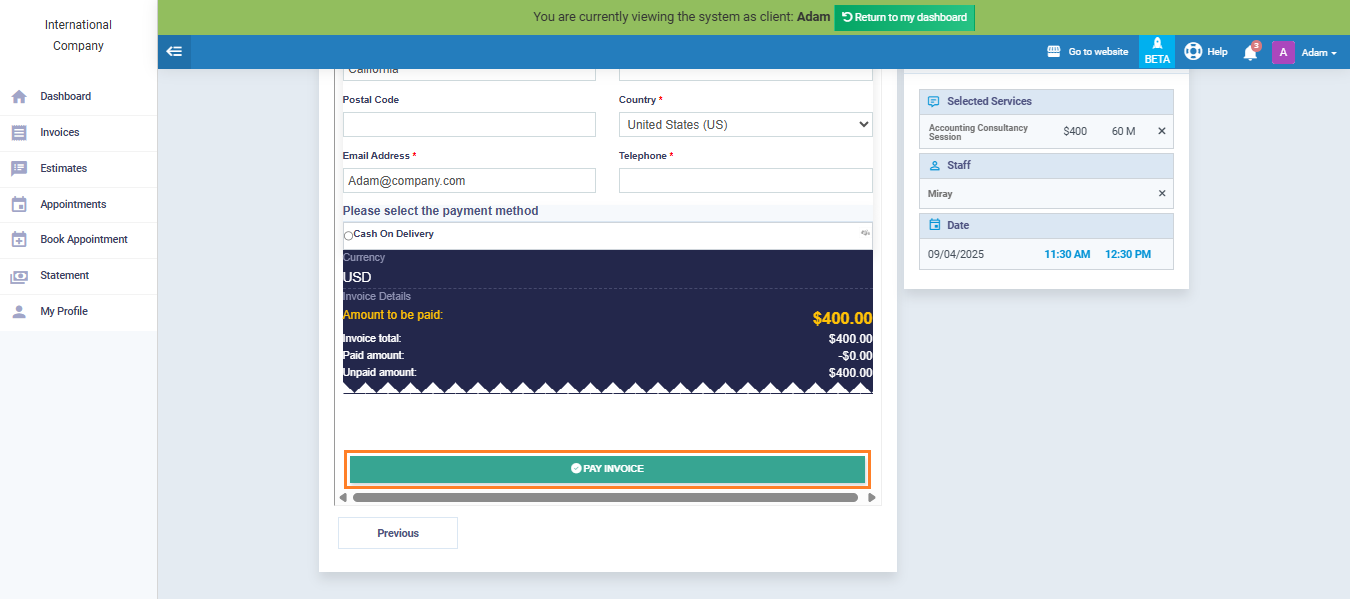
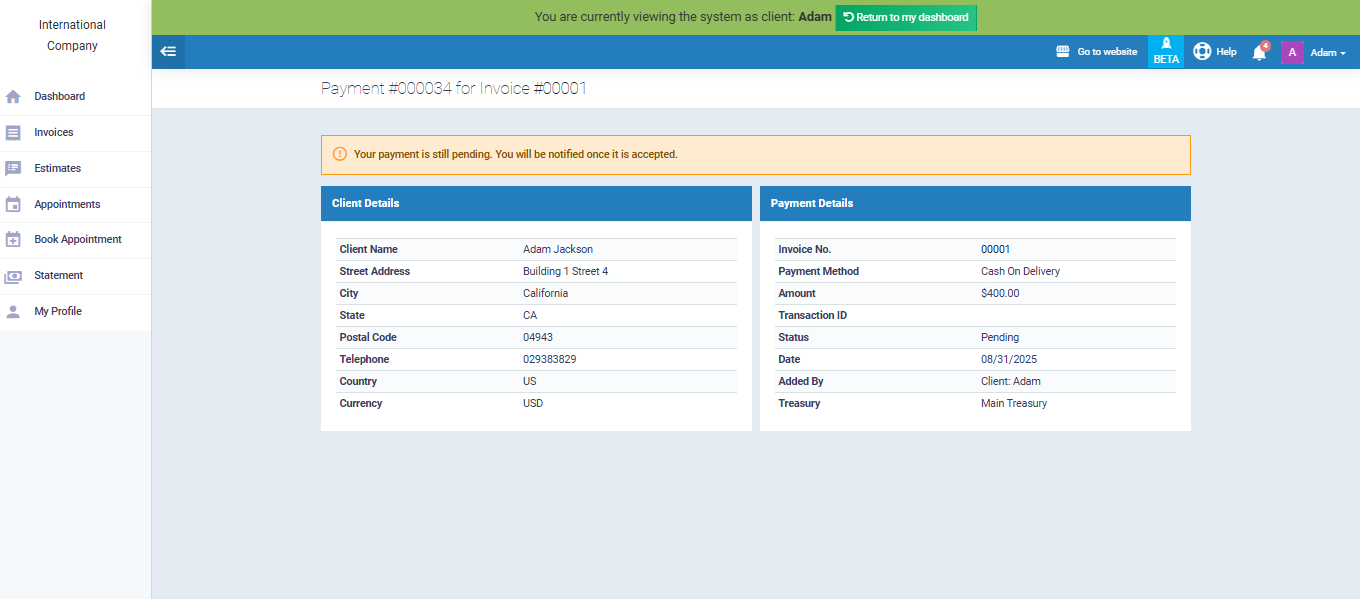
The payment will remain pending until confirmed by the responsible staff member.
If the client does not wish to pay immediately, click “Skip payment”.
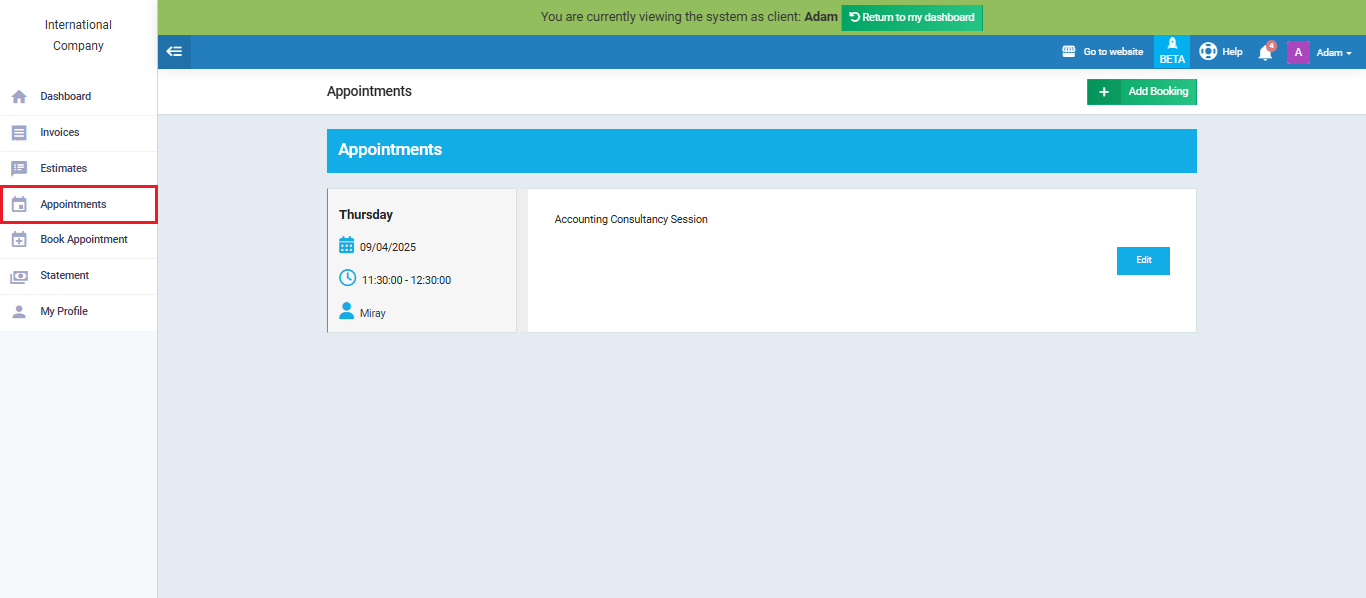
Clients can view their appointments by clicking “Appointments” from the side menu,
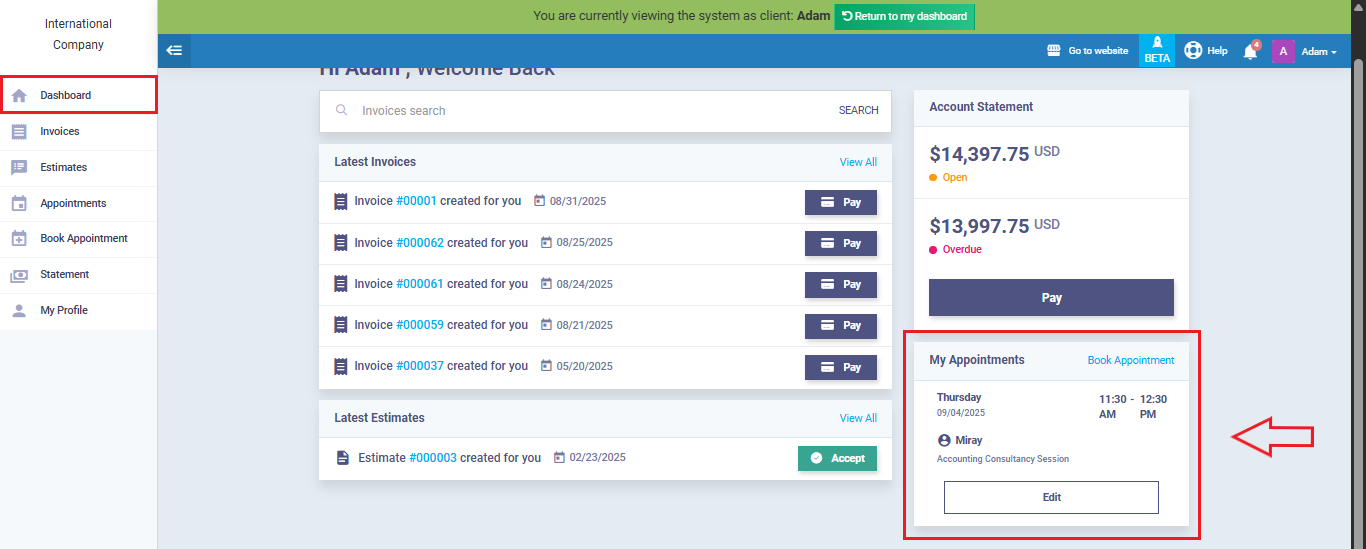
or checking the appointments listed in their main dashboard.
To view all client bookings and confirm payments, go to “Manage Bookings” under “Bookings” in the main menu.