


Custom Description on the Account Statement
The system automatically generates a description for sales invoices on client account statements. However, you might often need to include a custom description for these invoices to organize transaction data and help your clients easily review their account statements without referring back to the original invoice.
In this topic, we will cover two important features related to describing sales invoices on client account statements. The first feature allows you to set a custom description with specific information applied to all sales invoices on the account statement. The second feature enables you to specify a custom description for each sales invoice on the account statement.
We will discuss these points in detail:
- Activating the feature to add a description for sales invoices on the account statement.
- Setting a custom description with specific information for all sales invoices on the account statement.
- Setting a custom description for each sales invoice on the account statement.
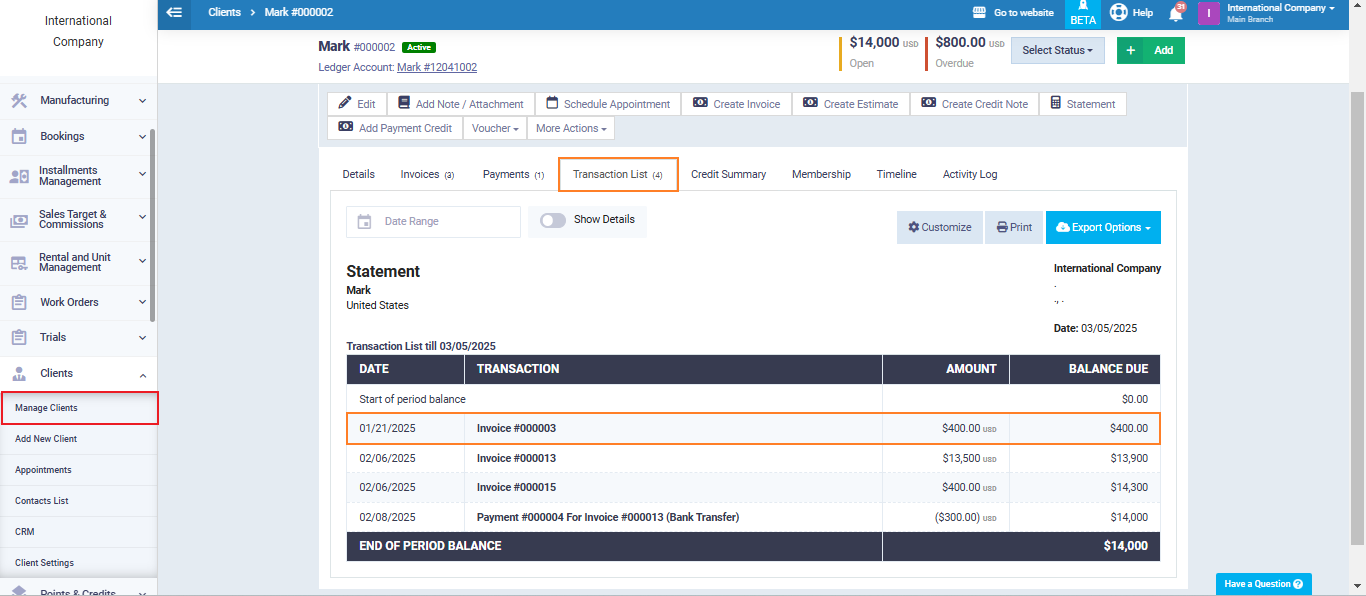
Before we get started, let’s take a look at the system-generated description for account transactions. By default, when you review an invoice on a client’s account statement, you will see only the invoice number in the description, as shown in the following image:
Add a Description for Sales Invoices on the Client's Account Statement
To enable the feature of adding a description for sales invoices on the client’s account statement, click on “Sales” from the main menu, then select “Sales Settings,” and choose “General Invoice and Estimate Settings” as shown in the following image:

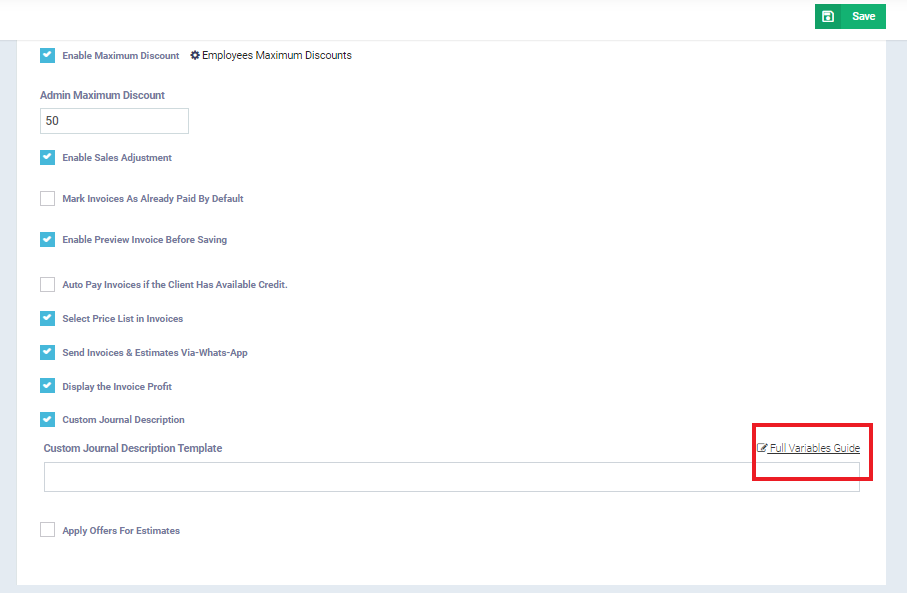
Now, activate the “Custom Journal Description Template” option at the bottom of the screen.
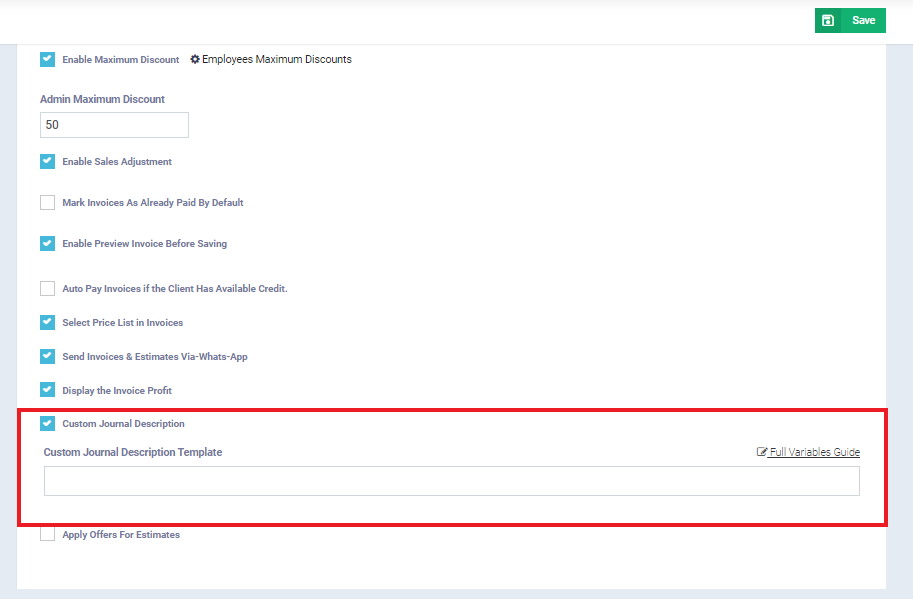
As you can see, once you activate the “Custom Journal Description Template” option, a field appears where you can add text. This text will be applied by the system as a fixed description for all sales invoices in the account statements of all client.
Practical Example
We add the description we want to appear on the client’s account statement, let it be ‘Adding a new custom description to sales invoices trial,’ just to make sure that the description has changed.

To create a new sales invoice for the client “Michael,” click on “Sales” in the main menu, then “Create Invoice,” and select the client “Michael.” Fill in the remaining invoice details, referring to the Sales Invoice Creation Guide.
We have created a sales invoice #000020 for the client “Michael,” as shown in the following image:

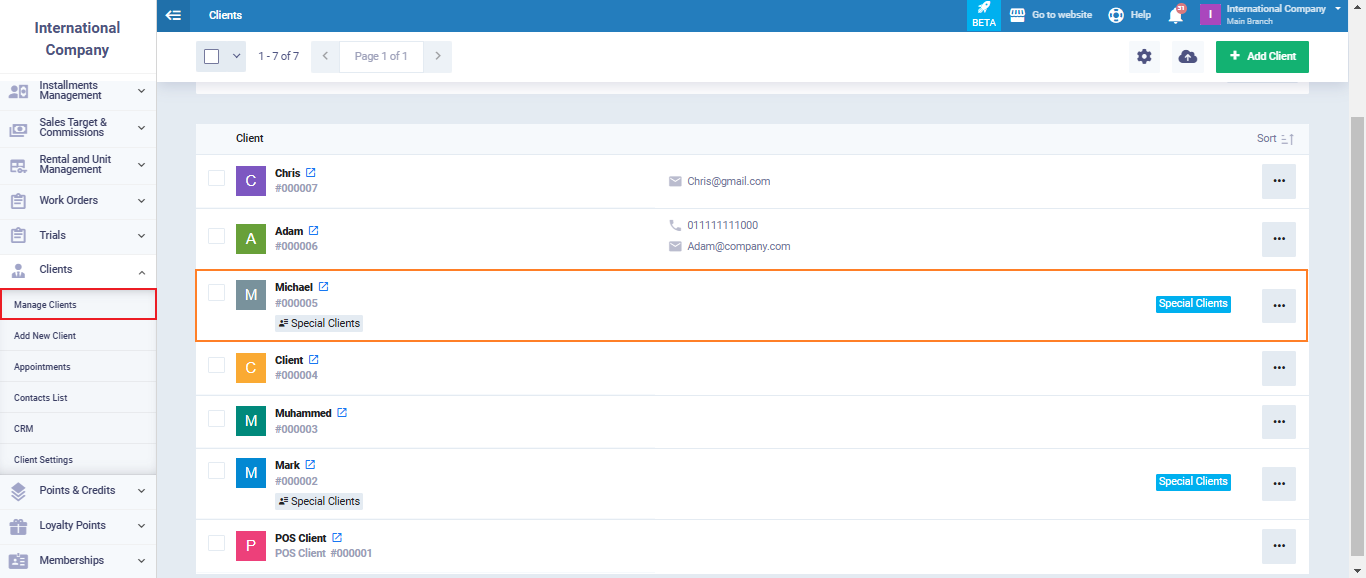
After creating the new invoice, we go to the client’s profile for “Michael” to review his account activity and ensure the change in the description of this sales invoice. To do this, first click on “Clients” in the main menu, then “Manage Clients,” and select the customer “Michael,” as shown in the following image:
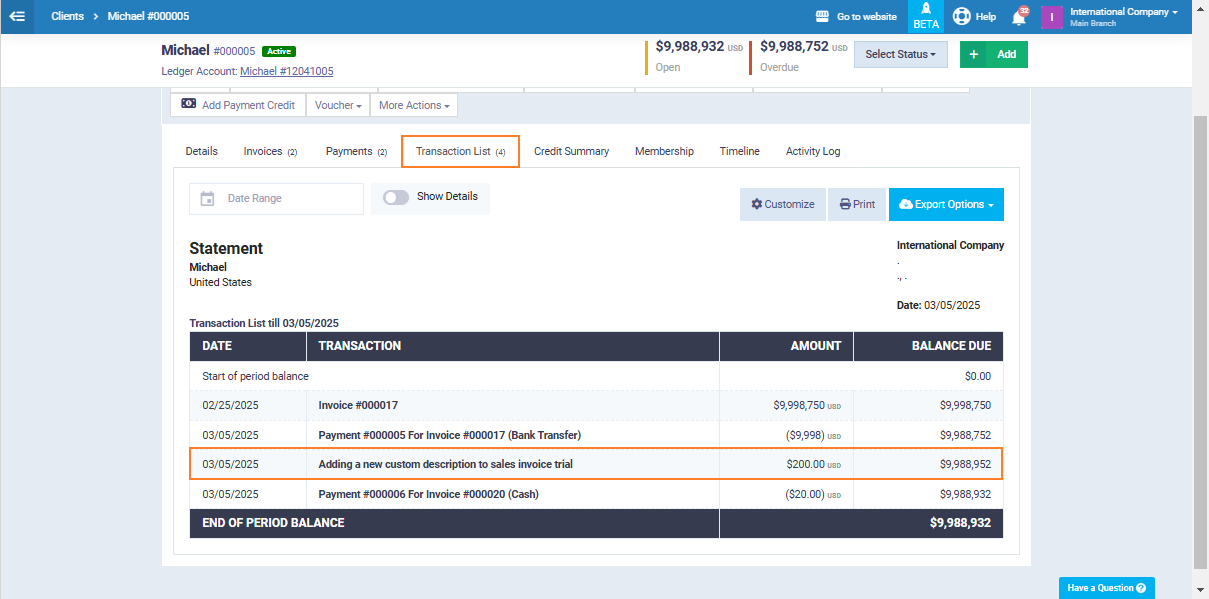
In the client’s profile for “Michael,” click on “Transaction List.” As shown in the image below, we can see the new description, “Adding a New Custom Description for Sales Invoices Trial,” in the invoice description field. Clicking on this field will display the invoice with all its details.
Defining a Custom Description for Each Sales Invoice in the Client's Account Statement
In the previous section, we learned how to add a fixed description to sales invoices to display in the client’s account statement. While this feature may be suitable in some cases, it may not fulfill the purpose if we want to differentiate each sales invoice with a custom description.
You can specify a description for each sales invoice by selecting the type of data to appear in the invoice’s description in the client’s account statement. The type of data referred to here includes the client’s name, invoice number, tax card, and more.
The system provides you with a range of data types that you can choose from without a maximum limit. After specifying the data type you want, it is automatically applied as a common description that changes its meaning according to the sales invoice.
To specify the data type, we return to the panel to add the description by clicking on “Sales” from the main menu, then “Sales Settings,” and then select “General Invoice and Estimate Settings” as shown in the following image:
Underneath the description field on the left, click on the “Complete Variables Guide” as shown in the image:
We can select from variables without an upper limit by clicking on the copy icon, as shown in the image:

After clicking on the copy icon, we return to the description field and paste the variable, then click “Save.”
Practical Example
To apply a practical example, we select the variables: Client Code and Invoice Number, to add them as a common description.
First, we click on the copy symbol to the left of the Invoice Number variable as shown:

Then, we return to the description field and paste the variables. Then we repeat the two steps with the other variable, which is the customer code.
After copying both variables, write the name of each variable next to the copied text, so the description field looks like this:
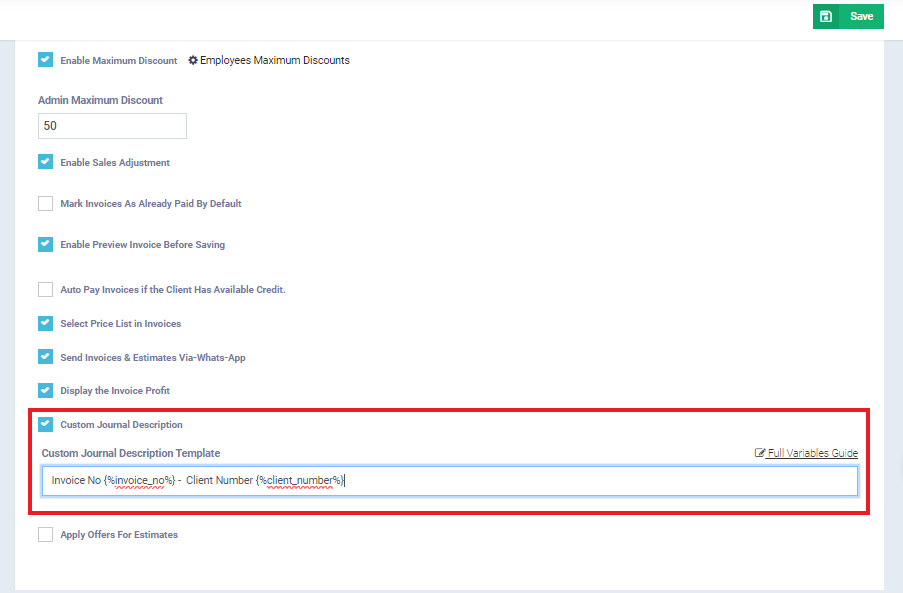
Then click “Save”
Now we can see the impact of adding these two variables to a sales invoice for the client “Michael.”
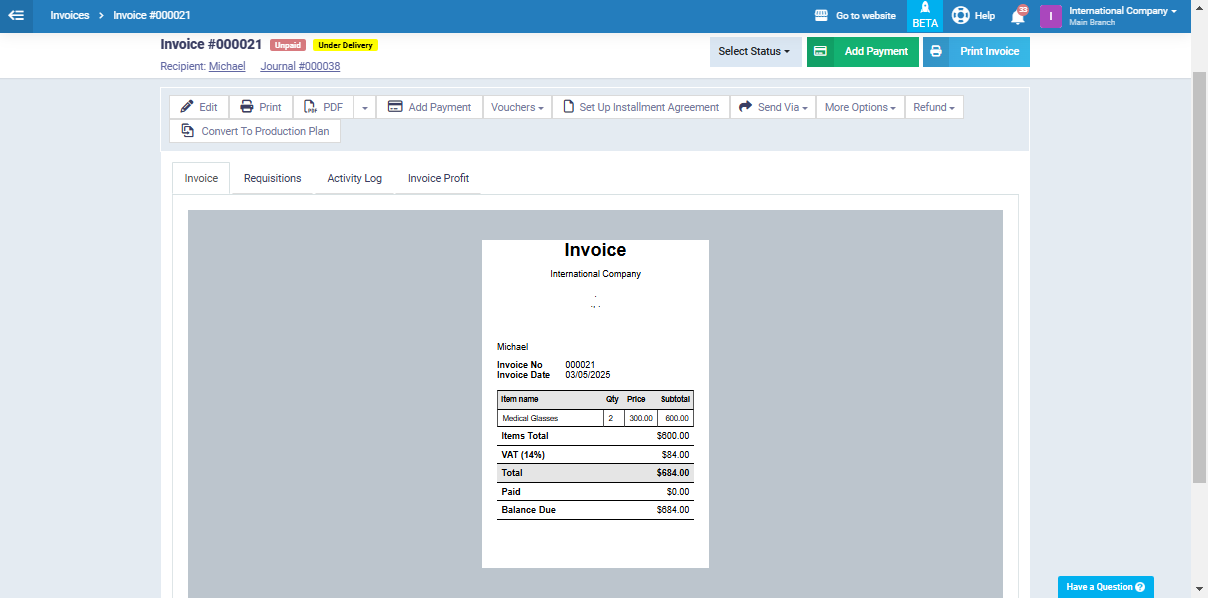
We create a new sales invoice following the steps explained earlier. We have created the following sales invoice for the client “Michael” to see how its description will appear in his account statement:
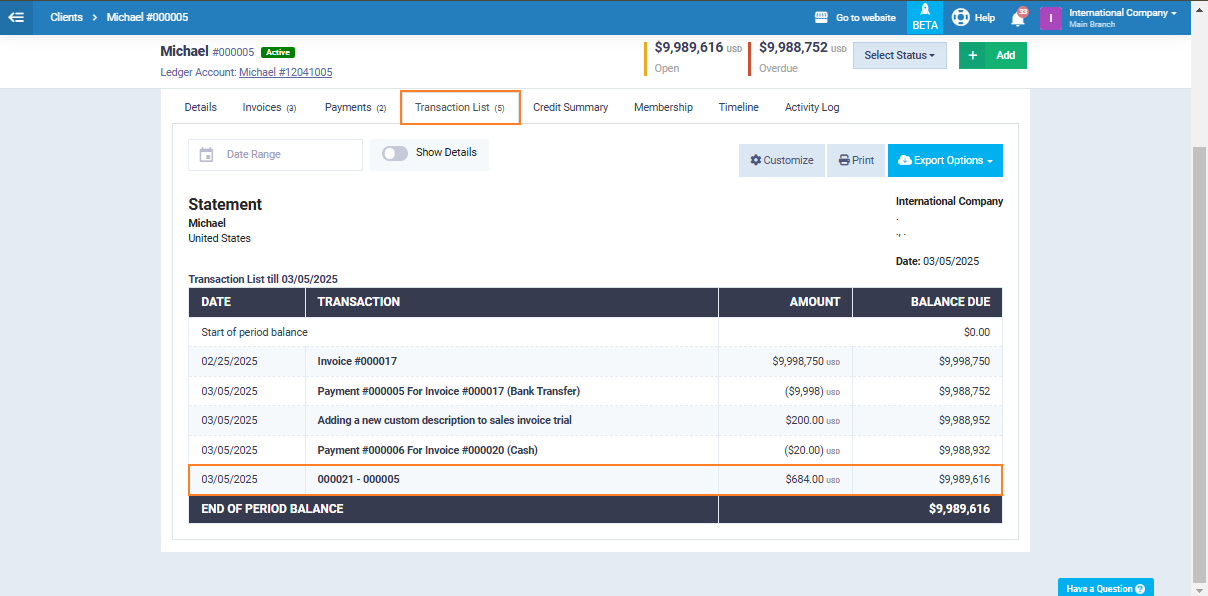
We will now proceed to check the client’s account statement for “Michael” by clicking on “Clients” in the main menu, then “Manage Clients,” and selecting the client “Michael.” This is to see how the description of the latest sales invoice will appear after adding the variables: Client Code and Invoice Number.
In the client’s profile for “Michael,” we click on “Transaction Lost,” and as shown in the image below, we can see the description of the sales invoice we created recently, including the variables: Client Code and Invoice Number.
Setting a Custom Description for Each Sales Invoice Individually
If you wish to add a custom description for each sales invoice individually in the client’s account statement, you can do so using the custom fields feature. To accomplish this, there are two main steps:
- First: Add a custom field to the sales invoice.
- Second: Add the custom field variable in the sales settings.
We will explain and illustrate these two steps as follows:
The First Step: Adding a Custom Field to the Sales Invoice
The first step to defining a custom description for each sales invoice individually is to create a new sales invoice with the addition of a custom field.
After filling in all the information, we go to the bottom of the invoice and click on ‘Custom Field Settings’ as shown in the image.
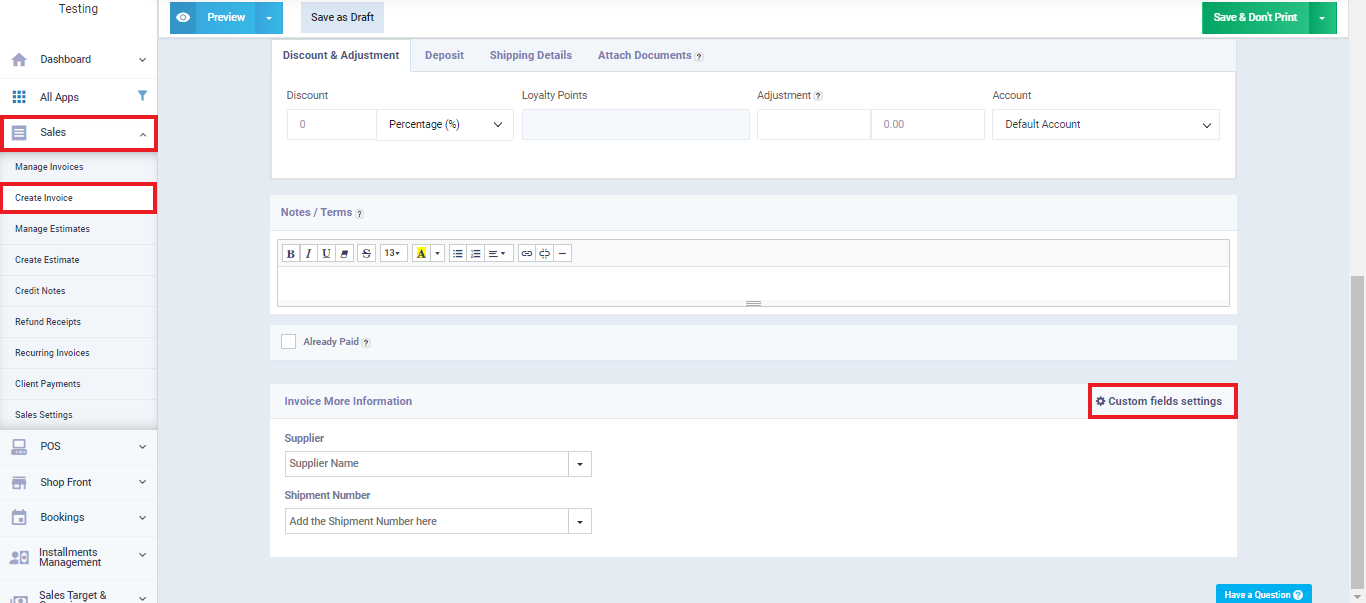
From the list of available fields that appear on the left of the panel, we click on the ‘Multi-Line Text‘ field and drag it to the middle of the page.

Now we add a name for the field, let it be ‘Additional Description’, then click ‘Save‘.
Now we go back to the invoice to add the custom description for this specific invoice, let it be “Additional information for Sales Invoice #2: 2 Sunglasses for client Majed.

The Second Step: Adding the Custom Field Variable in Sales Settings
Once you’ve added a custom field to the sales invoice, the system will automatically create a new variable with the same name in the list of invoice variables we discussed earlier in the sales settings. What you need to do now is to copy this variable and add it to the description field in the sales settings.
Start by clicking on “Sales” in the main menu, then “Sales Settings,” and select the “General Invoice and Estimate Settings” tab as shown in the picture:
At the bottom of the panel, click on “Full Variable Guide,” and then select from the variables that appear the variable named “Additional Description – Invoice.
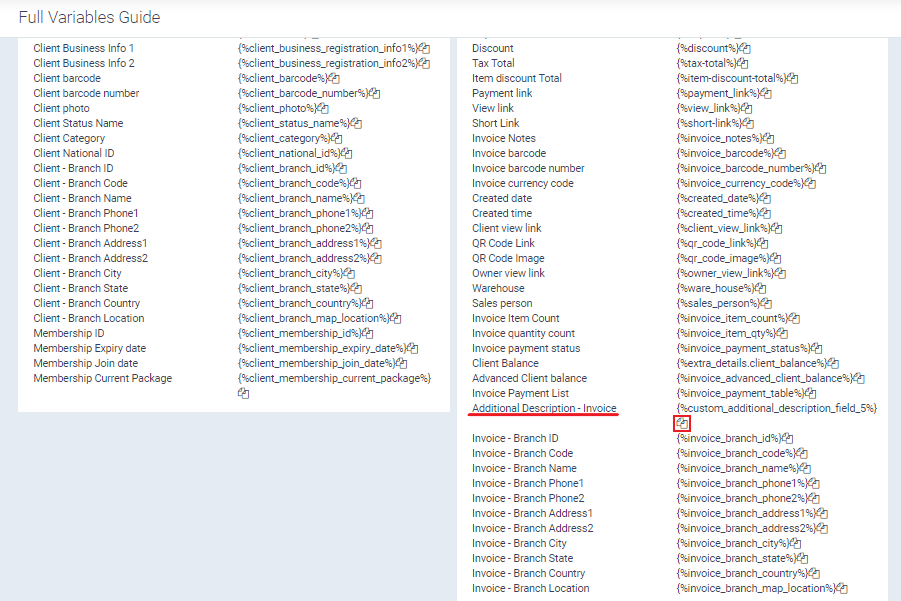
We now copy this variable to be alongside the other two variables we added earlier:

We click “Save,” then proceed to create another sales invoice after this modification.
Verifying the Application of the New Description
Now we move to the client’s account statement for “Majed” to confirm whether the additional description will appear in the invoice’s description.
First, we click on “Clients” from the main menu, then select the customer “Majed,” and after opening his file, we click on “Transactions List.”
Indeed, the additional custom description appears in the transactions list for this sales invoice, as shown in the following image:

So, we have now learned about two important features in describing sales invoices in the client’s account statement:
The first feature is about setting a custom description for each sales invoice in the client’s account statement by specifying the type of data displayed in the description.
The second feature is about specifying a custom description for each individual sales invoice in the client’s account statement.