Managing Client Appointments
Client appointments in the software are of two types; one is linked to Work Orders or Bookings, and the other is independent, and associated with a specific action. The system facilitates features such as the automatic recurring scheduling of appointments, assigning them to a specific employee, making appointments available for clients to view and confirm, as well as sending reminder messages before the appointment to both employees and clients. In this article, we will review how to add a new independent appointment, illustrating all related procedures.
Adding a New Appointment
Click on “Appointments” under “Clients” in the main menu and press the “New Appointment” button.
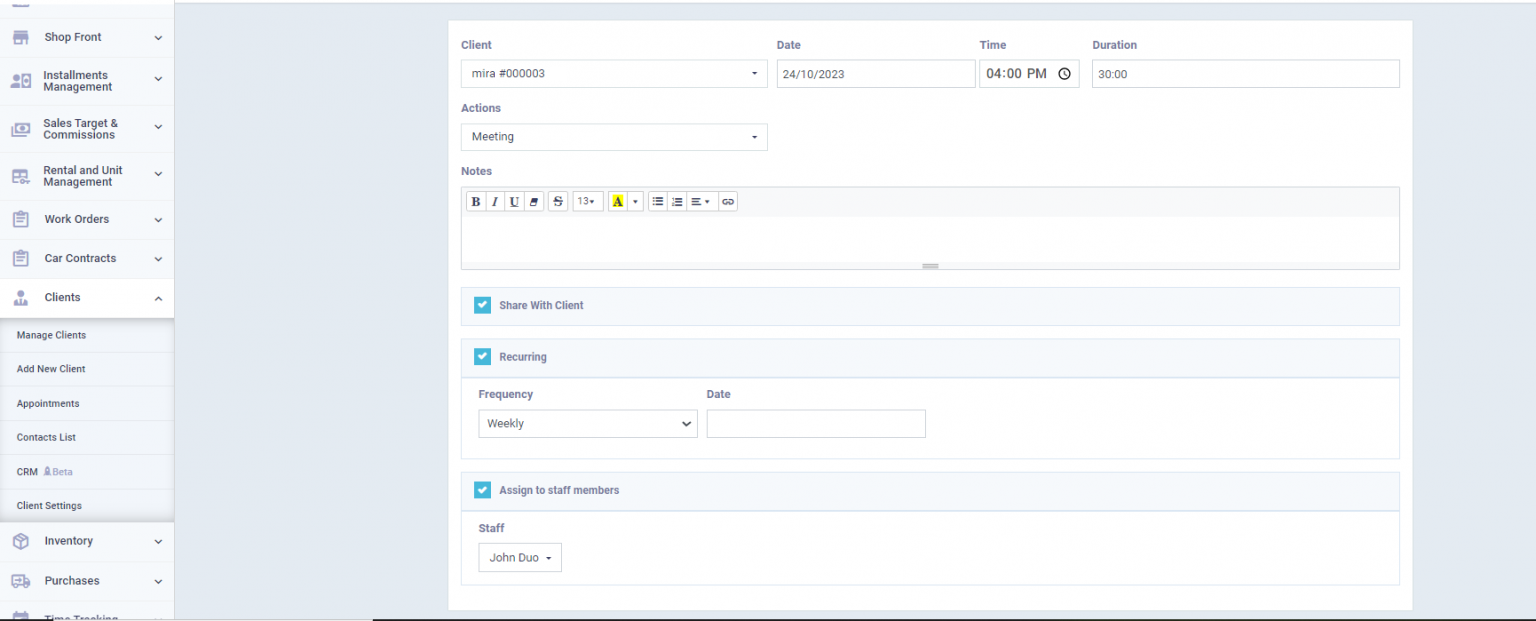
Enter the appointment details as follows:
- Client: Select the desired client from the drop-down menu to schedule the appointment for.
- Date: Choose the date for the client’s appointment.
- Time: Set the time for the client’s appointment.
- Duration: Specify the duration of the client’s appointment.
- Actions: Select the required action to be performed during this appointment.
- Notes: Write any notes related to the appointment.
- Share with Client: When this feature is activated ✅, the client will be able to view their own appointment (if they are allowed to access their personal portal on the system).
- Recurring: When this option is activated ✅, the appointment will be repeated periodically, whether weekly, monthly, or annually, based on what you select from the dropdown menu in the frequency field.
Date: Enter the end date for the recurrence here.
- Assign to staff members: Select the employee responsible for this appointment from the dropdown menu.
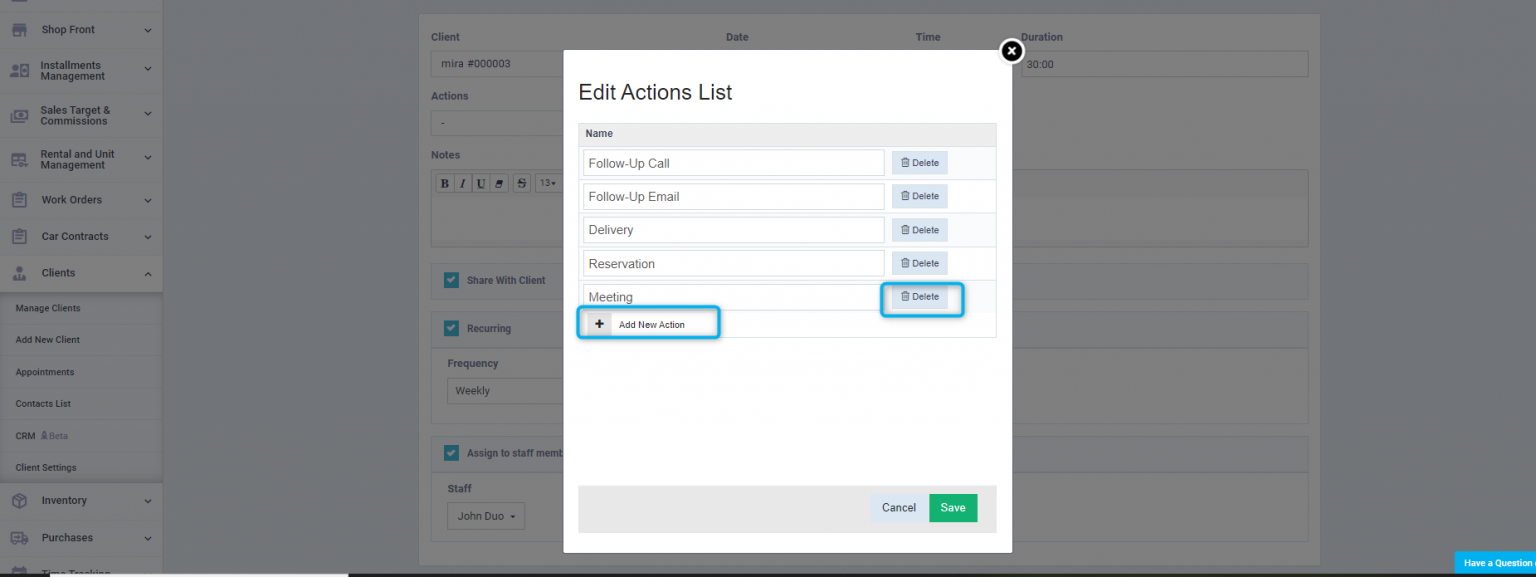
Modifying the Actions List
You can add a new action while creating an appointment for the client by clicking on “Edit Actions List” from the dropdown menu in the “Actions” field, then press “Add New Action”. Enter the required action name and then click “Save”. It will then permanently appear in the actions list for appointments.
After setting all the fields, click the “Save”.
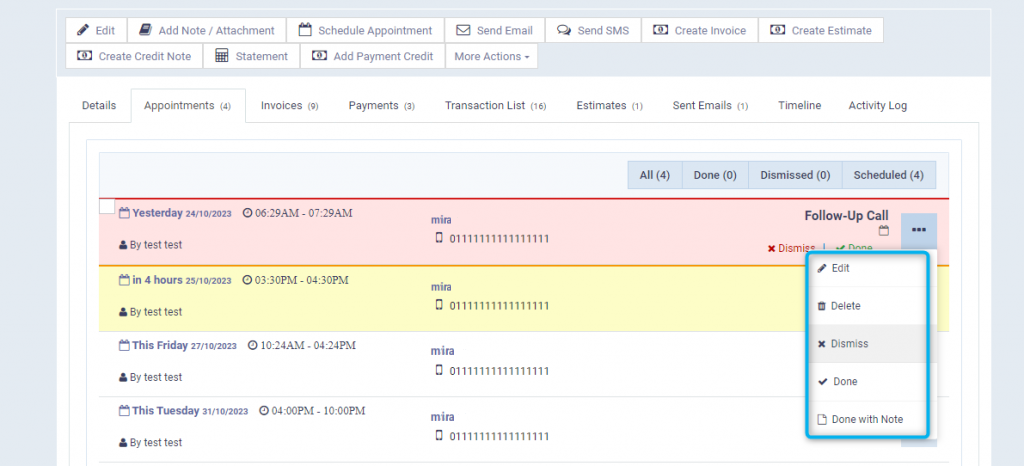
Viewing the Client Appointments in their File
After creating an appointment for a client, you will be directed to their appointment list, or you can go there at any time by clicking on “Manage Clients” from the “Clients” dropdown in the main menu, then clicking on the “Appointments” tab.
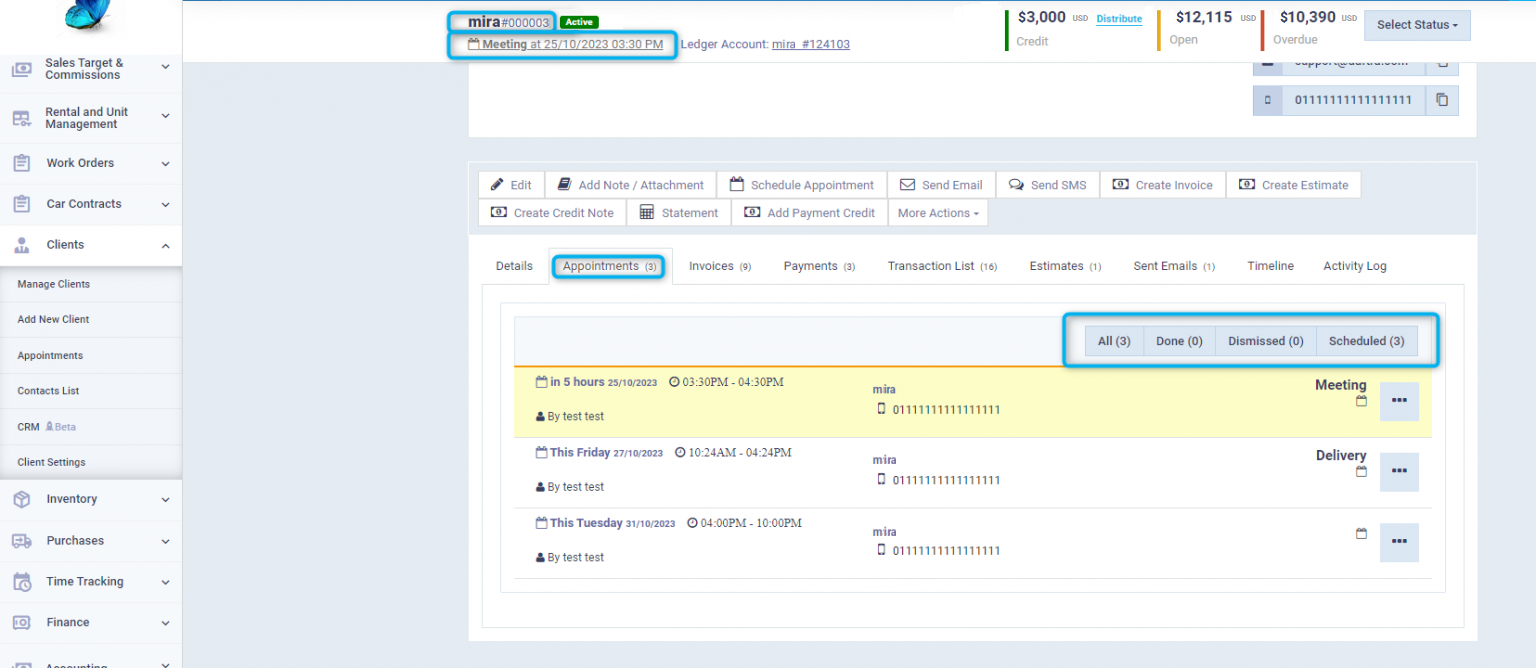
To edit the status of the appointment, delete it, or make modifications, click on the three dots next to the appointment and choose what you want from the dropdown menu.
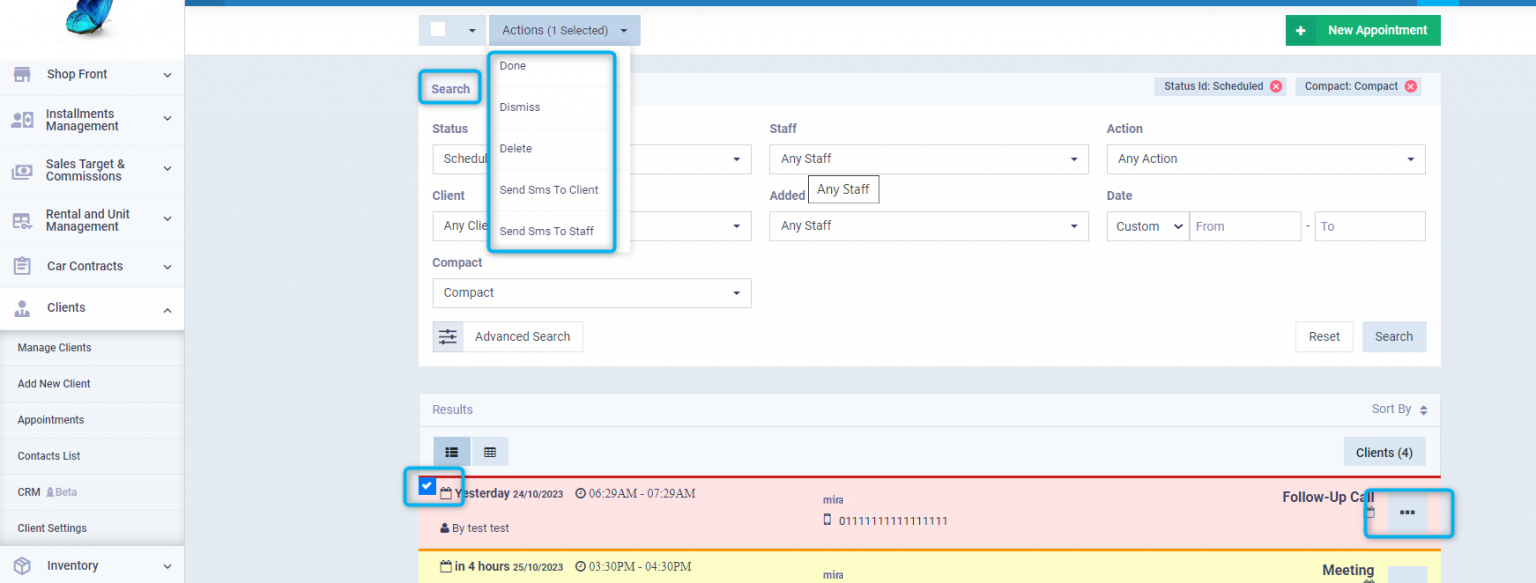
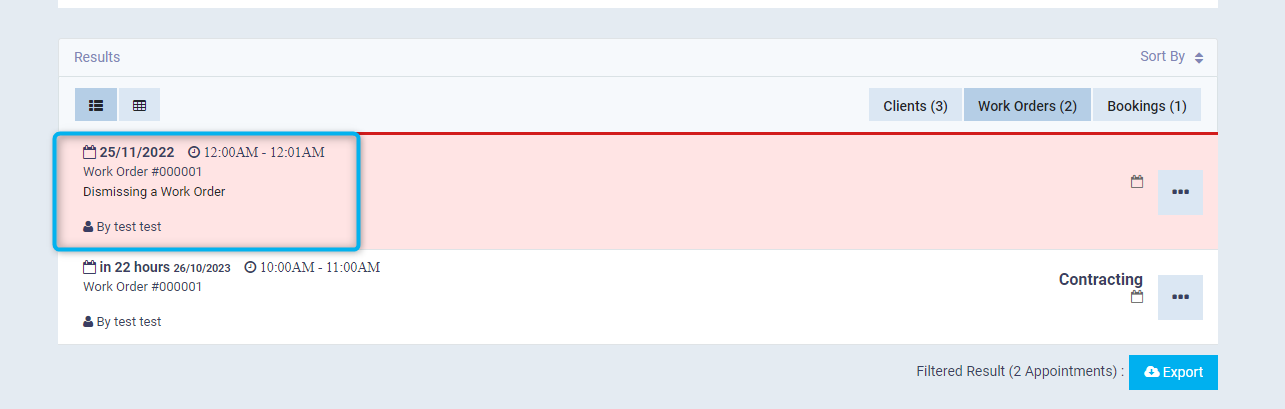
Appointments List and Actions on it
Click on “Appointments” in the main menu under “Clients” to view the complete list of appointments. To edit, delete, or change the status of an appointment, click on the three dots next to it. Alternatively, select multiple appointments by checking the box next to the appointment name ✅, then click on the “Actions” button and choose one of the following actions from the dropdown menu:
- Done.
- Dismiss.
- Delete.
- Send SMS To Client.
- Send SMS To Staff
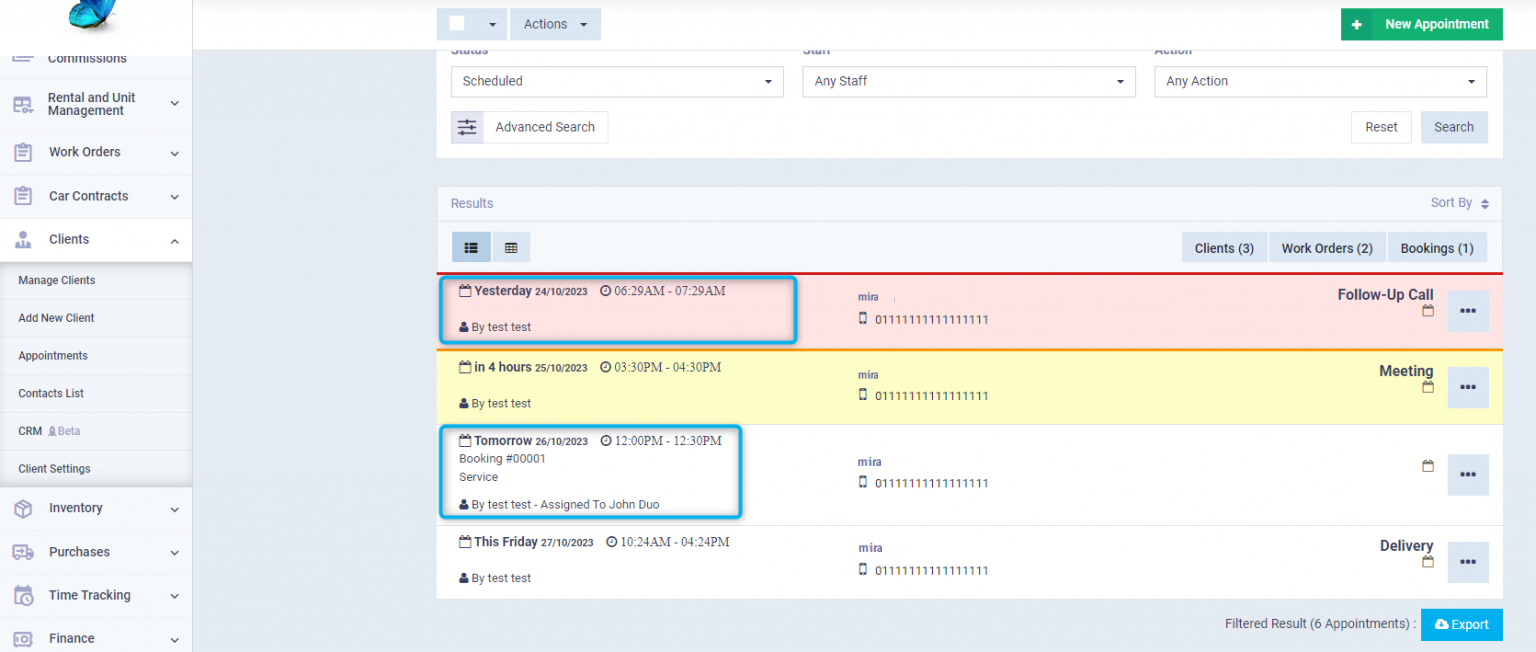
Note the distinction between appointments originating from a work order or booking and those created independently when browsing the list, with the associated action appearing next to the appointment name.
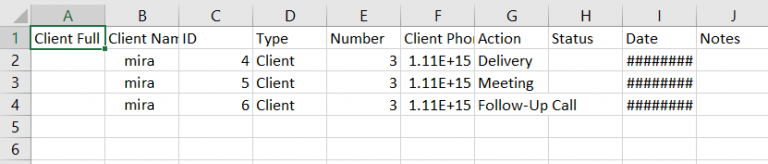
Exporting Appointments
You can easily download all the appointments on your Daftra account or select specific ones in an Excel file. Go to “Appointments” under “Clients” in the main menu, select the appointments you wish to export, or choose all appointments in the same manner mentioned in the previous paragraph, and then press the “Export” button located at the bottom of the appointments list.

- Choose from the Fields list the fields you want to display in the Excel file or leave the default selection “All”.
- From the dropdown menu under the field “Order By”, choose to order the appointments in descending or ascending order by date.
- Select the file type, CSV, Separated.
Click on the “Export” button.

The appointments will be downloaded to your device in an editable Excel file format as shown below.