Categorizing Clients and how to benefit of it
Categorizing clients is beneficial for organizing client files and facilitating search and filtering, among other things. There are two main methods for categorizing clients, each with its optimal use, which we will detail in the following lines.
Client Categories and Tags and the Difference between them
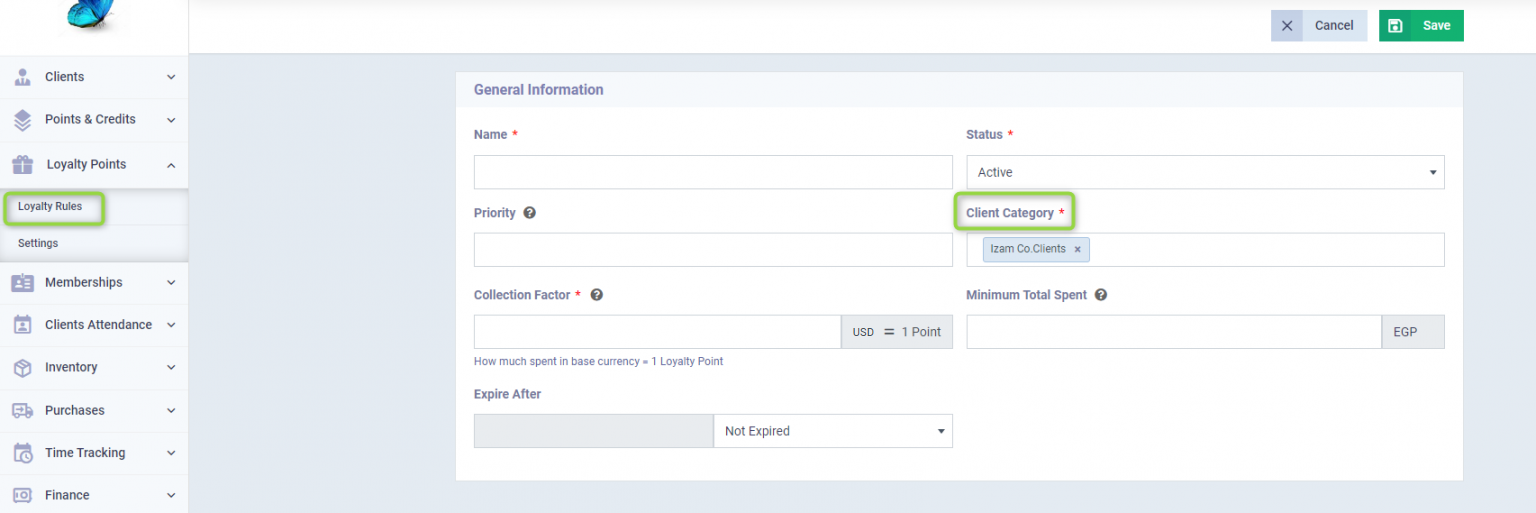
In addition to using categories to distinguish clients into groups, these categories entail certain important actions such as adding loyalty rules specific to a certain client category that reward them with points for each purchase to use as discounts later on.
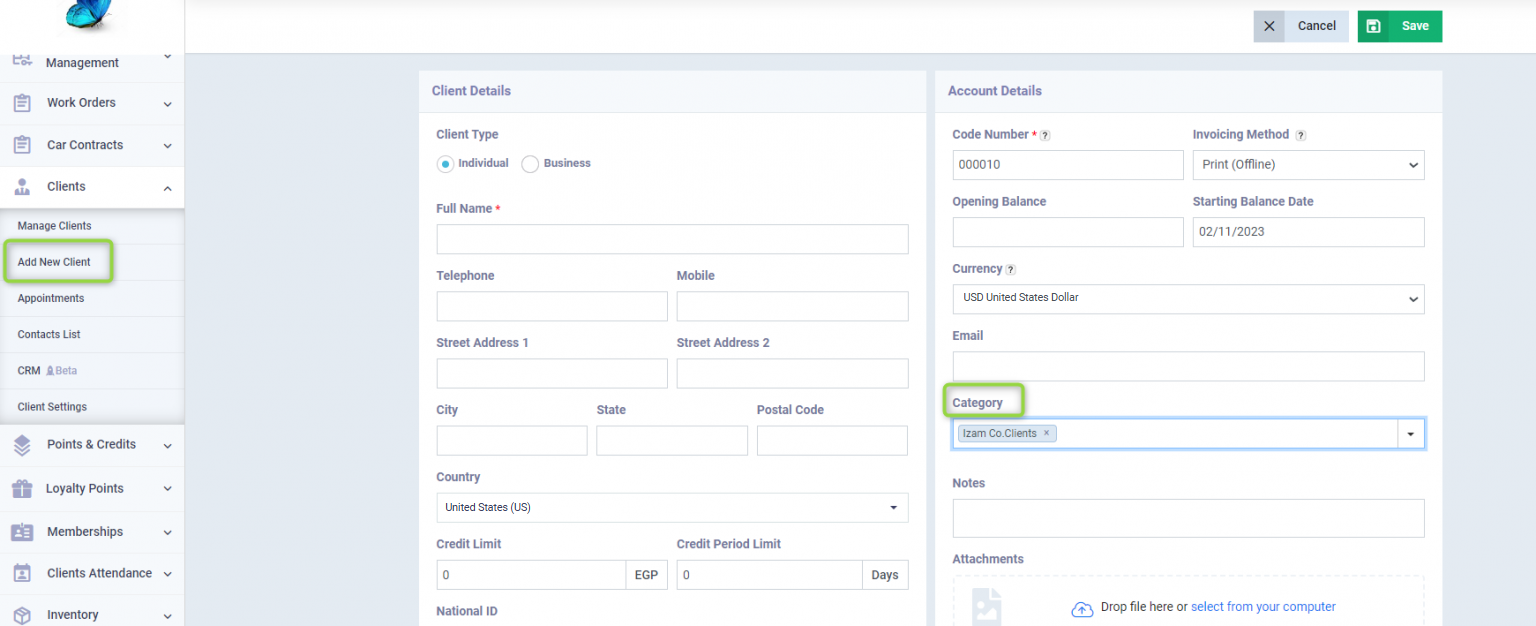
To add a category to a client, click on “Add New Client” from the “Clients” dropdown in the main menu, or by editing the profile of an existing client. Then go to the category field, click on the dropdown arrow to choose one of the existing categories or type the new category you wish to add then press the “Enter” key on your keyboard to add it, complete the data and then click on the “Save” button.
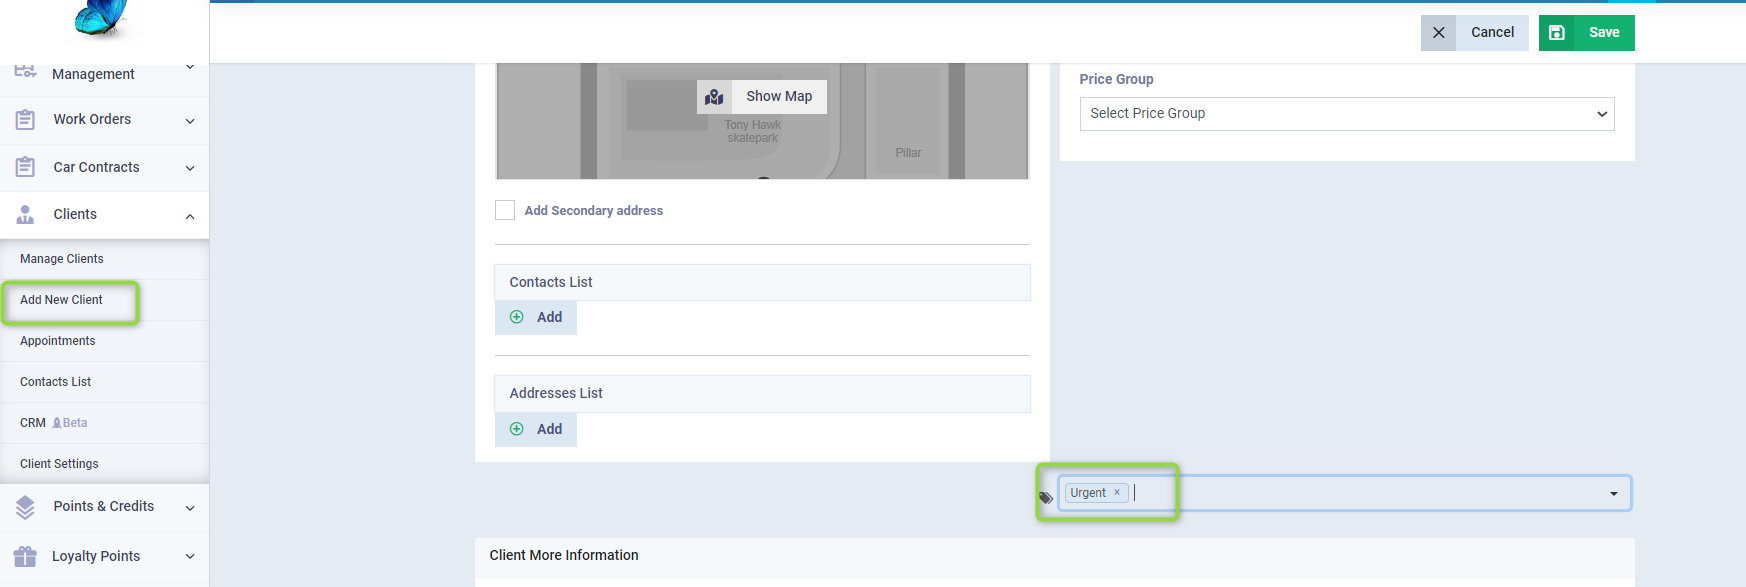
Tags, on the other hand, are used to indicate a particular status related to a client or a number of clients, and you can add them from the same page as adding a client category by typing the tag in the tags field ? and pressing the “Enter” key on your keyboard or by selecting one of the old tags from the dropdown list.
Placing of Categories, Tags, and Statuses on the Client File
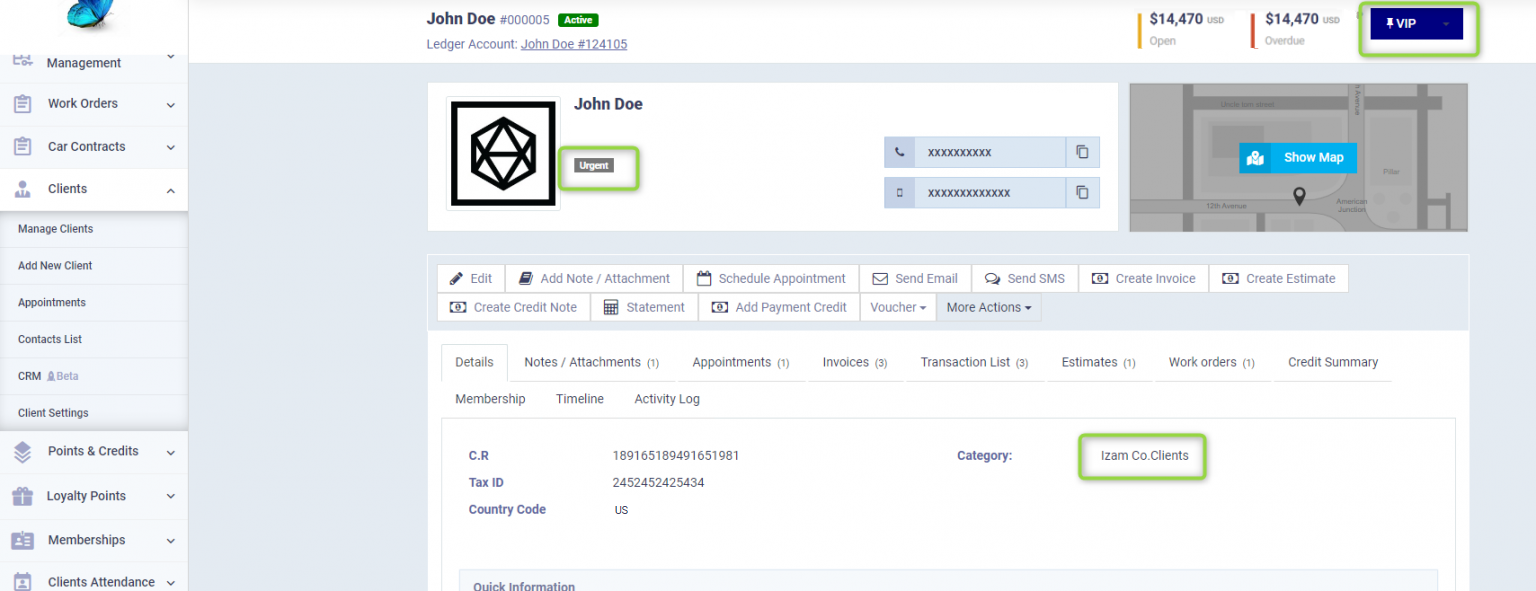
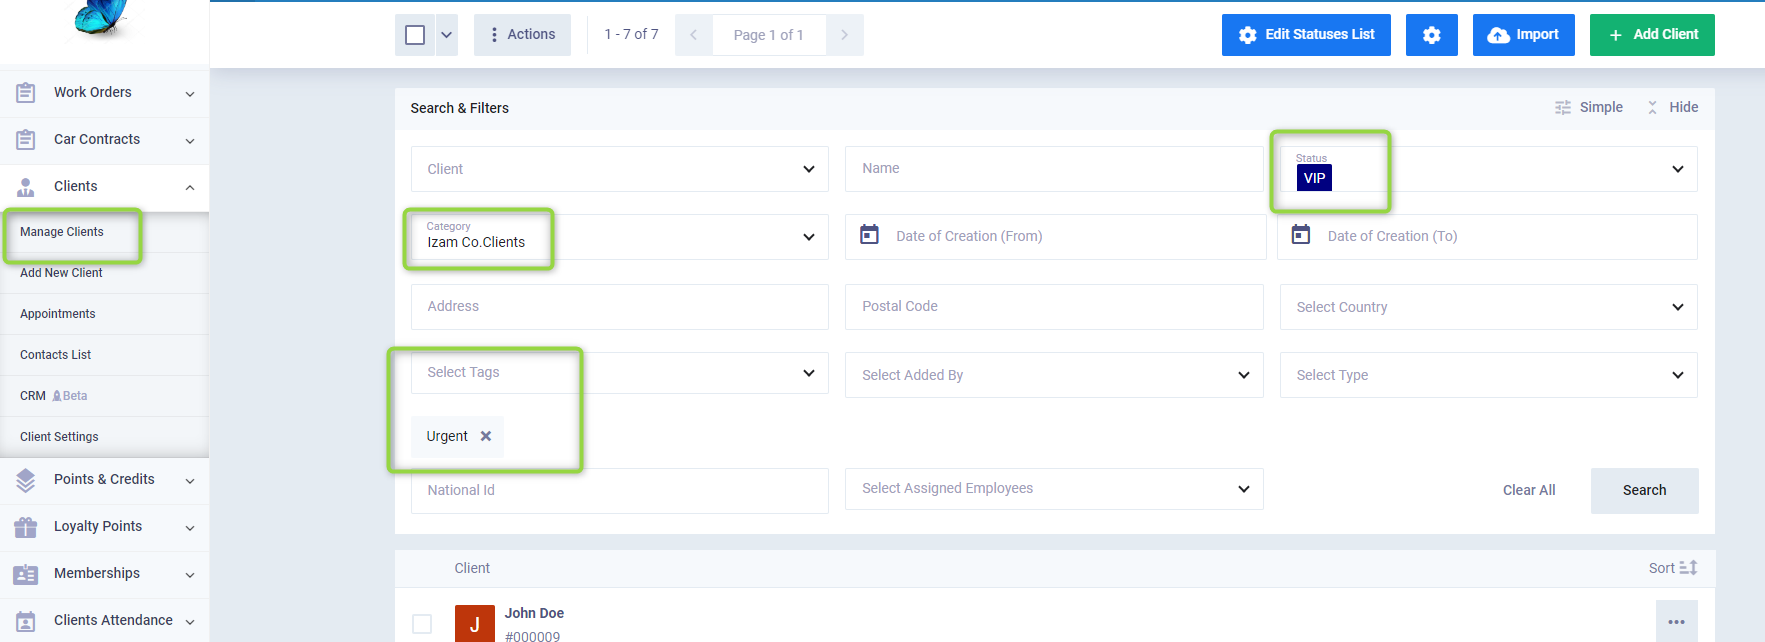
When you navigate to the “Manage Clients” dropdown under “Clients” in the main menu, you might find more than one term used to distinguish a client.
- Beside the client’s name in the main list, before clicking on it, you find the fixed status which appears in the following example as “VIP Client”.
- And below a tag like: “Urgent”.
- Whereas the category appears in a grey box, such as: “Izam Co. Clients”.

- When clicking on the client’s profile, you find the statuses at the top of the personal profile on the right to the amount due from the client: “VIP Client”.
- And the tag under the address details: “Urgent”.
- And the category in the details tab titled as the category: “Izam Co. Clients”.
Using Tags and Categories in Filtering and Searching
By clicking on “Manage Clients” under the “Clients” menu in the main navigation and other program screens, you can filter the search results for a specific category, a specific tag, or a specific status.
This is done by clicking on “Advanced Search” and selecting the tag or category from the main menu, then clicking on “Search”. This allows you to perform certain actions on all clients from a specific category together, or it makes it easier for you to follow up on matters related to clients of any category or tag you are searching for.
Creating a Loyalty Rule for a Specific Client Category
By clicking on “Loyalty Rules” under the “Loyalty Points” menu in the main navigation, select the client category you wish to assign this loyalty list to, complete the information, and then press the save button.