Different Client Statuses
You can easily distinguish clients by adding different statuses. Statuses are also used in the search process to filter clients. Moreover, you can link them to an appointment that requires following up with the client, and the system will alert you through notifications when the time comes.
Types of Client Statuses
Client statuses can be sticky or variable:
- A sticky status is permanently associated with the client, and alongside it, a variable status can be assigned to the client.
- On the other hand, a variable status is considered temporary and is secondary to a sticky status.
If you need more statuses for the same client for differentiation or filtering purposes, you can use categories or tags.
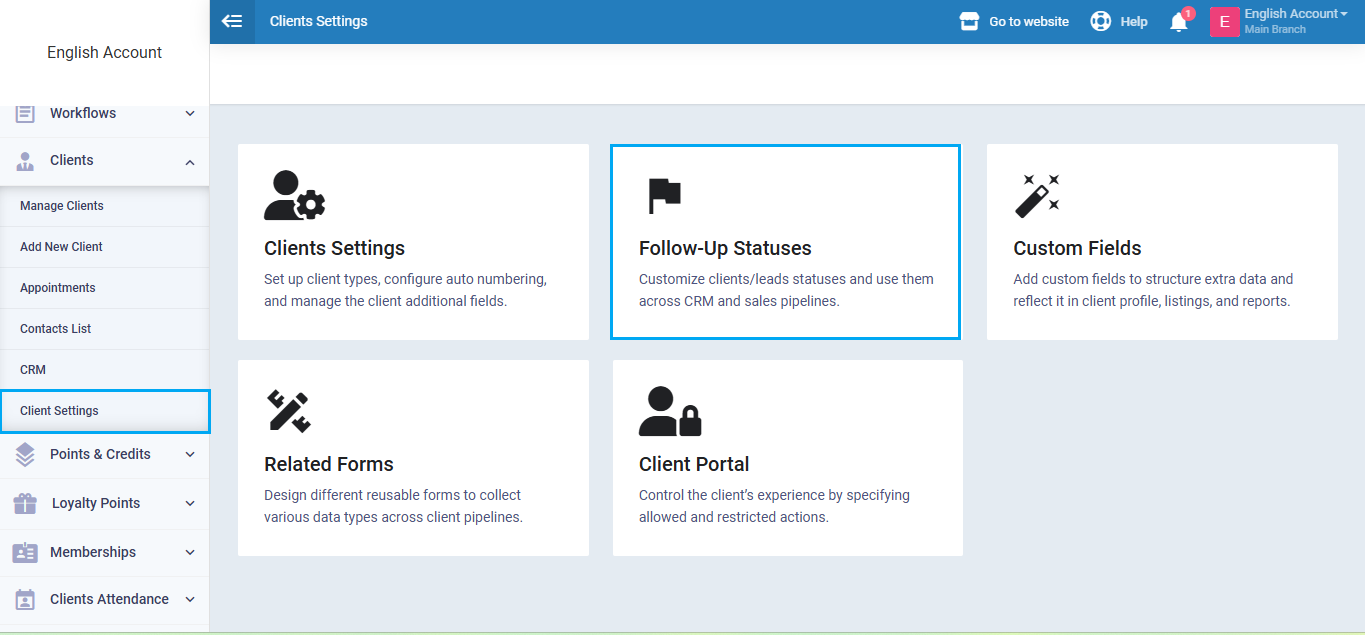
How to Add New Statuses in Daftra
Click on “Client Settings” found under “Clients” in the main menu, then click on the card labeled “Follow-Up Statuses”.
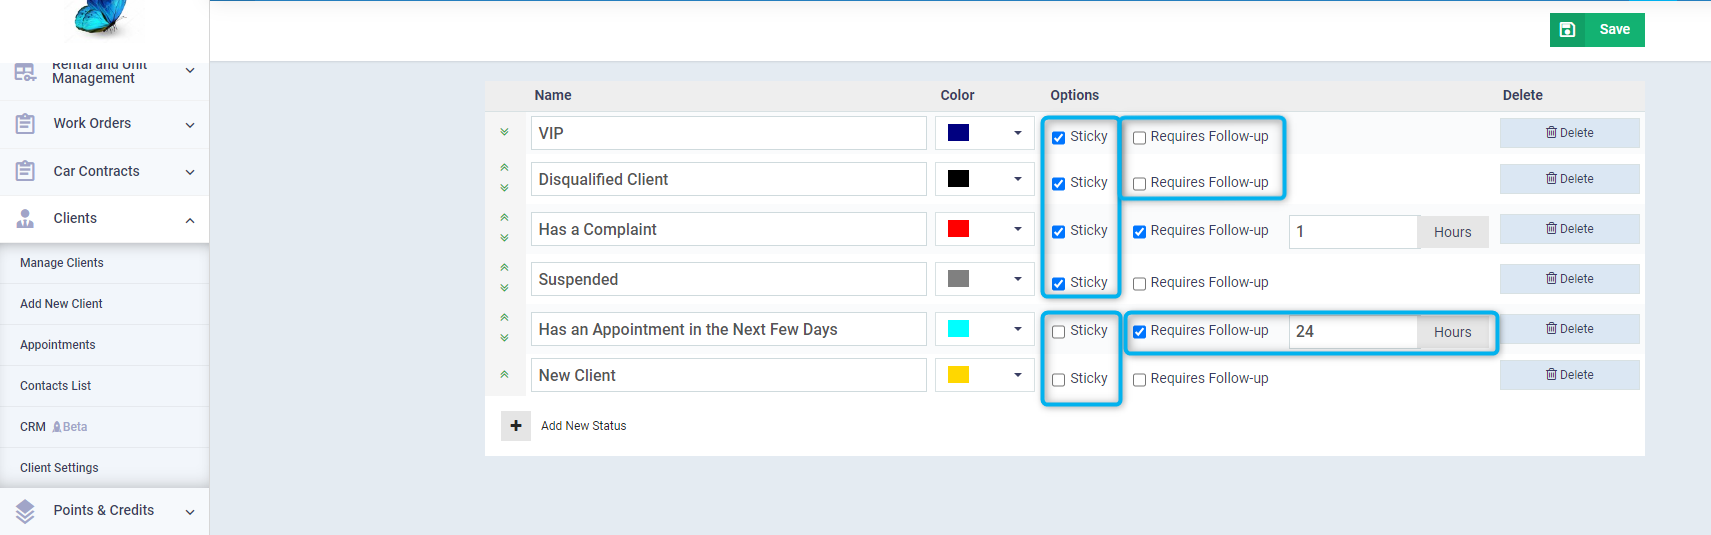
Control the type of status and the resulting actions through the data in the following fields:
- Name: Enter the status name, ensuring it is concise and expressive.
- Color: Choose the status color.
- Sticky: Activate this feature if you want the status to be fixed ✅, and deactivate it if you want it to be variable.
- Requires Follow-Up: Activate this feature if the status is associated with an action that requires alerting the admin or employee when due ✅ and enter the required follow-up period in the “Follow-up After” field.
- Delete: If you want to delete a status, click on the “Delete” button and confirm the action.
- + Add New Status: Click on the “+Add New Status” button to add more statuses and fill in the fields.
After setting the field data, click on the “Save” button.
Assigning a Status to a Client
Click on “Manage Clients” under “Clients” in the main menu, then click on the client you wish to assign a status to. Click on the “Select Status” button if this is the first status being added to the client, or on the current status of the client if one or more statuses have been assigned to them before. Choose the status from the dropdown menu to automatically update the client’s status.
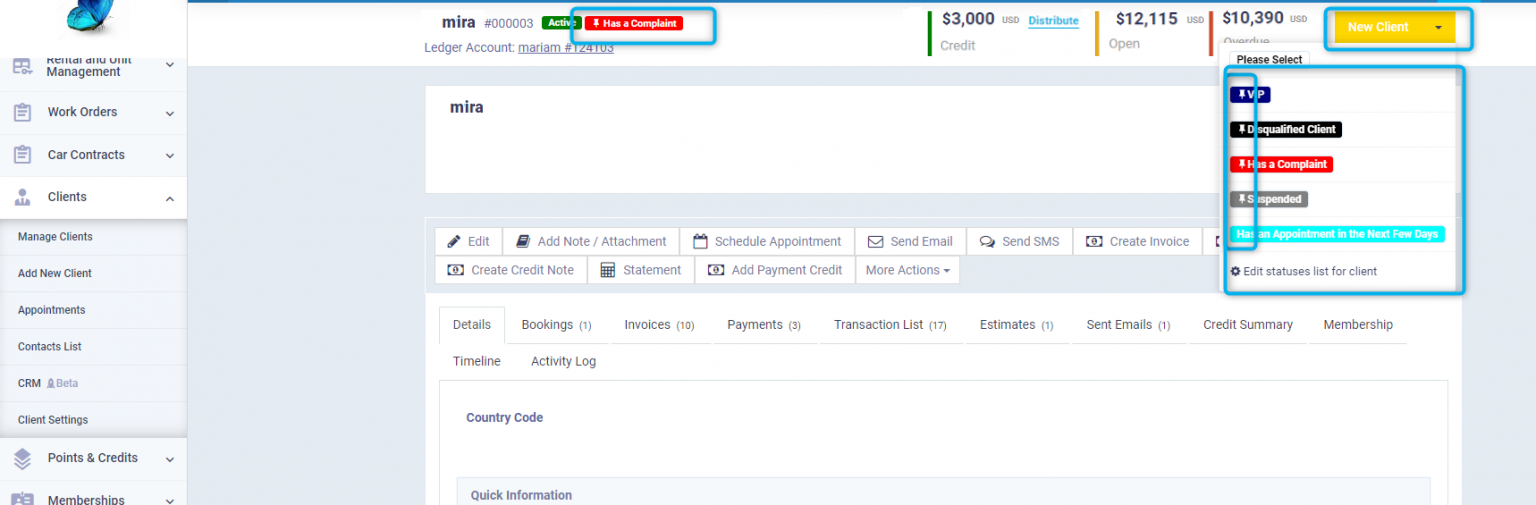
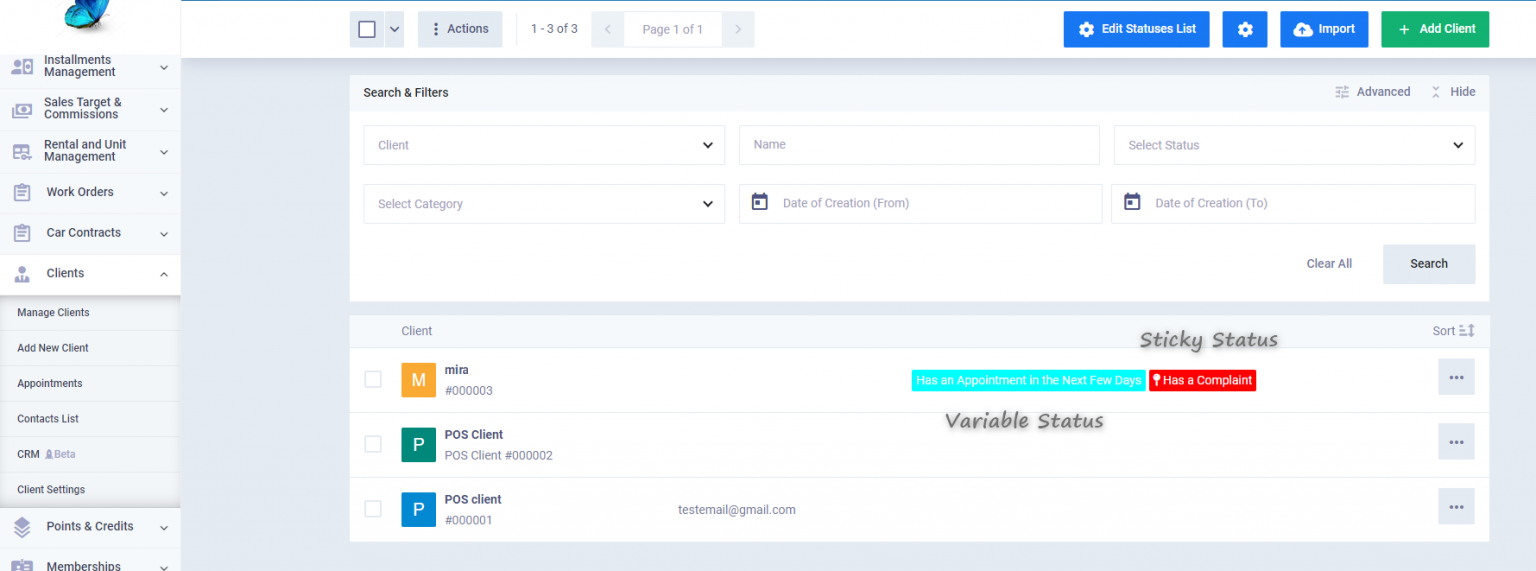
When browsing the client list from “Manage Clients” under “Clients” in the main menu, you will find the sticky status next to the client’s name, preceded by a pin icon ?, while the variable status appears without the icon.
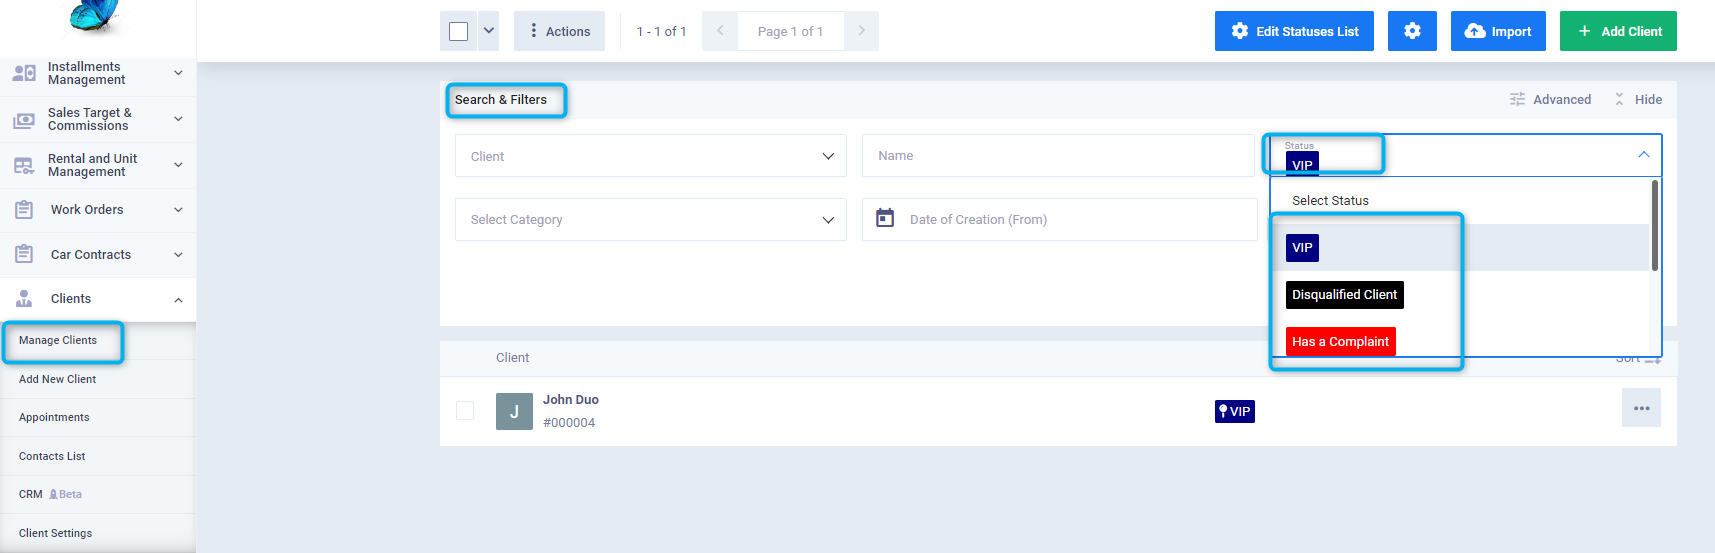
Searching and Filtering by the Statuses
Click on “Manage Clients” found under “Clients” in the main menu, and navigate to the search section. Click on the status field, select the client status you want to search for from the dropdown menu, and then click on the “Save” button to easily follow up with clients of this status.