Creating and Printing the Client Barcode
The system also allows you, when adding a product, to generate its barcode and also print it. It also allows you to create a barcode for clients and print it if you want, for easy identification of client data and distinguishing their shipments. We review the method in this article step by step.
Creating a Client Barcode in the System
Client barcodes are not automatically added when creating a new client. Instead, it is done through creating a custom print template for the barcode.
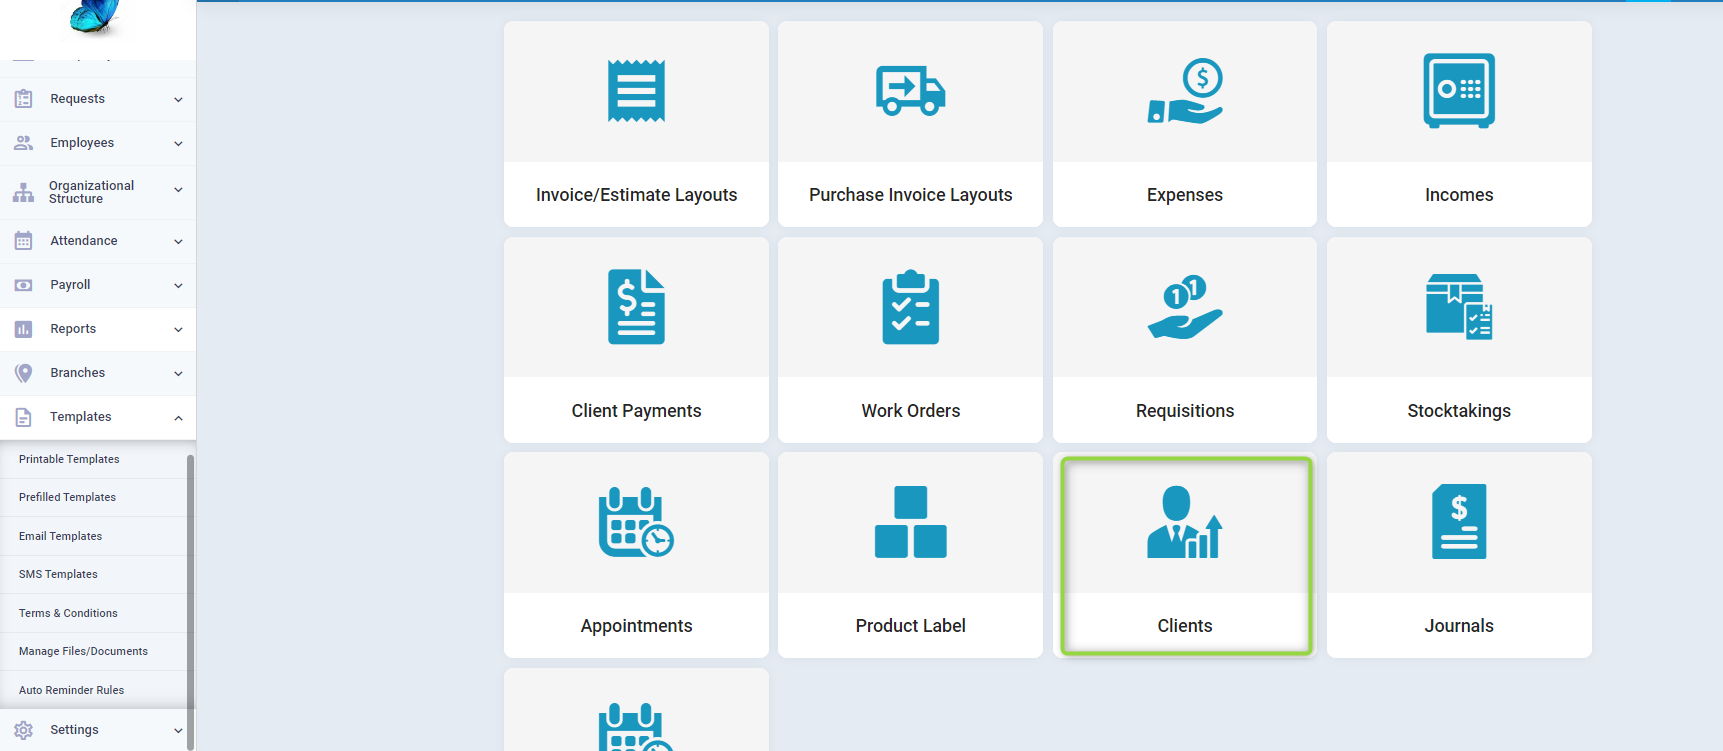
Click on “Printable Templates” from the dropdown menu under “Templates” in the main menu, and click on the “Clients” card to create a new printable template.
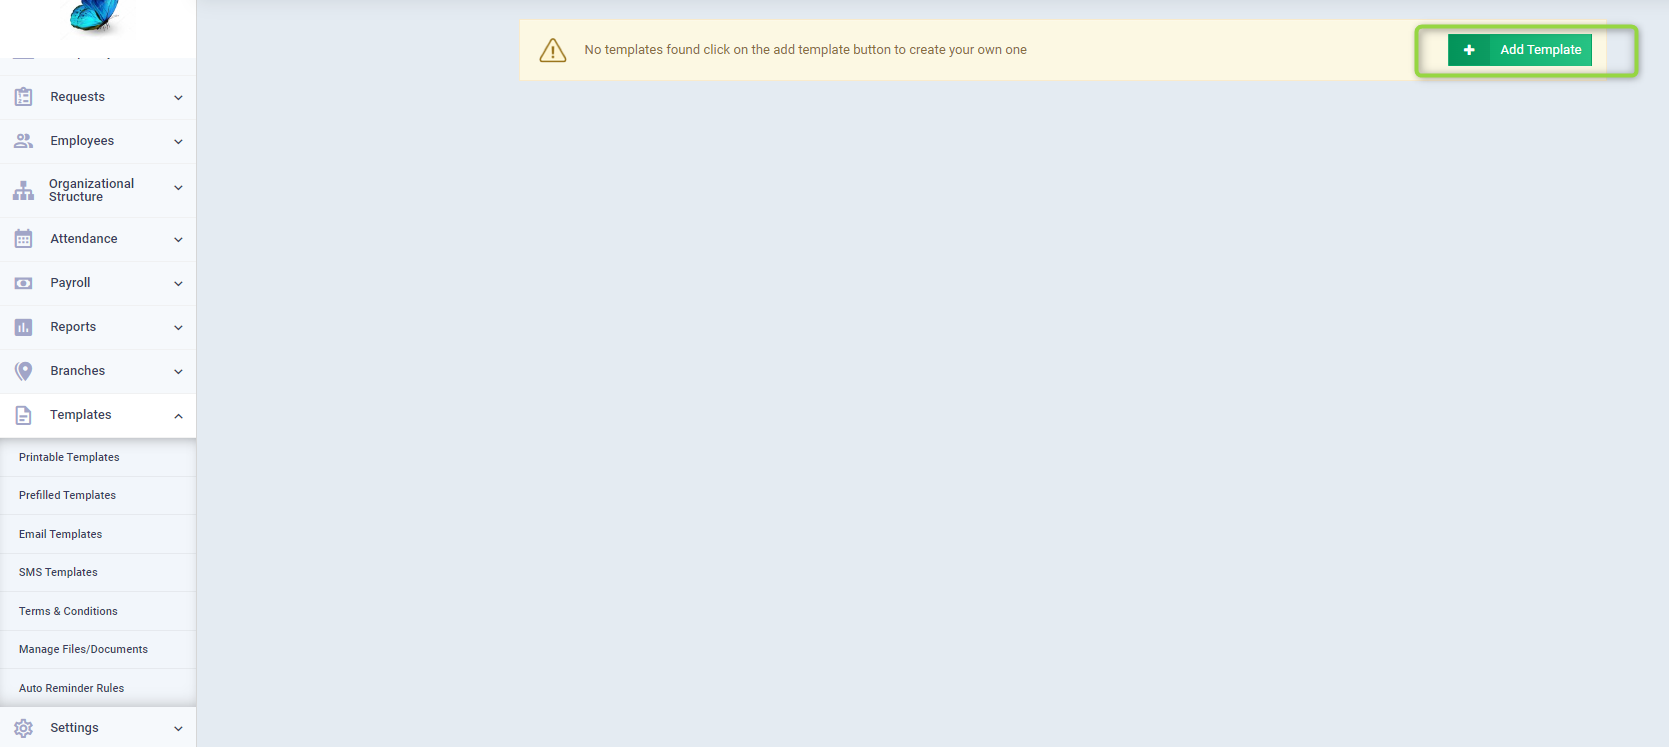
Click on the “Add Template” button.
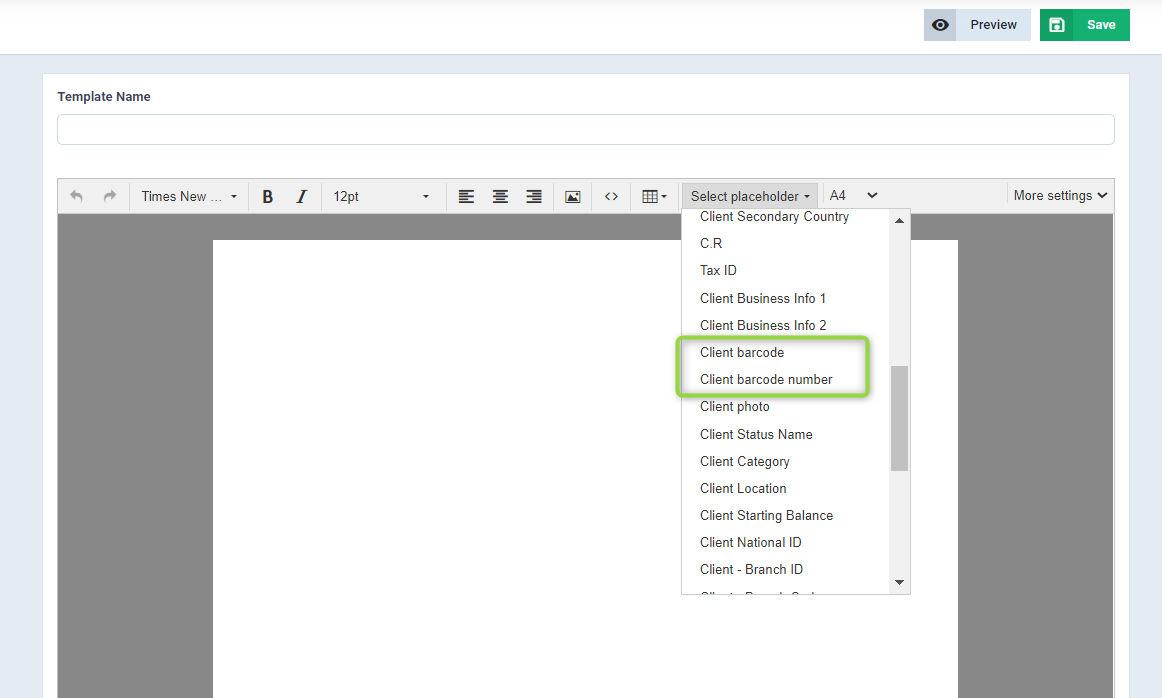
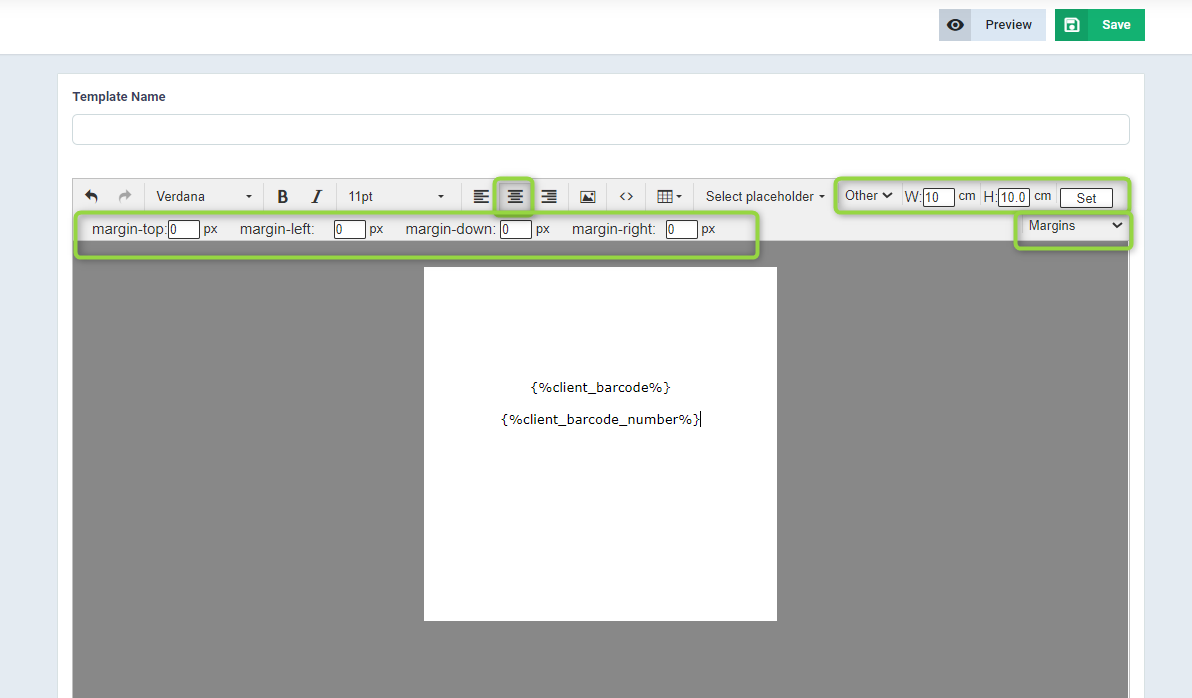
In the template name field, write the name of the printout: Client Barcode or another name that represents the printout.
Click on “Select Placeholder”, then choose the variable from the dropdown menu “Client Barcode” and “Client Barcode Number”.
Adjust the format of the barcode printout using the standard formatting editors to center the text.
Control the size of the printout and choose from the following options:
- A4
- A3
- A5
- Other: In case of manually setting the width and height.
To adjust the margin spaces in the barcode printout design, click on “More Settings” and choose “Margins” from the dropdown menu, then enter the margin size you want.
- Top Margin of the Barcode.
- Left Margin of the Barcode.
- Bottom Margin of the Barcode.
- Right Margin of the Barcode.
Printing the Client Barcode
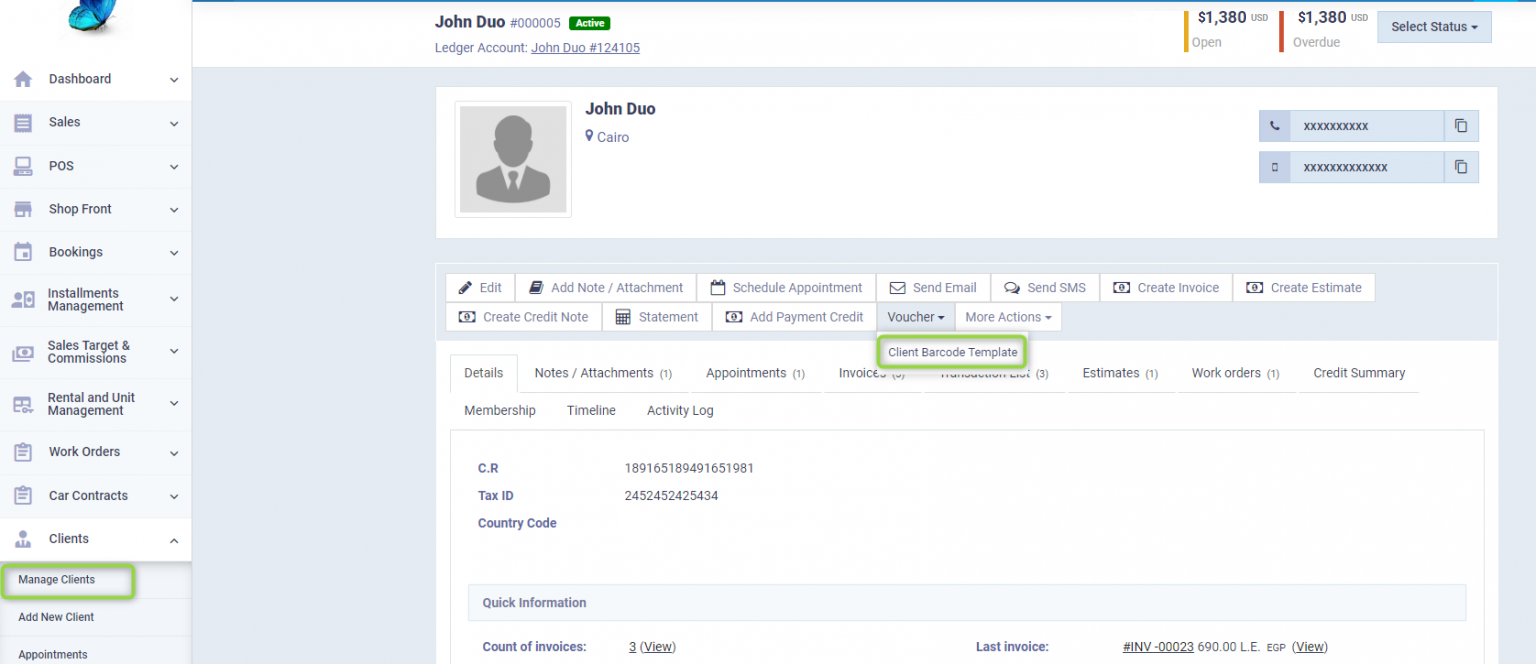
To print the barcode for any client, go to “Manage Clients” under “Clients” in the main menu and click on the desired client.
Click on the “Voucher” button and choose the barcode template name depending on the name you have given it “Client Barcode Template” from the dropdown menu.
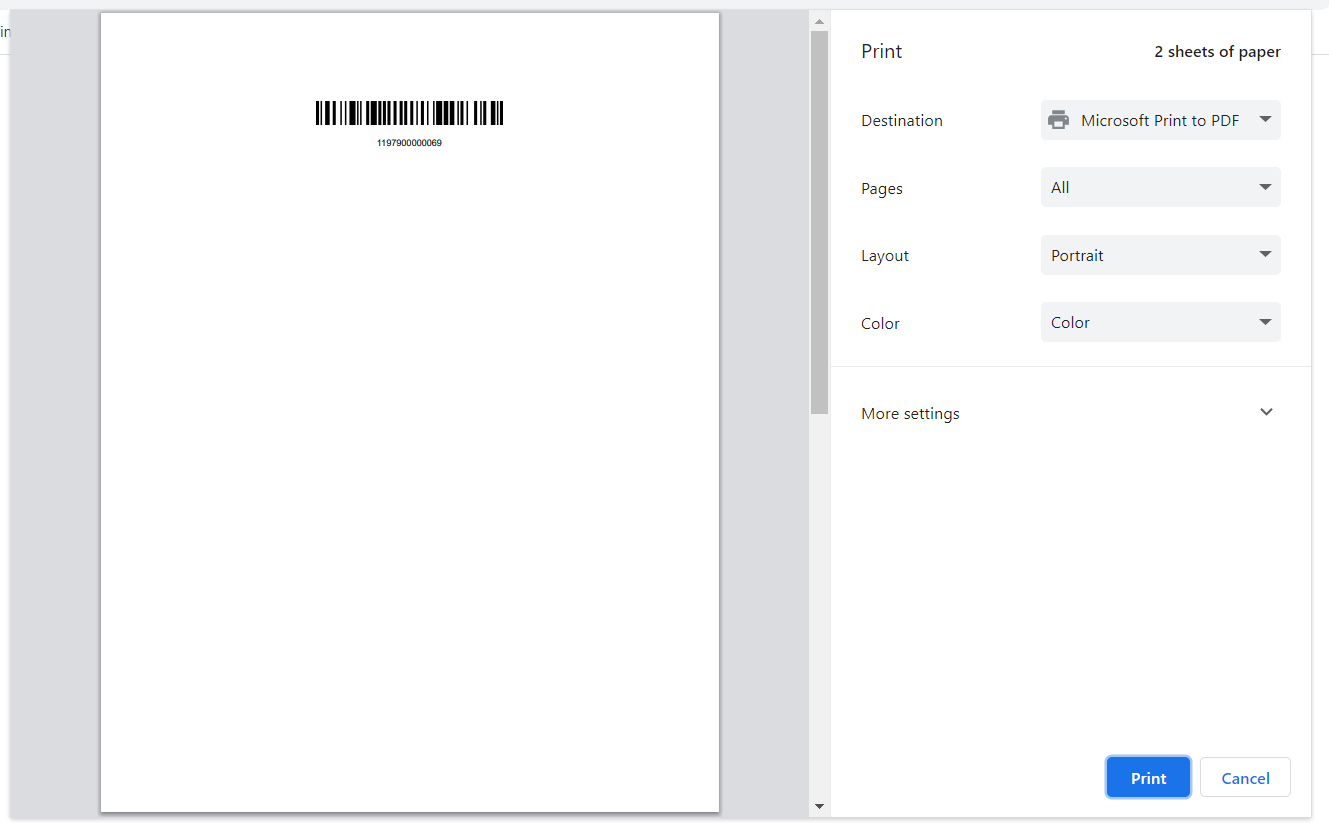
You can download the barcode as a PDF, send it by email, or print it by clicking the “Print” button.
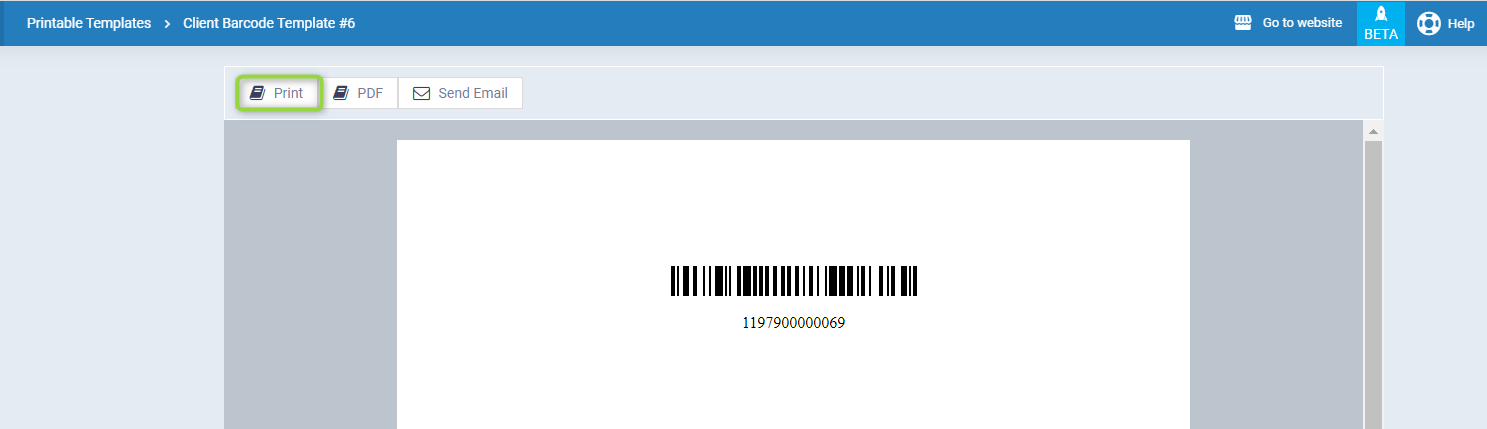
Adjust the print settings and press the “Print” button.