Logging a Client Attendance
Some activities require recording and documenting the attendance of clients, indicating the date, time, and the user responsible for registering the attendance. This allows you to review a vital aspect of your business activity. Here are the steps on how to do it:
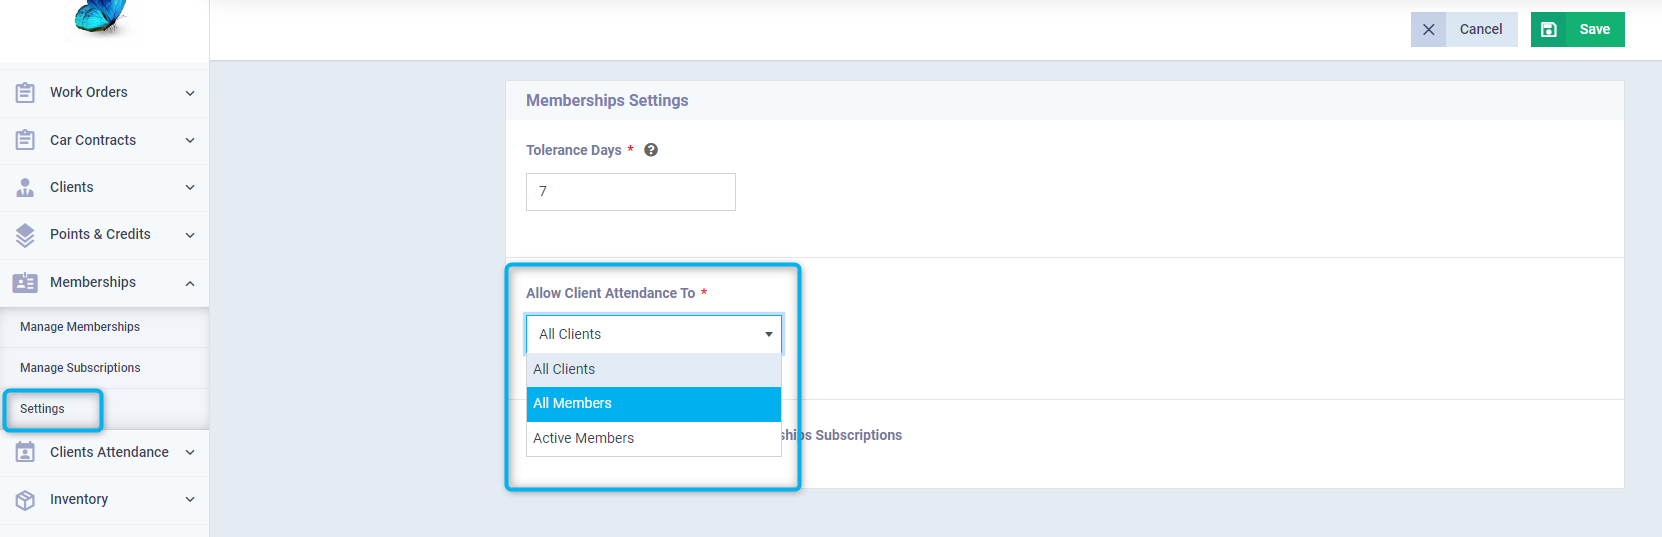
Controlling the Clients Available for Taking their Attendance
You can control which clients are allowed to record their attendance by clicking on “Settings” > “General” under “Memberships” in the main menu, and choose from the dropdown menu next to the field “Allow Client Attendance To “:
-
- All Clients: To allow attendance check-in for all clients, whether they have memberships or not.
- All Members: To allow attendance recording all clients registered in any membership, even if their subscription has expired.
- All Active Members: To allow attendance recording for clients with active memberships, blocking those whose membership has expired or has been frozen until renewal and activation.
Click on the “Save” button.
How to record a Client's Attendance
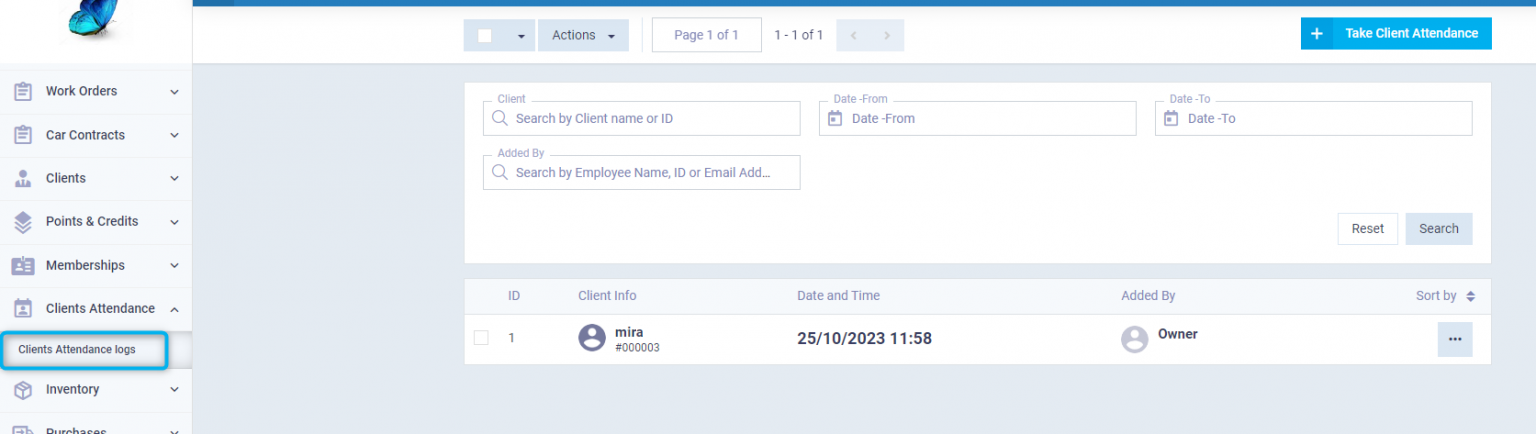
Click on “Clients Attendance Logs” from the dropdown under “Clients Attendance” in the main menu, and click on the “Take Client Attendance” button.
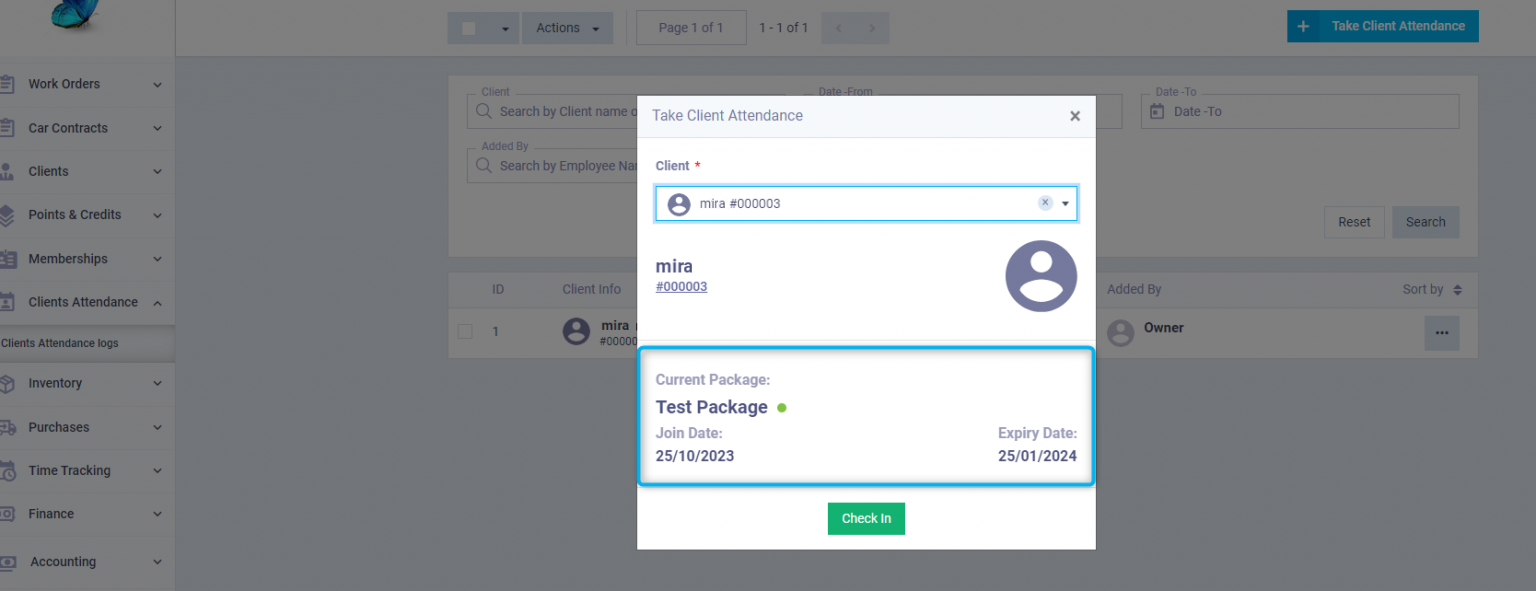
Choose the client you wish to record attendance for from the dropdown menu under “Client”, then press the “Check In” button.
The time and date are automatically calculated to match the moment of registration in the system.
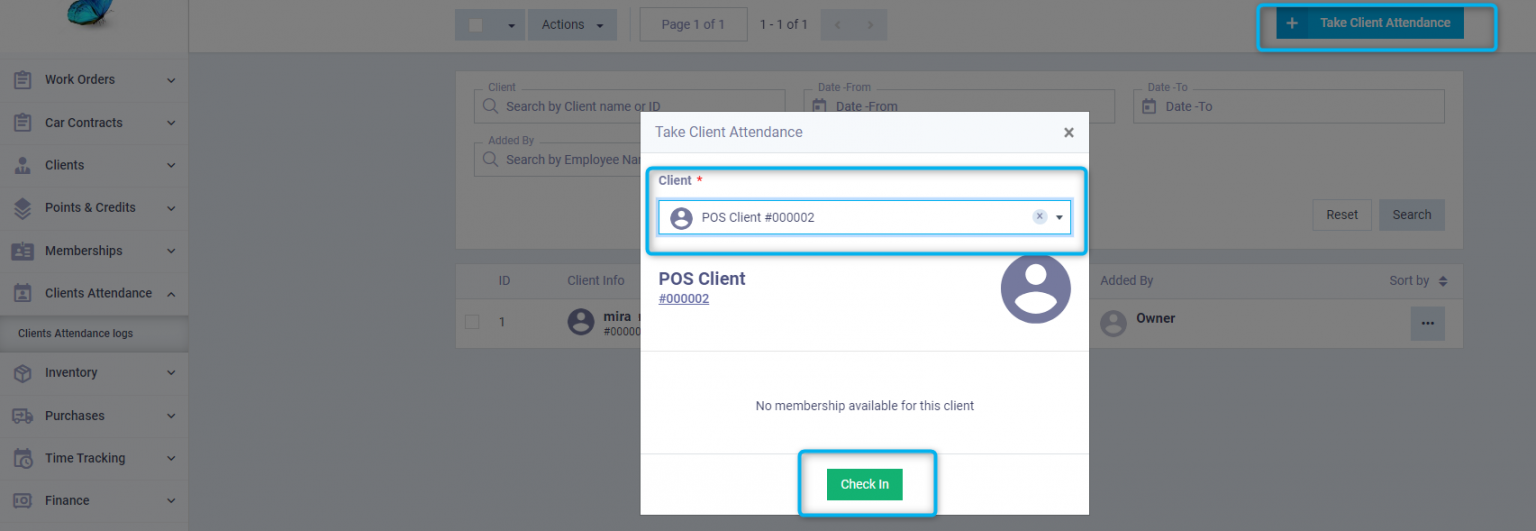
If the attendance is being recorded for a client with a membership in the system, the membership details will appear when recording the attendance.
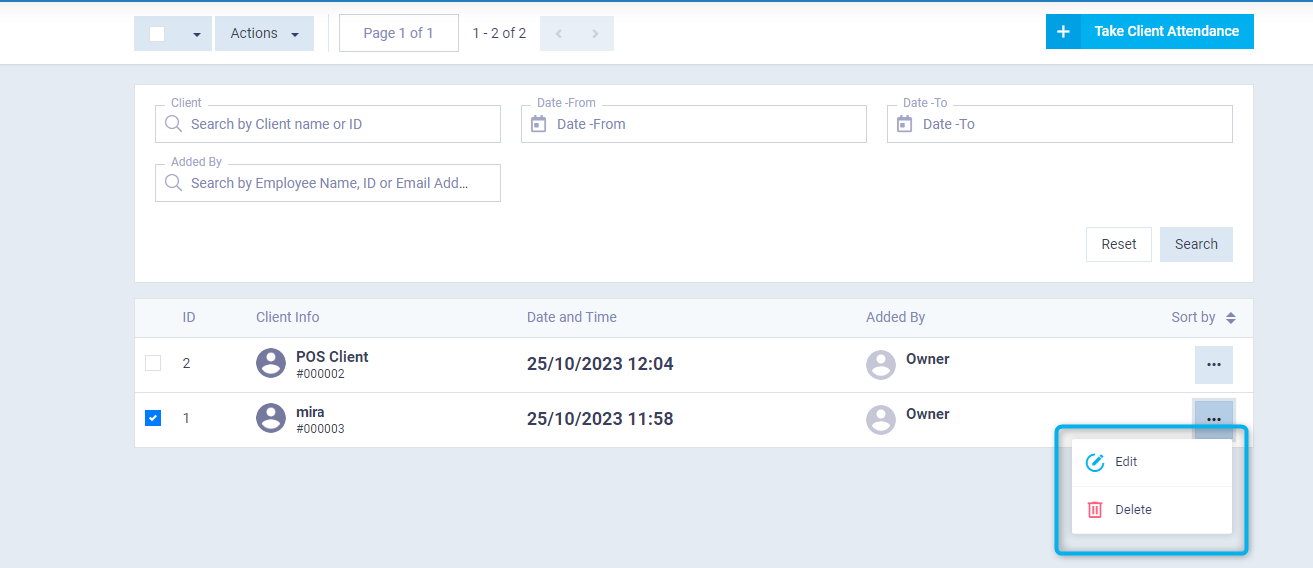
Actions on the Client Attendance Logs
Click on “Clients Attendance logs” under “Clients Attendance” in the main menu, and click on the three dots next to the attendance log you wish to modify. From the dropdown menu, choose “Delete” or “Edit”.
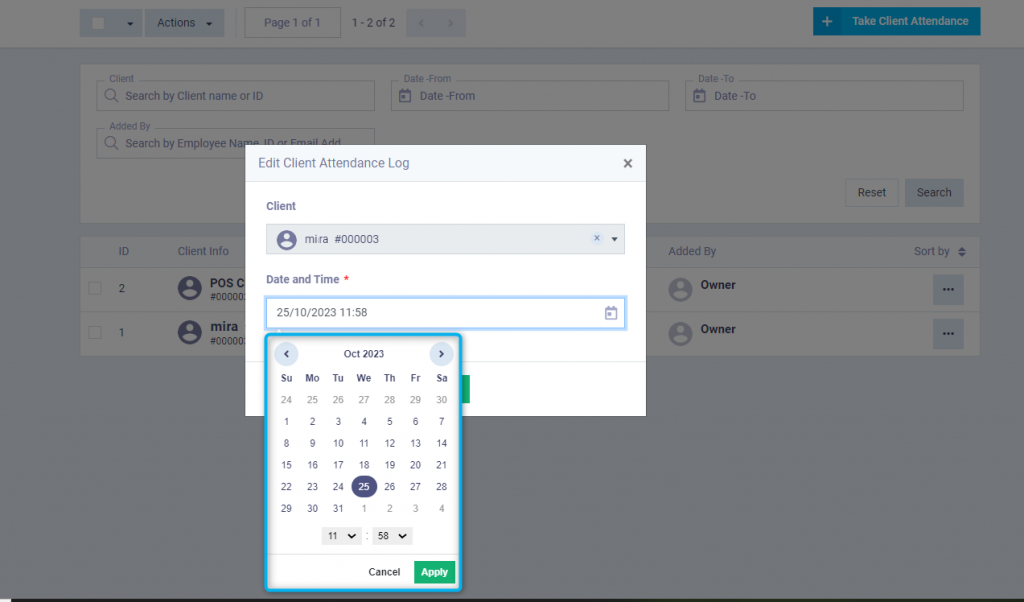
When you press the “Edit” button, the date and time of the client’s attendance log will appear, allowing you to change them manually before saving.
Actions on the Attendance Logs of more than one Client Together
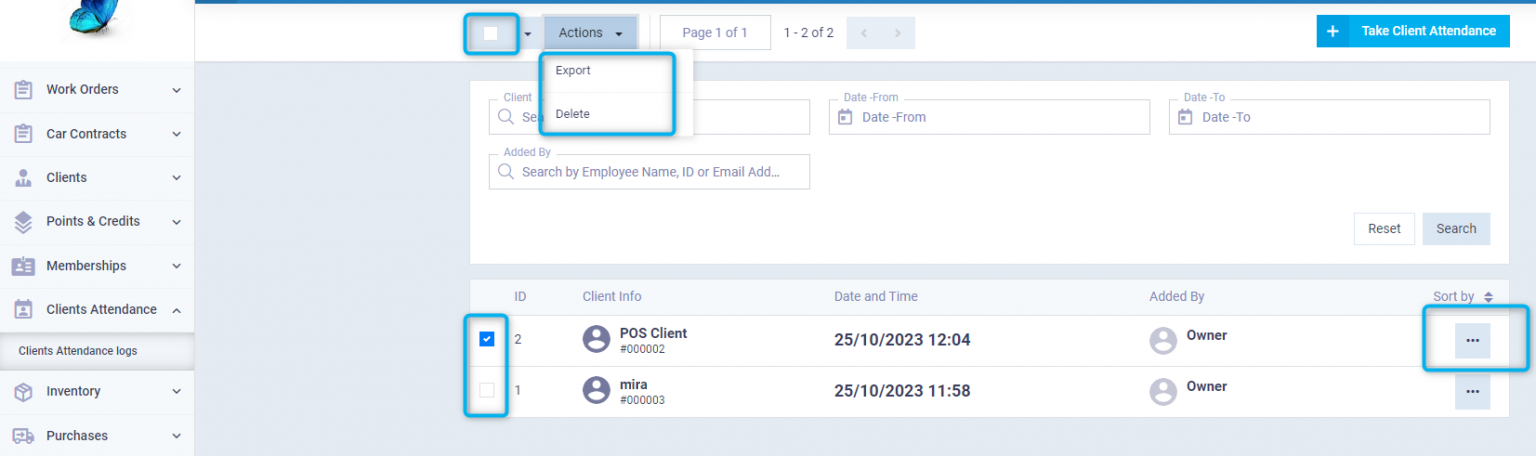
You can also select multiple attendance logs by ticking the checkbox next to the name ✅, or all attendance logs by ticking the checkbox next to the “Actions” button. Then, press the “Actions” button and choose “Delete” or “Export”.
Exporting the Clients' Attendance Logs
After selecting the client attendance logs you want to export, click on the “Actions” button and then click “Export”
Choose the fields you want to include in the file, then click on the “Export” button.
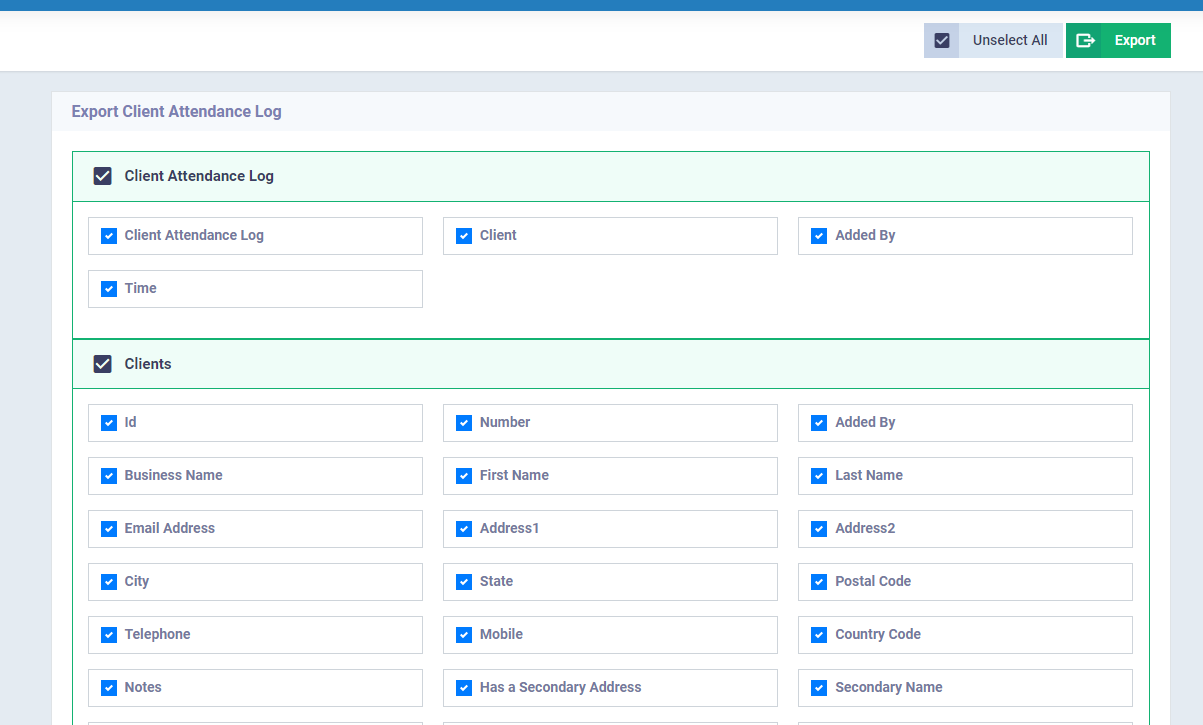
An Excel file containing the desired client attendance logs will be downloaded, and it is editable.

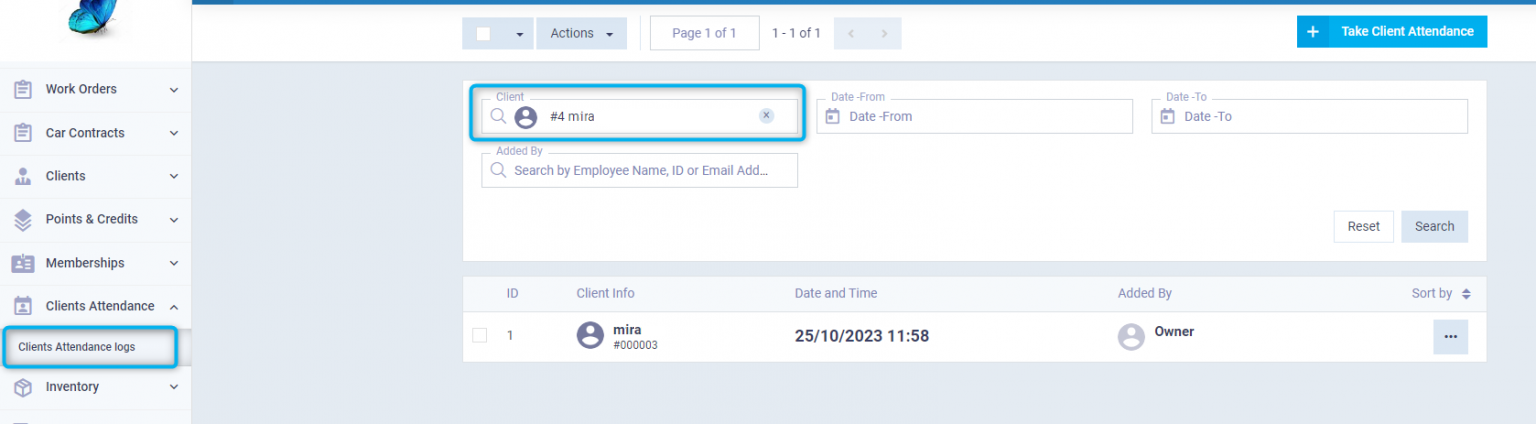
Displaying a Specific Attendance Log
You can use the search tools available in the client attendance menu to view attendance logs for a specific client, a specific day, or a specific employee.
This can be done by clicking on “Client Attendance logs” from the dropdown under “Clients” in the main menu, filtering through the search tools, and then clicking the “Search” button.