Clients Related Forms
Client-related forms allow adding a set of data on a separate page as part of the client’s profile. For example, you can add a form related to the client’s industry that contains information about them and their competitors. You can add this form for the client you wish to include it for, while it is not mandatory to add it for all clients. Here are the details for adding and using “related forms” in this guide.
Adding a New Related Form
Related forms consist of a section that includes basic information such as the name of the form, who has access to it, and how it is used. The second part relates to the form’s design where you add the form fields and control their properties. To add a new related form:
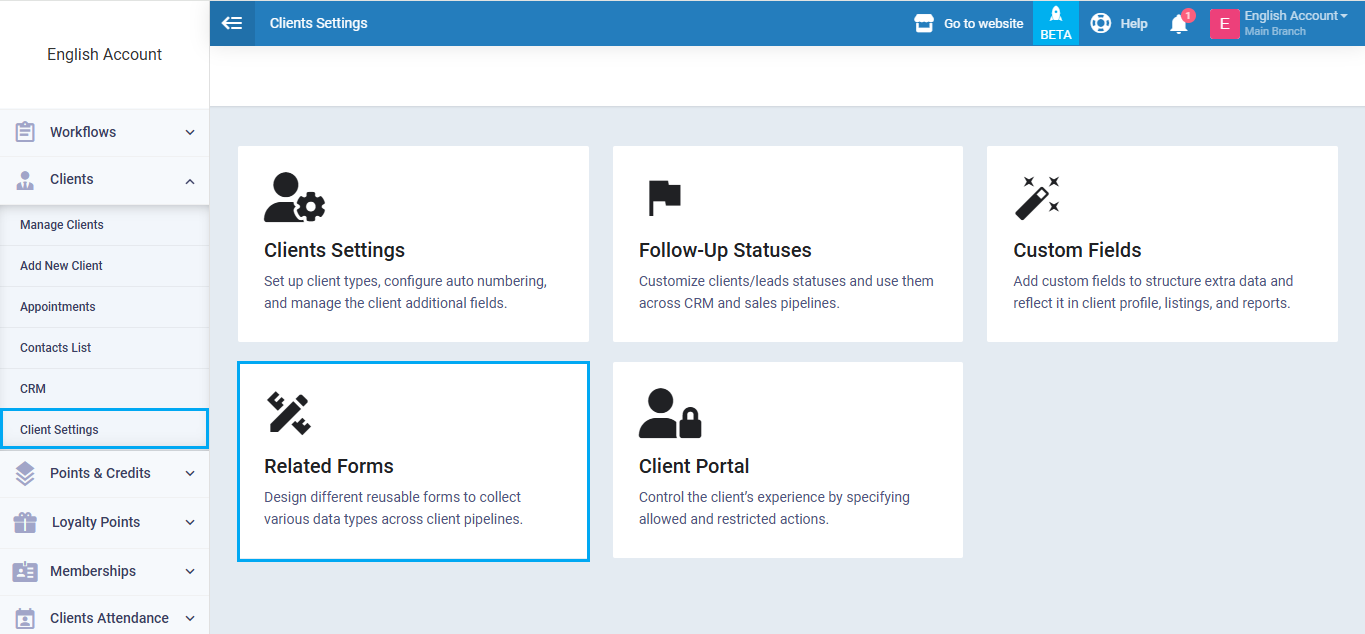
Click on “Client Settings” under “Clients” in the main menu and click on the card “Related Forms”.
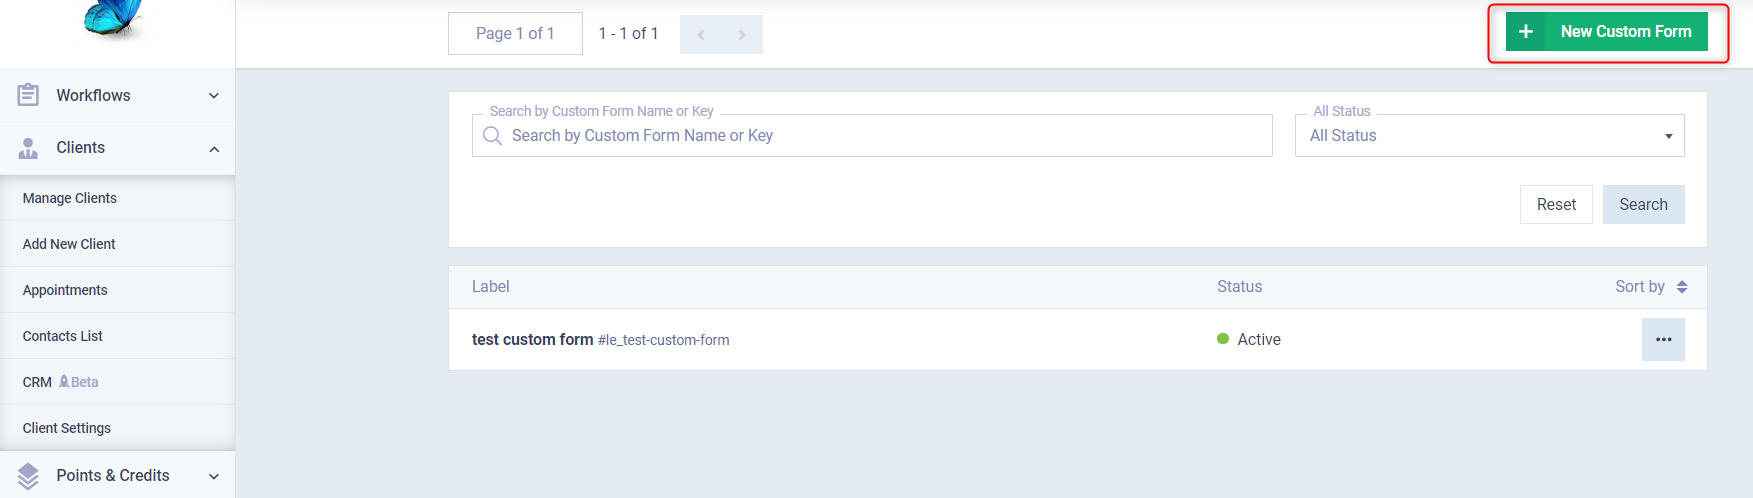
Click on the button “New Custom Form”.
Enter the information for the related form:
- Name: Enter a name for the related form, preferably descriptive of its purpose.
- Key: Similar to a code identifying the form, it can be a number, or a letter in English.
- Status: Either choose active to enable the use of the form or inactive.
- Description: If there are any details worth including about the custom form and its purpose.
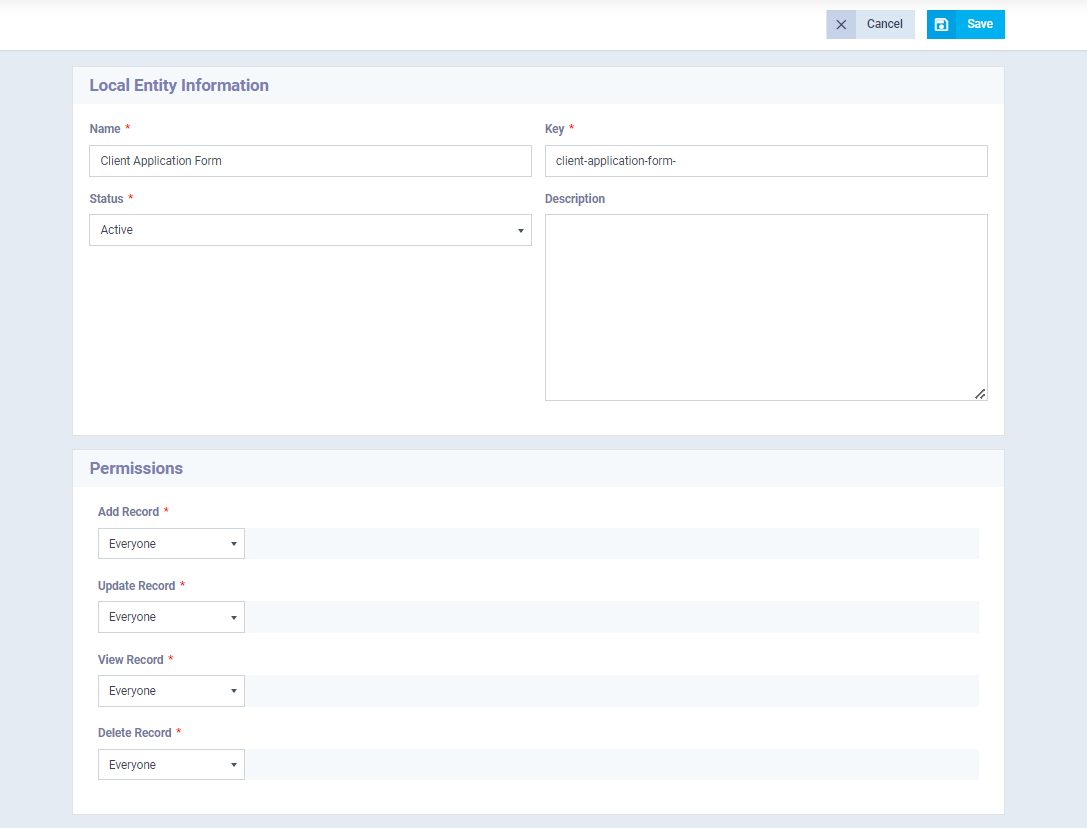
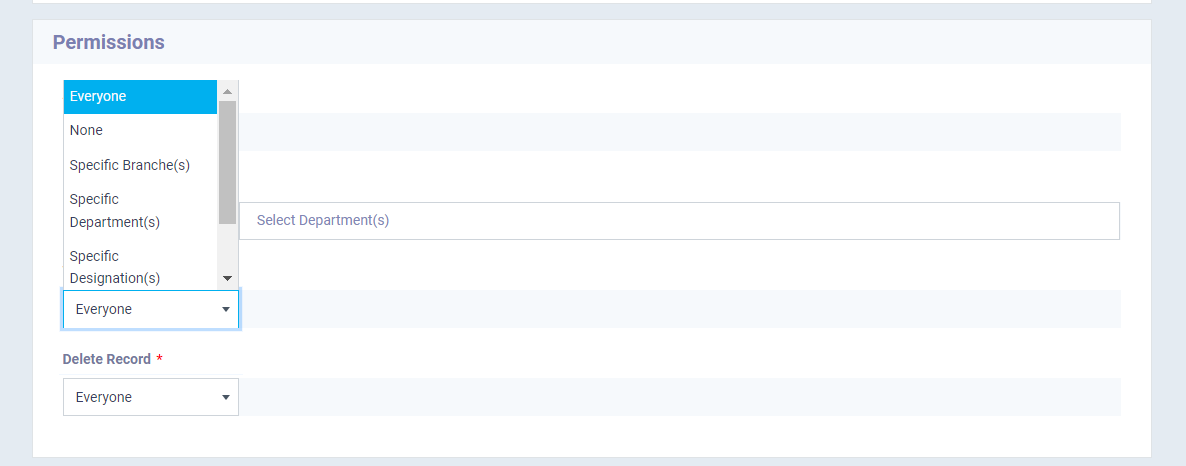
Control the permissions of the related form:
- Add Record: Choose who can add this custom record. Is it available to a specific branch, department, designation, or just one employee?
- Update Record: Choose who can edit this custom record.
- View Record: Choose who can view this custom record.
- Delete Record: Choose who can delete this custom record.
Then click on the button “Save”.
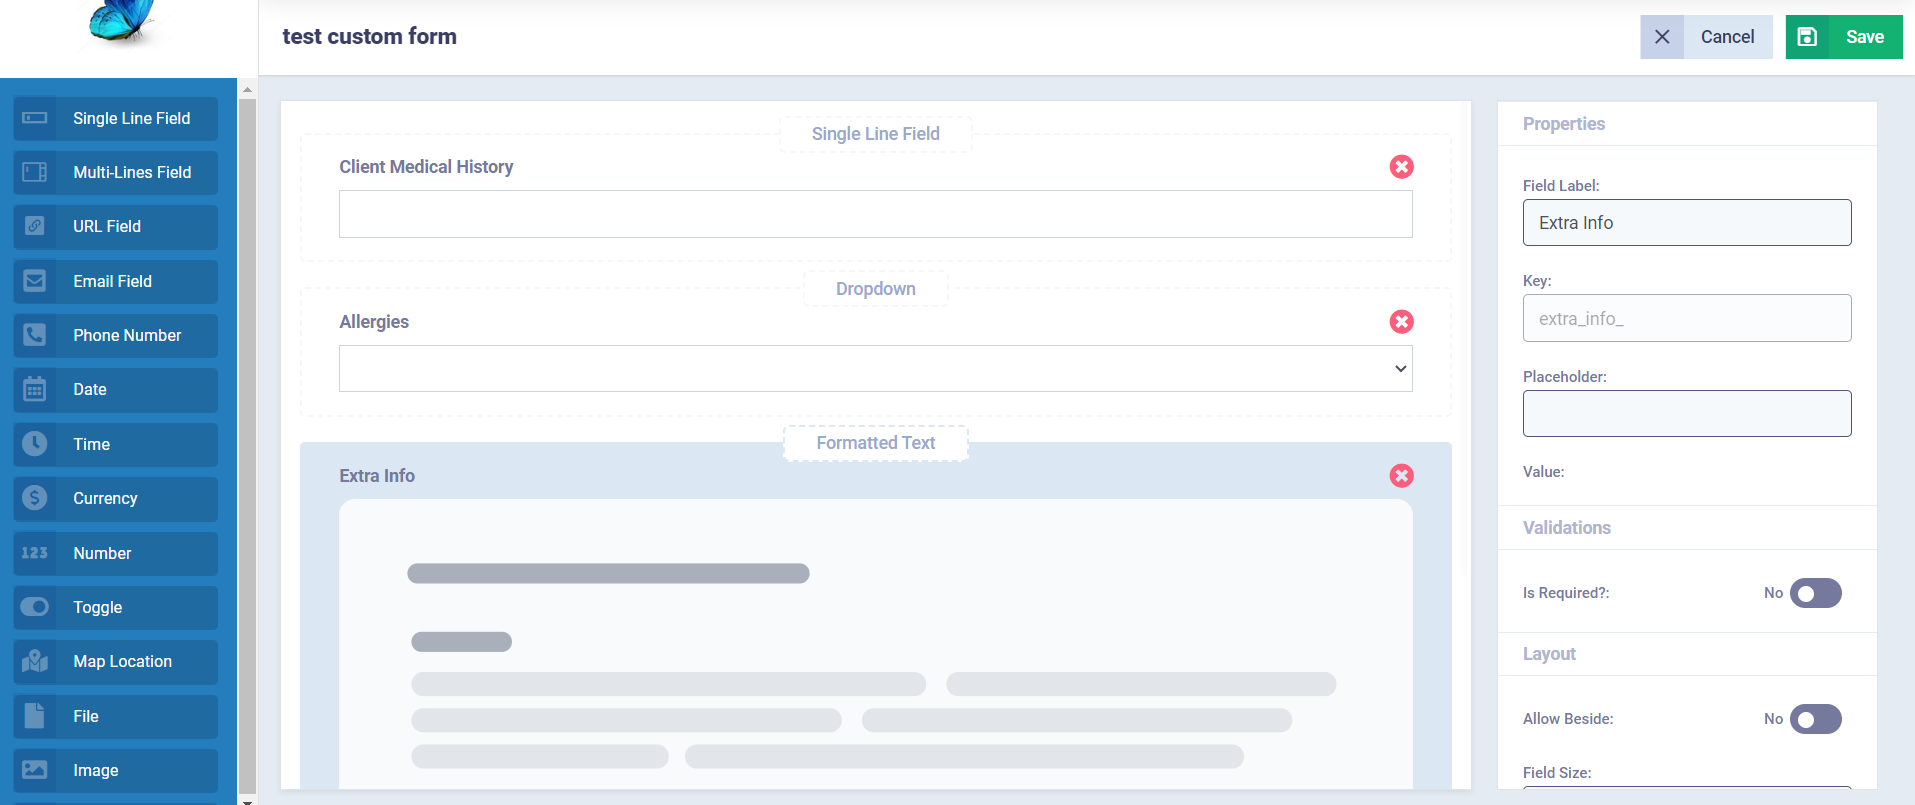
Designing the Related Form
After adding the information and permissions for the related form, you will be redirected to the form design page. Here in the menu are fields of various types that allow for the inclusion of diverse data types in the form. You can add:
- Single-line or multi-line text entry.
- A dropdown list with choices.
- Email address.
- Date.
- URL field.
- Image.
And many more types of data.
All you need to do is drag and drop the type of field you want into the center, then type the field title, adjust its settings, control its properties, and finally, press the “Save” button.
Adding a Client Related Form
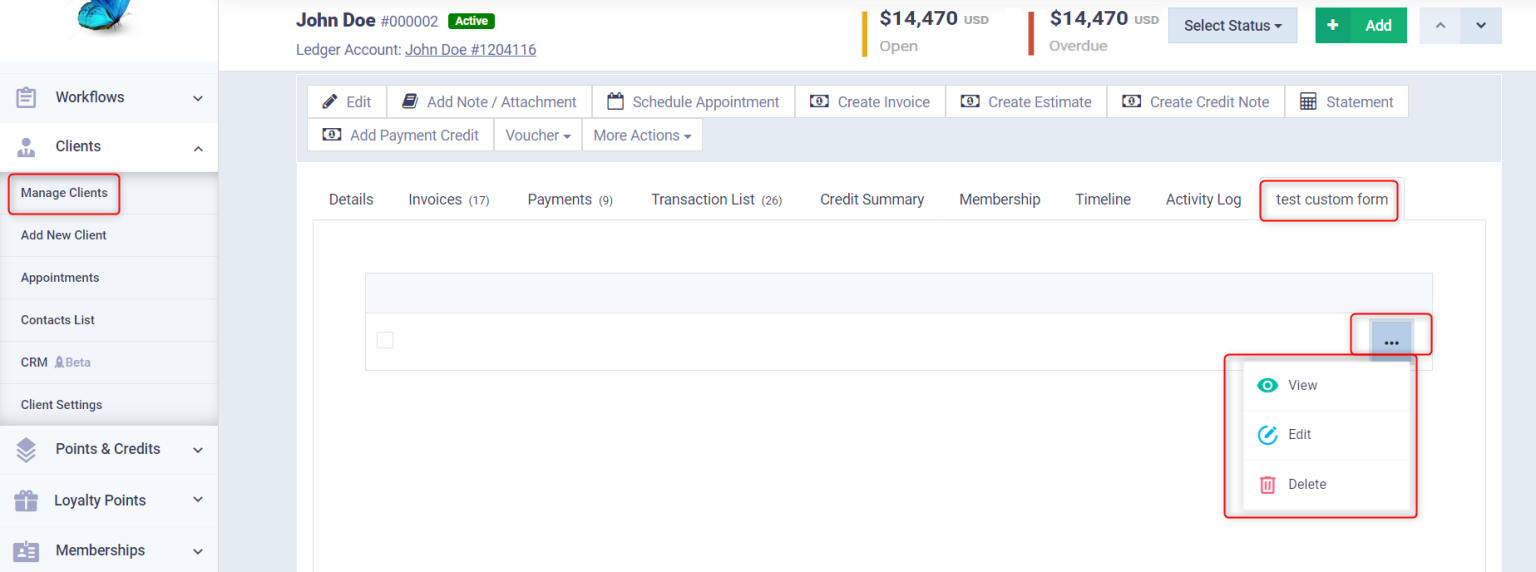
Click on “Manage Clients” from the “Clients” dropdown in the main menu and select the client profile you want to add the related form to.
Click on the “Add” button and select the related form you want to add to the client from the dropdown list.
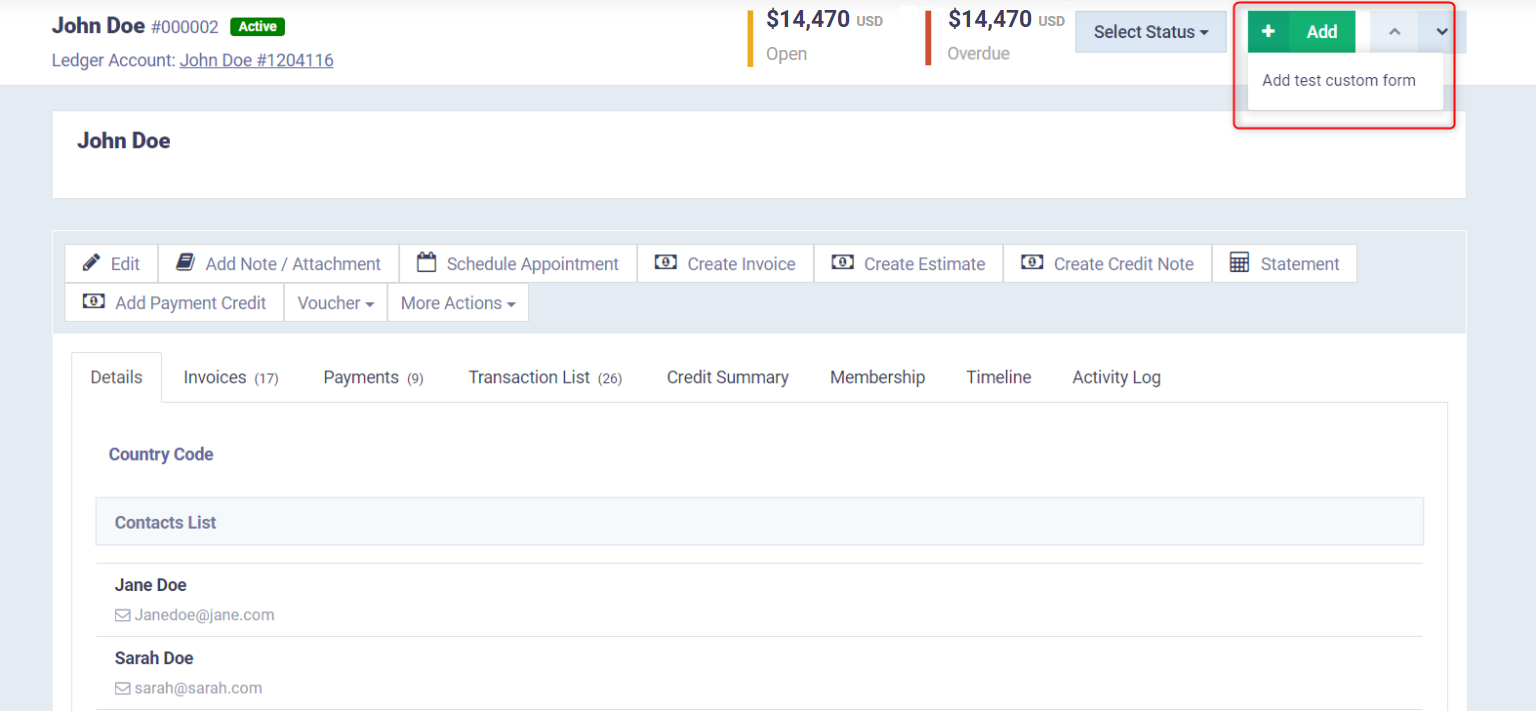
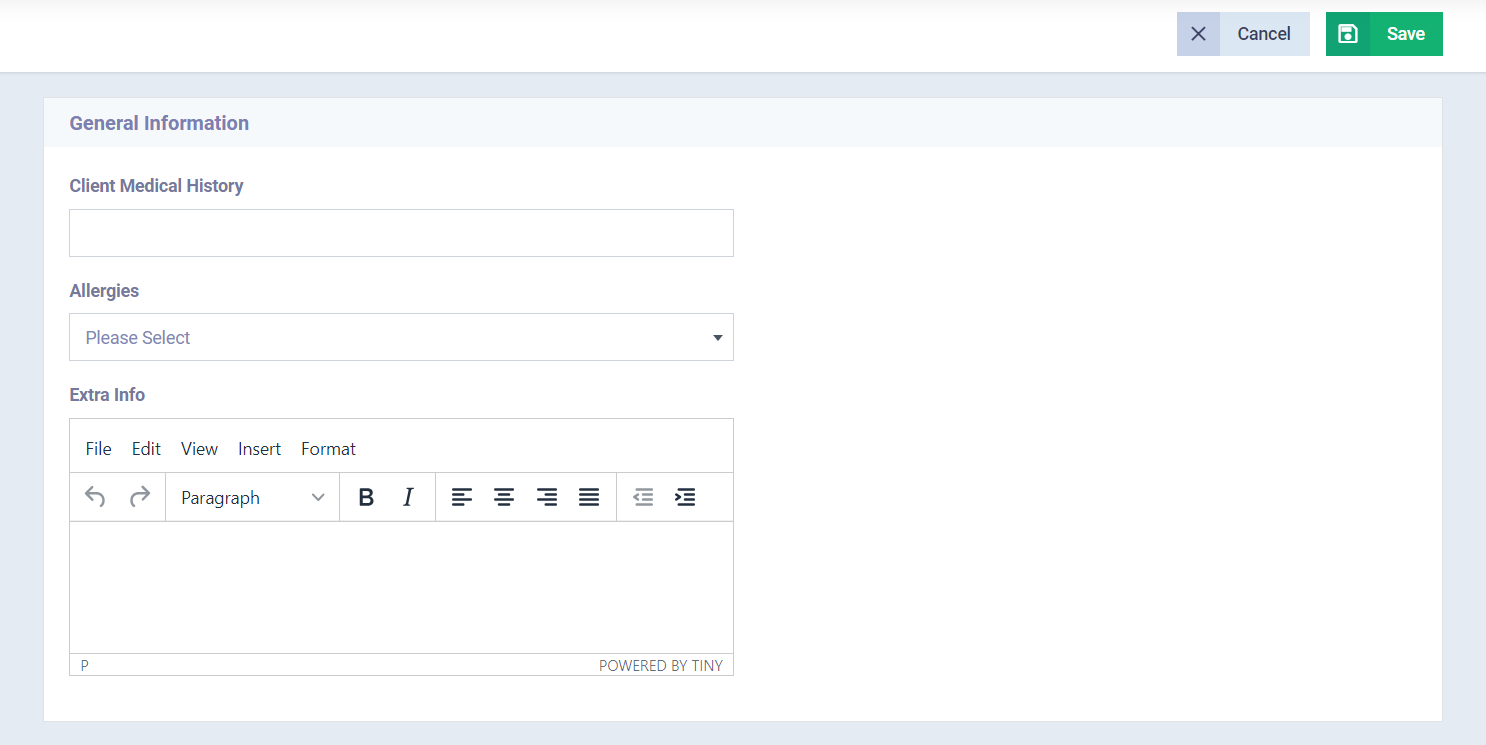
Enter the required information in the form fields then click on the “Save” button.
After adding the related form to the client, a tab named after the related form appears in the client’s profile next to tabs like “Details,” “Appointments,” “Activity Log,” and others.
To take action on this client’s related form, click the three dots next to it “…” and choose from the dropdown menu:
- View.
- Edit.
- Delete.
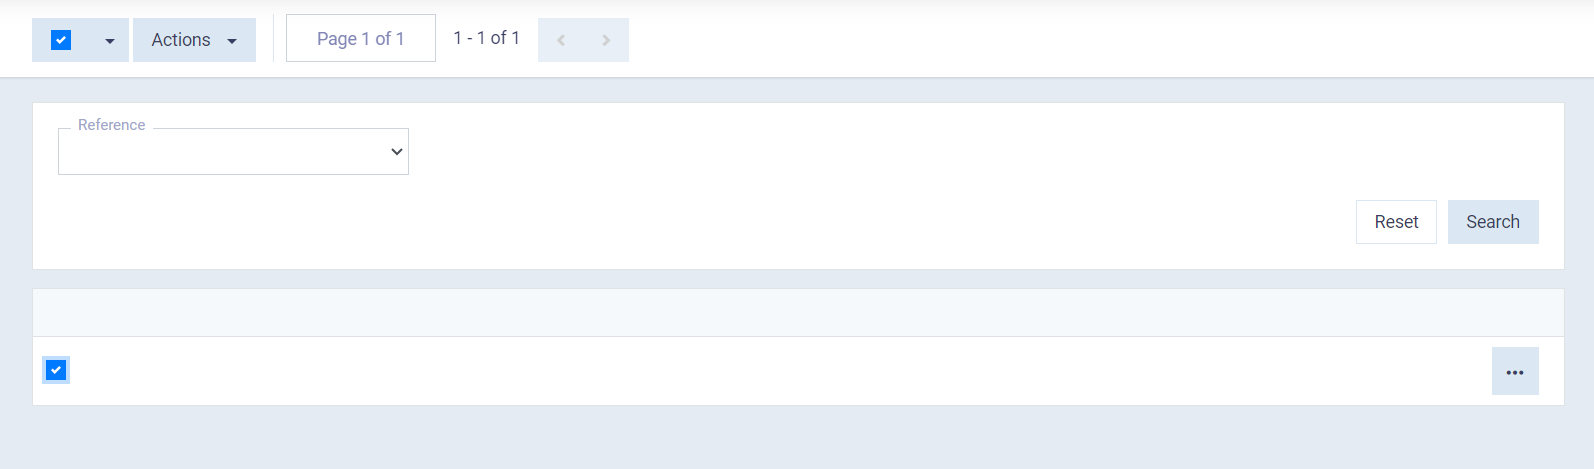
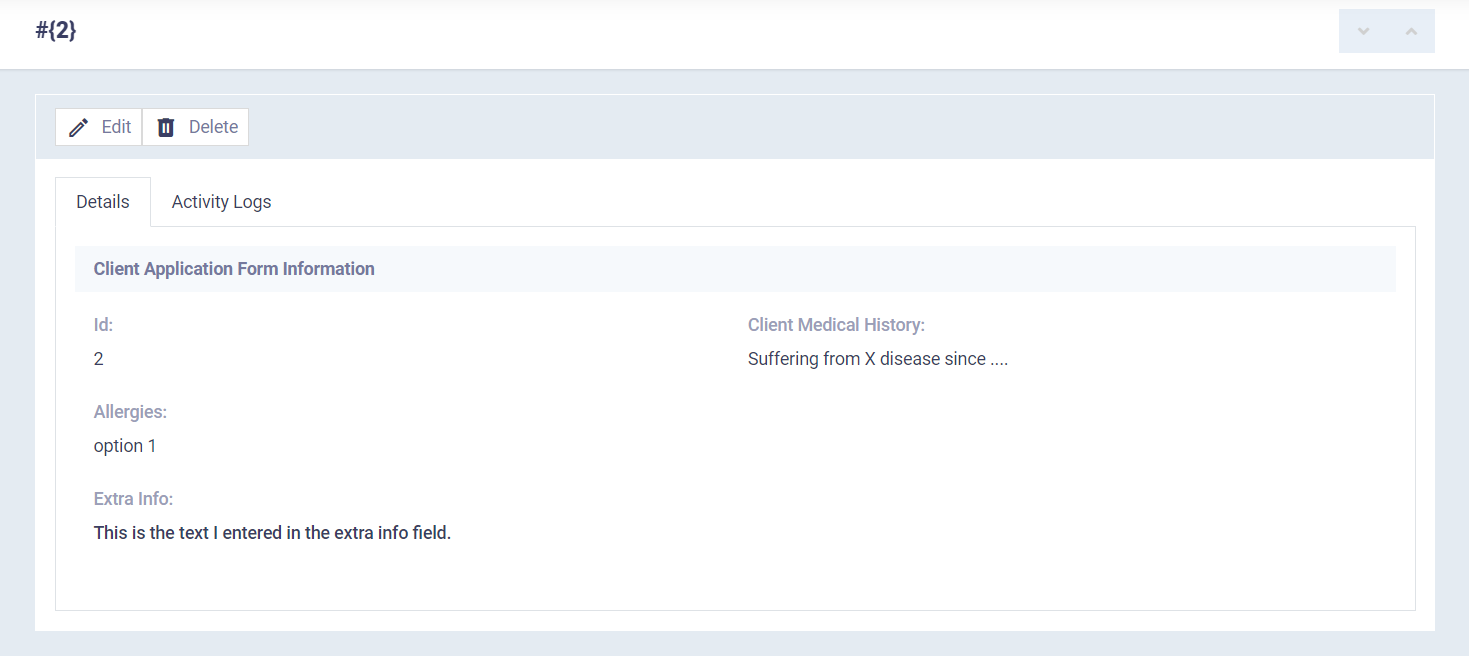
The details of the clients custom form appear when reviewed from their profile as follows.
Actions on the Related Forms
To view all client forms for clients in your system
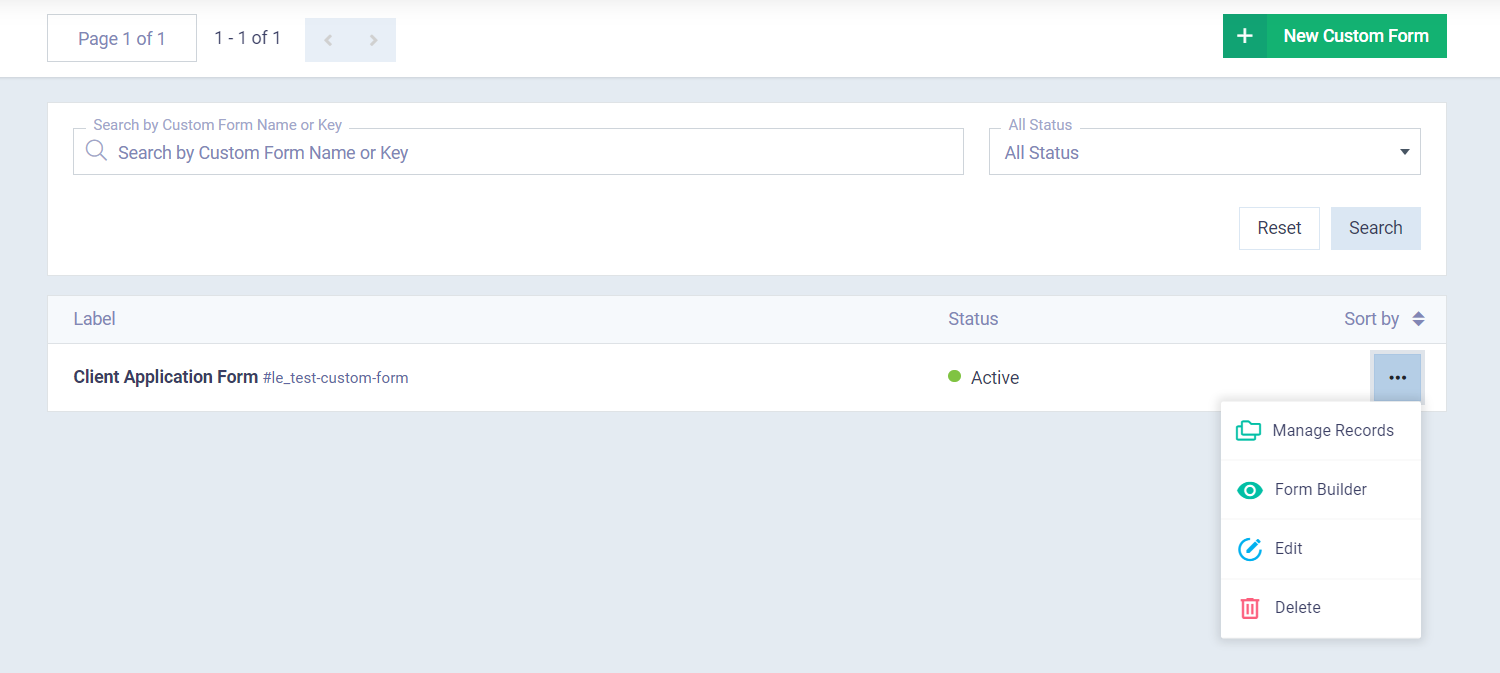
Click on “Client Settings” from the “Clients” dropdown in the main menu and click on the “Related Forms” card.
Then click on the three dots next to the form name “…” and click on:
- Manage Records: Click here to view all client forms you have already added for clients using this custom form.
- Form Builder: Click here if you want to modify the design of the related form.
- Edit: To edit the basic information of the custom form such as its name and permissions.
- Delete: To delete the related form.
After clicking on “Manage Records” or on the form itself, you will see all client forms associated with this custom form, allowing you to review their data or take certain actions.
Note: If this related form has not been added to any client yet, this message will appear “No (Form Name) Added Yet“.