


Adding a New Client
Maintaining organized files for clients and facilitating necessary procedures on them saves you a lot. Here are the details of adding clients and organizing their files through scheduling in the upcoming steps.
How to Add a New Client
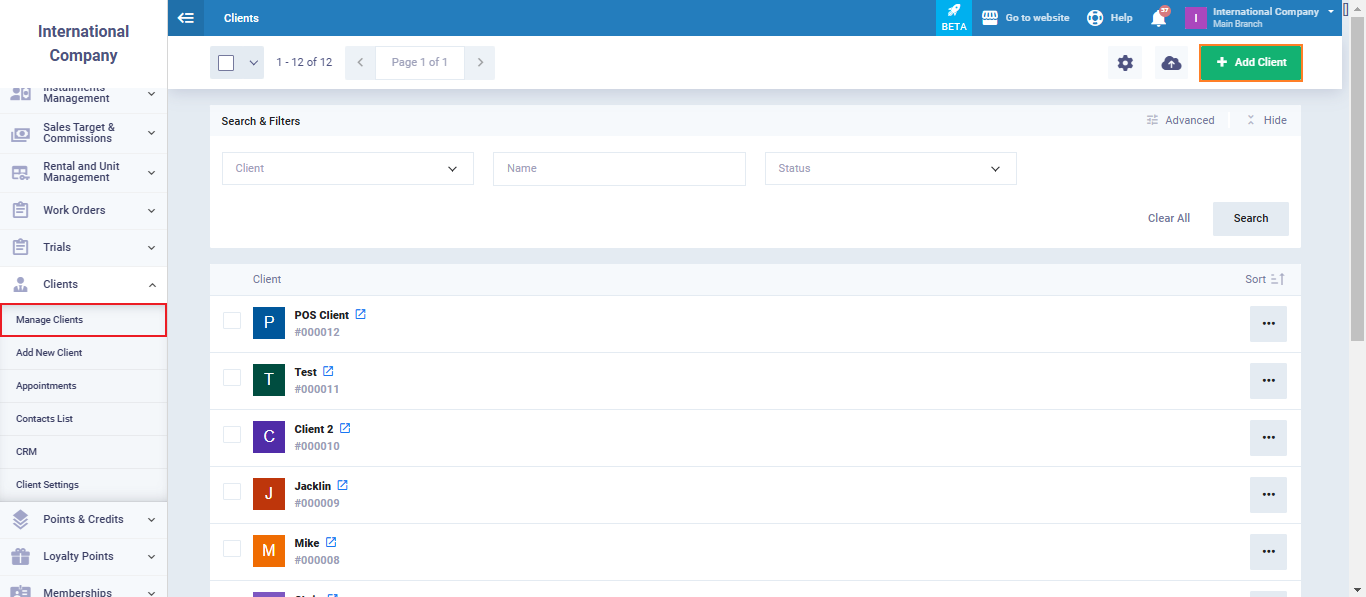
Click on ‘Add New Client‘ from the ‘Clients‘ dropdown menu in the main menu, or click on ‘Manage Clients‘ from the dropdown menu in the main menu, then click on the ‘New Client‘ button.
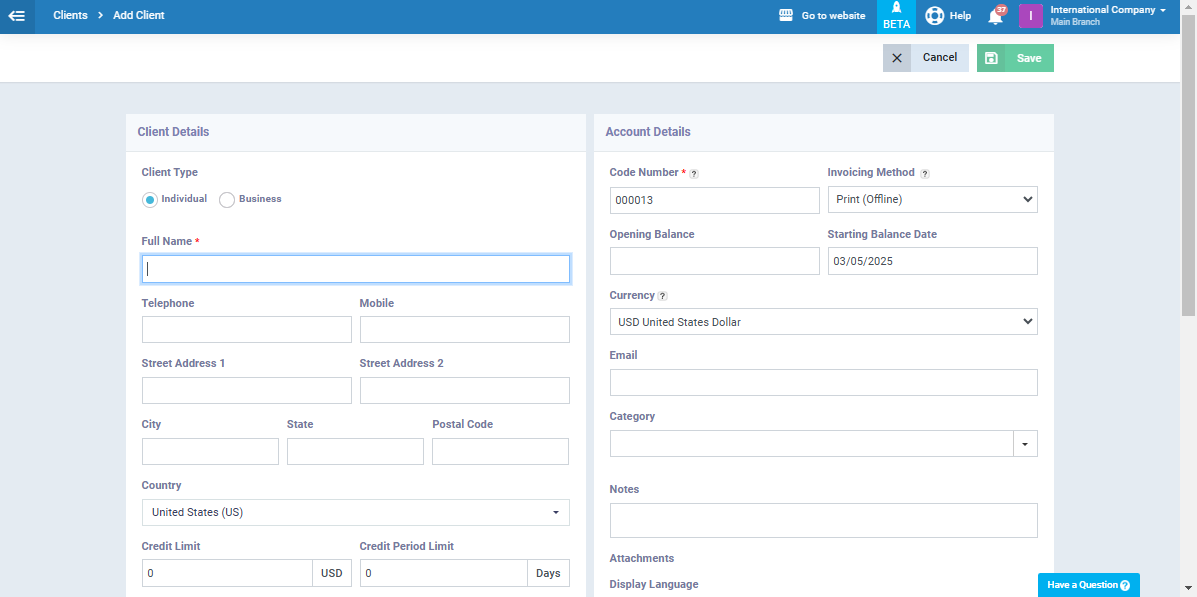
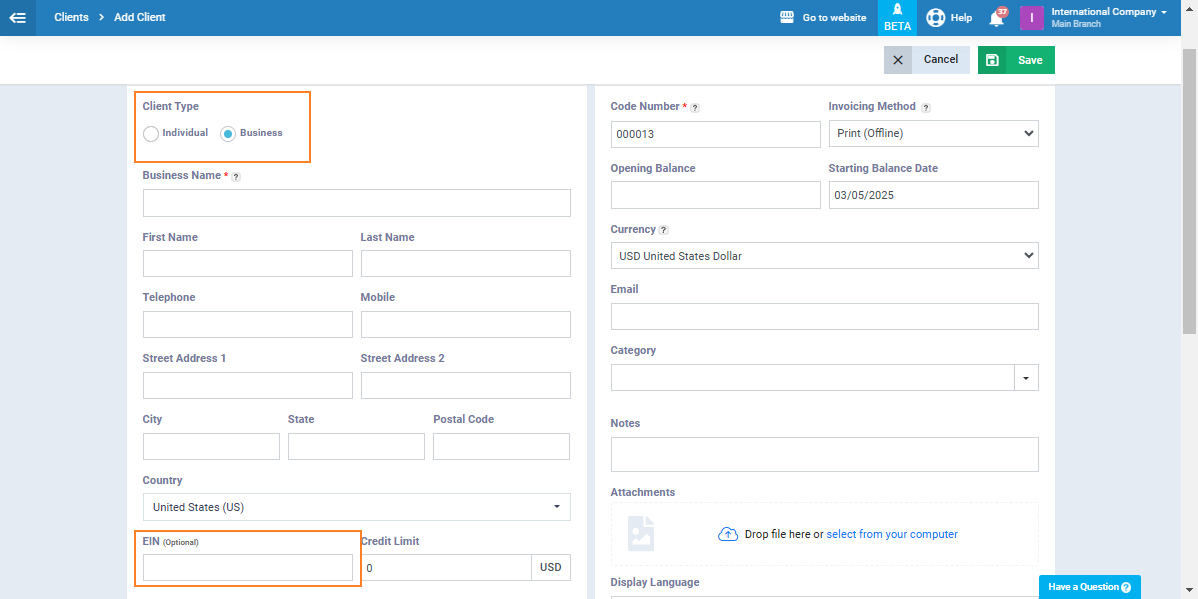
Select the type of client and enter the general information.
You can learn more about client data fields from here.
And more about the client’s opening balance from here.
And more about client classification from here.
For more information on assigning a price list to the client, refer to the guide assign a price list to the client.
For more information on creating price lists in the system and how to use them, click here.
And from here learn how to add multiple addresses for the client or link their address to Google Maps.

Note the difference between individual and business client types, where business clients will have fields for ‘Commercial Register‘ and ‘Tax ID‘.”
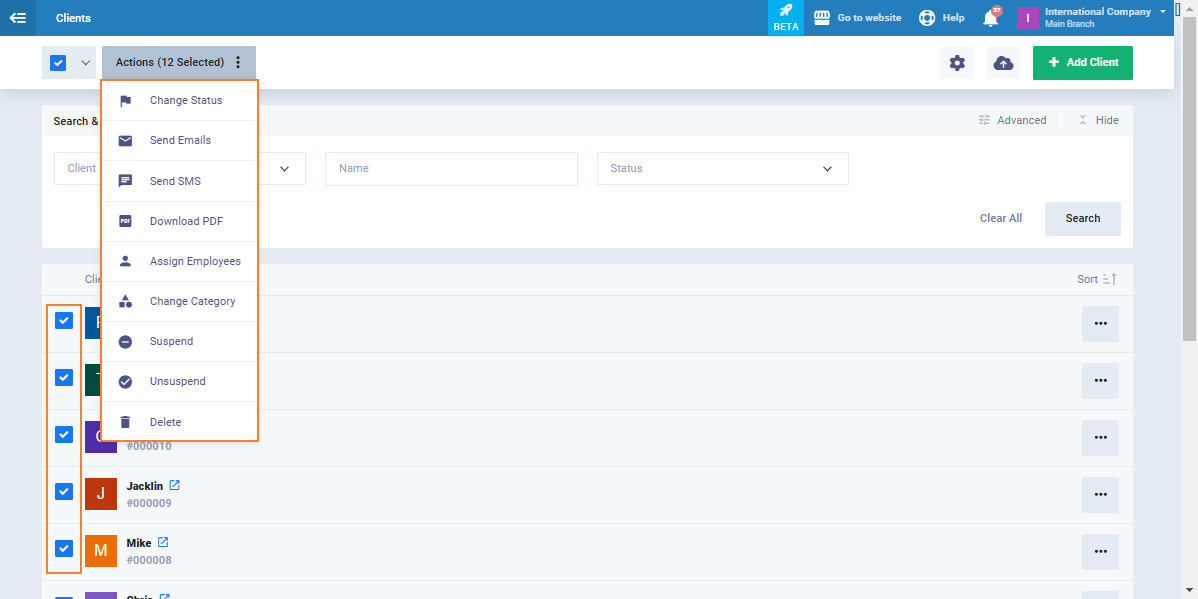
By accessing ‘Manage Clients‘ from the dropdown menu under ‘Clients‘ in the main menu, you can select several clients to perform certain actions collectively or individually, such as:
- Change Status
- Send Emails
- Send SMS
- Download PDF
- Assign Employees
- Change Category
- Suspend
- Unsuspend
- Delete
You can also use advanced search tools to access clients based on classification, tags, country, and other filters.
By clicking on the client’s profile, you can take certain actions such as:
- Edit
- Add Note / Attachment
- Schedule Appointment
- Create Invoice
- Create Estimate
- Create Credit Note
- Statement
- Add Payment Credit
- Vouchers
- More Actions (Edit Opening Balance- Add Work Order- Login as Client- Suspend- Delete Client- Assign to a Staff Member- Clone)
