


Importing Clients Through Excel
The process of adding clients to the system can be done individually for each client or by uploading all clients into the system in the form of an Excel file. This guide reviews how to prepare the Excel file and how to import clients from it into the system in moments.
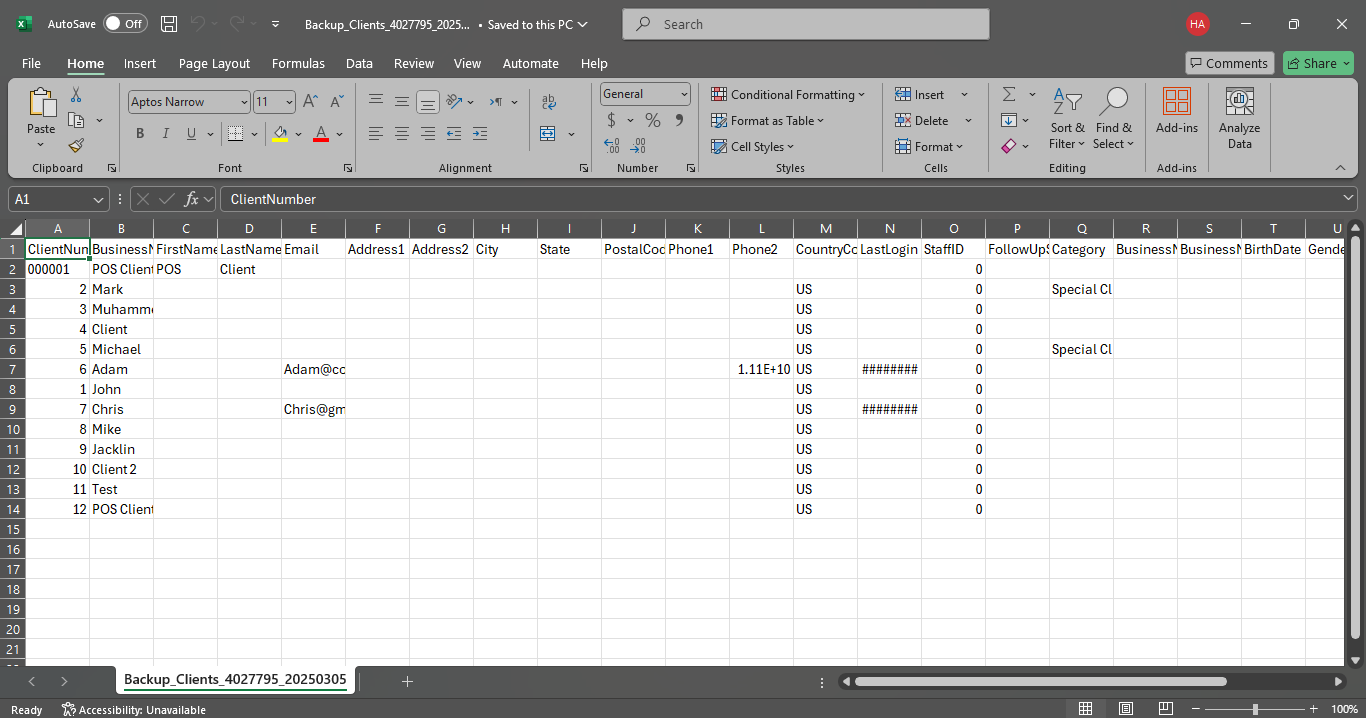
Viewing the Proper Excel File for Importing the Clients
Ensure that the Excel file is prepared, including all the client data to be uploaded to the system, such as the client’s name, email address, client code, business name, telephone, and other information.
How to Import Clients Through an Excel File
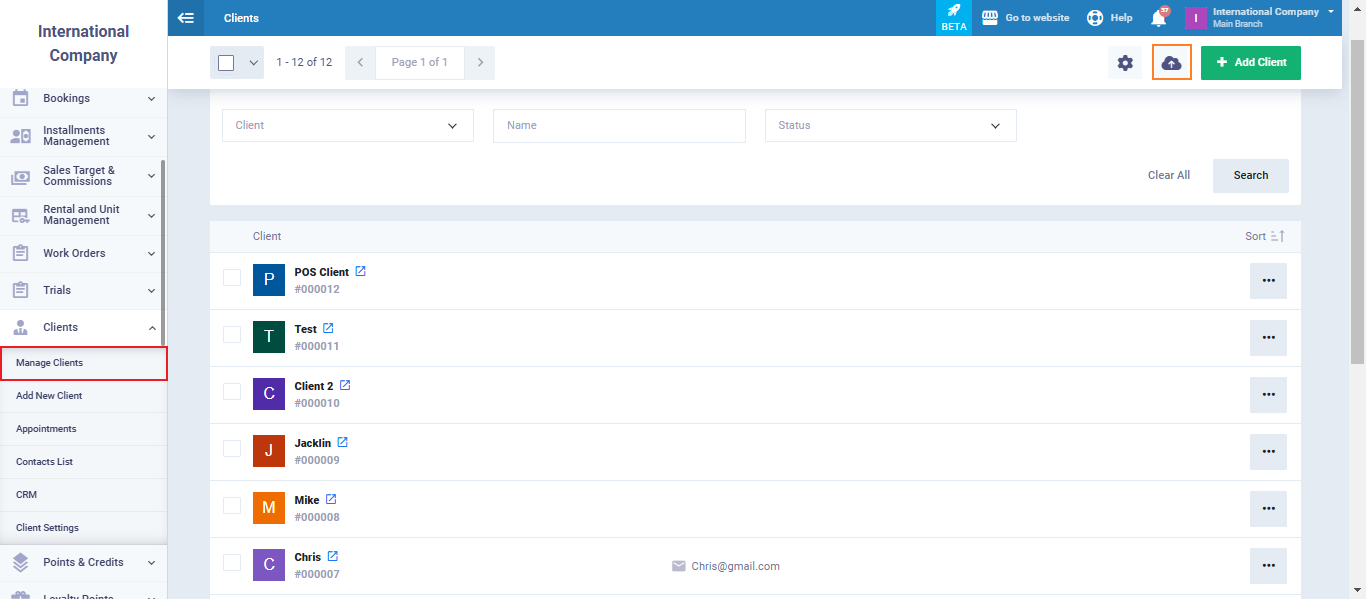
Click on “Manage Clients” dropdown under “Client” in the main menu, and click on the Import button.
Choose the “Comma Separated ( , )” option and click on “Choose File” to upload the desired Excel file from your device.
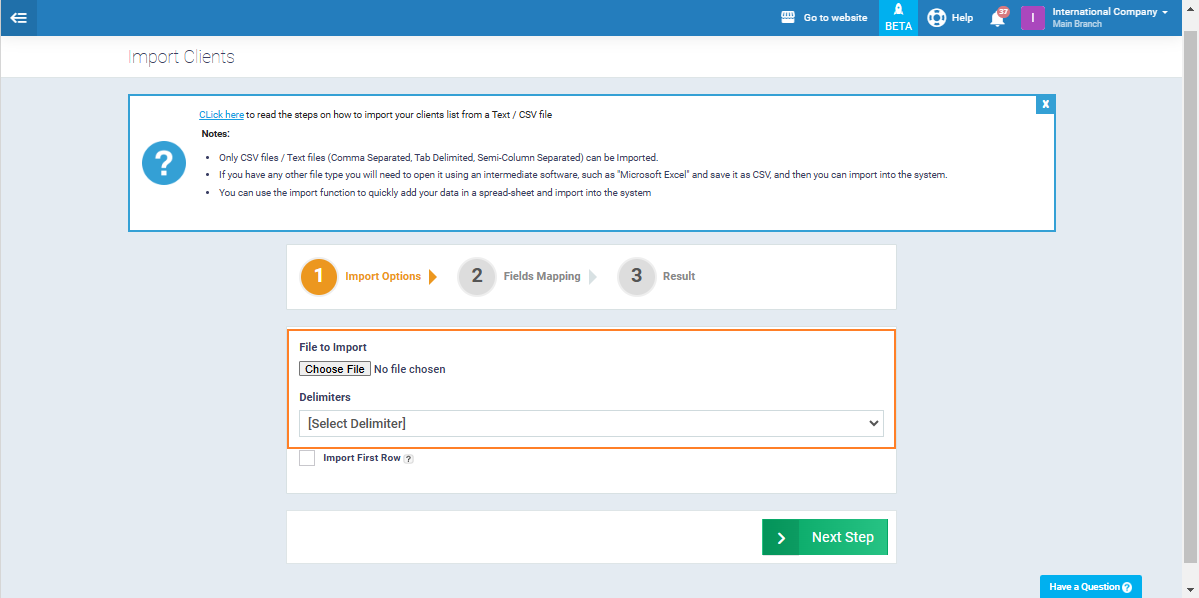
Choose the Excel file of the clients from your device to upload to the system

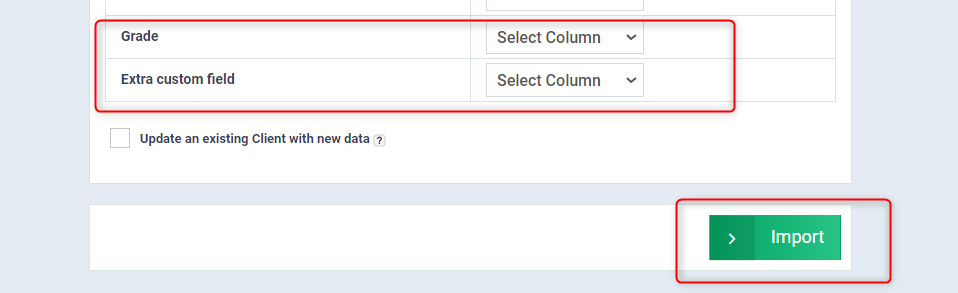
Map the data in the Excel file containing the clients with the corresponding fields in the system, for example, if the client’s email column in the Excel file is titled “Email”, write this title opposite the email field on the system so that the Daftra system recognizes each type of data being uploaded, then click the “Import” button.
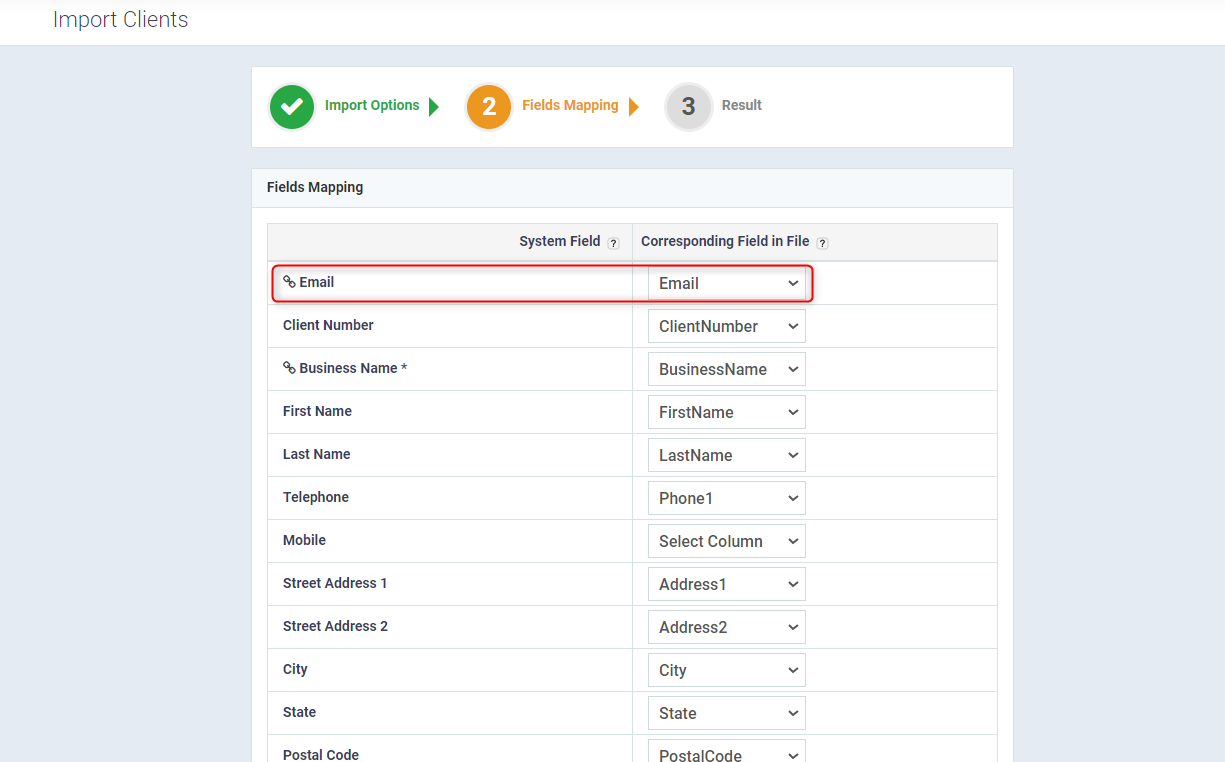
If the Excel file contains additional columns for data that do not have a corresponding field in the client profile on the system, you can add an additional field to match this column of data, for more about additional fields for clients and their uses see this guide.
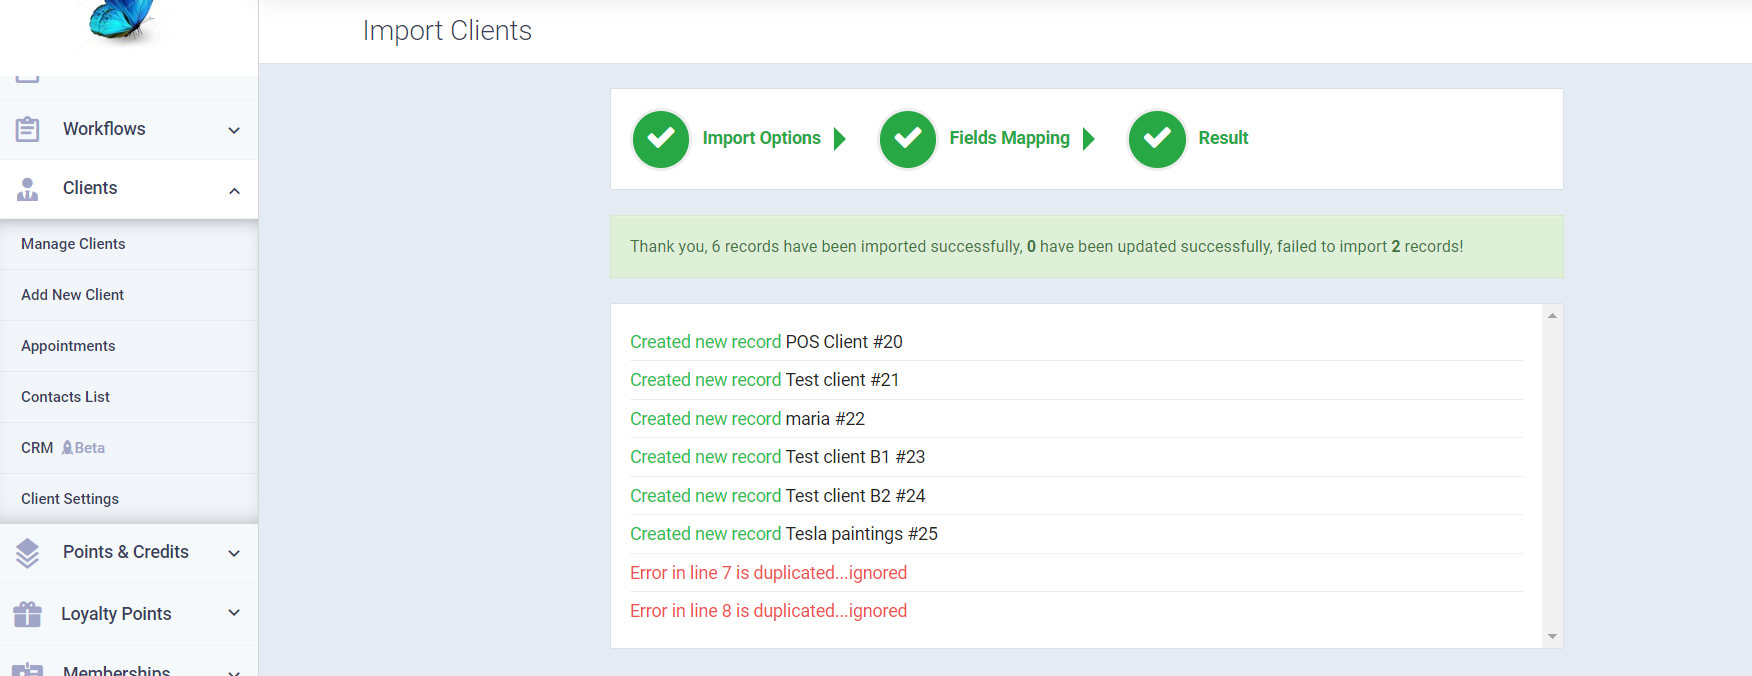
You will receive a message indicating the number of clients successfully imported and those that failed to import so you can correct any errors that led to their loss.
After successfully importing clients through the Excel file, you can head to “Manage Clients” dropdown under “Clients” in the main menu to find the clients now on your system.
