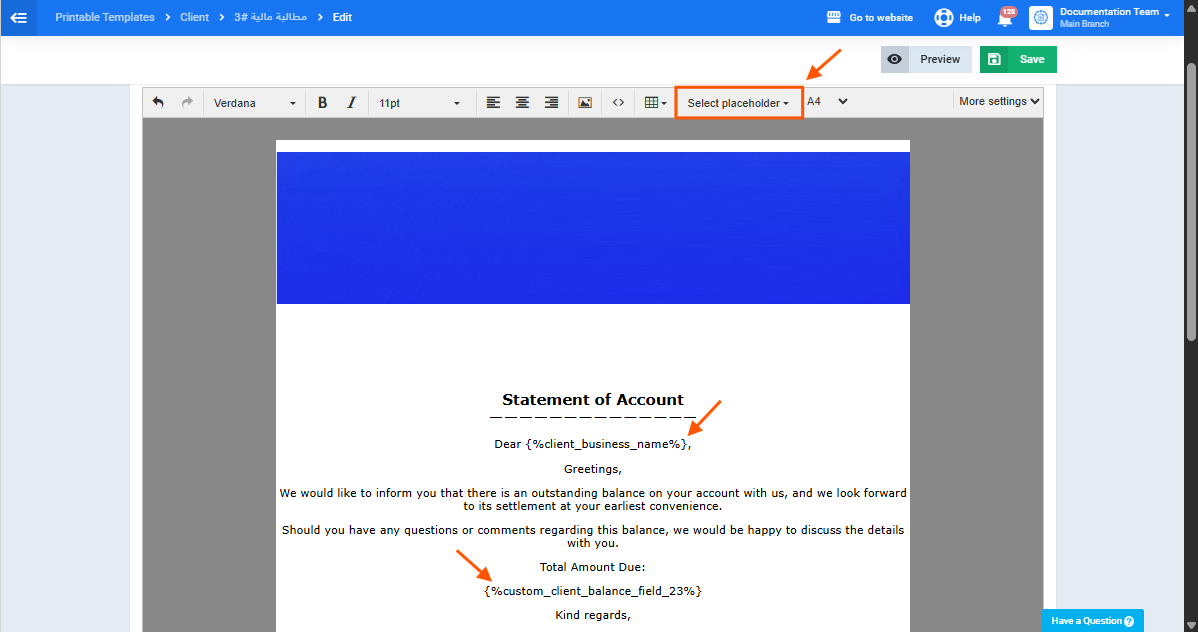
Issuing and Printing a Statement of Account
The system allows you to issue a formal statement of account for any client, clearly displaying their outstanding balance in a ready-to-print or ready-to-send document. This capability relies on adding a custom field to the client profile to record their outstanding balance, then linking that field to the “Statement of Account” template so it appears automatically in the document whenever it’s issued.
This way, you can issue an accurate statement of account for any client at any time, simply by updating their balance, without needing to redesign the document or re-enter its data from scratch each time. This guide walks you through creating the client balance field, inserting it into the statement of account template, and finally issuing and printing the statement.
Part 1: Adding a "Client Balance" Field
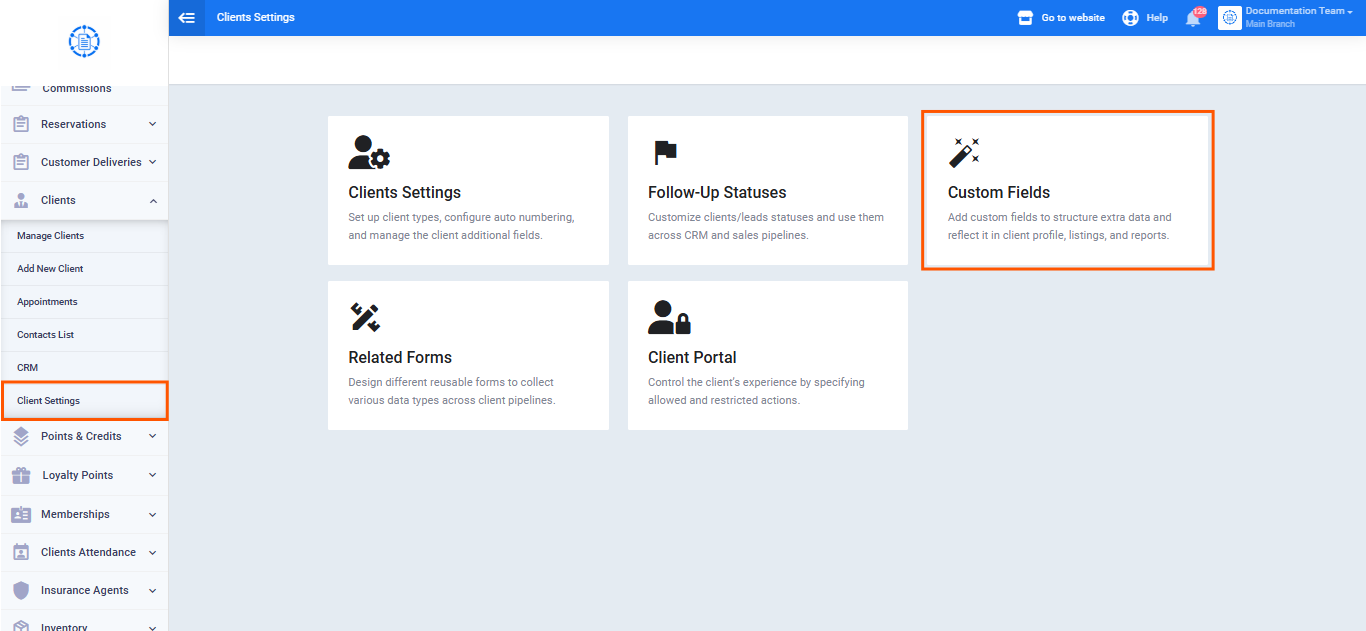
- From the main menu, go to the “Clients” dropdown menu, then click “Client Settings.”
- Click “Custom Fields.”
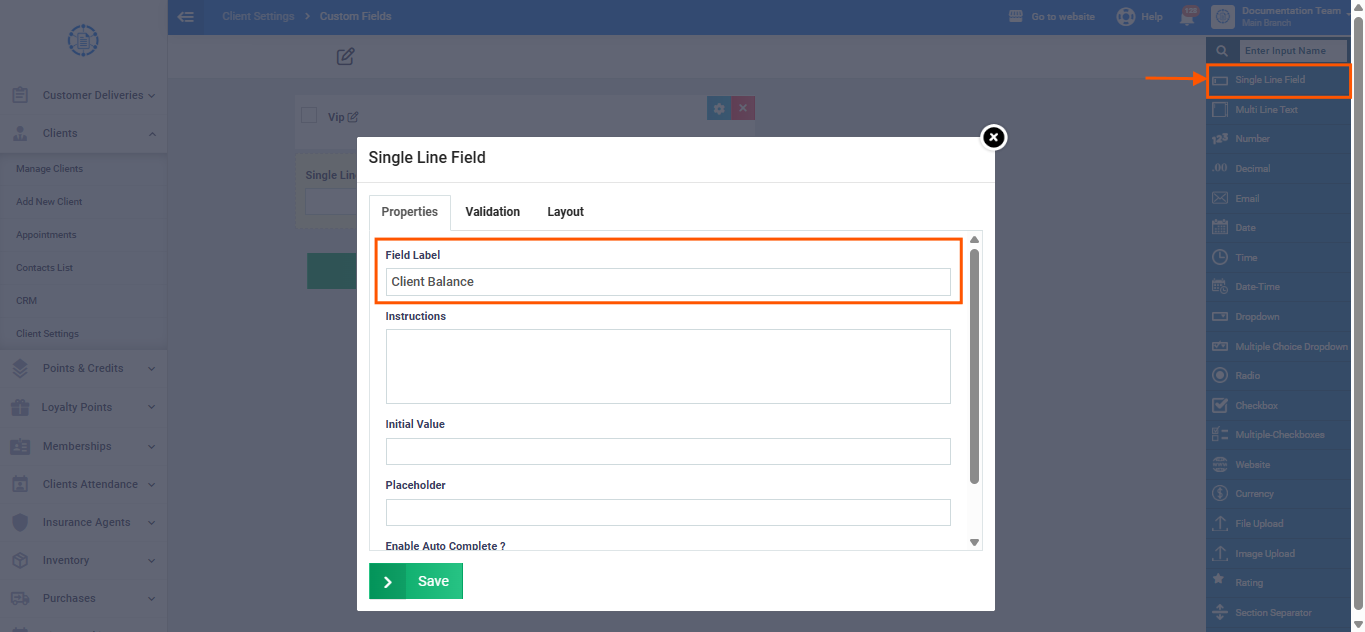
- From the sidebar field list, drag the “Single Line” field onto the screen.
- Enter a suitable name for the field (e.g., “Client Balance“).
- Click “Save.”
Once saved, this field automatically appears at the bottom of every client’s profile in the account, and its value becomes manually editable for each client individually — this is the balance that will later appear on the statement of account.
Part 2: Adding the Field to the Statement of Account Template
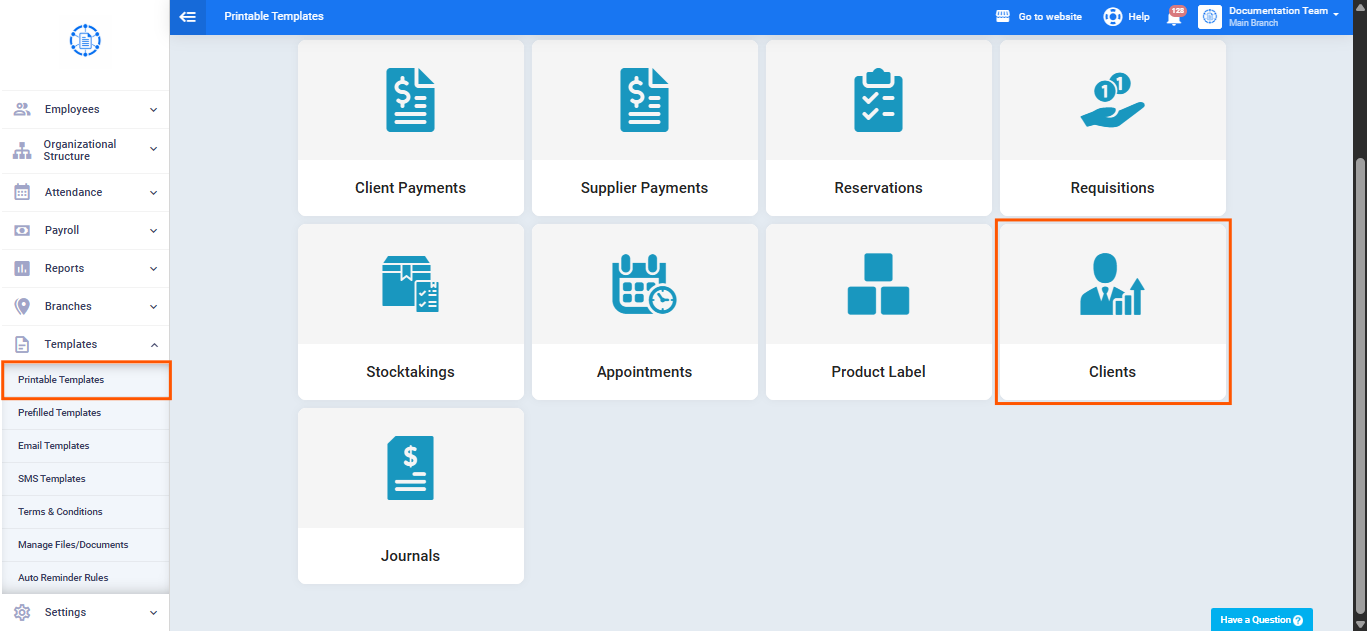
- From the sidebar, click “Templates.”
- Click “Print Templates.”
- From the list of categories shown, click the “Clients” card.
- Select the “Statement of Account” template from the list, or create a new template and name it accordingly.
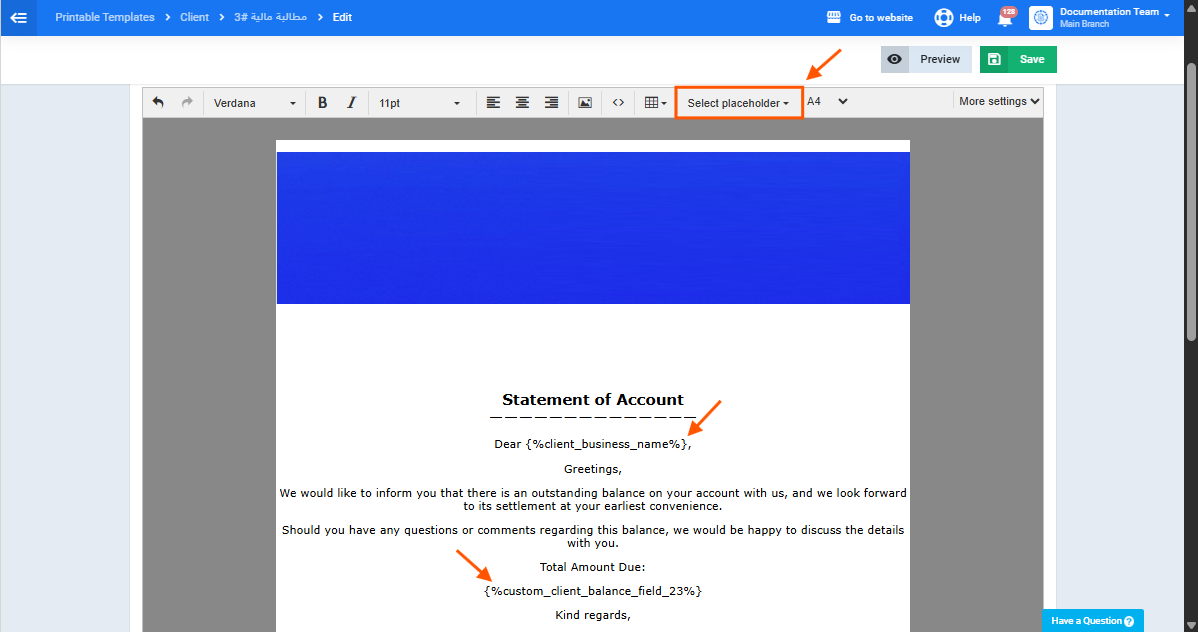
- Enter the appropriate wording for the statement of account within the template, and use the “Placeholders” dropdown to select:
- The additional field you created in Part 1 (Client Balance), so it appears as the amount due on the statement of account.
- The client’s Company Name, or any other data you want displayed on the statement of account alongside the balance.
- Click “Save.”
Part 3: Recording the Client's Balance Before Issuing the Statement of Account
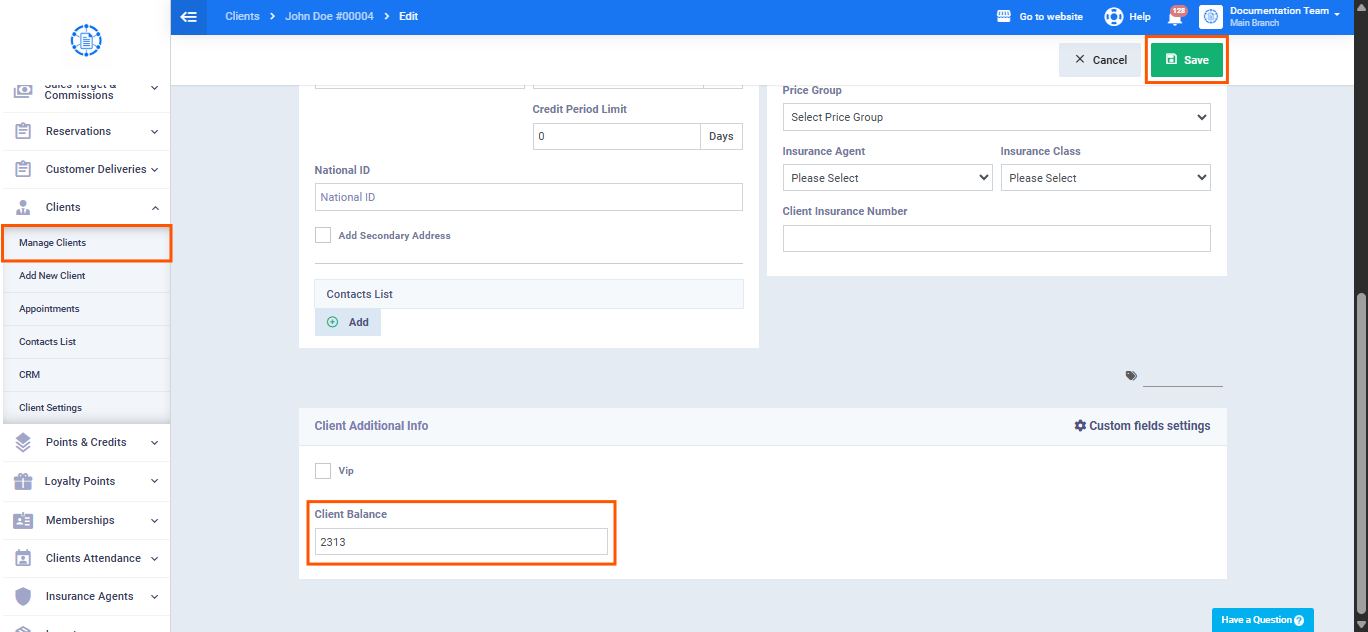
- From the sidebar, click “Manage Clients.”
- Select the client you want to issue a statement of account for.
- At the bottom of the client’s profile, you’ll find the additional field you created earlier (“Client Balance“).
- Enter the client’s current balance value in this field — this is the value that will appear on the statement of account.
- Click “Save.”
Issuing and Printing the Statement of Account
- From the client’s profile, click “Printouts.”
- Select the “Statement of Account” template.
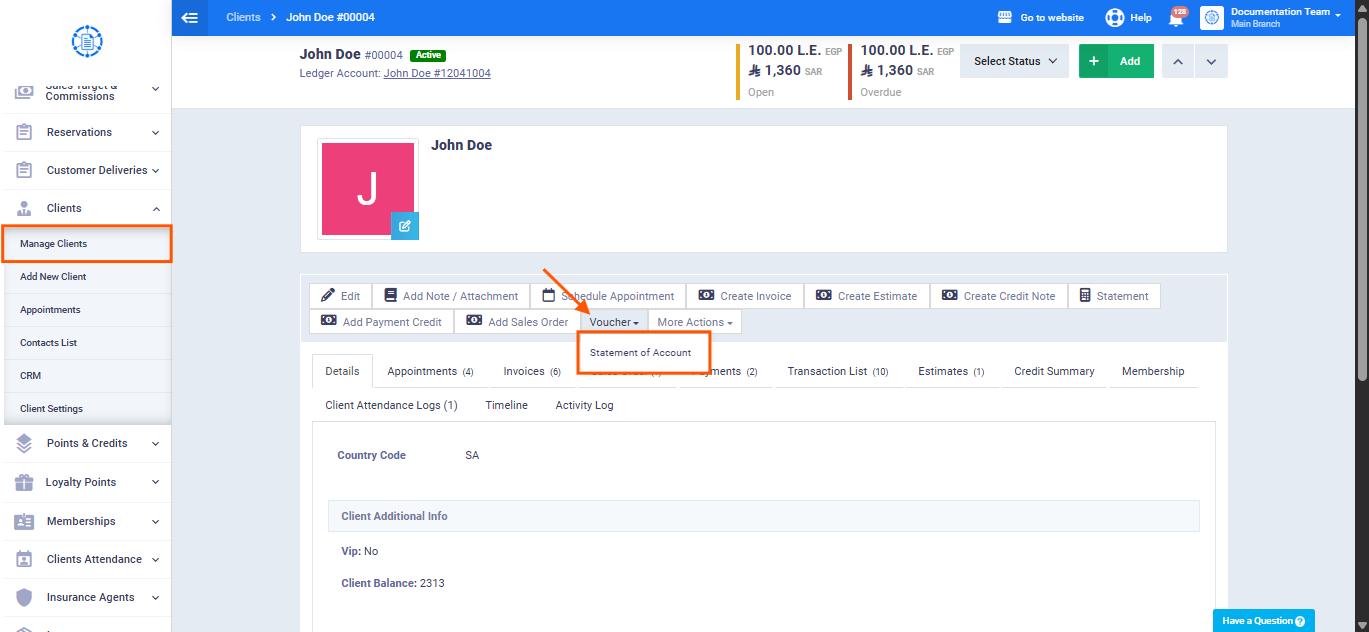
- The statement of account will be issued, displaying the previously entered client balance printed directly within the document, with no further input needed.