Assigning a Default Warehouse for Each Branch
Through inventory settings in the system, you can assign a default warehouse for each branch, which will be shown as the default option when selecting a warehouse in branch invoices or any of its accounting transactions.
How to Assign a Default Warehouse to a Specific Branch
To assign a default warehouse to a specific branch, make sure to select the desired branch in your account before adjusting the settings. You can select the branch by clicking on your account name, which will display a dropdown menu with the branches added to your system. Simply click on the branch you want to switch to.
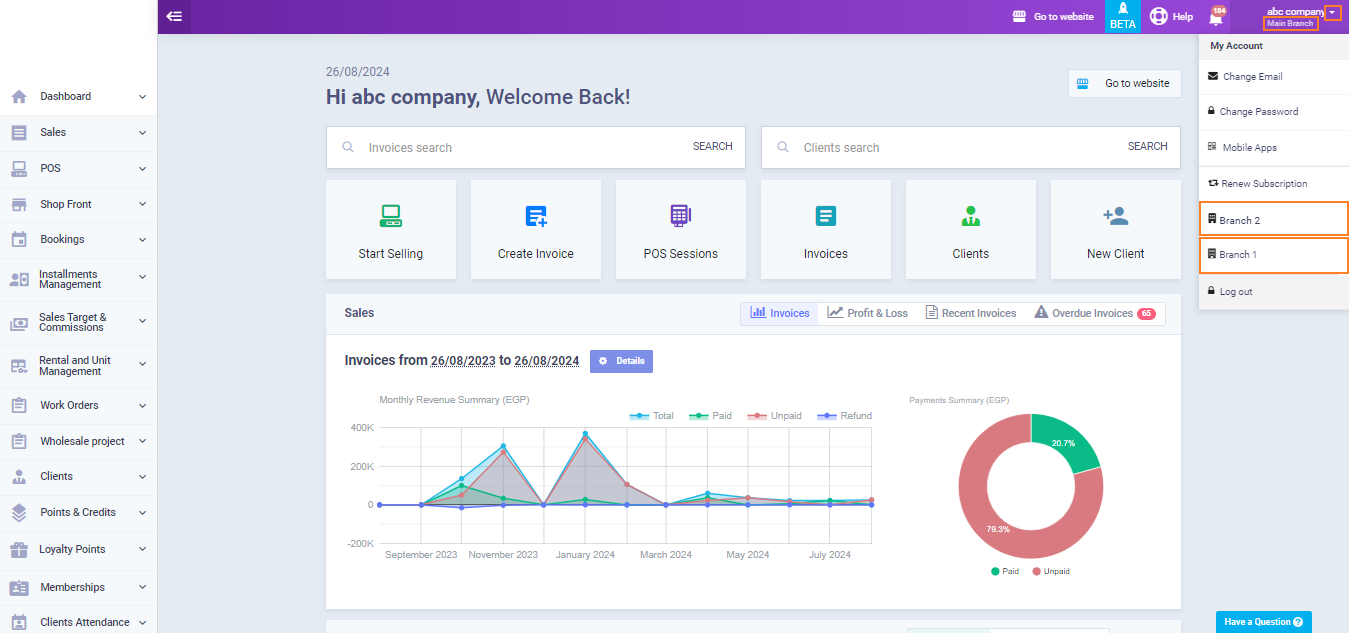
The current branch appears below your account as the Main Branch.
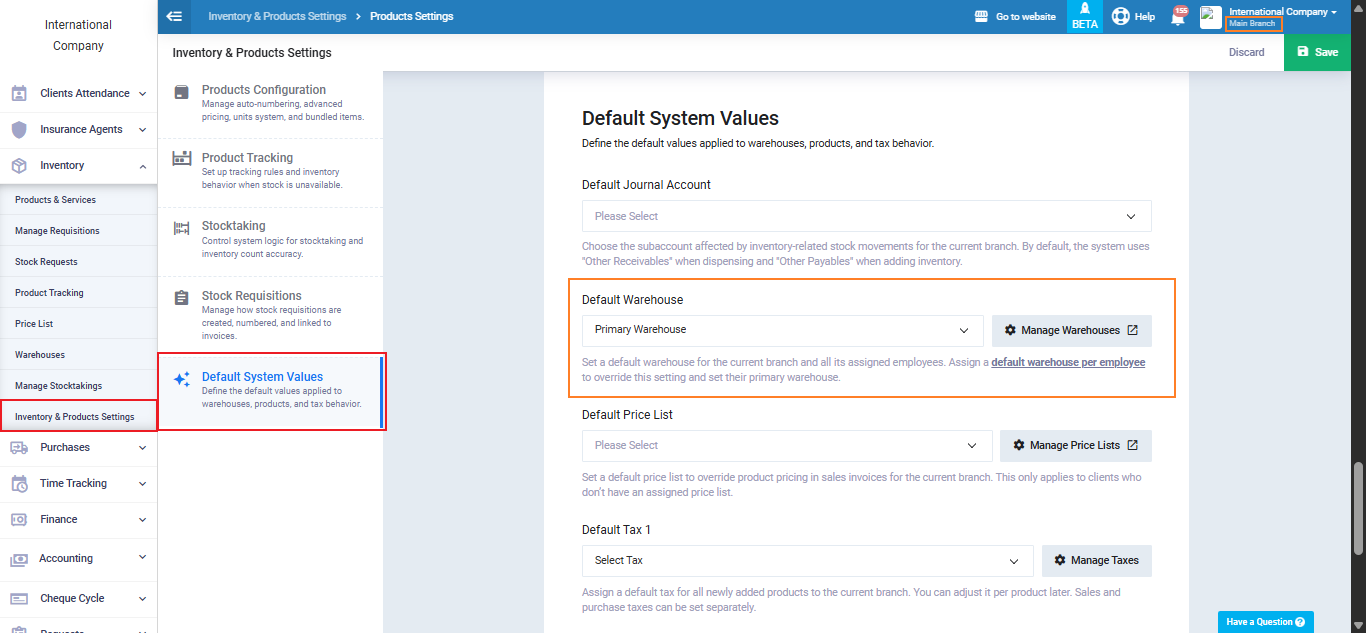
To assign a default warehouse to this branch, click on “Inventory & Product Settings” under “Inventory” in the main menu, then click on “Product Settings.” From the dropdown menu next to “Default Warehouse,” select the warehouse you want to set as the default for this branch, and then click the “Save” button.
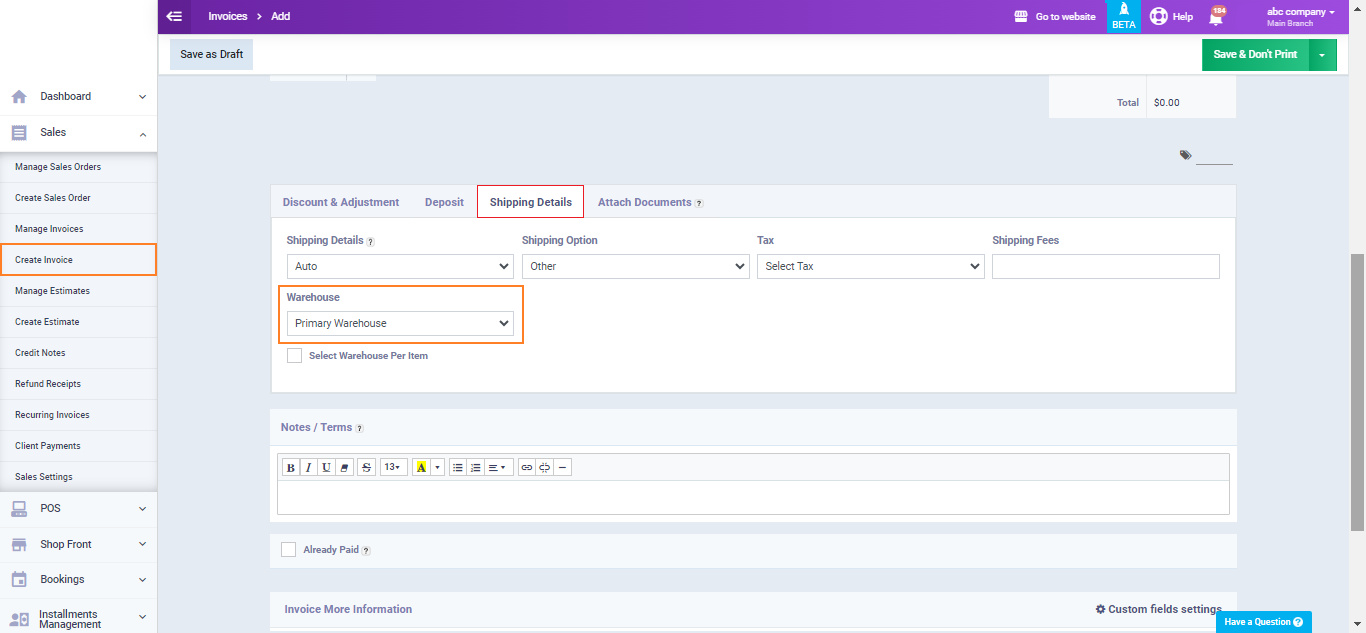
When creating an invoice in this same branch, you will find that in the “Shipping Details,” the default warehouse is the one you have set as the default for this branch. In this example, the default warehouse is shown as Primary.
Note When Changing the Branch and Selecting “Branch 2“
You can assign a different default warehouse for this branch in the same way. Click on “Inventory & Product Settings” under “Inventory” in the main menu, then select the desired warehouse from the dropdown menu next to “Default Warehouse.” In this example, choose “Branch 2” and then click the “Save” button.
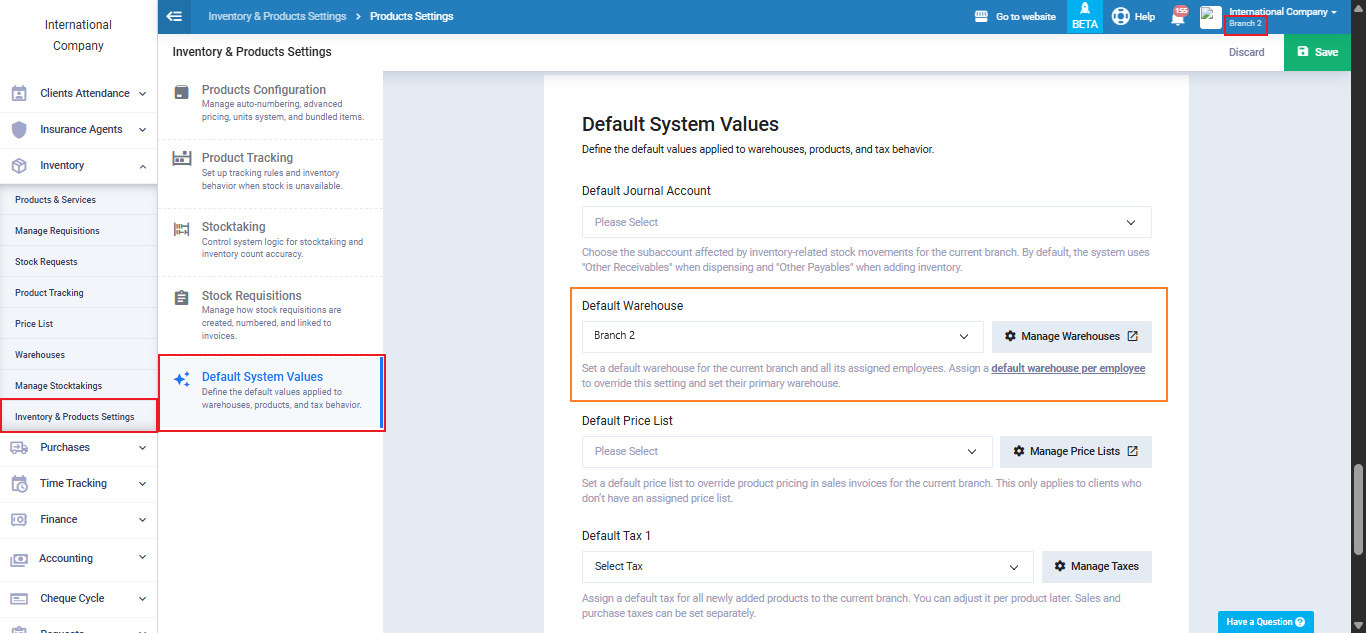
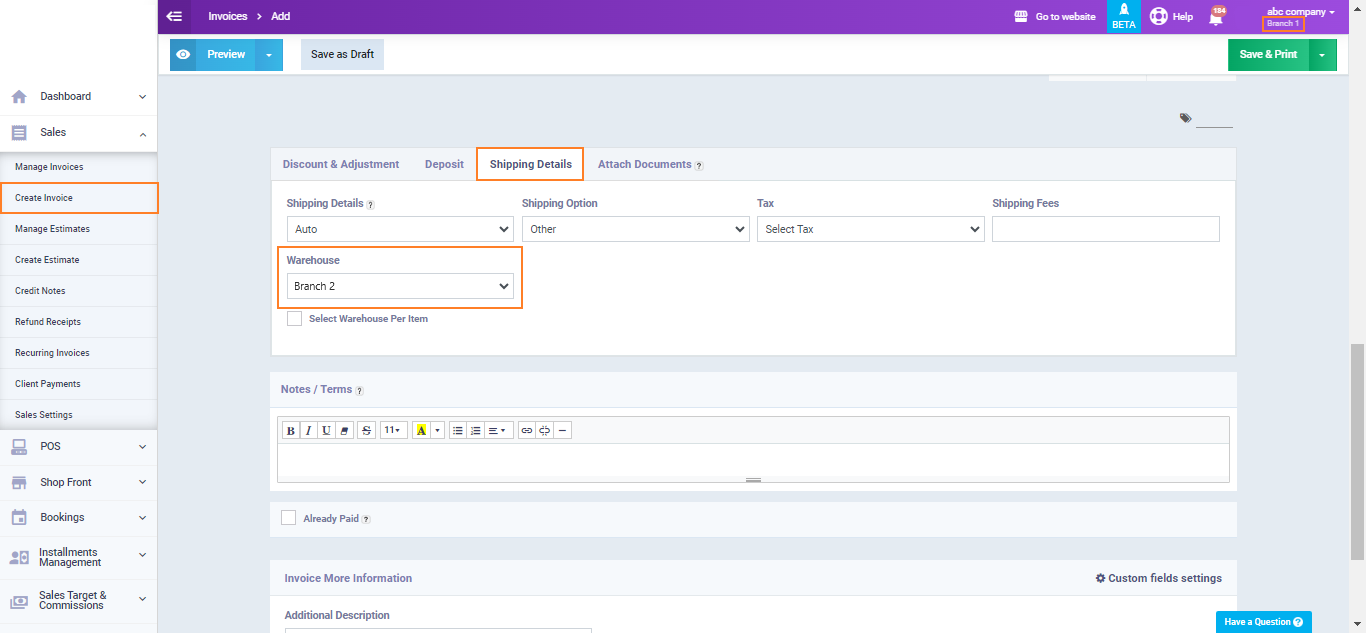
When creating an invoice in this same branch, you will find that in “Shipping Details,” the default warehouse is the one assigned as the default for this branch. In this example, “Branch 2” is shown as the default.
