Back

Sending Payment Reminder Emails to Clients

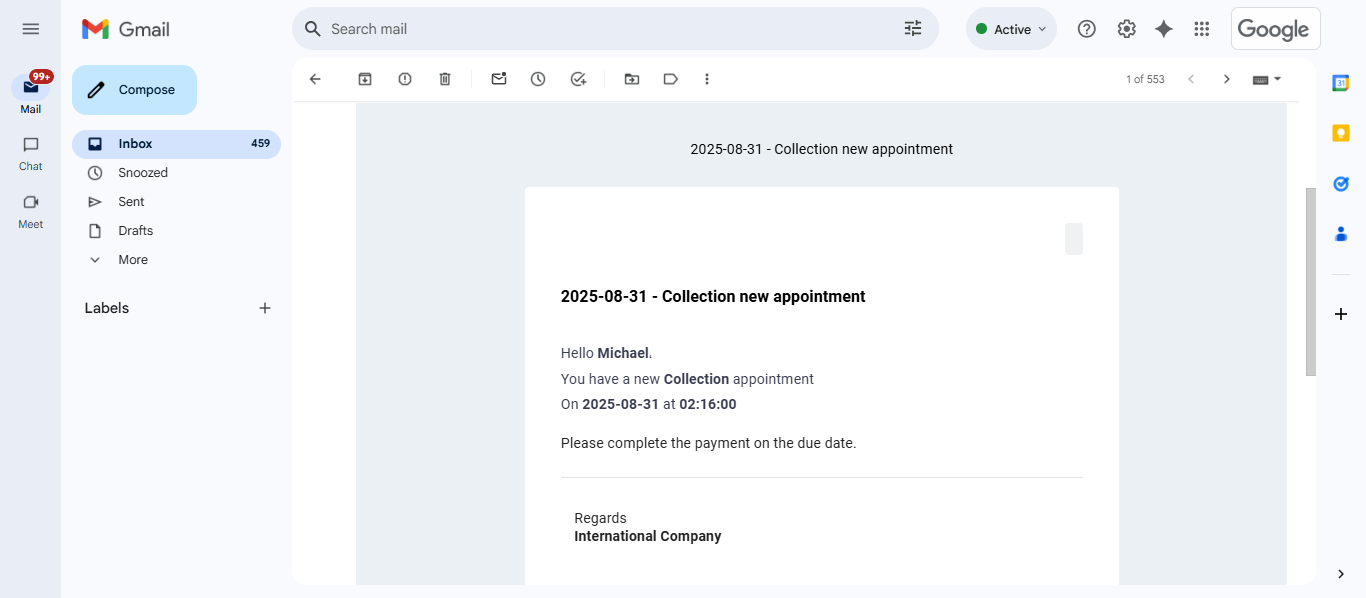
The system allows you to automatically send payment reminder emails to your clients, helping you track your receivables easily and ensure payments are collected on time.

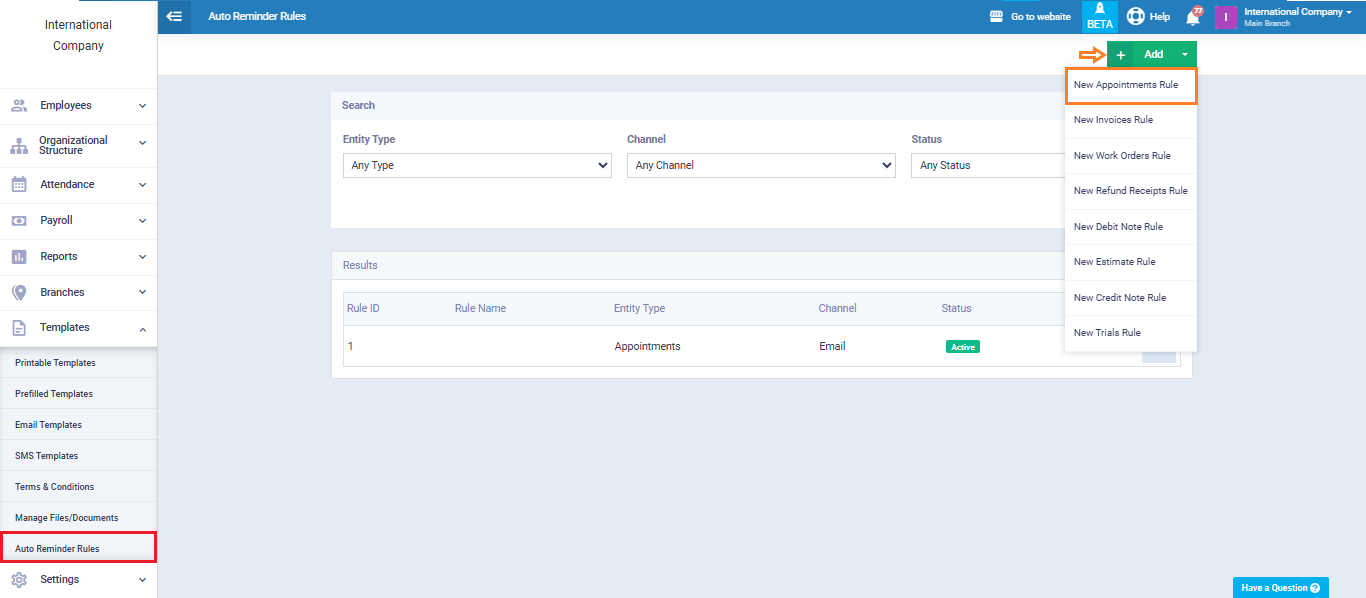
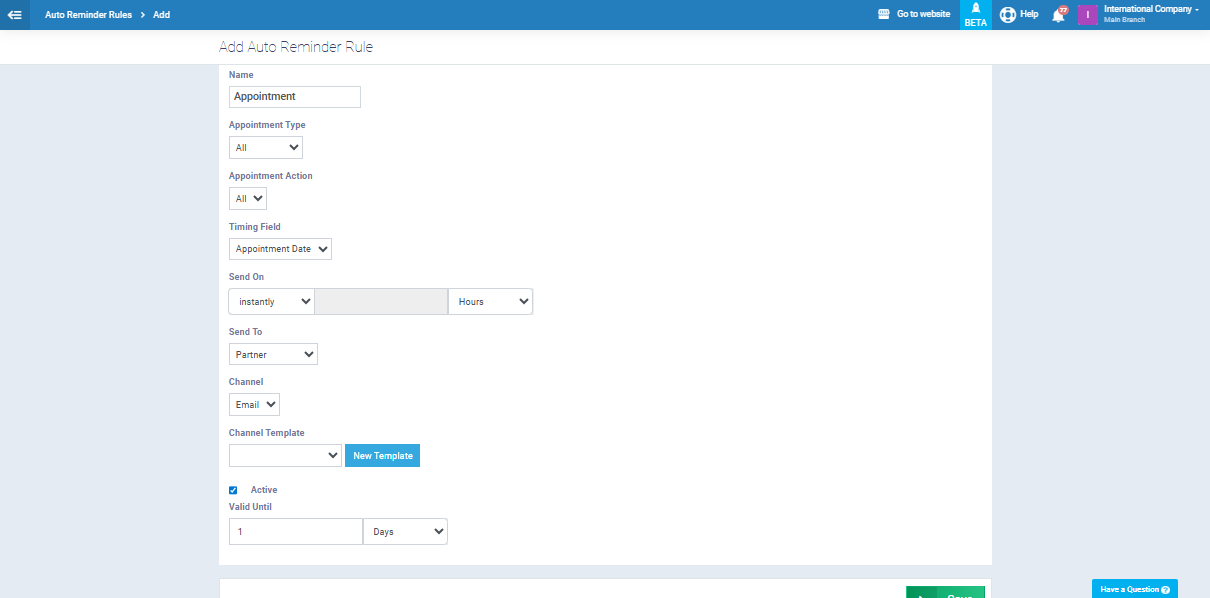
In this guide, we’ll walk through how to set up this process by creating an appointment for the client and linking it to an automated sending rule, so reminders are sent systematically without manual intervention.

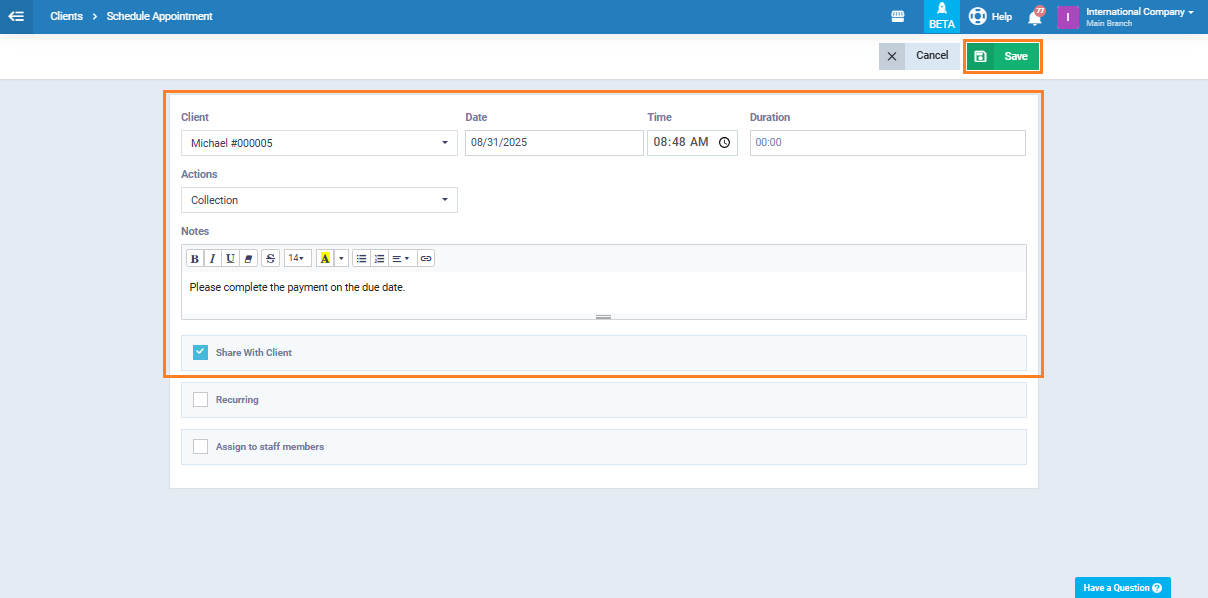
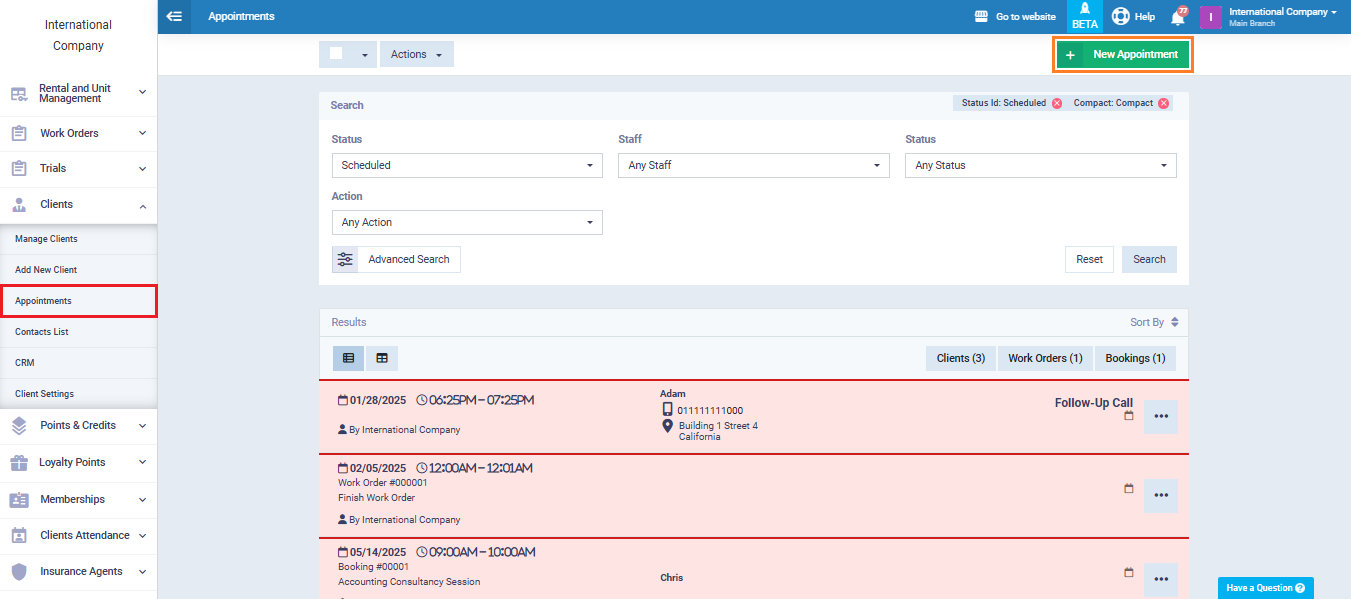
From the main menu, click “Clients”, then from the dropdown, select “Appointments”, and click “New Appointment.”

Select the client you want to send the reminder email to and mark the box next to “Share with Client.” Then, complete the appointment details as shown below.

For more details on how to create a new appointment, you can refer to this guide.

Next, go to “Templates” and select “Auto Reminder Rules.” Click the “Add” button, and from the list, choose “New Appointments Rule.”

Fill in the automated reminder rule details as follows:

  • Name: Choose the required appointment.
  • Appointment Type: Select (All).
  • Action: Select (All).
  • Timing Field: Select (Appointment Date).
  • Send on: Select (Immediate).
  • Send To: Select (Customer).
  • Channel: Select (Email).
  • Channel Template: Choose the suitable template.
  • Active: Tick ✅ to activate the rule.
  • Valid Until: Enter the duration (e.g., 1 day).

Finally, click the “Save” button to save the auto reminder rule.

When the client checks their email inbox, they will find the reminder message delivered successfully.