


Routing a Client to a Specific Account in the Chart of Accounts
The system allows you to add a new account in the Chart of Accounts dedicated to the transactions of a specific client or a defined group of clients. You can then link this client to the account you previously created, helping you accurately track all their financial transactions and ensure they are recorded in the correct account.
Creating the Account in the Chart of Accounts
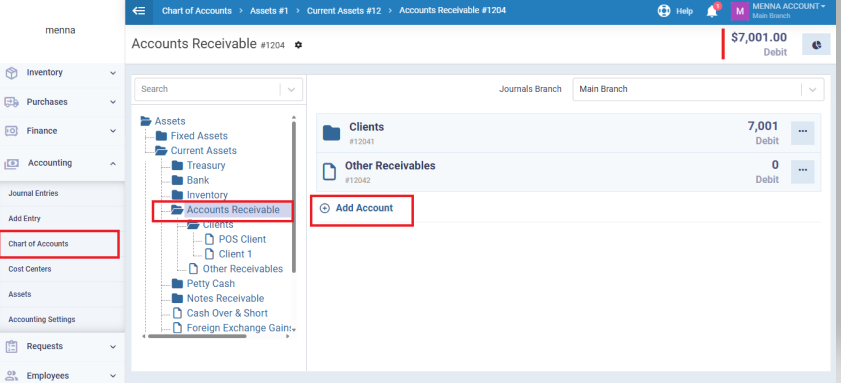
From the main menu, go to “Accounting” and select “Chart of Accounts”.
Click on the “Assets” tab, then choose “Current Assets”, and select “Accounts Receivable”.
Create a new account for the required customer or group of customers by clicking the “+ Add Account button”.
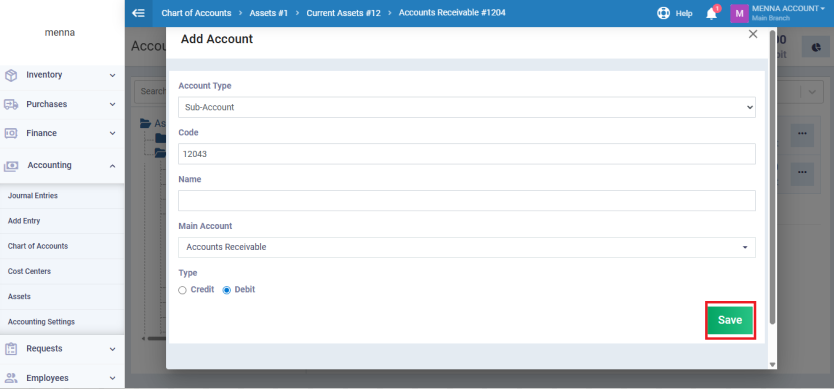
Enter the account details, then click “Save”.
Enabling Account Routing for Customers
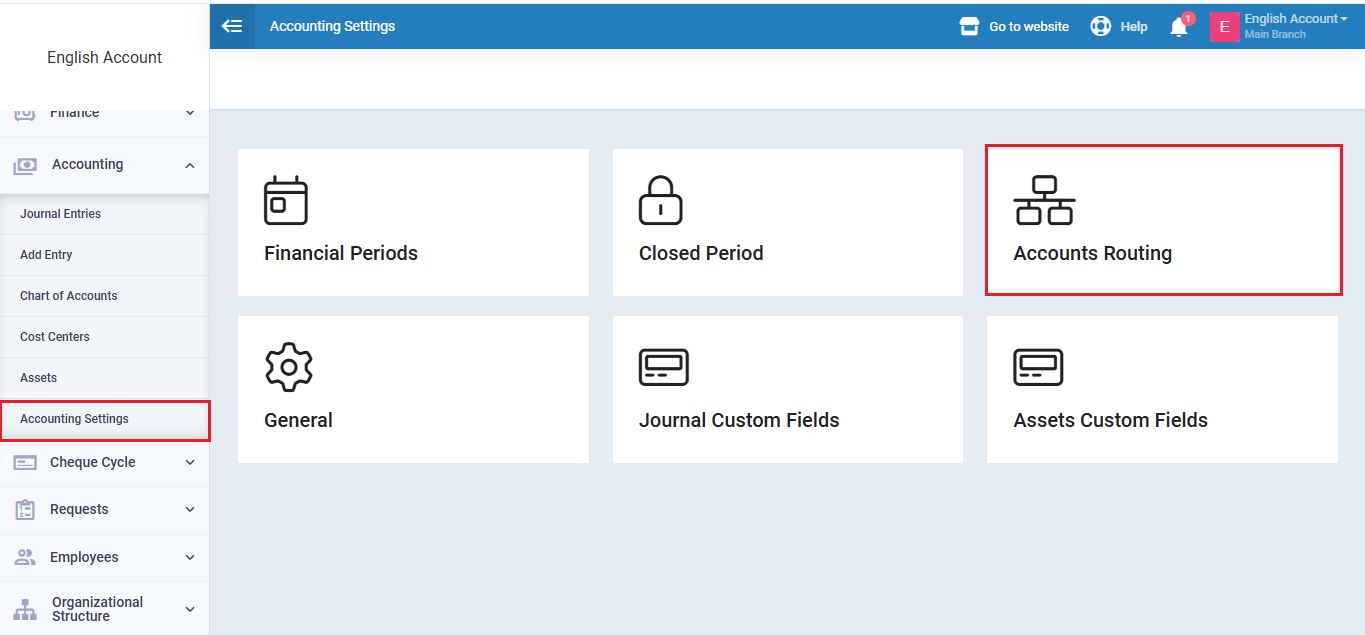
Go to Accounting, then select “Accounting Settings”.
From the settings list, choose “Account Routing”.
In the Customers field, select “Specify per each”.
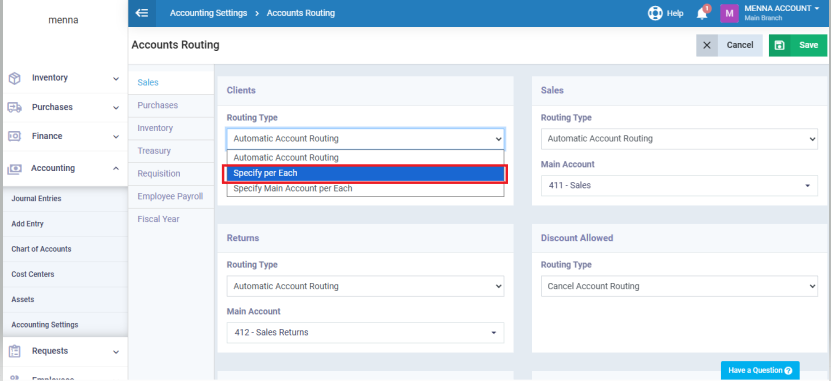
Click “Save” to enable the setting.
Adding the Customer and Linking to the Account
From the main menu, go to “Clients”, then from the dropdown menu, select “Add New Client”.
Enter the required client information. In the “Account” field, search for the account you created earlier in the Chart of Accounts and assign it to this client.
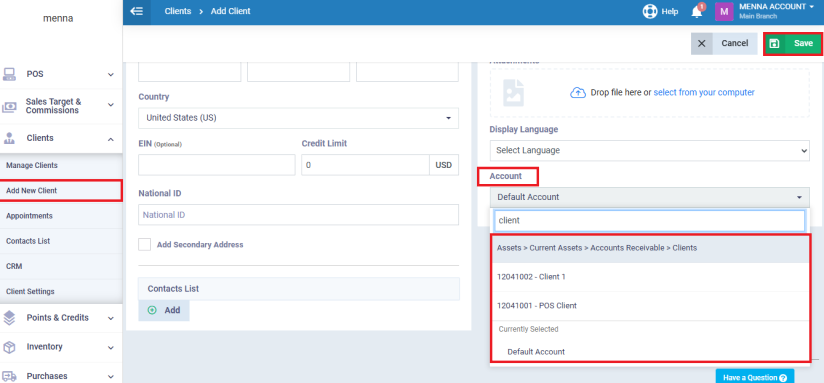
click “Save” to confirm adding the client.