


Managing and Sending Client Appointments via WhatsApp
In this guide, we will explain how to activate the feature of sending client appointments via WhatsApp or any other communication method through the system. You will be able to configure the necessary settings to send appointments easily and efficiently, allowing you to communicate with clients directly and quickly through their preferred application.
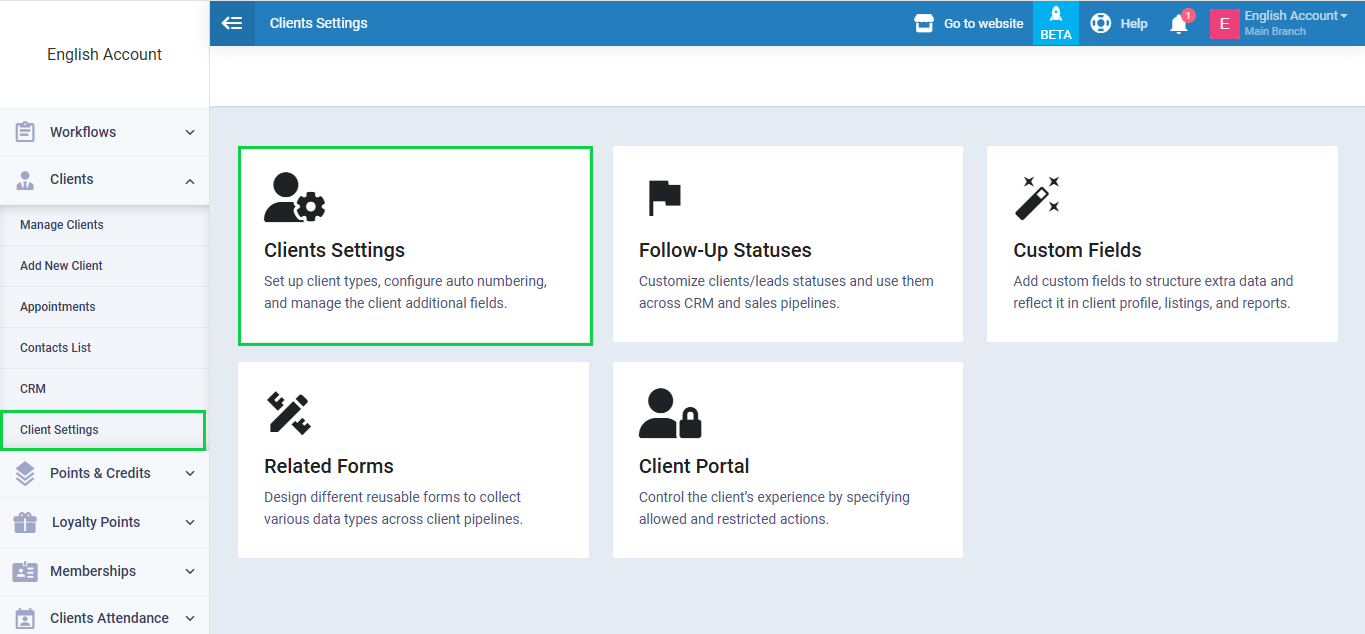
Activating the feature from the client settings
Before sending the client’s appointment via WhatsApp or any other communication method, make sure to activate and configure this setting.
Click on “Client Settings” from the dropdown under “Clients” in the main menu, then click on the “Clients Settings” card.
Activate “Send Client Details Via Messaging Apps” and then click the “Save” button.
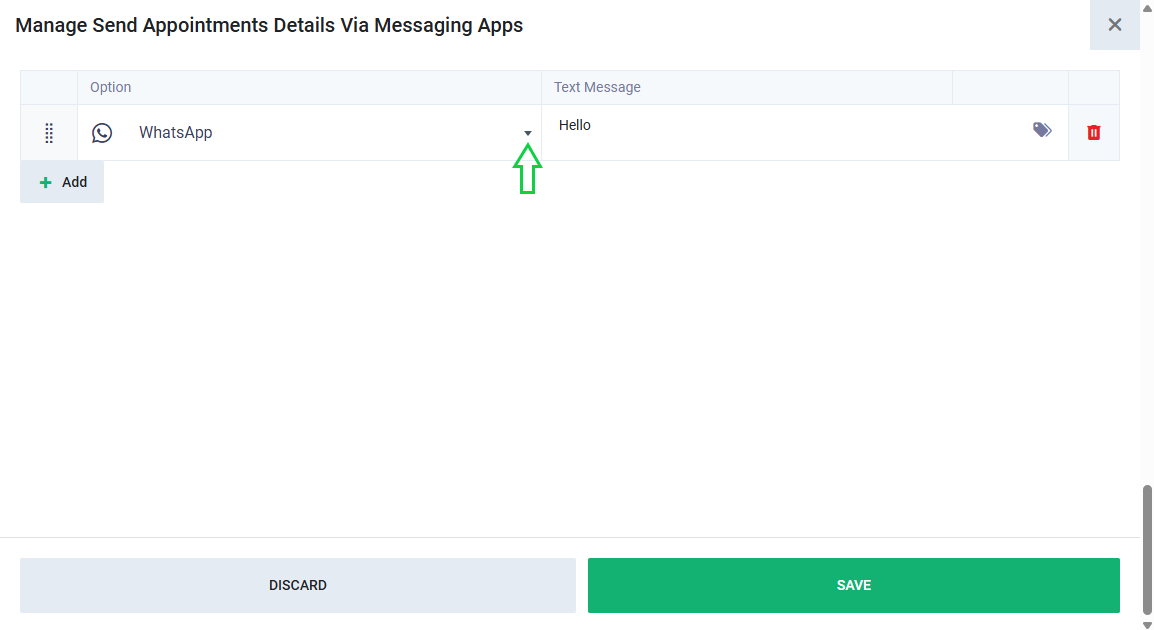
Next, click on “Send Appointments Details Via Messaging Apps” below the setting to adjust the message text to be sent to the clients.
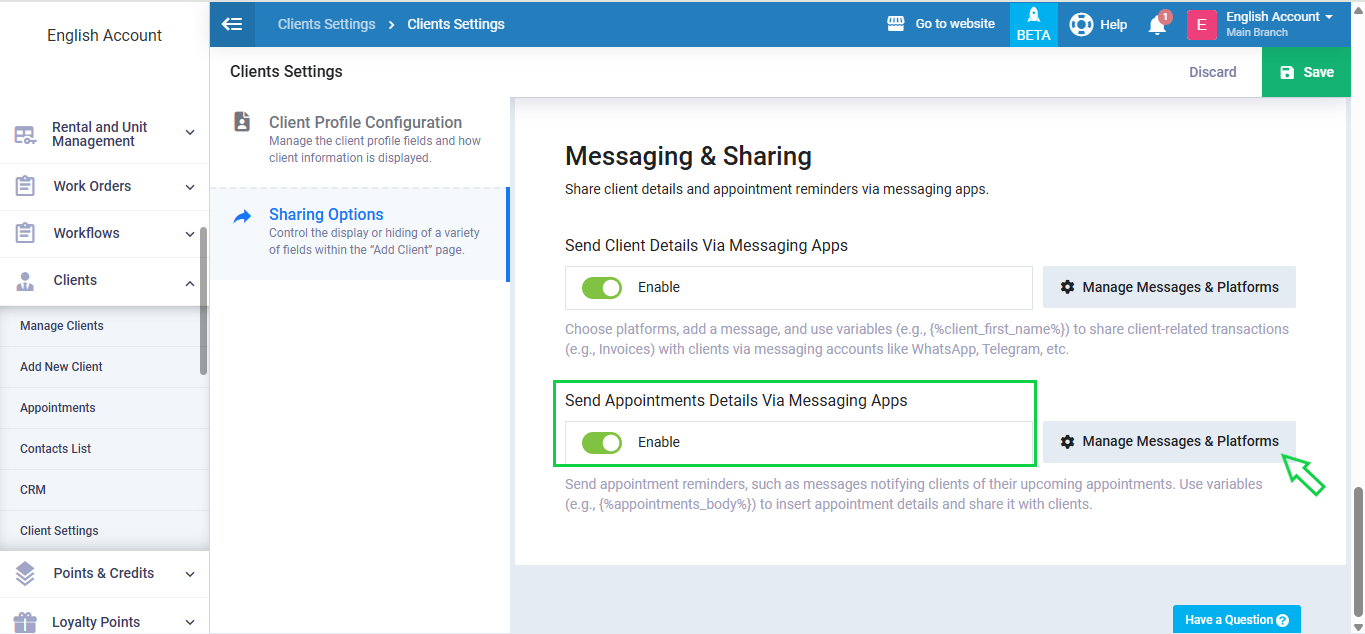
You can adjust the text field and enter the message you want to send with the appointment to the clients. By clicking the “Variables” button next to the field, you can choose the variables to include in the message. Once you’re done, click the “Save” button.
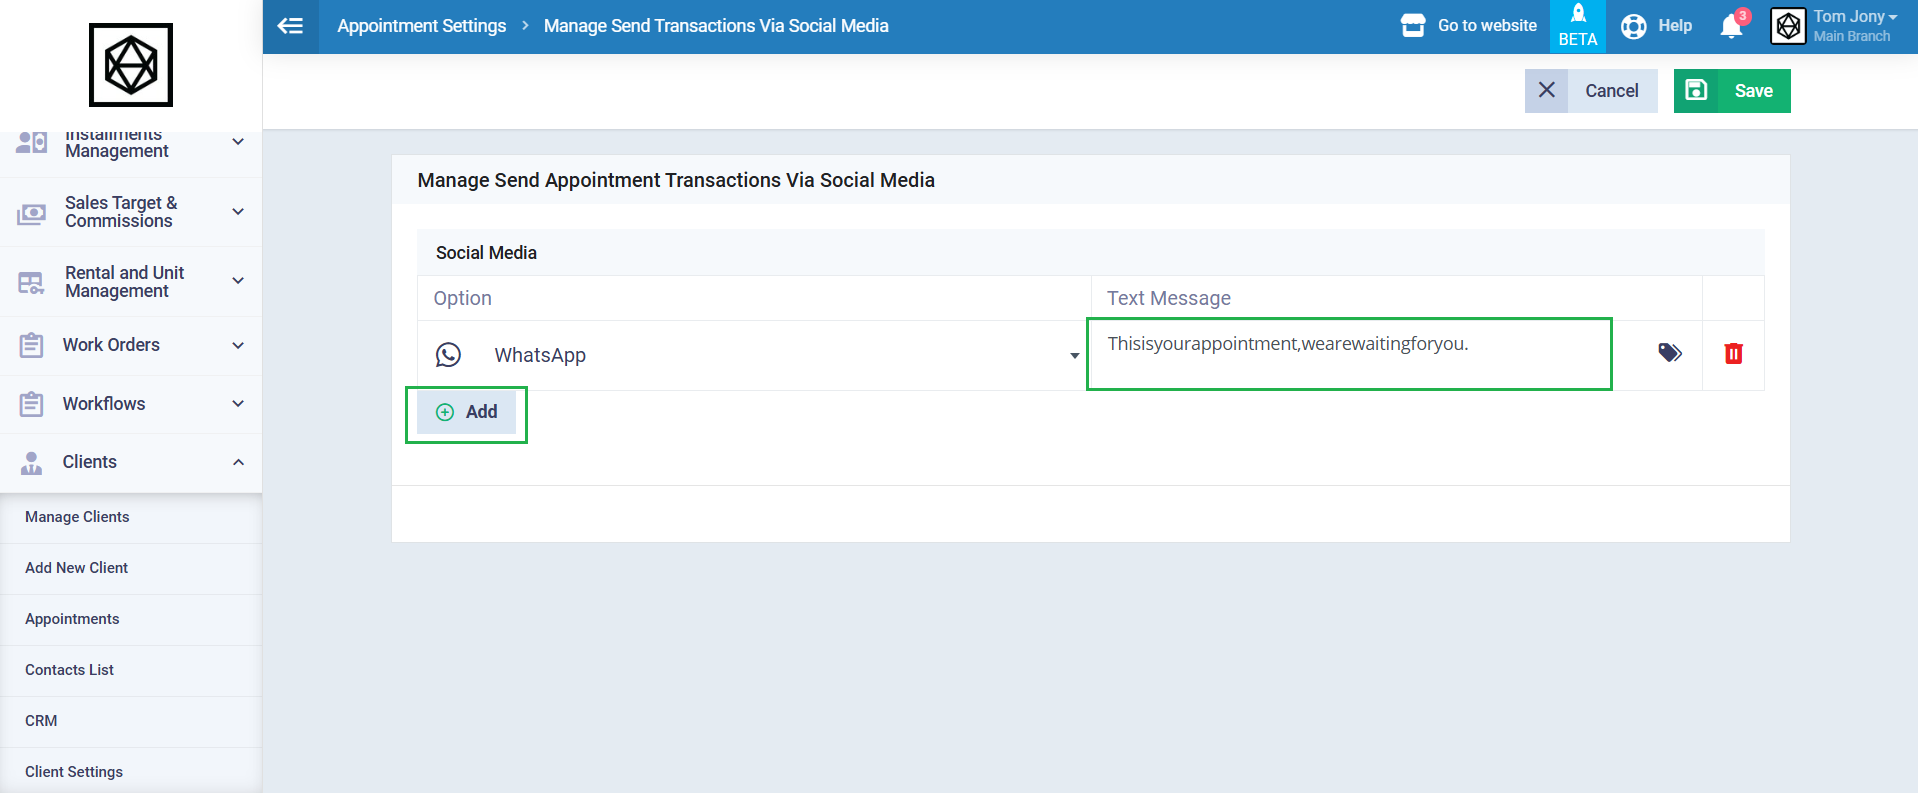
If you want to send the appointment using a different communication method, click the arrow next to the app name to show the drop down menu, choose the preferred method, and follow the same steps.
Sending the appointment to the client
For more about client appointments and how to add them, refer to this guide.
After enabling the feature to send the client’s appointment via WhatsApp, follow the steps below to send the appointment to the client:
Click on “Manage Clients” from the dropdown under “Clients” in the main menu, then select the desired client.
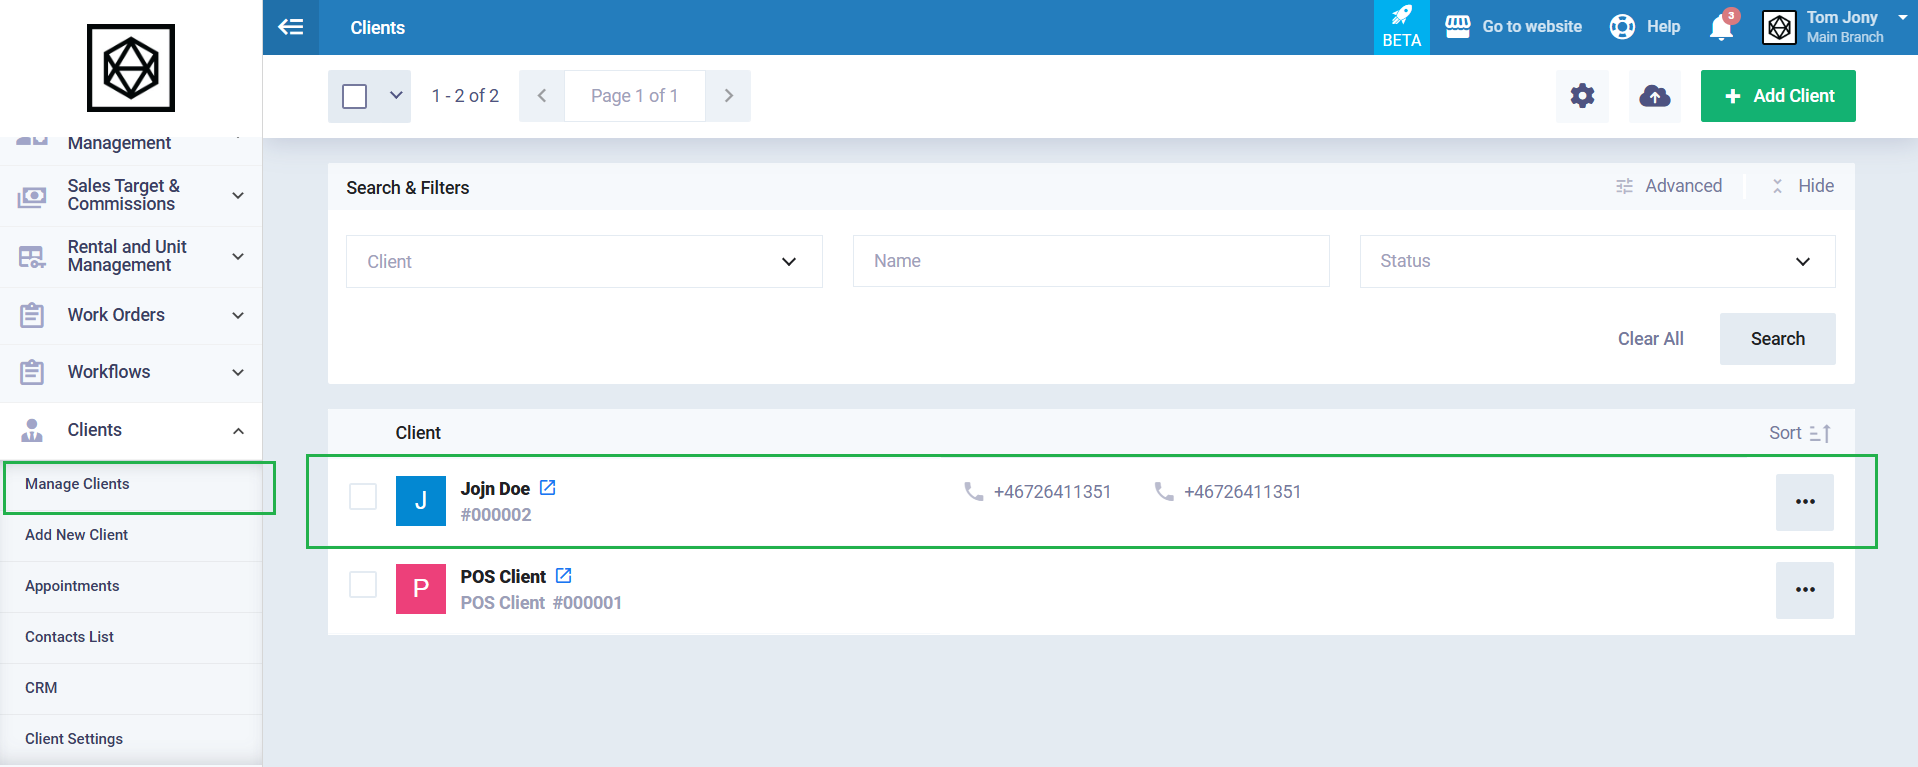
Click on the “Appointments” tab, then click the three dots next to the appointment you want to send via WhatsApp.

Click on “Send via WhatsApp” from the dropdown menu.

Choose either to continue through the browser or switch to the WhatsApp app if it’s installed on your device.
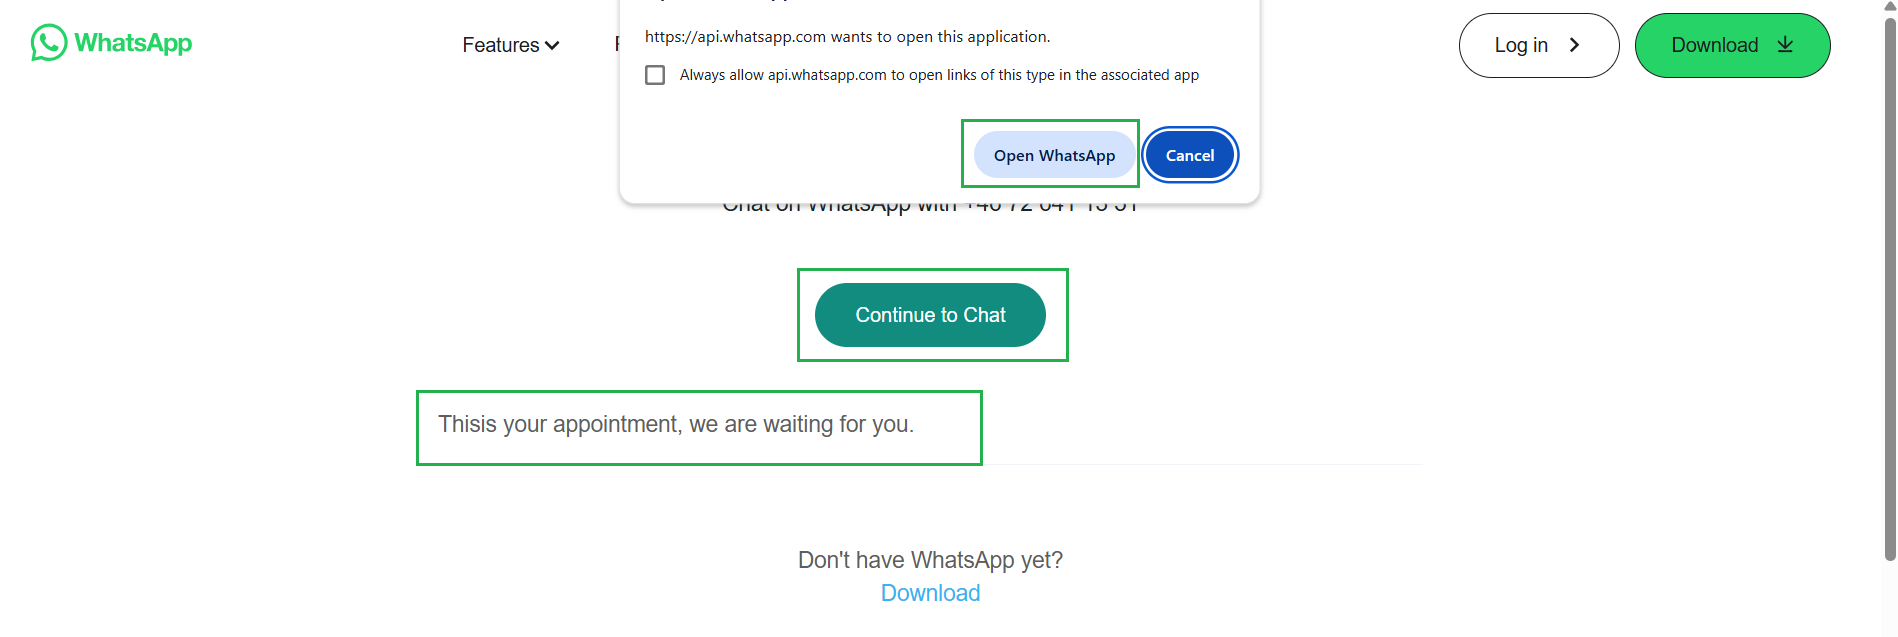
You will be redirected to the conversation with the client registered in your account, where the client’s appointment link will appear in the message text field. You can add any additional details alongside the link before completing the sending process. Once you’re done adding the details, click the “Send” button to send the appointment via WhatsApp.