Lease Contracts Guide
Managing lease contracts is a key aspect of property and unit management. The system now offers a dedicated lease contracts feature, allowing you to easily add, organize, and monitor all lease-related data directly within the platform. This tutorial will guide you through the process of adding a new lease contract, setting essential payment terms, and tracking active leases to ensure accuracy and compliance.
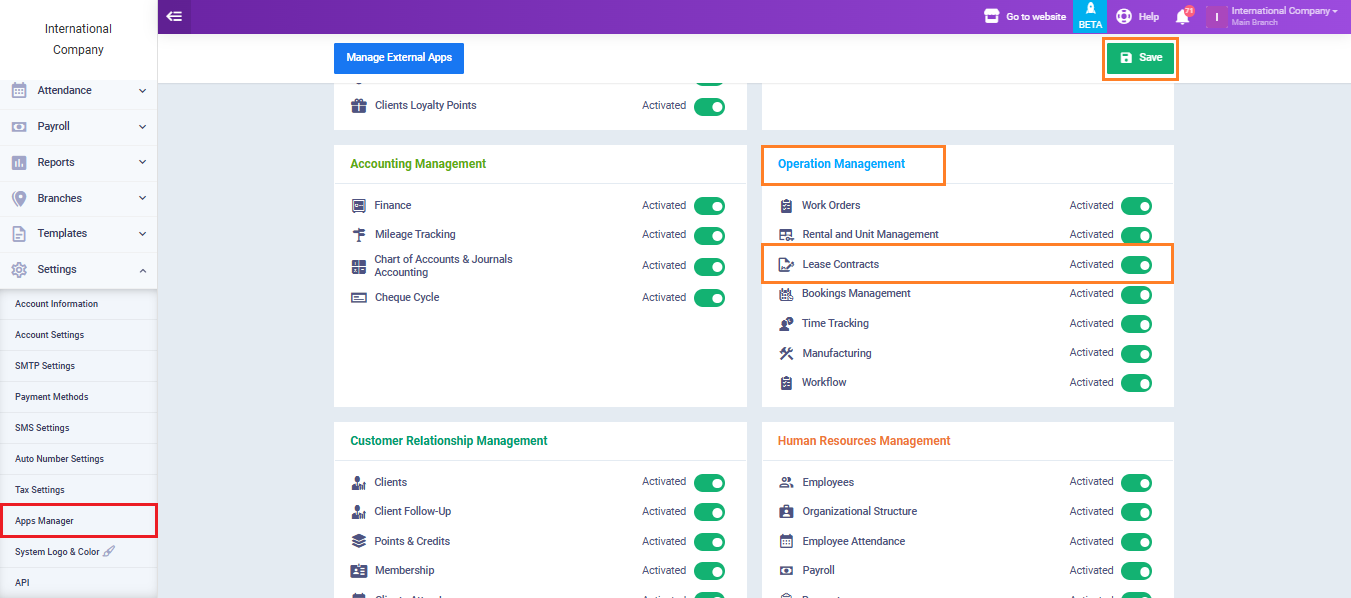
Enabling Leasing Contracts App
Before starting, make sure to activate the “Lease Contracts” feature by navigating to “Settings” then “App Manager”, so you can fully utilize the lease contracts management.
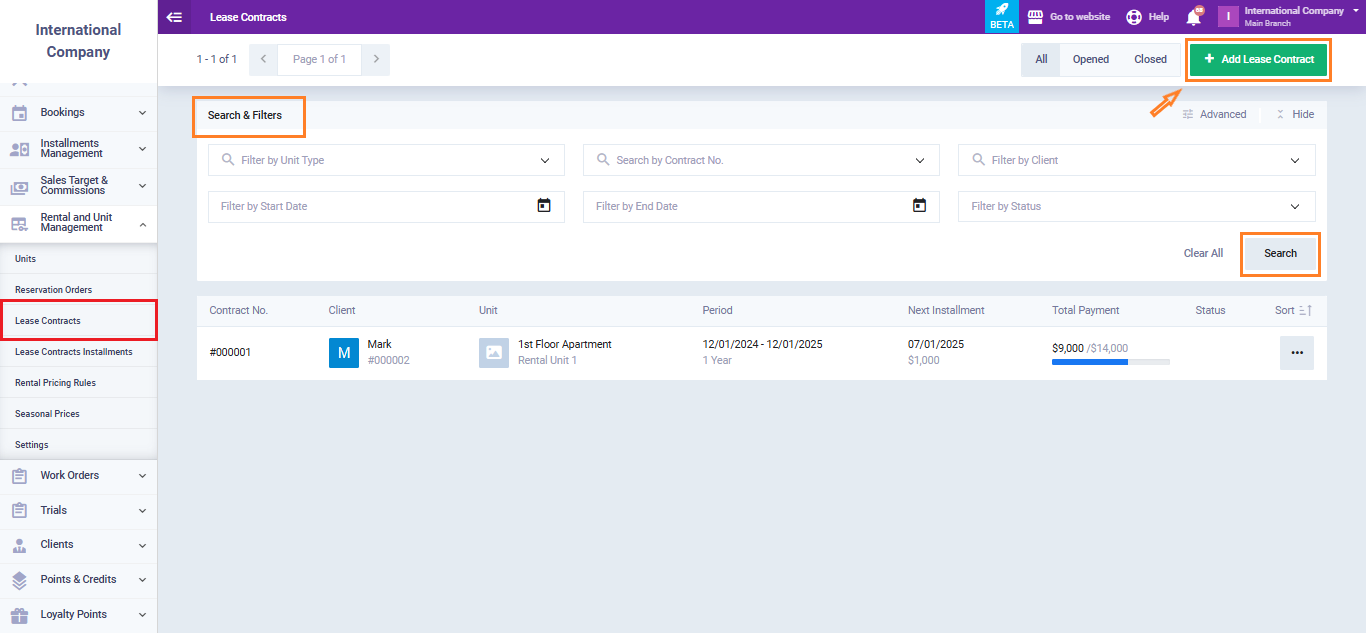
To start, navigate to the “Rental and Unit Management” section from the main menu, then select “Lease Contracts” from the dropdown list.
You’ll be directed to the lease contracts dashboard, which displays all current and past contracts. You can easily:
- Search by client name or unit
- Filter by lease status (active, expired, upcoming)
This centralized view helps you track all agreements immediately and quickly access important details.
Add Lease Contract
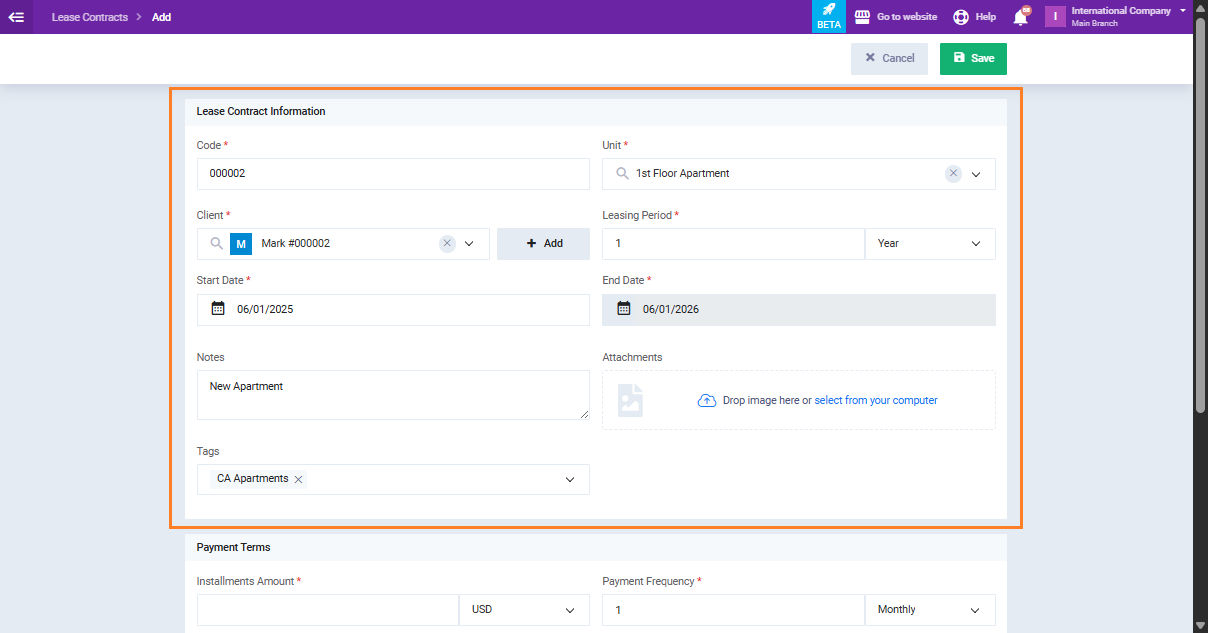
Creating a new lease contract requires filling in various fields across two sections:
- Lease Contract Information
- Payment Terms
To create a new lease contract, click the “Add Lease Contract” button.
- Lease Contract Information
Fill in the following fields:
- Code: Enter a unique code to easily identify each lease contract.
- Unit: Select the property or unit that is being leased.
- Client: Choose the client who will be leasing the unit.
If the client is not already registered in the system, click the ‘+Add‘ button to add a new client.
- Leasing Period: Define how long the lease will last (e.g., 1 year, 6 months).
- Start Date: The date when the lease begins.
- End Date: The date when the lease ends.
- Notes: Any additional remarks or important details about the contract.
- Attachments: Upload supporting documents such as signed contracts or ID copies.
- Tags: Keywords or labels to help categorize and search for the contract.
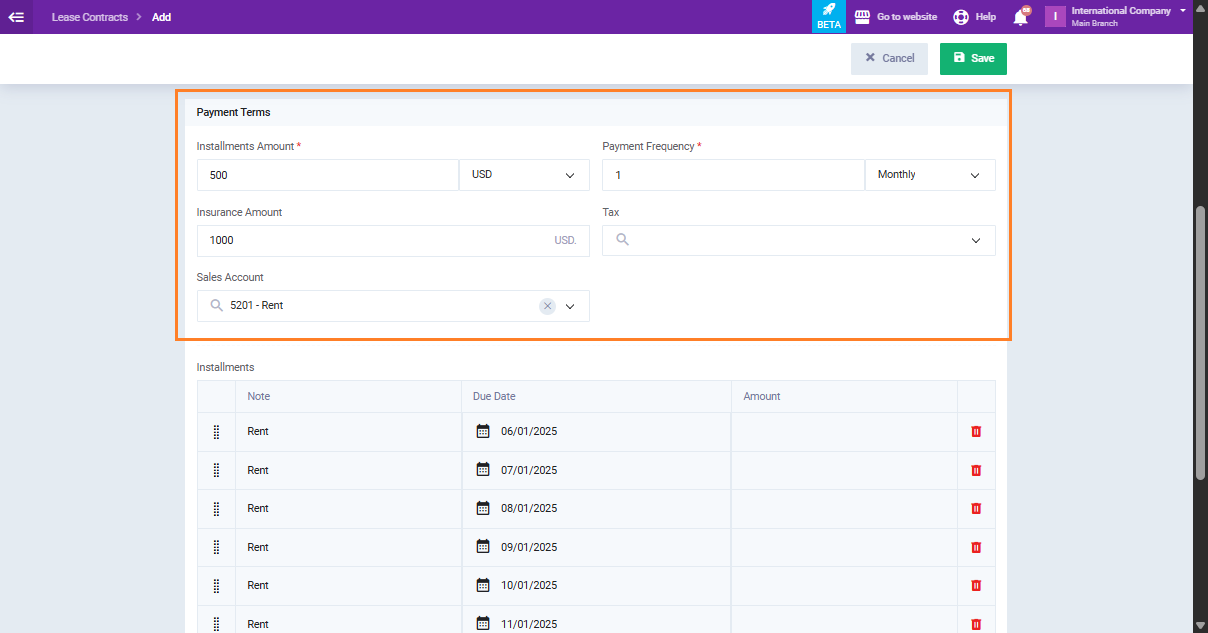
- Payment Terms
This section helps define the financial structure of the lease. Enter the following:
- Installment Amount: The fixed amount to be paid in each installment during the lease period.
- Payment Frequency: How often the client will make payments (e.g., monthly, quarterly, annually).
- Insurance Amount: The security deposit or insurance fee required for the lease.
- Tax: The applicable tax rate or amount added to the lease payment.
- Sales Account: The accounting ledger where lease revenue will be recorded.
- Installments: A breakdown of all scheduled payments, including dates and amounts.
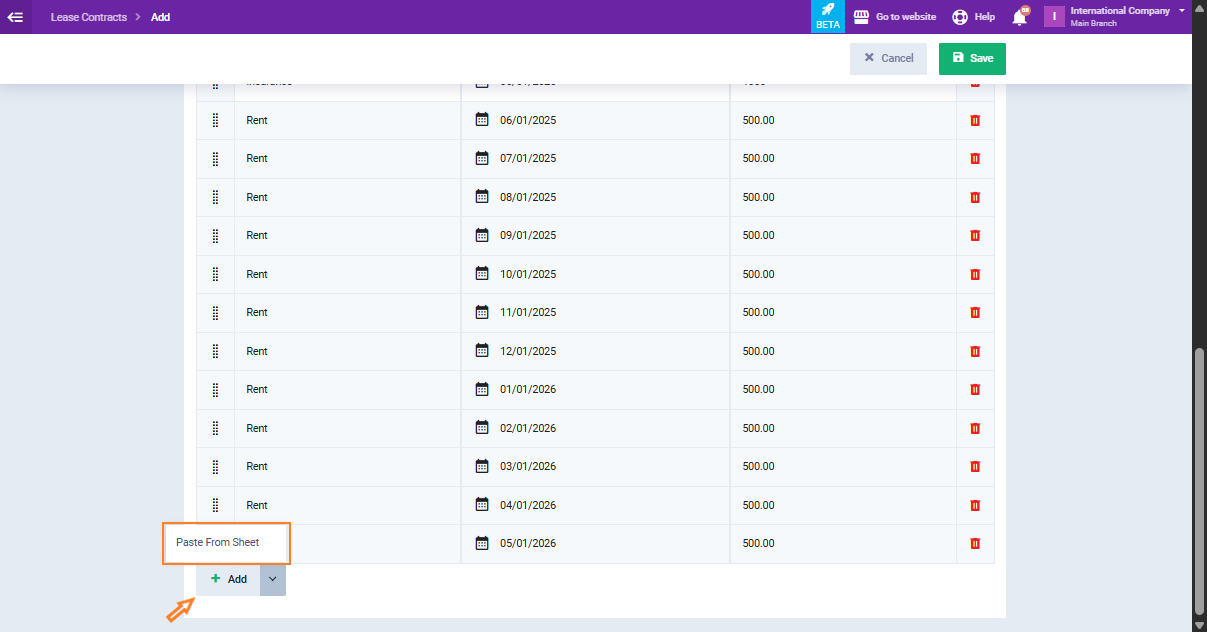
The system can auto-generate installments based on your input. However, if you need to adjust the payment plan:
- Click “Add” to create a manual installment.
- Enter the due date and amount, then click Save.
- You can also paste installment data directly from an Excel sheet for bulk input.
This flexibility ensures that lease terms can reflect any specific agreement with the client.
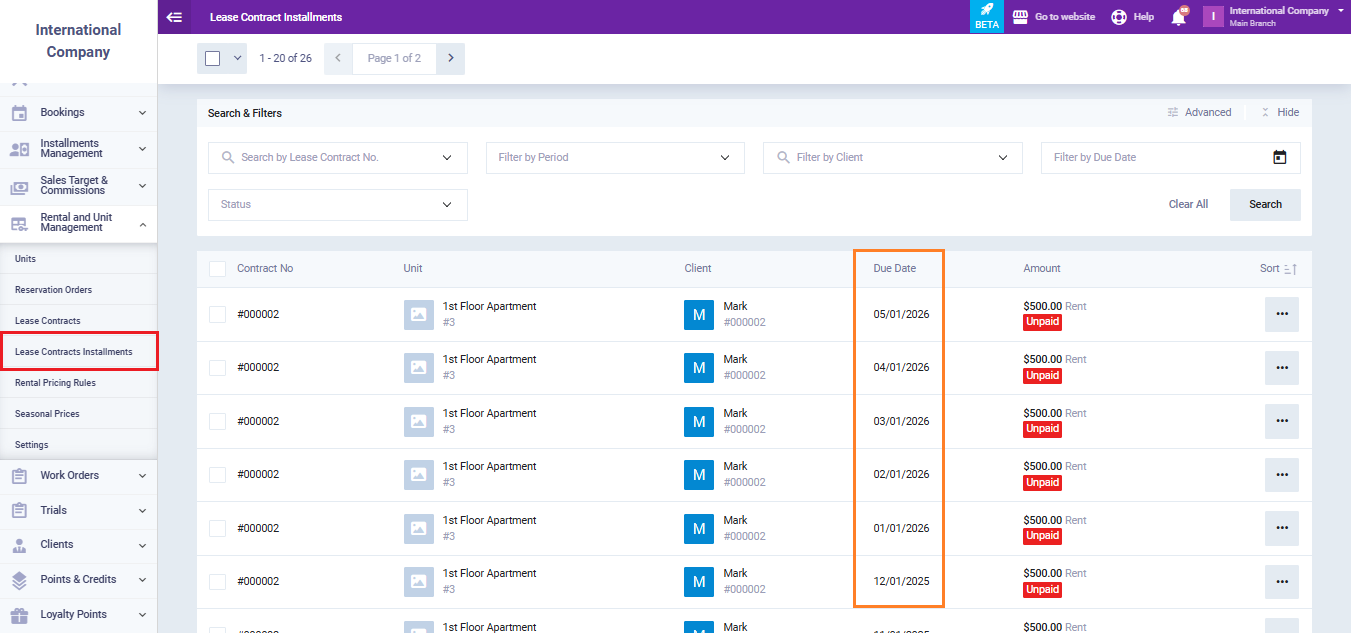
Lease Contract Installments
After successfully saving the leasing contract, navigate to “Lease Contracts Installments” from the dropdown menu of “Rental and Unit Management“.
In this page you’ll find the following:
- A table displays detailed lease installment records for all units leased to various clients, including due dates, amounts, and payment statuses.
- A list of all installment records linked to lease contracts. Each row represents a scheduled installment and includes the following key fields:
-
- Contract number
- Unit
- Client
- Due Date
- Amount
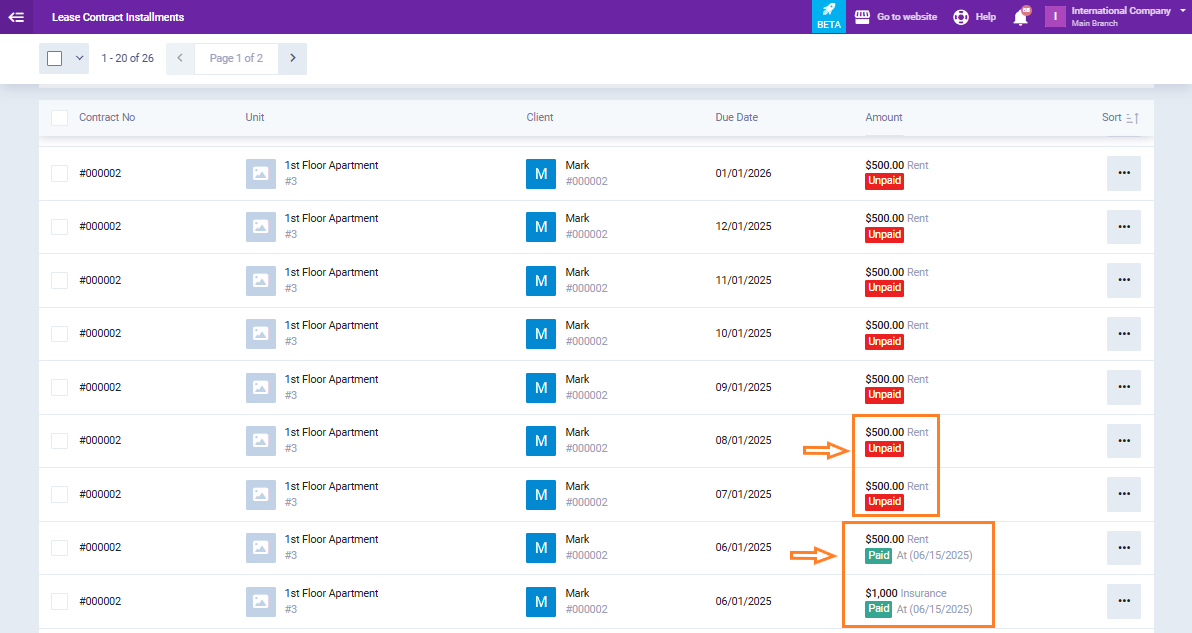
Certain dues, such as insurance payments and manually added amounts, appear with a tag next to the status that indicates whether the amount is paid or unpaid.
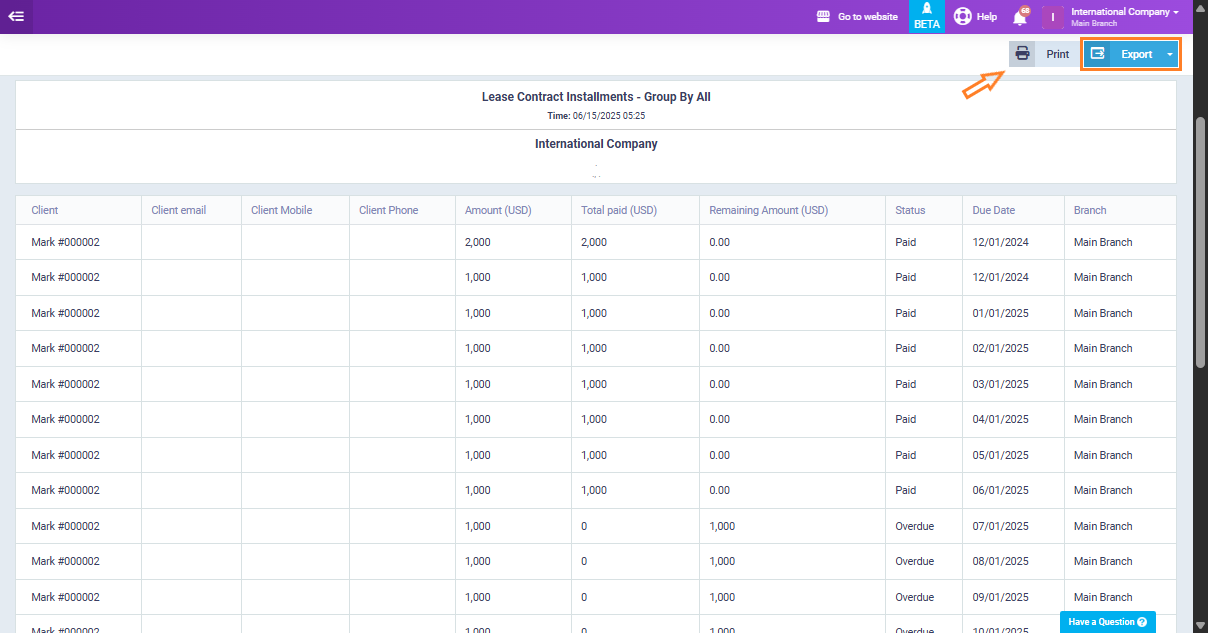
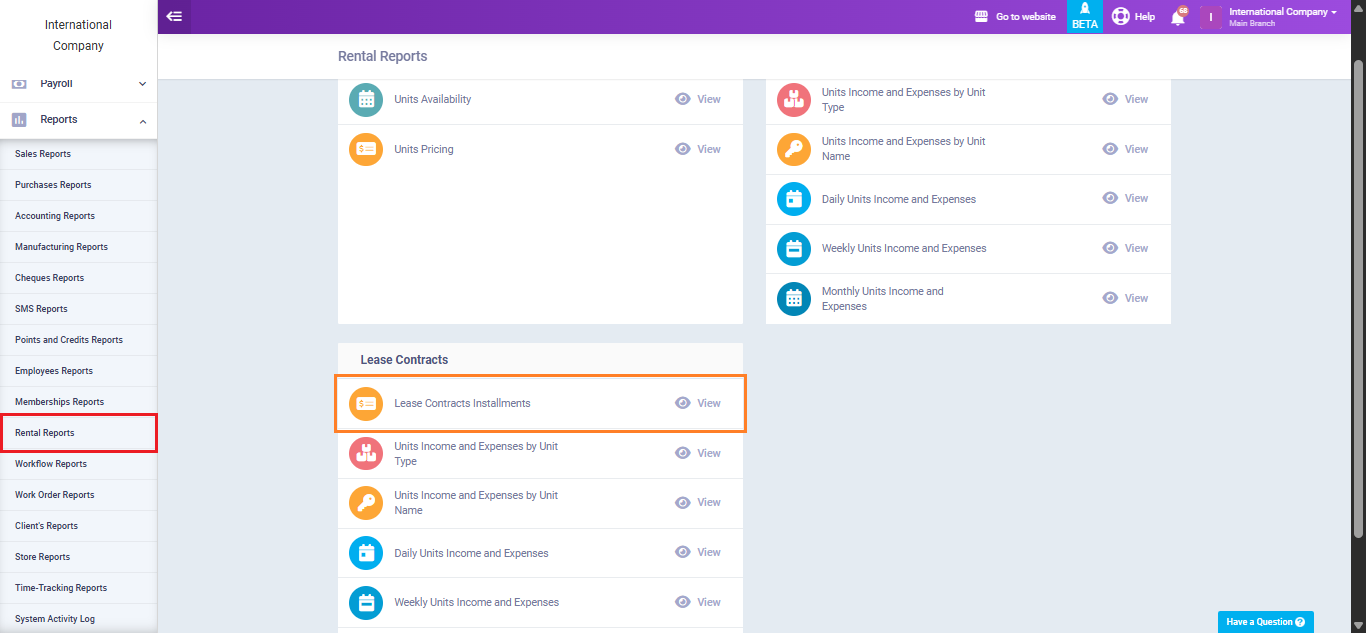
Lease Contract Reports
The system offers a comprehensive “Rental Report” that consolidates essential details for all clients, including rental amounts, total payments made, outstanding balances, payment status, and upcoming due dates, giving you a clear and organized overview of your rental operations.
From the main menu click on “Reports“, then from the dropdown choose “Rental Reports“, click on “Lease Contract Installments“.
Filter the report by selecting the required fields that match your needs, such as client, unit, status, or due date range, then click on the “Show Report” button.
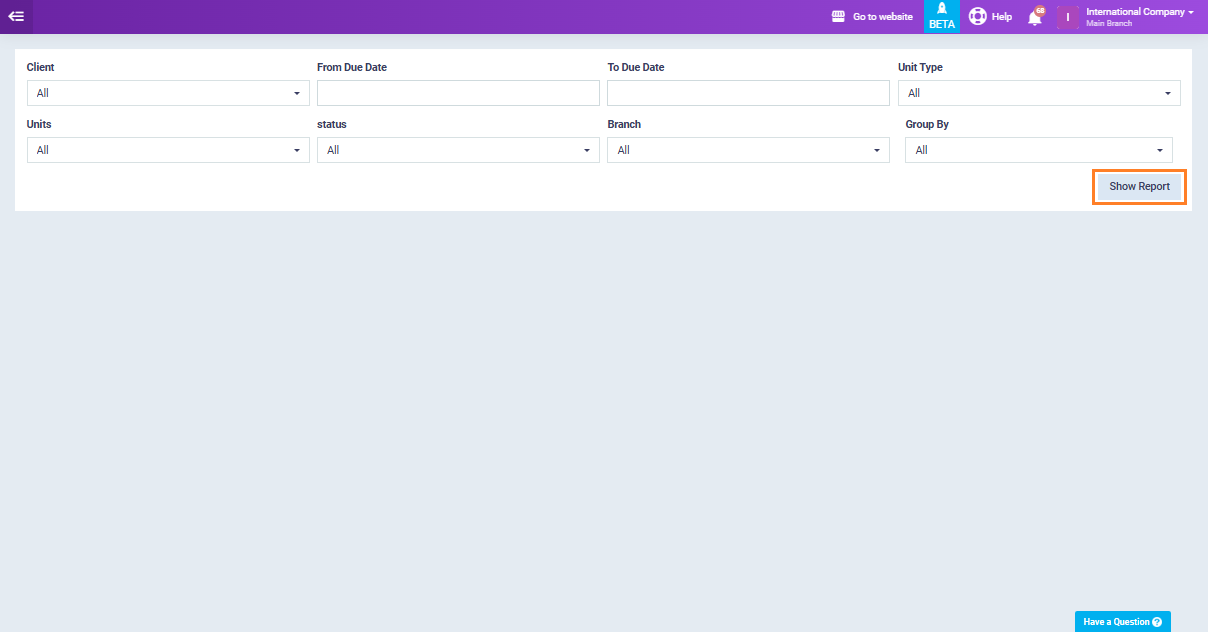
The report will be displayed with the selected fields, providing a clear overview of the filtered leasing data. Additionally, the system offers options to export the report in various formats or print it directly for easy sharing and documentation.