


Adding Treasuries and Bank Accounts on Daftra
Through Daftra you can add your treasuries and bank accounts to track the transactions associated with each treasury or bank account. You can also transfer between different treasuries and accounts, as well as reconcile between the actual bank statement and transactions of the same account in Daftra.
Add Treasury
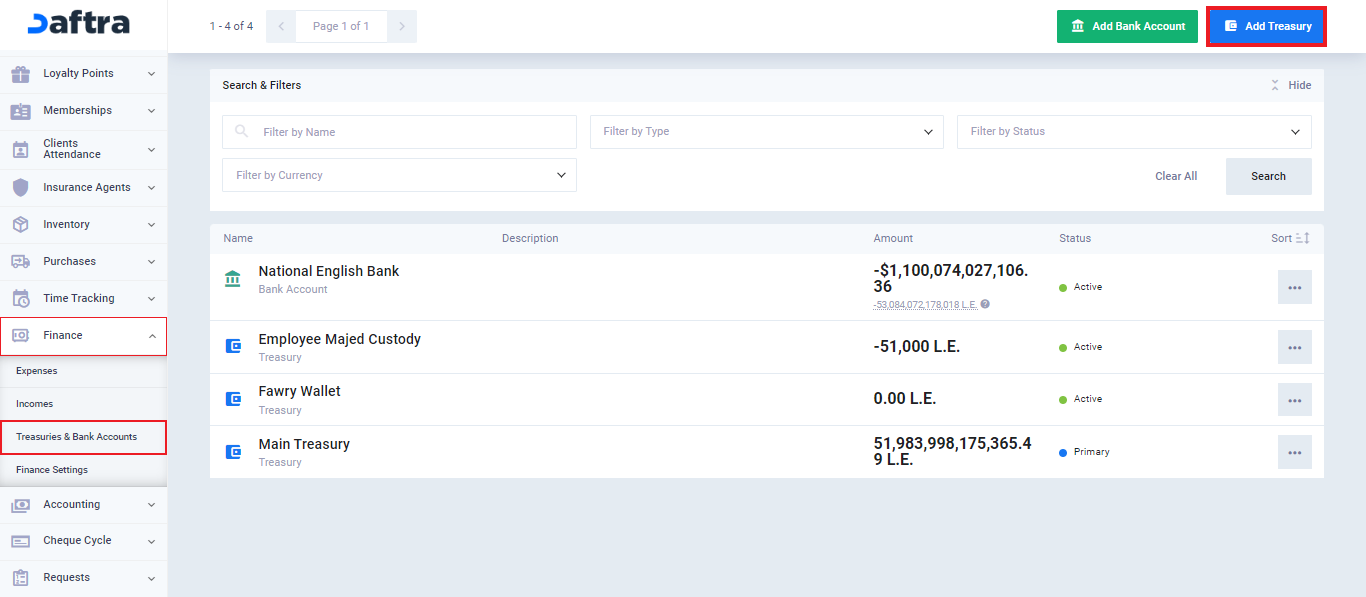
Click on “Treasuries & Bank Accounts” from the dropdown menu of “Finance” in the main menu then click on “Add Treasury“.
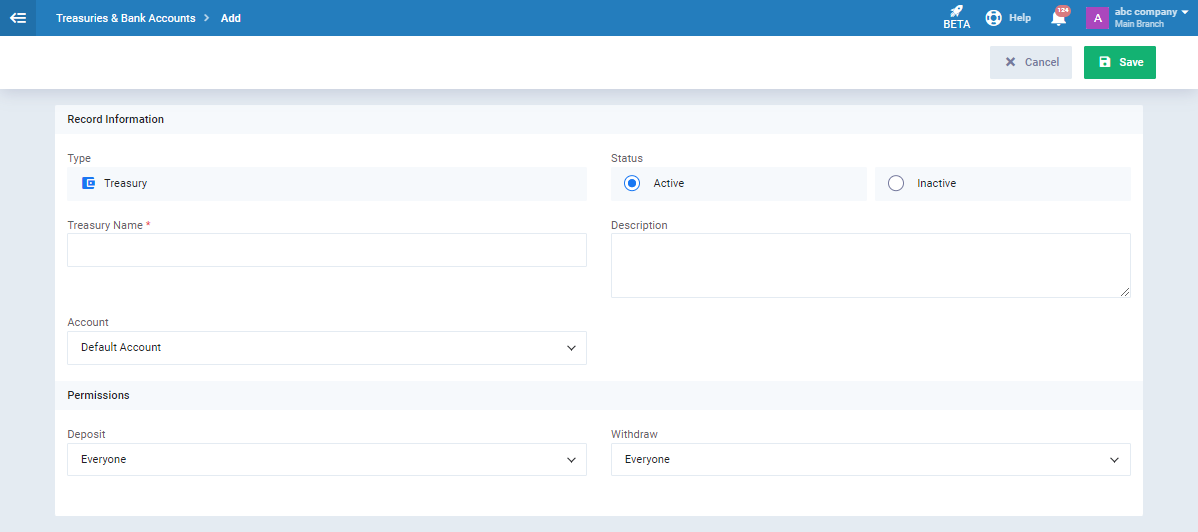
- Add treasury data as required:
- Status: Select “Active” to activate the treasury or “Inactive” to deactivate it.
- Treasury Name: Enter the name of the treasury as you want it to appear in the program’s lists and windows.
- Description: Add a general description of the nature or specialization of the treasury.
- Account: Link the treasury to one of the sub-accounts in the chart of accounts.
- Permissions:
- Deposit: Select from the dropdown menu the deposit permission in the treasury for a specific employee, role, specific branch, or all.
- Withdrawal: Select from the dropdown menu the withdrawal permission from the treasury for a specific employee, role, specific branch, or all.
After finishing, click the “Save” button.
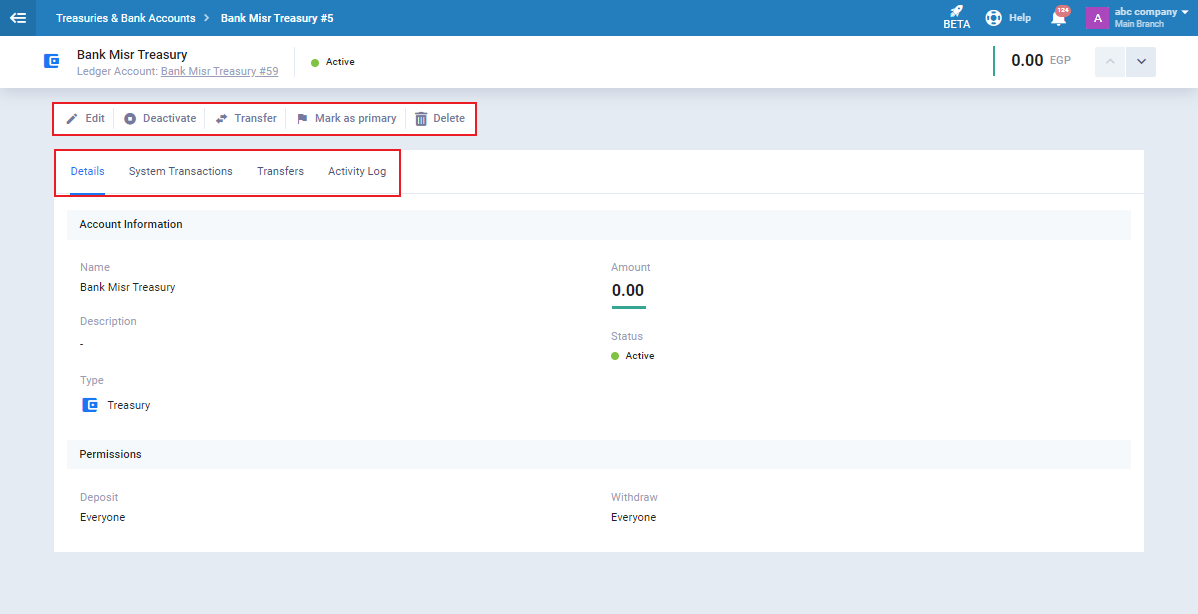
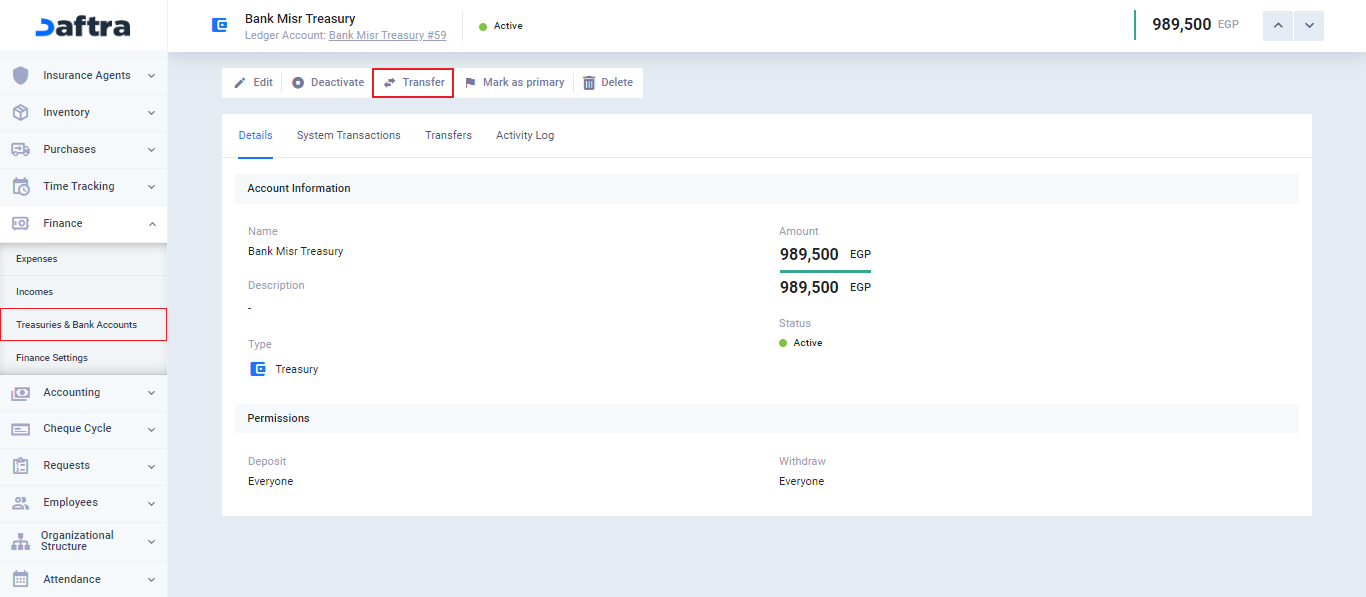
You can perform some actions on the treasury such as:
- Modify the treasury
- Disable the treasury
- Transfer funds to and from the treasury
- Make the treasury primary
- Delete the treasury
You can also access:
- Treasury details
- Transactions related to it in the system
- Previous transfers
- Activity log
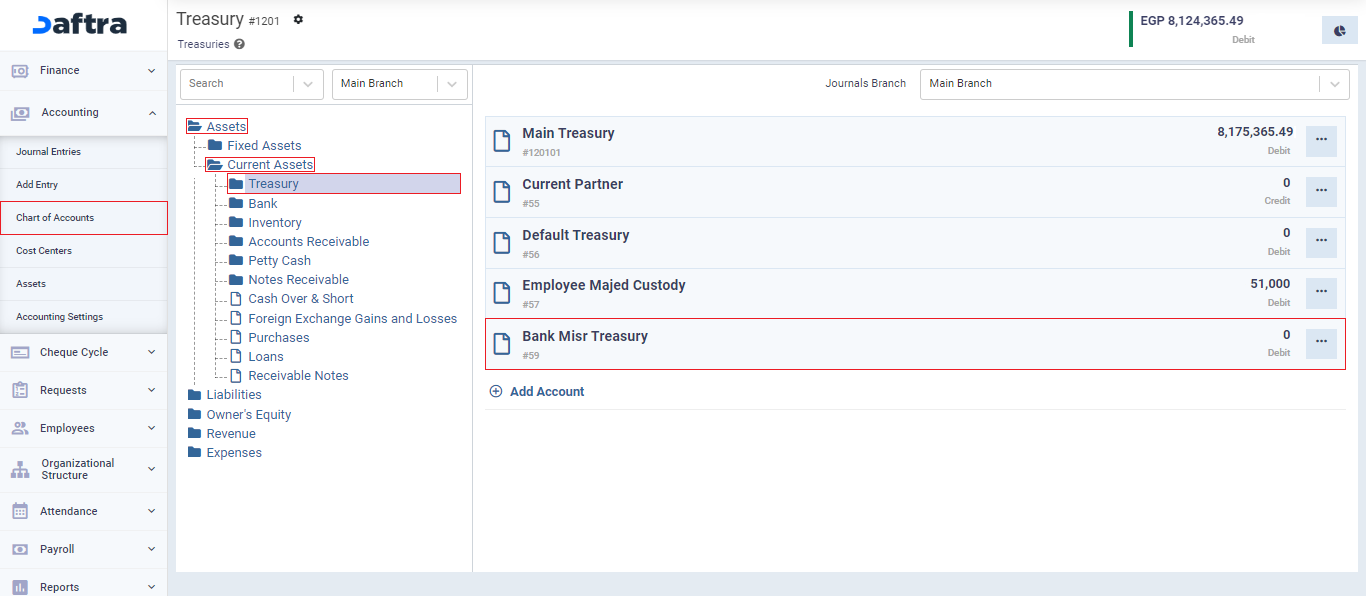
After creating the treasury, an account specific to it is automatically created in the chart of accounts. You can find it listed under current assets in the chart.
Add Bank Account
Click ‘Treasuries & Bank Accounts‘ under ‘Finance‘ in the main menu, then click the ‘Add Bank Account‘ button.

Add bank account details as follows:
- Name: Enter the bank account name as you want it to appear in the program’s lists and windows.
- Bank Account Name: Enter the name of the bank account within the bank.
- Bank Account Number: Enter the bank account number within the bank.
- Currency: Select the currency used in the bank account.
- Status: Choose “Active” to activate the bank account or “Inactive” to deactivate it.
- Description: Add a general description of the nature or specialization of the account.
- Account: Link the bank account to one of the sub-accounts in the chart of accounts.
- Permissions:
- Deposit: Select from the dropdown menu the deposit permission in the bank account for the employee, role, branch, or all.
- Withdrawal: Select the withdrawal permission from the bank account for the employee, role, branch, or all.
- Then click the “Save” button.

You can perform some actions on the bank account such as:
- Modify the bank account
- Disable the bank account
- Transfer funds to and from the bank account
- Make the bank account primary
- Import bank statement
- Delete the bank account
You can also access:
- Bank account details
- Transactions related to it in the system
- Bank statement
- Previous transfers
- Activity log

After creating the bank account, a corresponding account is automatically created for it in the chart of accounts. You can find it listed under the bank category under current assets in the chart.

Transferring Financial Amounts Between Treasuries and Bank Accounts
Select the desired treasury/bank account.
Click on the “Transfer” button.
- Adjust the “Treasury” and “Currency” fields on the “From” side.
- Enter the desired amount to transfer from the treasury in the “Amount” field.
- Adjust the “Treasury” and “Currency” fields on the “To” side.
- Select the transfer date and time inside the “Transfer Date” field.
- Record any additional notes in the “Notes” section.
- Click on the “Transfer” button.
