Uploading a Purchase Invoice Via AI
Creating purchase invoices manually from paper or digital invoices can be time-consuming and prone to errors. To simplify this process, the system automatically generates purchase invoices using AI. Simply upload the invoice file, and the system will extract the supplier, products, taxes, and discounts, then present them for your review before final saving.
Step one: Files Upload
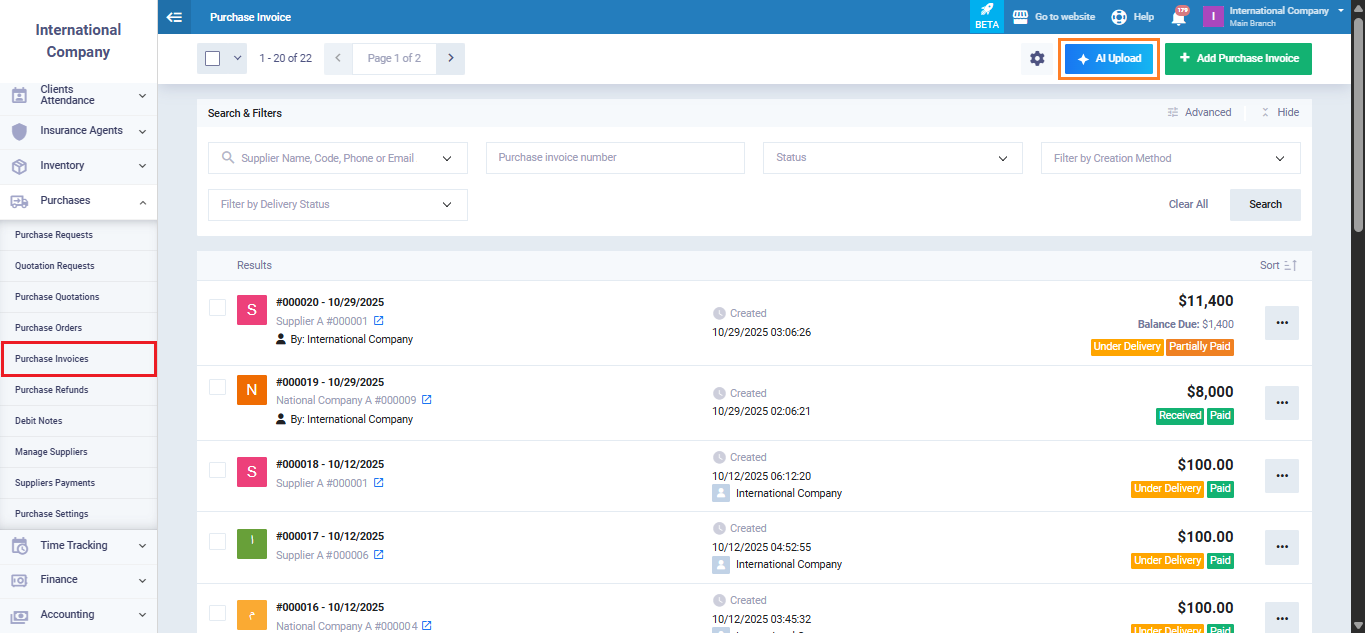
Go to “Purchases Invoices” from the main menu, then click “AI Upload.”
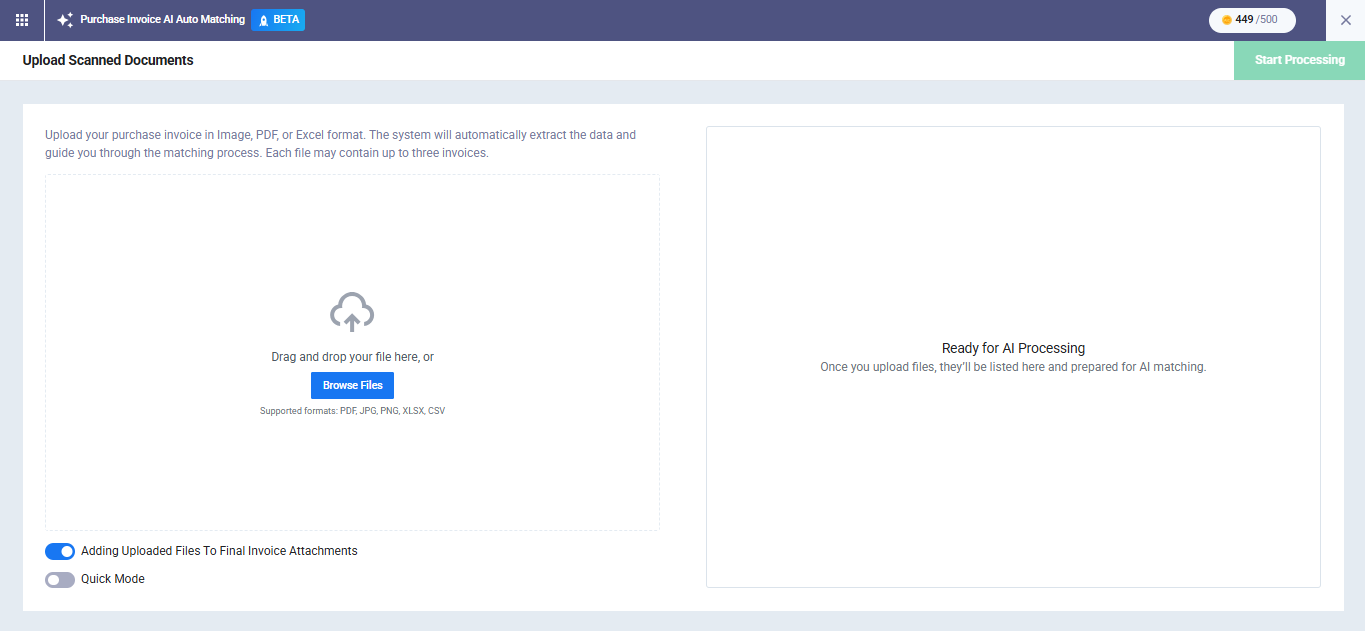
The upload screen will appear, supporting two methods: drag and drop files into the designated area, or click “Browse Files” to open the file browser on your device.
The system accepts the following file types: PDF, PNG, JPG, XLSX, CSV, with a maximum size of 10 MB per file. You can upload up to 100 files in a single batch.
Instant File Check
Once files are selected, the system immediately performs a quick check on each file. The result appears next to each file in the list:
- Ready for Review: The file is valid and ready for processing.
- Failed: The file is rejected with a clear reason, unsupported file type, file size exceeding 10 MB, corrupted file, or duplicate file.
You can delete any file from the ready list before starting processing. The file list is automatically saved as a draft batch, which can later be resumed by any authorized user.
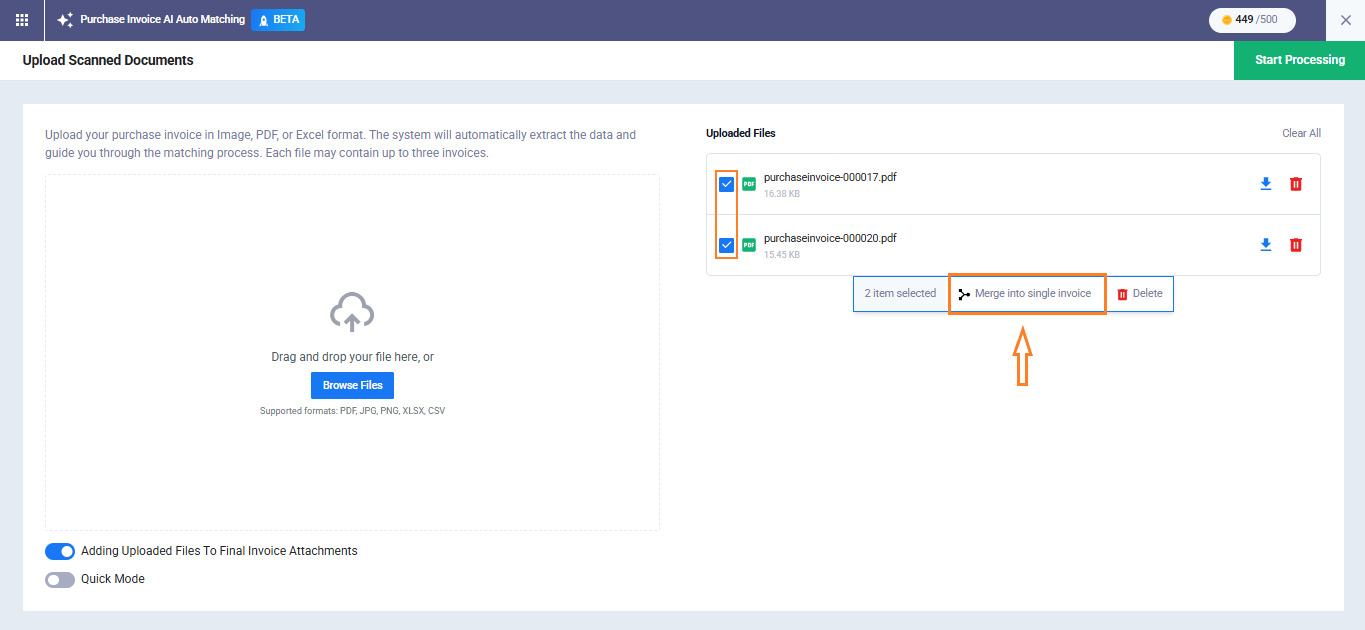
Merge Multiple Files into One Invoice
If a single invoice is distributed across multiple files, you can select two or more files by checking the box beside each one. The “Merge into Single Invoice” button will appear automatically.
When clicked, the selected files are grouped into one box, indicating that they will be processed together as a single invoice. In the preview screen, merged files appear in a carousel view to easily navigate between them.
Attach the Original File to the Created Invoice
At the bottom of the screen, you will find the option “Attach the uploaded invoice file to the created invoice in the system.”
Enable this option if you want the original file to be saved as an attachment to the invoice after it is created.
When at least one file has the status “Ready,” the “Start Processing” button becomes active. Click it to proceed to the next step.
Step Two: File Processing
On this screen, the AI begins extracting invoice data from the files sequentially, one after another. Click the “Start Processing” button to begin the process.
The top bar of the screen displays: the batch number, total files, AIC balance, a percentage progress bar, and counters for each status.
The top bar of the screen displays:
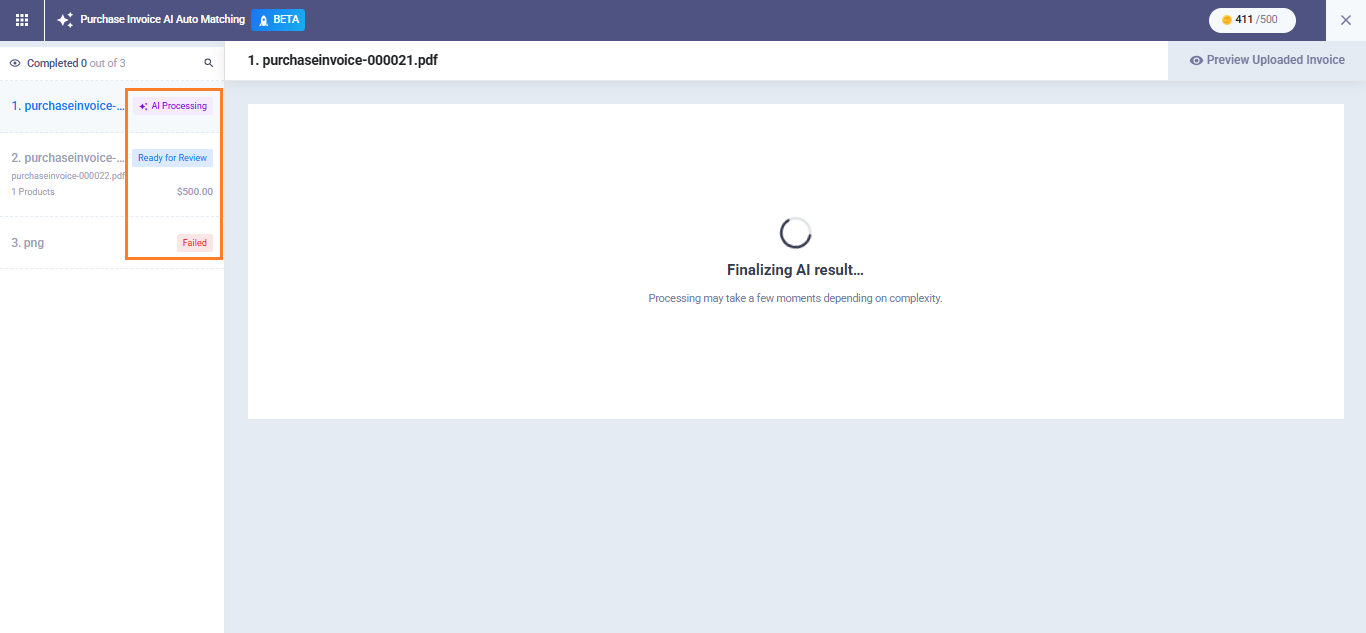
File Statuses During Processing
- Queued: Processing has not started yet. The file can still be removed.
- Processing: AI is currently extracting the data. The file cannot be removed.
- Ready for Review: Processing is complete and waiting for your review.
- Completed: The invoice has been reviewed and saved.
- Failed: Processing failed with a clear reason and a retry option.
- Limit Reached: AIC balance has run out and processing has stopped.
You can pause the batch, resume it later, or cancel all remaining files at any time. You may also leave the page and return later; the batch will remain in the same state.
When all files are processed, the batch status becomes “Finished.” You can then proceed to review the invoices or go directly to the “Purchase Invoices” list.
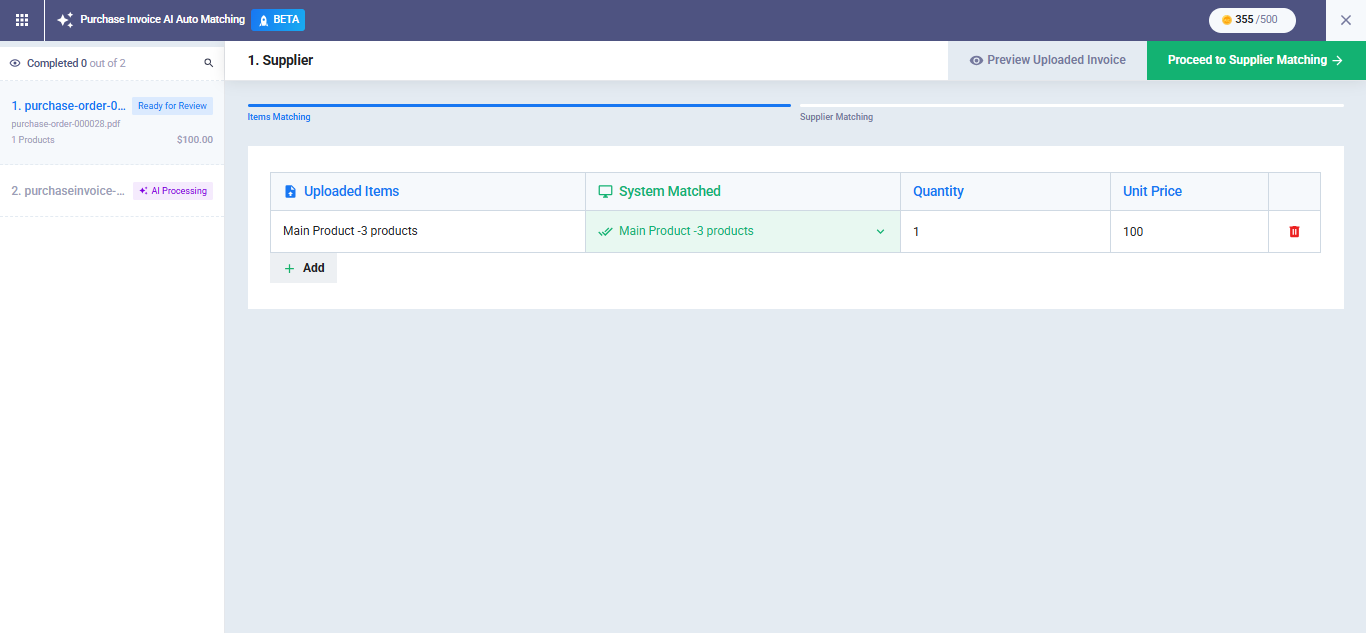
Step Three: Items Matching
After processing is complete, you will be taken to the review screen. The system displays a table for each invoice item including:
- Detected product
- Matched product in the system
- Quantity
- Unit of measurement
- Unit price
- Total
For each item, you can:
- Confirm the suggestion: Accept the product suggested by the system.
- Choose an alternative suggestion: From the dropdown list showing other AI suggestions.
- Search manually: Click “Add Product Manually” to search through all system products (results from the selected supplier appear first).
- Create a new product: Click “Add New Item” at the end of the list to open a quick creation form. The product name, unit, and price fields are automatically filled from the invoice data.
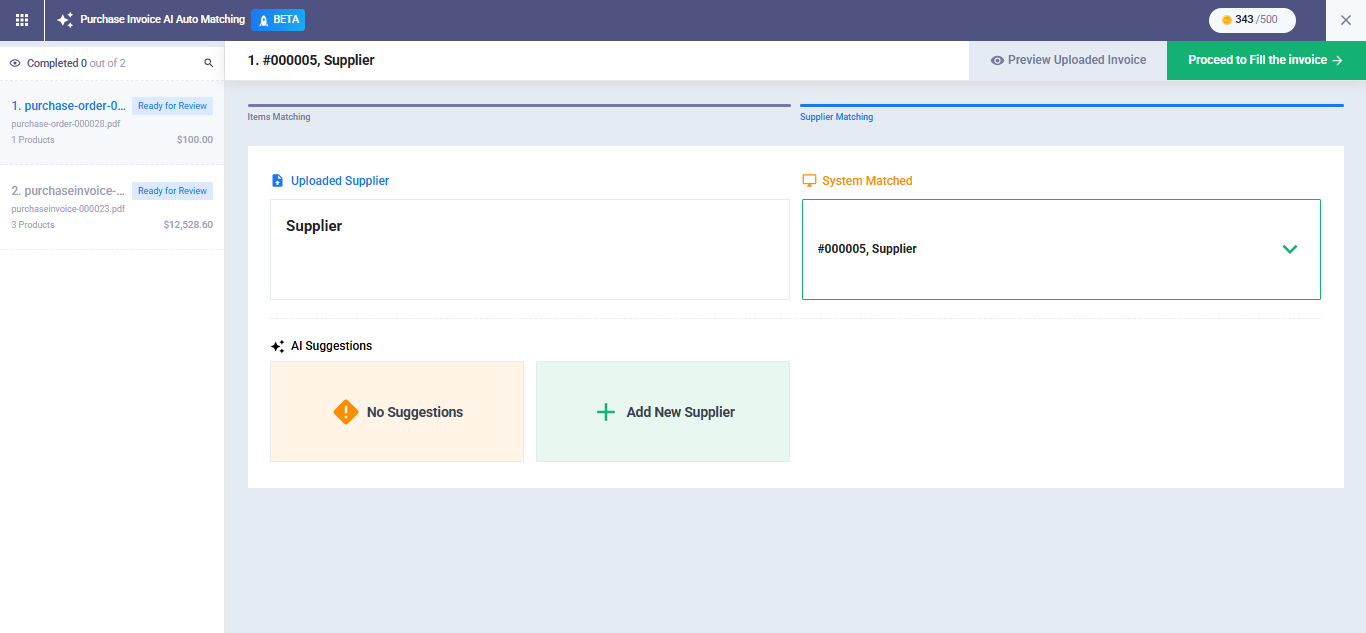
Step Four: Supplier Matching
After matching the products, you proceed to supplier matching.
On the left side of the screen, a panel displays all invoices in the batch and the status of each one. Invoices are reviewed sequentially through four steps, starting with supplier matching.
In this step, the system displays four sections:
- Extracted Information from the Invoice: Data read by the AI (supplier name, tax number, commercial registration number, etc.).
- Matched Supplier: The best match found in your account’s supplier database.
- AI Suggestions: Up to two alternative suggestions with the reasoning for each.
- Manual Selection: Search existing suppliers or create a new one.
Matching accuracy depends on the type of detected data:
Tax number or commercial registration match: High confidence (≥ 90%)
Name-only match: Medium confidence (70–89%)
Below 70%: Low confidence, manual search or creation is recommended
Creating a New Supplier from the Screen
If none of the suggestions match the correct supplier, click “Add New Supplier.”
A sidebar will open with fields automatically filled using the invoice data:
- Supplier name
- Country
- Tax number
- Commercial registration number
- Phone number
- Address
The only required field is “Supplier Name“.
If the system detects another supplier with the same tax number or commercial registration number, a warning appears allowing you to either use the existing supplier or continue creating a new one.
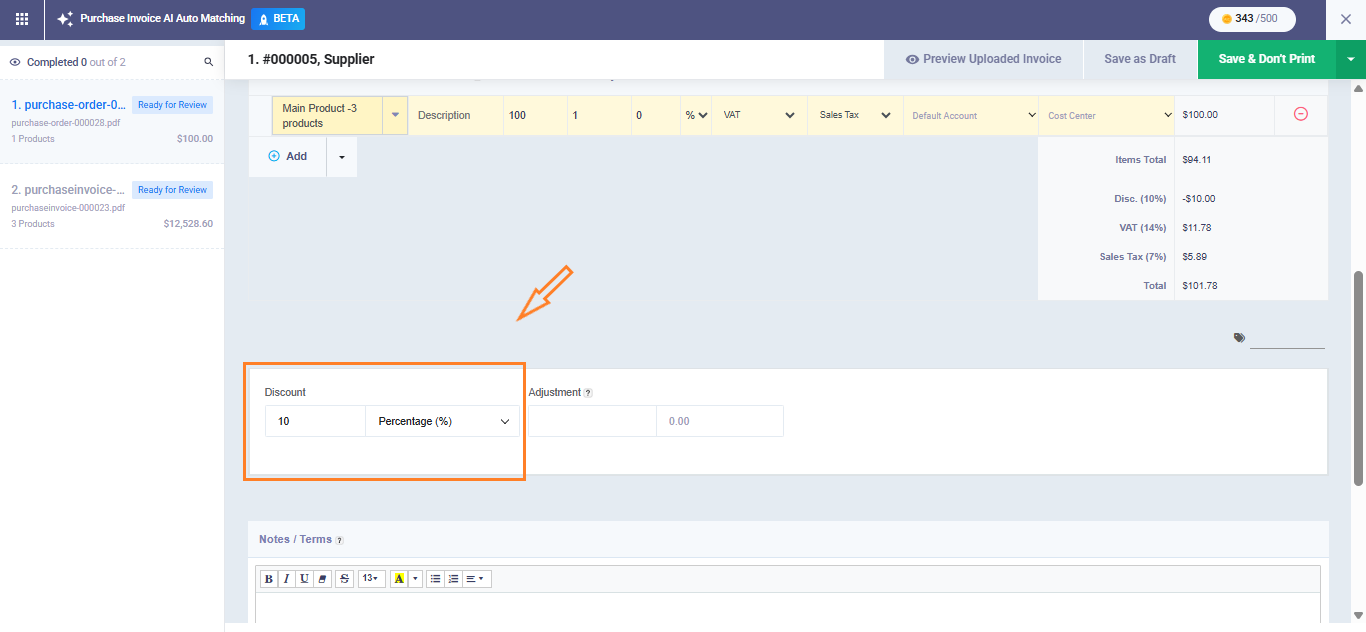
Step Five: Review Taxes and Discounts
After completing product matching, the system automatically extracts taxes and discounts and distributes them across the invoice items.
Taxes:
The tax process happens in two stages:
The system detects the tax types present in the invoice and displays them for confirmation.
It then automatically distributes the taxes across the product items.
If the invoice contains one total tax amount at the bottom, the system calculates the proportional share for each item and distributes it automatically.
If the tax is inclusive (included in the price), the system calculates the pre-tax price and displays it separately.
You can modify any suggested tax by selecting a different tax from the dropdown menu or adding a new tax not detected by AI. Any manual adjustment will be marked with “Edited by User.”
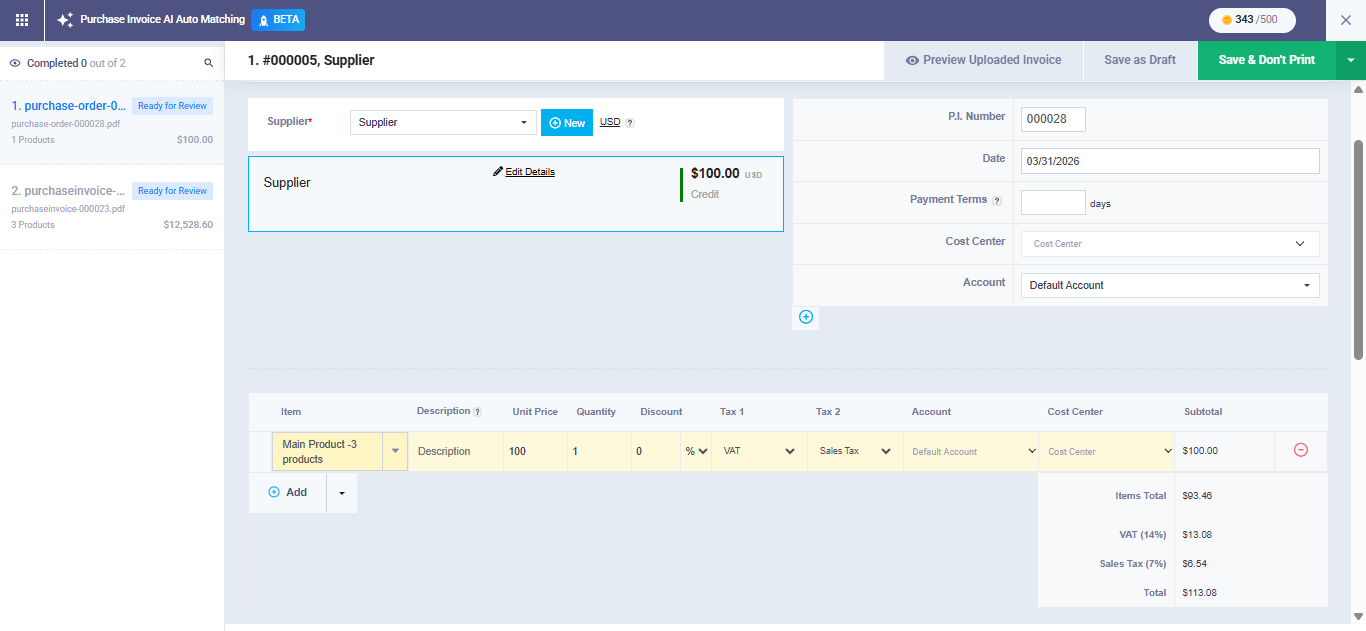
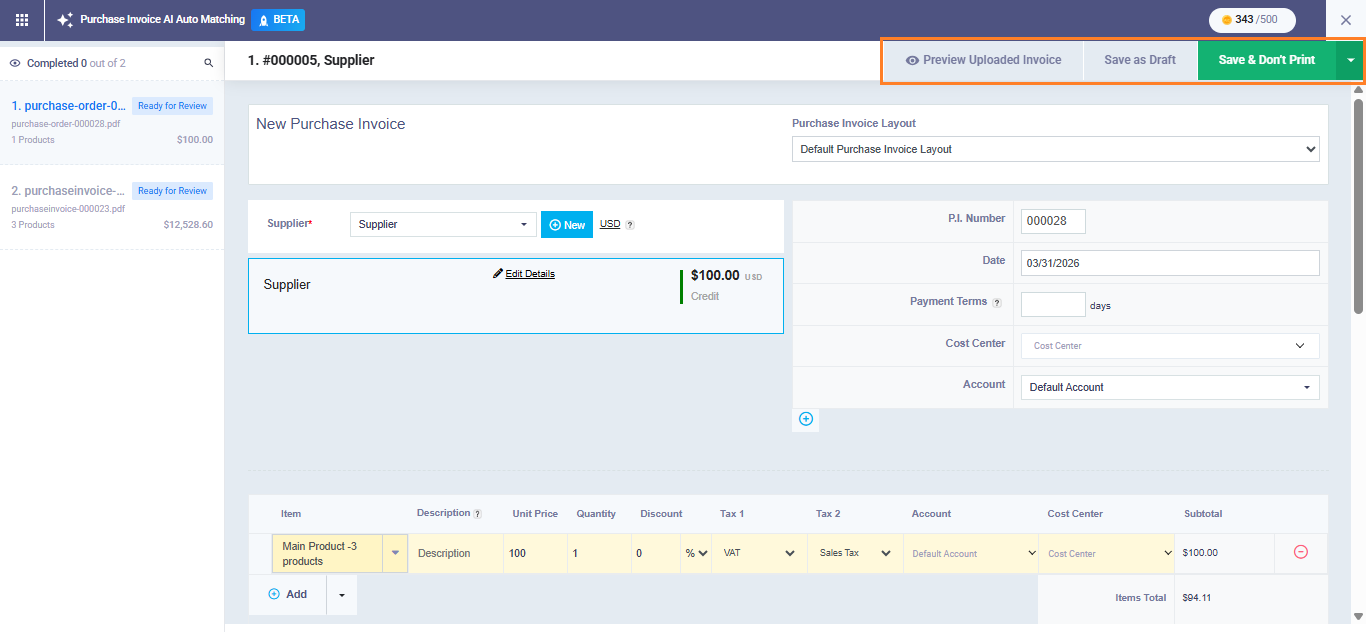
Step Six: Save the Invoice
After reviewing taxes and discounts, the invoice appears in the standard invoice interface, with all fields filled and ready to be saved. You can review and modify any field before final saving.
The system automatically saves your progress every 30 seconds in the background to prevent data loss if the browser is closed or the connection is interrupted.
You can leave the screen and return later. When you click upload invoices again, a list of in-progress batches will appear so you can resume where you left off.
Click “Save & Don’t Print” to officially create the purchase invoice in the system. After saving, the system automatically moves you to the next invoice in the batch, and once the final invoice is saved, you will be redirected to the purchase invoices list.
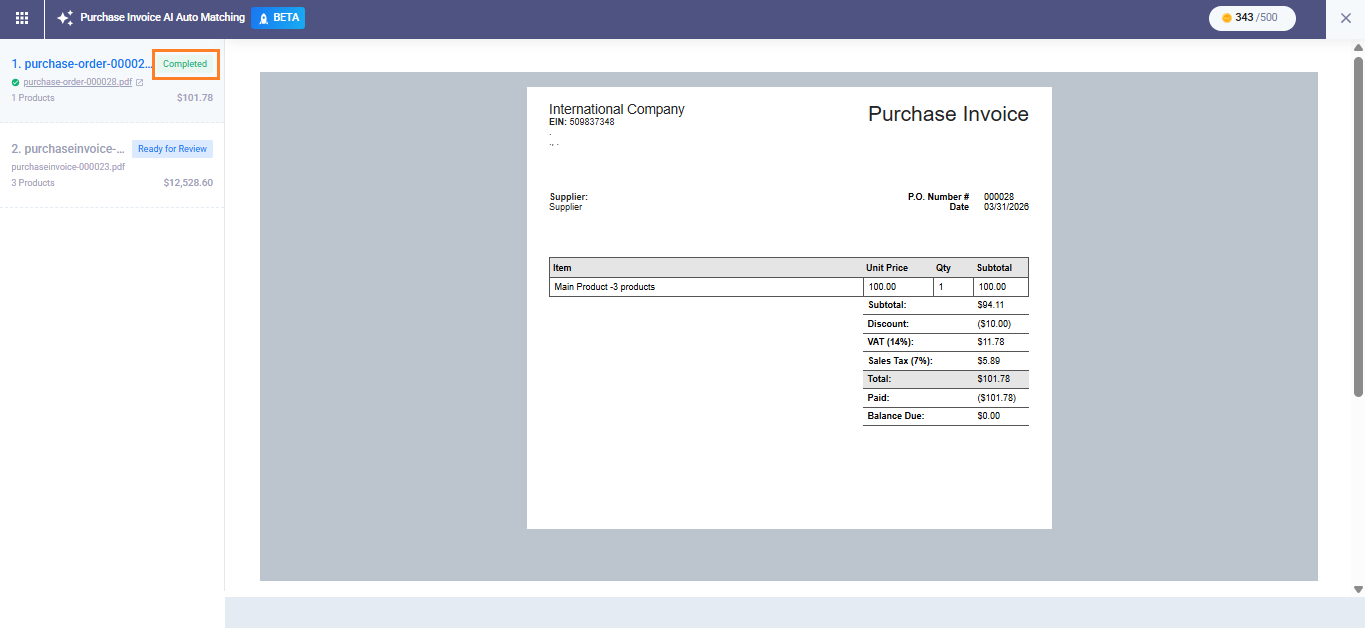
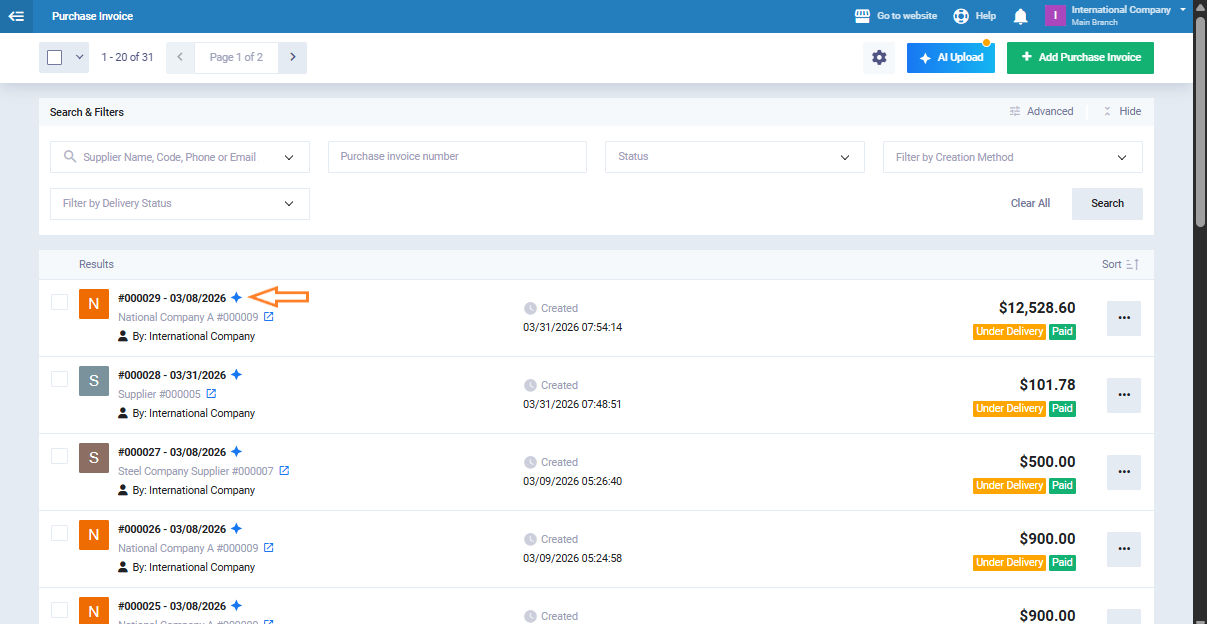
Identifying AI-Created Invoices
After saving, the invoice appears in the Purchase Invoices list with an AI icon next to it, distinguishing it from invoices entered manually.
You can also filter invoices using the “Creation Method” filter to display:
Manual
Via AI
All