Mileage Tracking
The mileage tracking system simplifies the accounting process by automatically calculating the travel costs based on the distance traveled. This way, businesses can easily manage travel-related expenses without manual entry, ensuring accuracy and saving time during tax season.
This tutorial will walk you through the steps, explaining each step and how it all works.
How to Add New Mileage?
To start using mileage tracking, the first step is to enable the feature in your system:
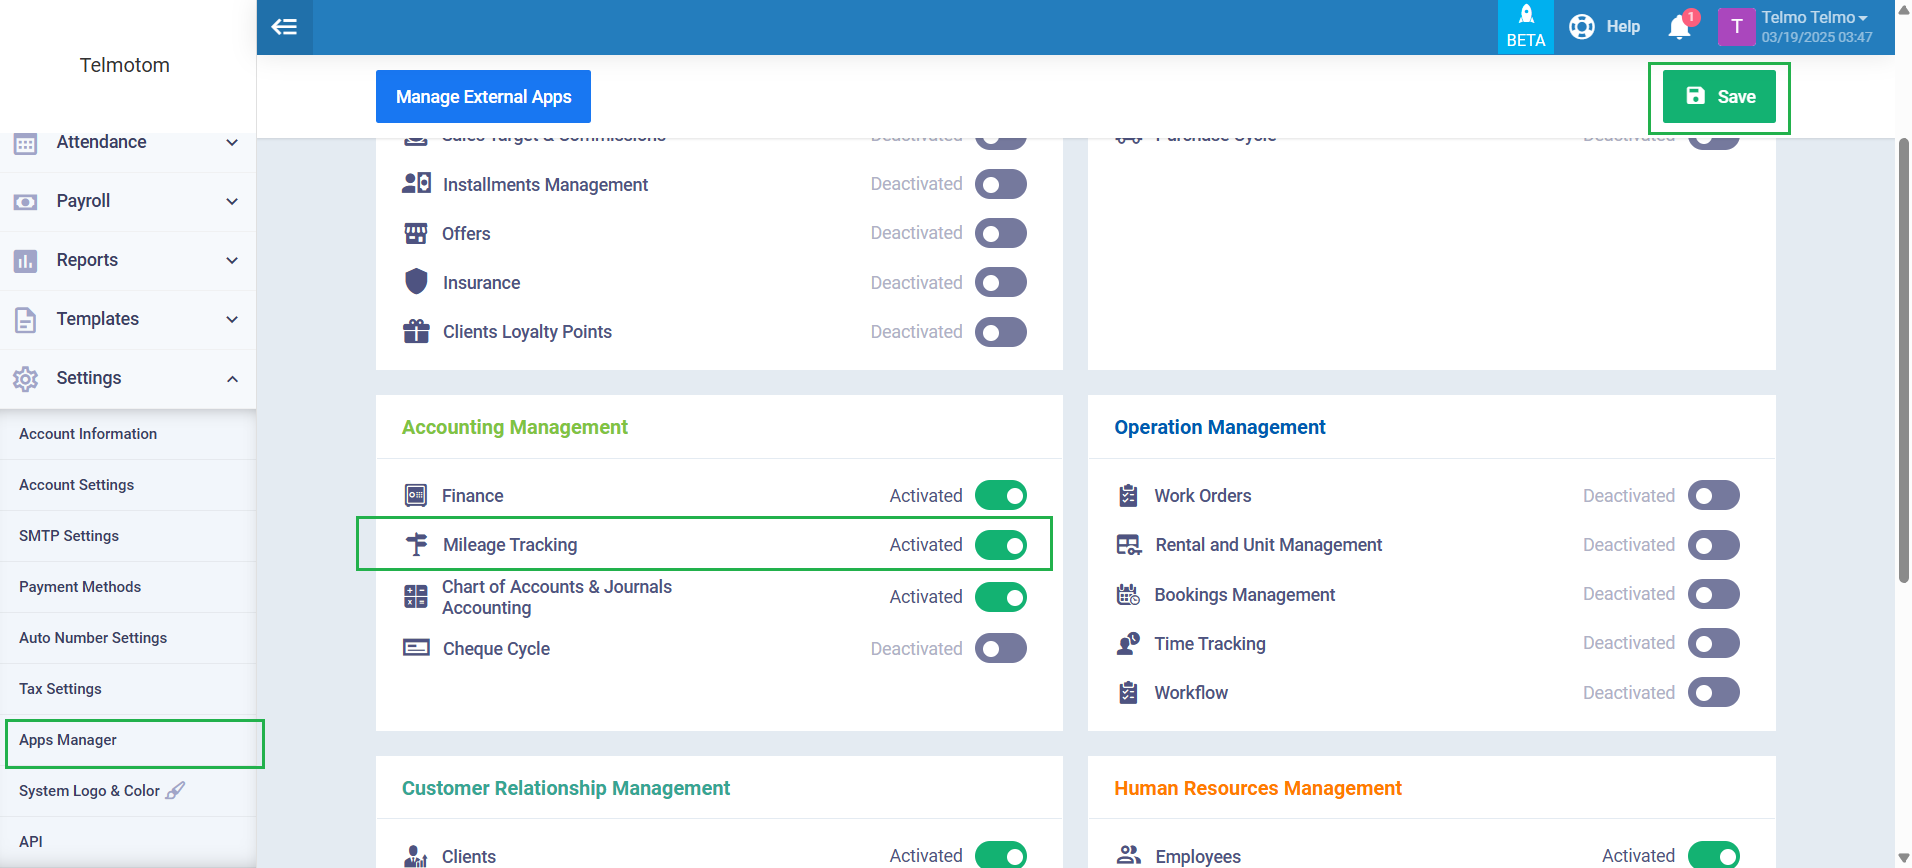
Click on “Settings” from the main menu, then click on “Apps Manager.”
Enable the “Mileage Tracking plugin.”
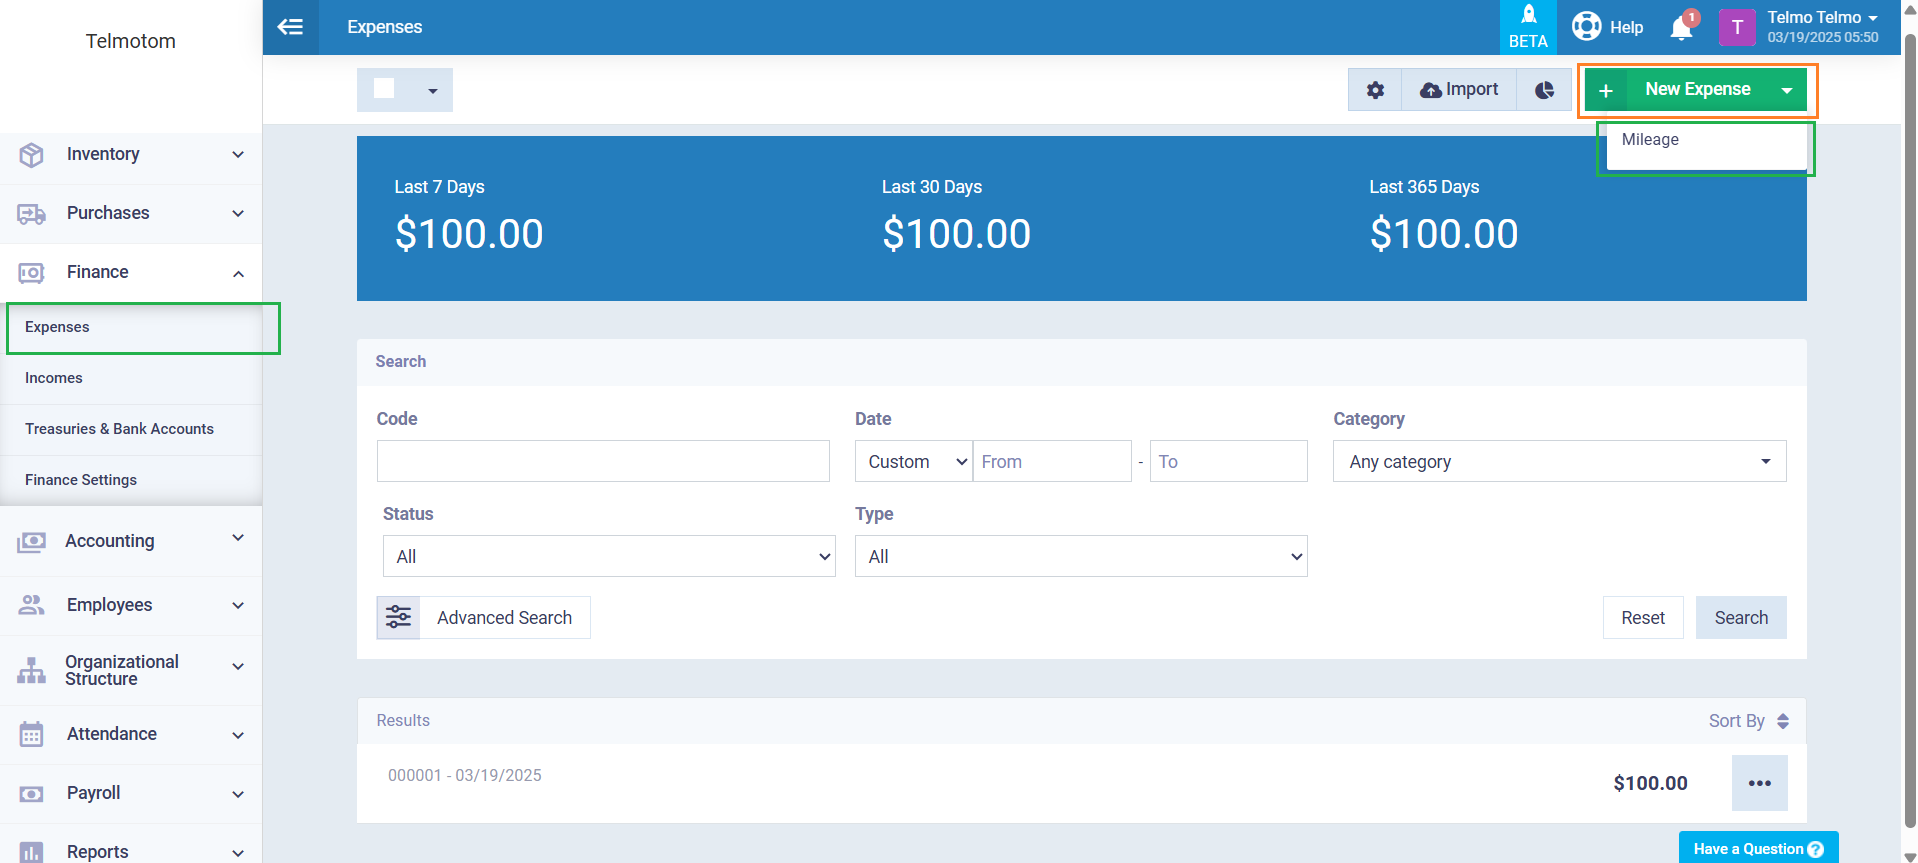
Click on “Finance” from the main menu, then click on “Expenses.”
Click on the arrow next to “New Expense,” then click on “Mileage.”
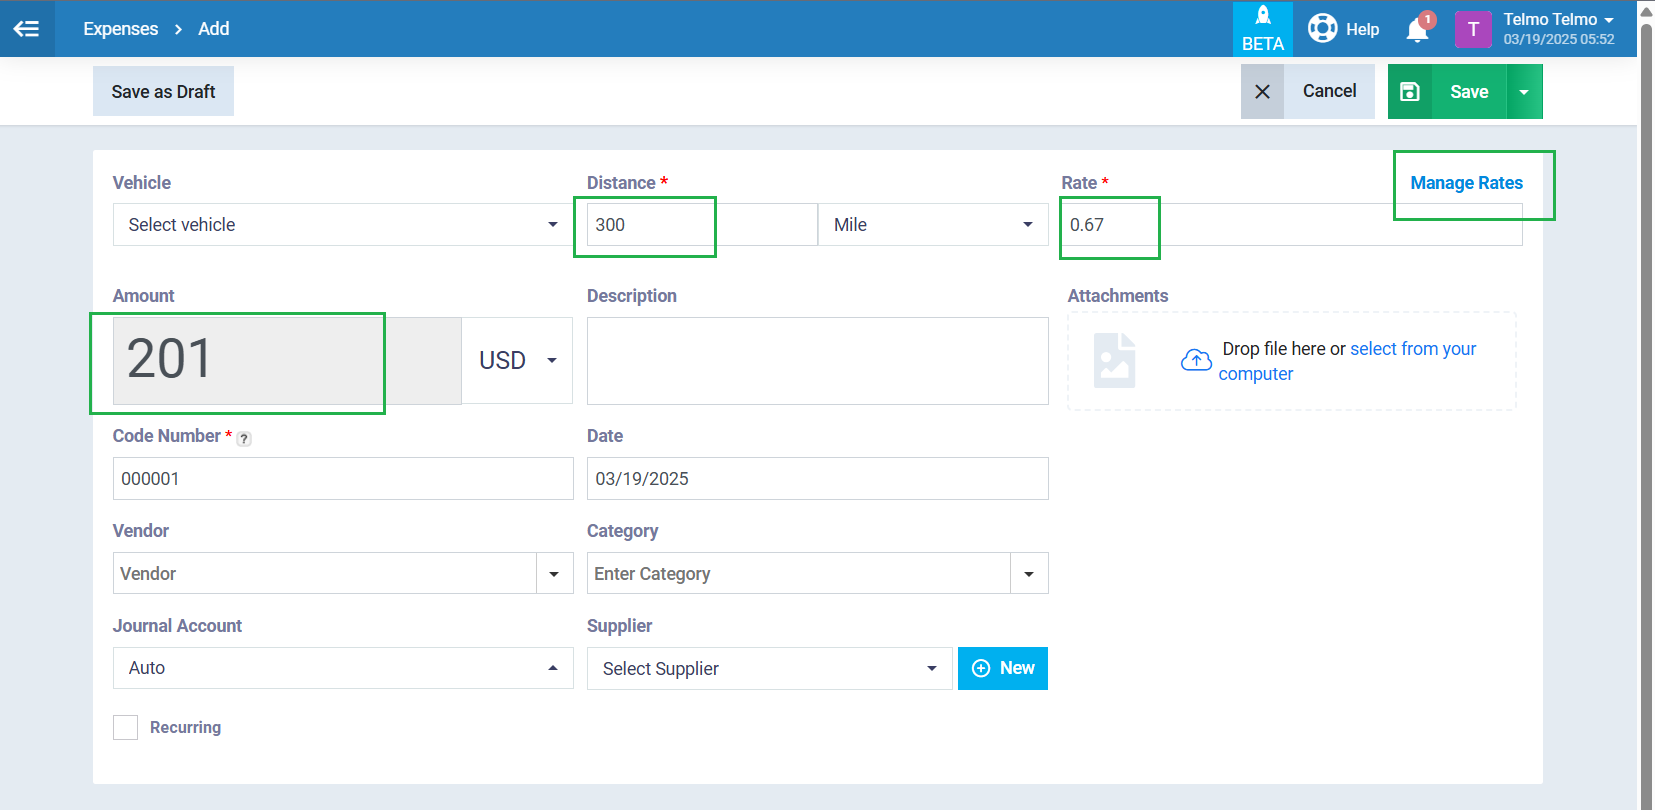
Vehicle: If you have added more than one vehicle to the system, you can select the vehicle used for the business trip from the available options. If not, the field will remain as the default, allowing you to enter the vehicle used.
Distance: Enter the distance traveled for business purposes. This is the number of miles or kilometers you’ve driven. Example: “150 miles.”
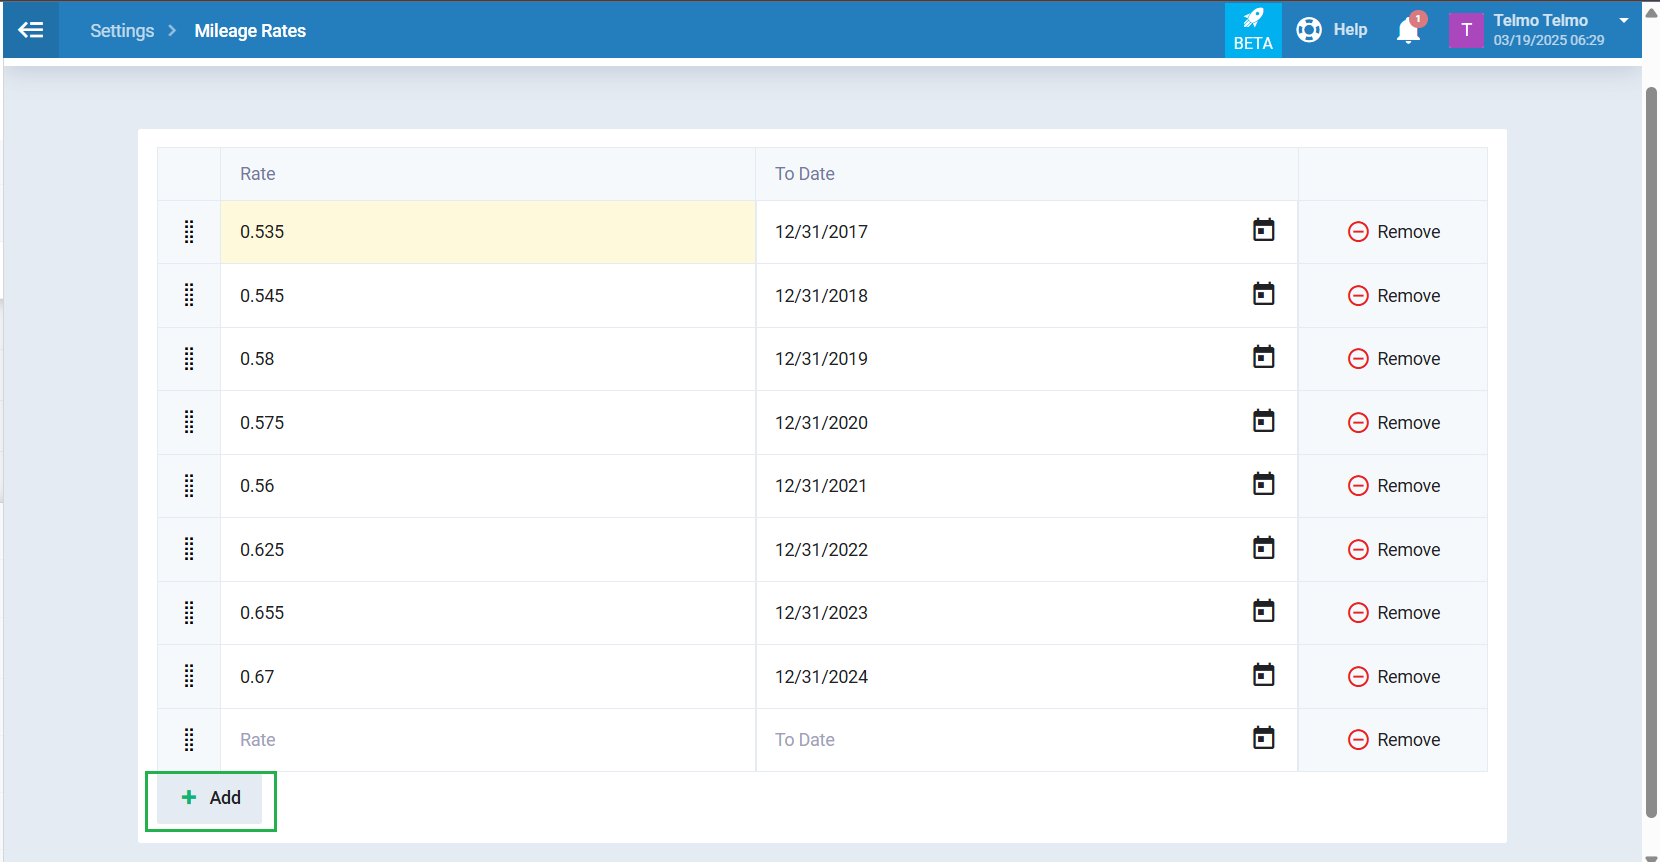
Rate: This is the IRS standard mileage rate (or your company’s rate). The system will calculate the cost based on this rate.
Example: “$0.67 per mile.”
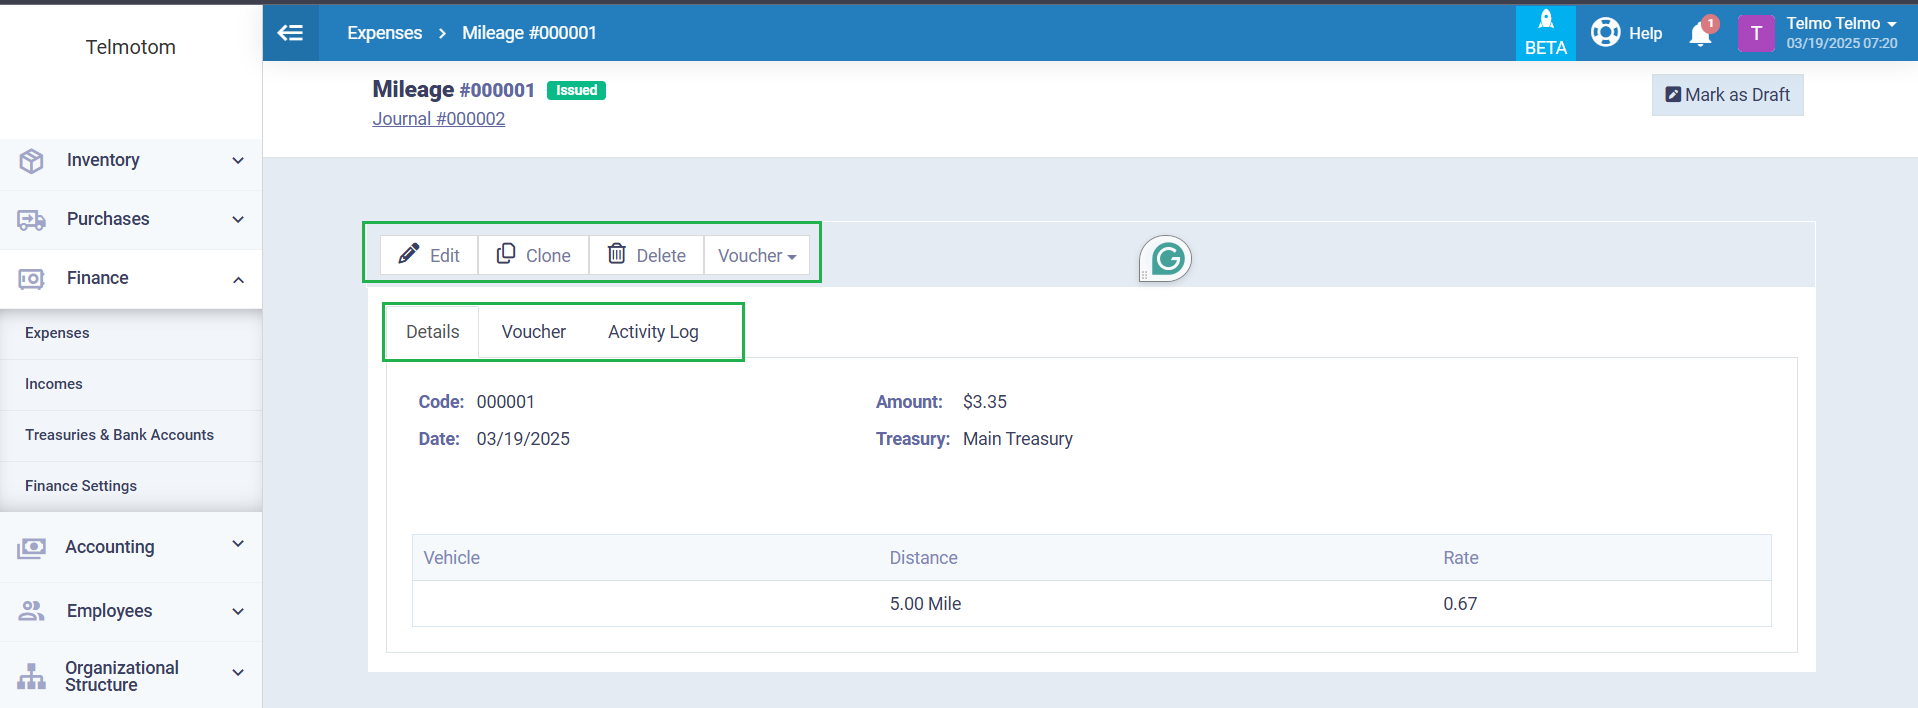
Amount: This is the total amount calculated based on the distance and rate. The system automatically populates this field after you enter the distance.
Example: “150 miles * $0.67 = $100.50.”
Description: Provide a brief description if needed.
Attachments: Upload any documents related to the travel if needed.
Code Number: A unique code automatically generated by the system to distinguish each mileage.
Date: Select the date the trip occurred.
Vendor: If you’re dealing with a specific vendor, enter the vendor here.
Category: Choose the appropriate category for the mileage entry.
Journal Account: Select the journal account associated with the mileage expense.
Supplier: If you’re dealing with a specific supplier, enter the supplier here.
Recurring: If this mileage is a regular trip (e.g., weekly client visits), you can set it as a recurring expense, and the system will automatically track future expenses.
Once you’ve filled out all the necessary information, click on the “Save” button.