Cost Centers Guide
Cost centers are useful for classifying income and expenses according to the departments or categories you define. This allows you to identify the most costly and the most profitable departments (cost centers), by comparing the expenses and income of each cost center and knowing its exact profitability ratio against what is spent on it.
Activating the Accounting and Journal Entries Application
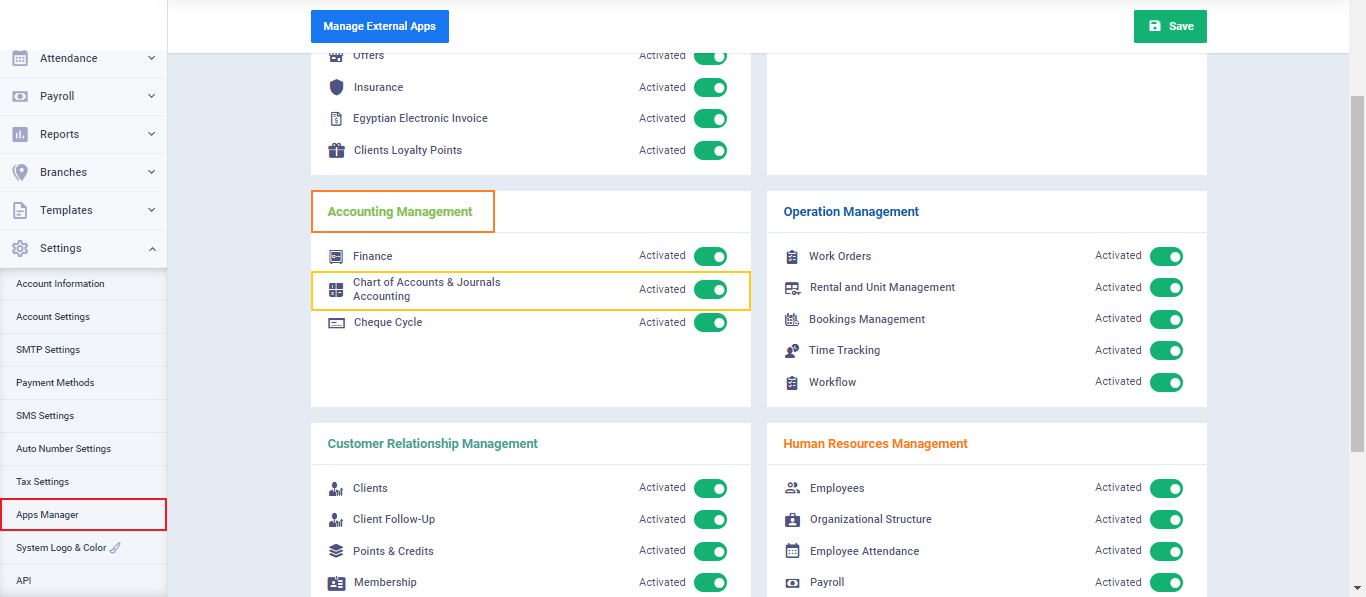
First, you need to ensure that the Accounting apps are activated from the “Accounting Management” application.
To do this, click on “Settings” from the main menu and select “Apps Manager.” Now, activate the “Chart of Accounts & Journals Accounting” option as shown in the image, and then click “Save.”
Creating Cost Centers and Configuring the Chart of Accounts
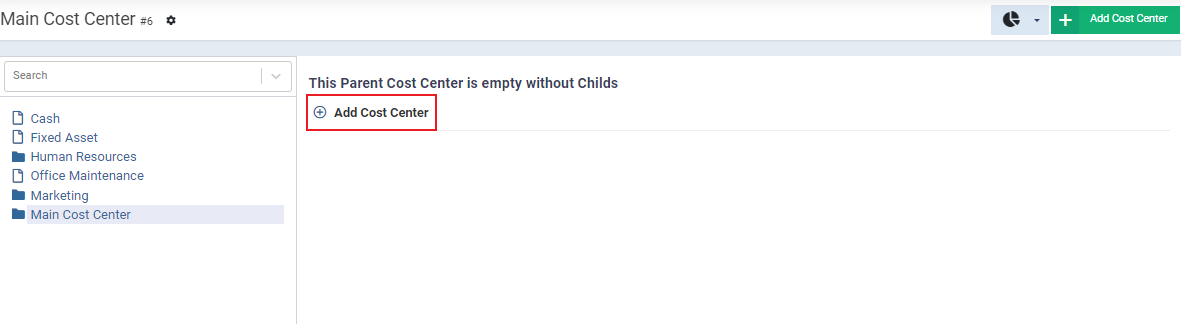
To start creating cost centers, you must first have a main cost center under which a group of sub-accounts will fall. Therefore, the first step is to create a main cost center, and then add the sub-accounts under it. After that, we proceed to assign expenses to these centers.
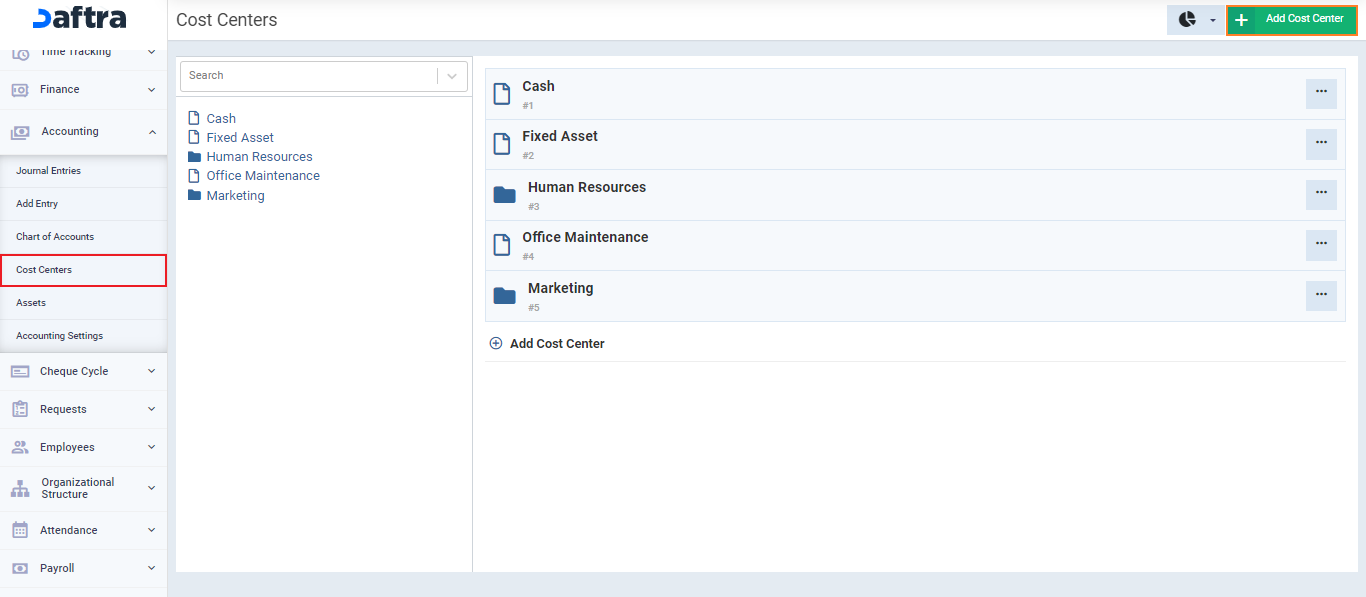
To create a main cost center, go to “Accounting” from the main menu, then click on “Cost Centers.” After that, click on the “Add Cost Center” button at the top left of the page, and a pop-up screen will appear as shown in the image.
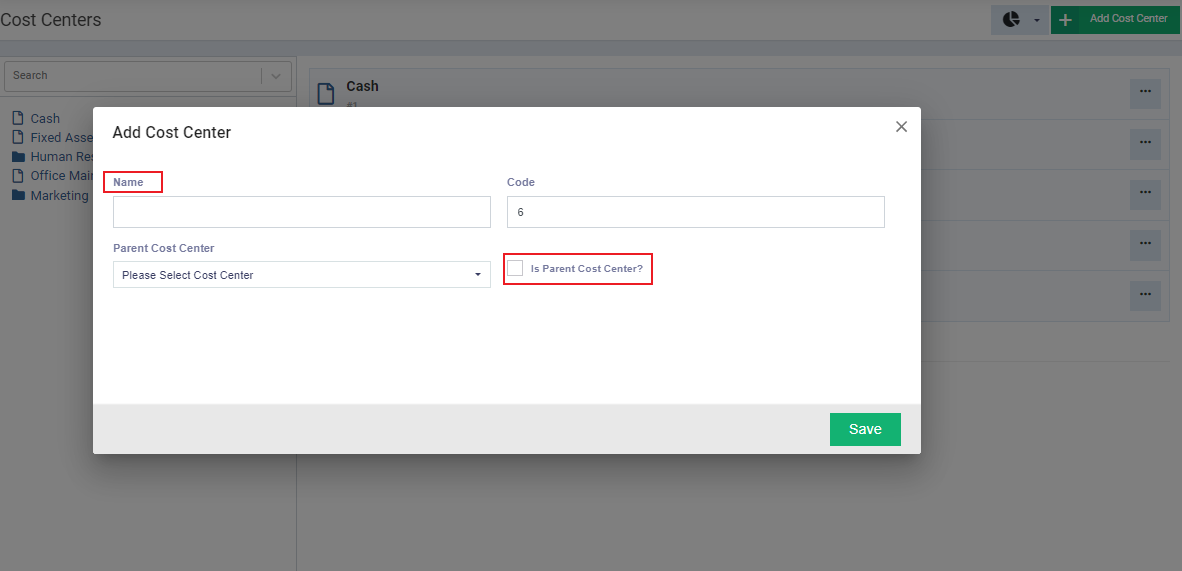
Now, add the “Name” for the new main cost center and activate the “Parent Cost Center” option.
With this, we have created a parent cost center, and we can see it appearing on the cost center management page. The next step is to create a sub-cost center under it. Below the main cost center, click on “Add Cost Center.”
Now, enter the name of the sub-cost center. In the field below the name, select the main cost center.
Then, click the “Save” button.
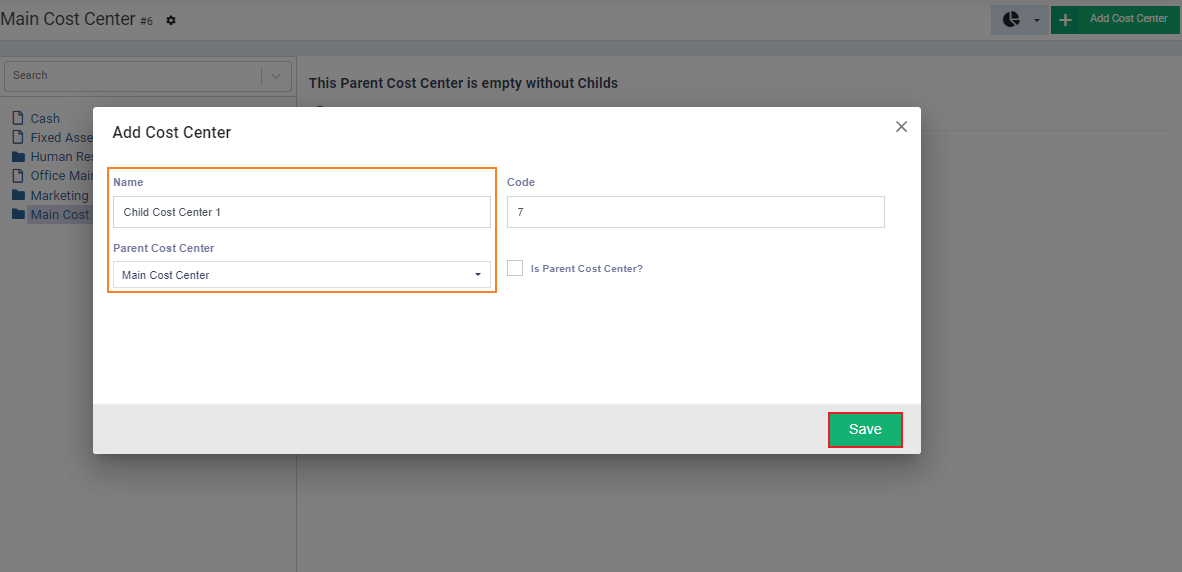
You can add more than one sub-cost center to a single main cost center. Moreover, you can certainly add more than one main cost center, each with several sub-centers. You can freely configure your cost center chart according to the nature of your organization’s activities.
Linking Accounting Transactions to Cost Centers
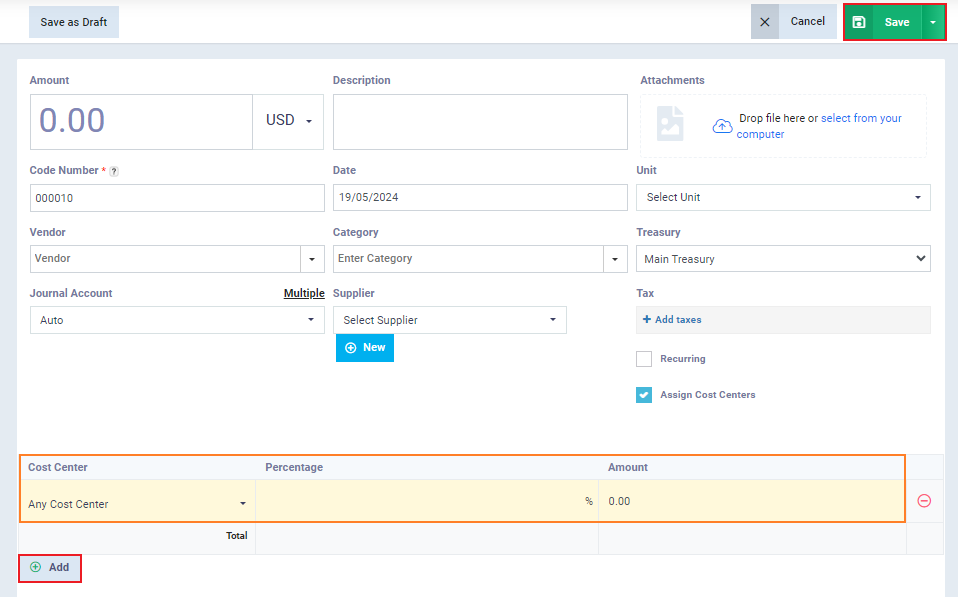
When adding an accounting transaction such as an expense, income, journal entry, or even an invoice, you can link this transaction to a specific cost center. Here’s an example where we add any expense and assign a cost center to it.
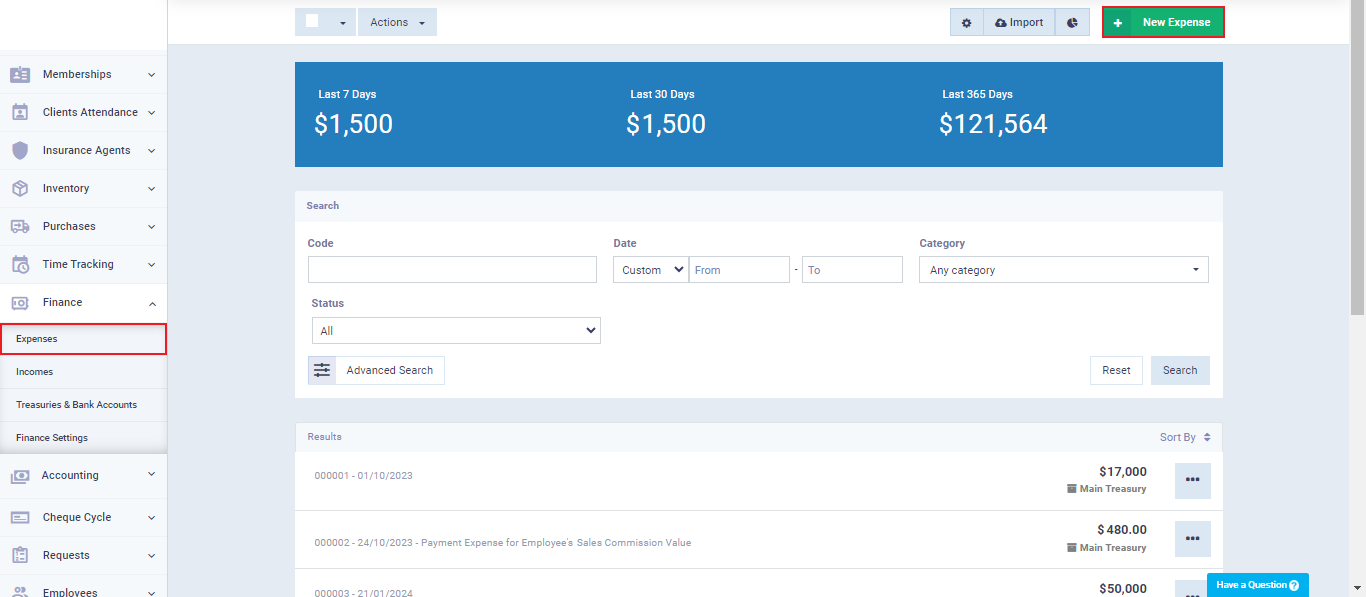
First, we navigate to the page for creating an expense by clicking on “Finance” from the main menu, then selecting “Expenses,” and then clicking on the “New Expense” button.
After entering all the basic data related to the expense such as the amount, description, etc., you can activate the “Assign Cost Centers” option to display the fields for configuring the cost centers that will bear all or part of the expense and specify their proportions.
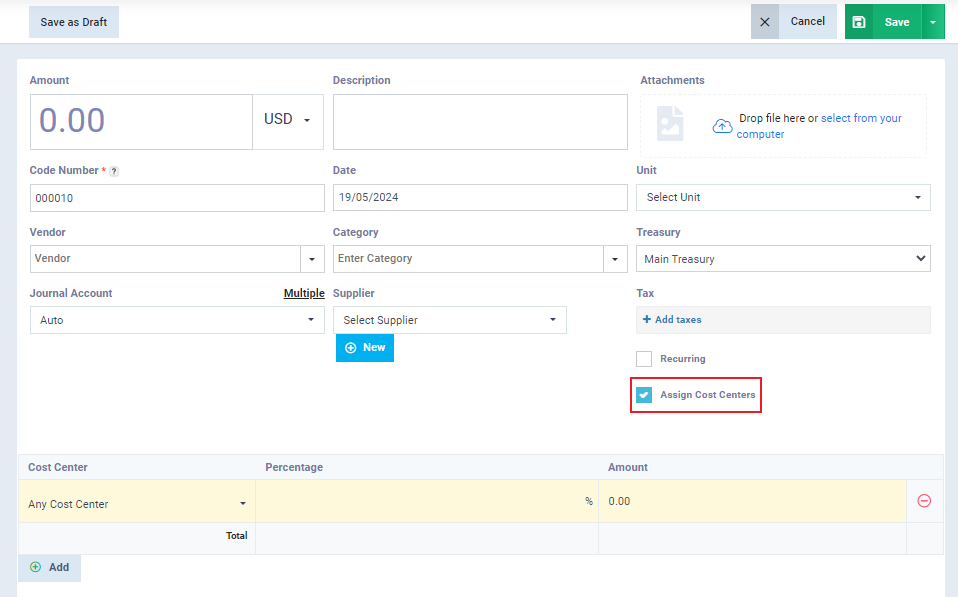
Choose the desired cost center, then select whether to record the value as a percentage or a fixed amount.
The system will automatically adjust the other field according to your choice. If you enter a percentage, the system will process the value and calculate the amount based on the total expense value and the percentage you entered. Conversely, if you input a fixed amount, the system will calculate the corresponding percentage for this value.
You can assign more than one cost center to the same expense by clicking the “+ Add” button.
After finishing, click the “Save” button. You will then find this expense included in the accounts of the designated cost center.
Linking a Specific Account in the Chart of Accounts to a Cost Center
You can assign one of the chart of accounts account to a specific cost center, linking transactions of this account to the cost center automatically. This means that when assigning any accounting transaction, such as journal entries, to this account, these transactions will be recorded within the cost center associated with the account.
You can link company accounts to cost centers. For example, you can create a sub-account under expenses or incomes in the chart of accounts and link this account to a specific cost center or multiple cost centers. To do this, click on “Accounting” from the main menu, then click on “Cost Centers,” and then click on “Accounts without Cost Centers,” as shown in the image.
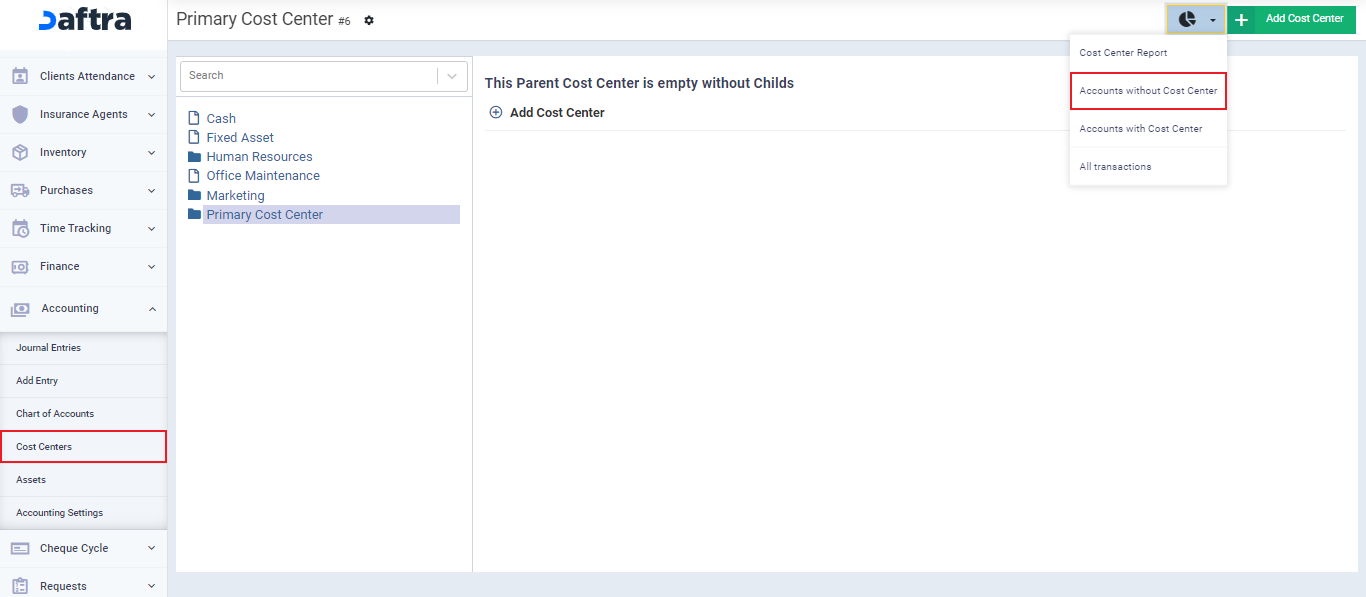
Now, among all the available displayed accounts, you can click on “Assign Cost Centers” to the right of the account you want to assign a cost center to.

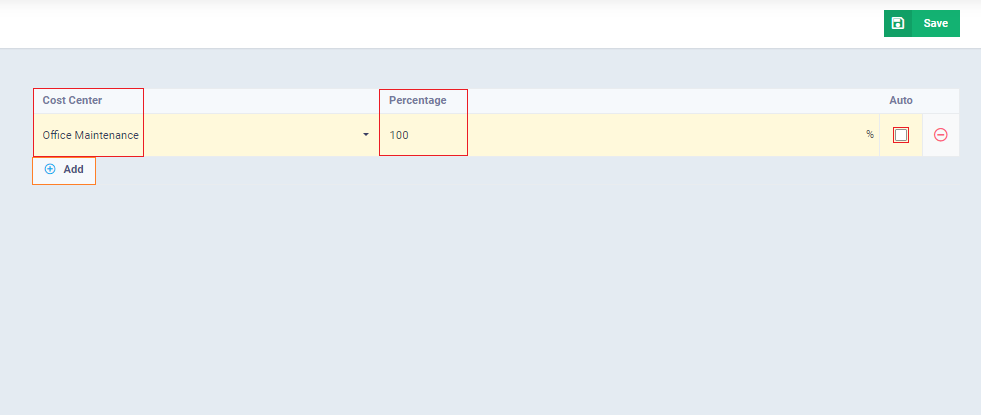
When you click on it, you will be taken to the page for specifying the cost centers to be linked to this account, along with specifying the percentage or amount for each center. As mentioned earlier, you can add multiple centers by clicking “Add” to assign another center, then clicking “Save.”
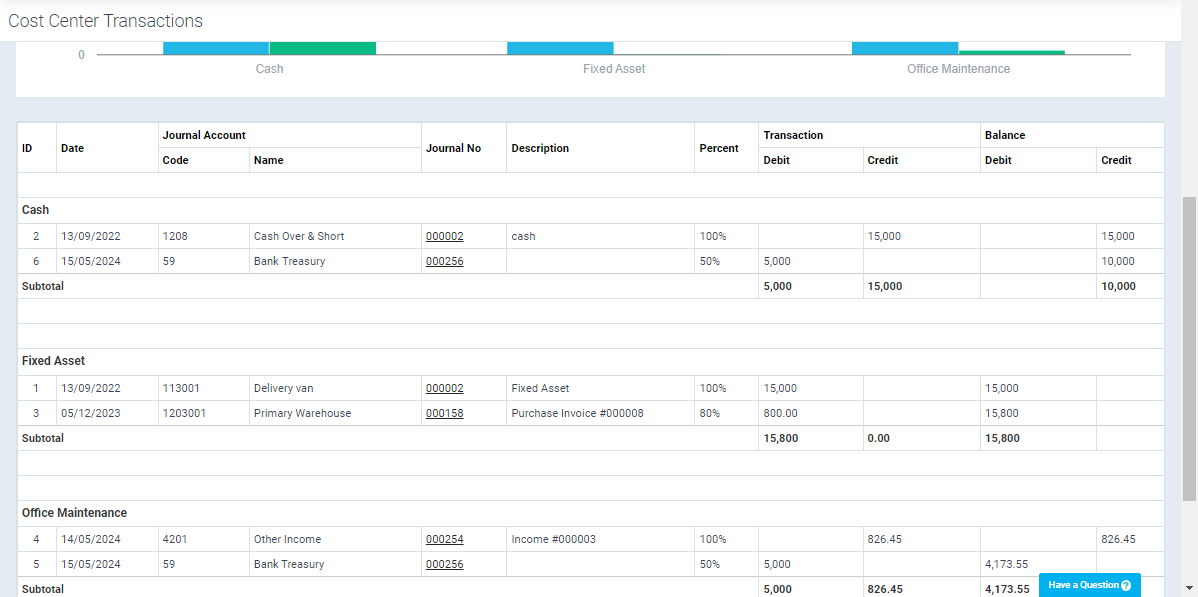
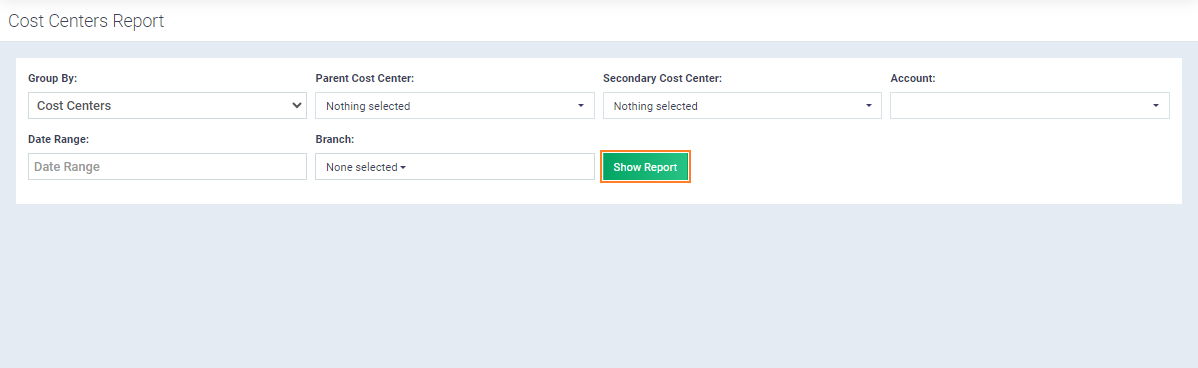
Cost Center Reports
Now, the only thing left is to review the cost center reporting feature. Daftra provides a set of reports that display all main and sub-cost centers, as well as reports specific to cost centers linked to the company’s accounts. With a range of filtering tools, the process of displaying and extracting data becomes more accurate and easier.
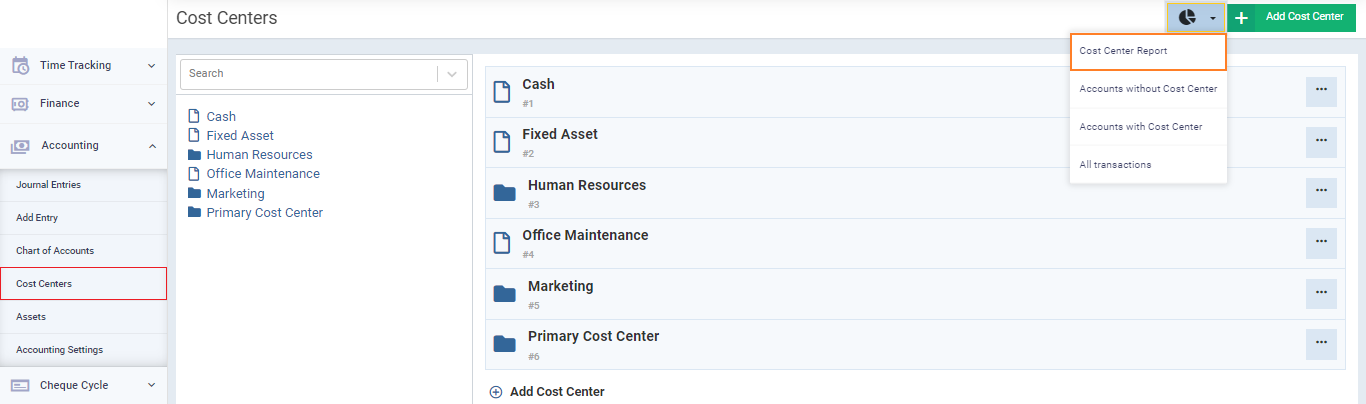
You can access the reports by clicking on “Accounting” from the main menu, then clicking on “Cost Centers,” then clicking on the cost center management icon and selecting “Cost Center Report,” as shown in the image.
Then click on “Show Report“.
The report can display main and sub-cost centers, showing the balance of each cost center in terms of debits and credits, along with details of the expenses and income transactions that have been accounted for.