Automatic and Manual Journal Entries
All accounting transactions should be backed up with journal entries, which are automatically transferred to the general ledger and recorded in the chart of accounts to generate reports and financial statements based on them.
The system automatically creates entries based on your financial transactions recorded in the system, such as invoice creation or issuing an employee’s payslip. You can also manually create daily entries if needed.
Automatic Journal Entries
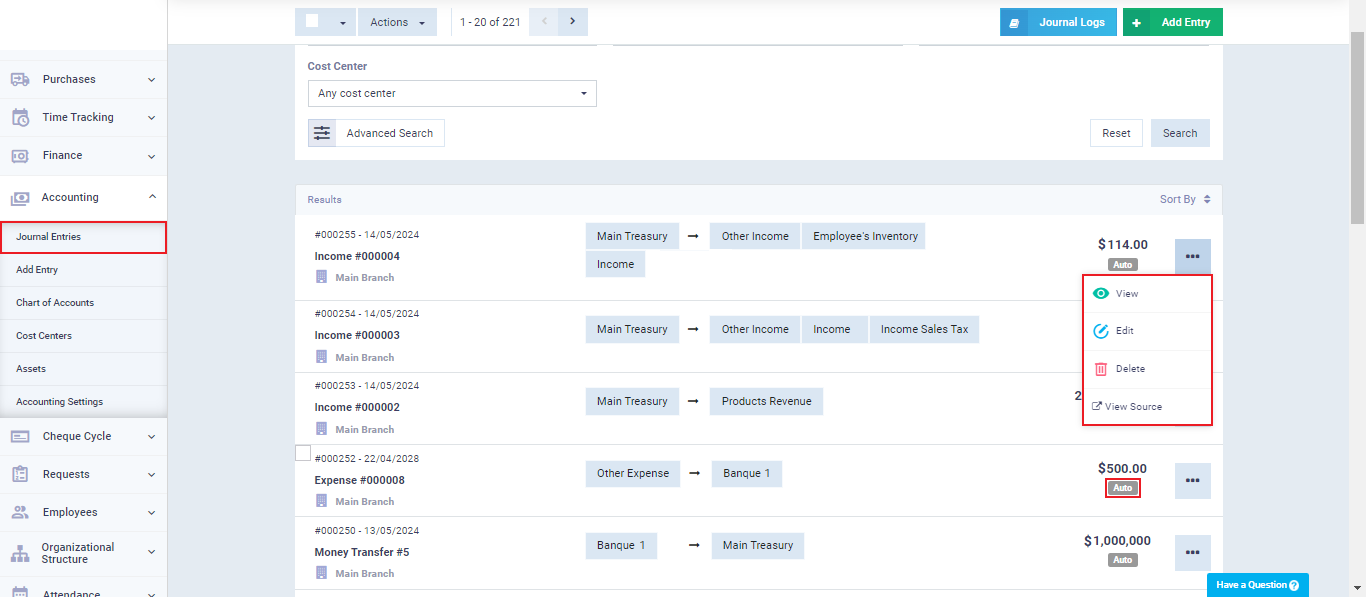
Entries related to your transactions are added to the system automatically once these transactions are recorded in the system. To view these entries, go to “Journal Entries” under “Accounting” in the main menu. Automatic entries are distinguished by the “Auto” label next to them, unlike manual entries, which do not have this label.
You can perform some actions on the entry such as:
- View.
- Edit, as will be explained.
- View source.
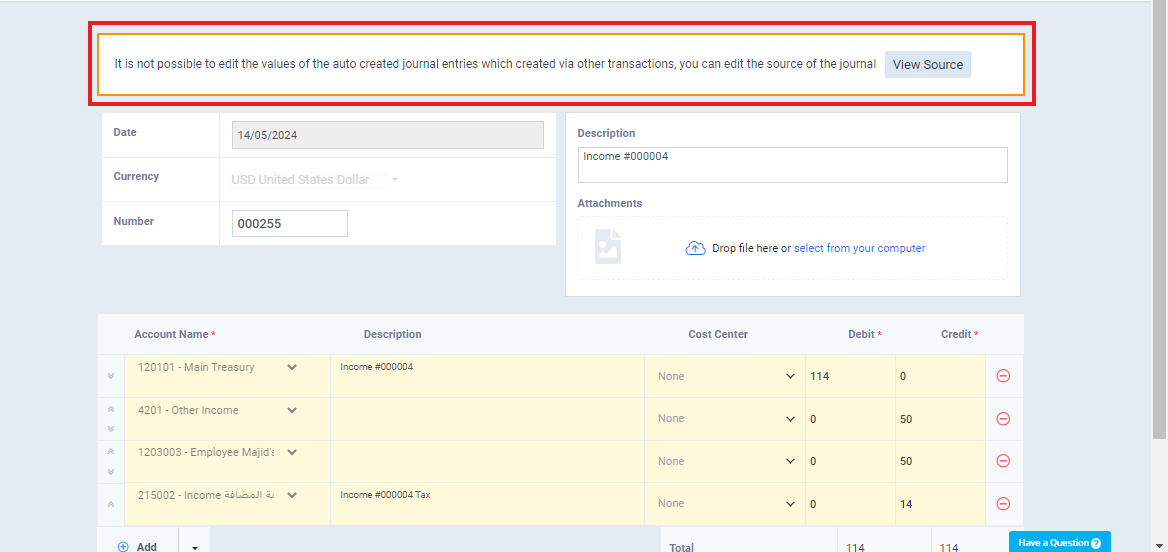
When you click on “Edit” for automatic entries, a message will appear saying, “It is not possible to edit the values of the auto-created journal entries created via other transactions, you can edit the source of the journal .” Indeed, you will find that the values specific to the entries are not editable, but you can edit the description or number of the entries.
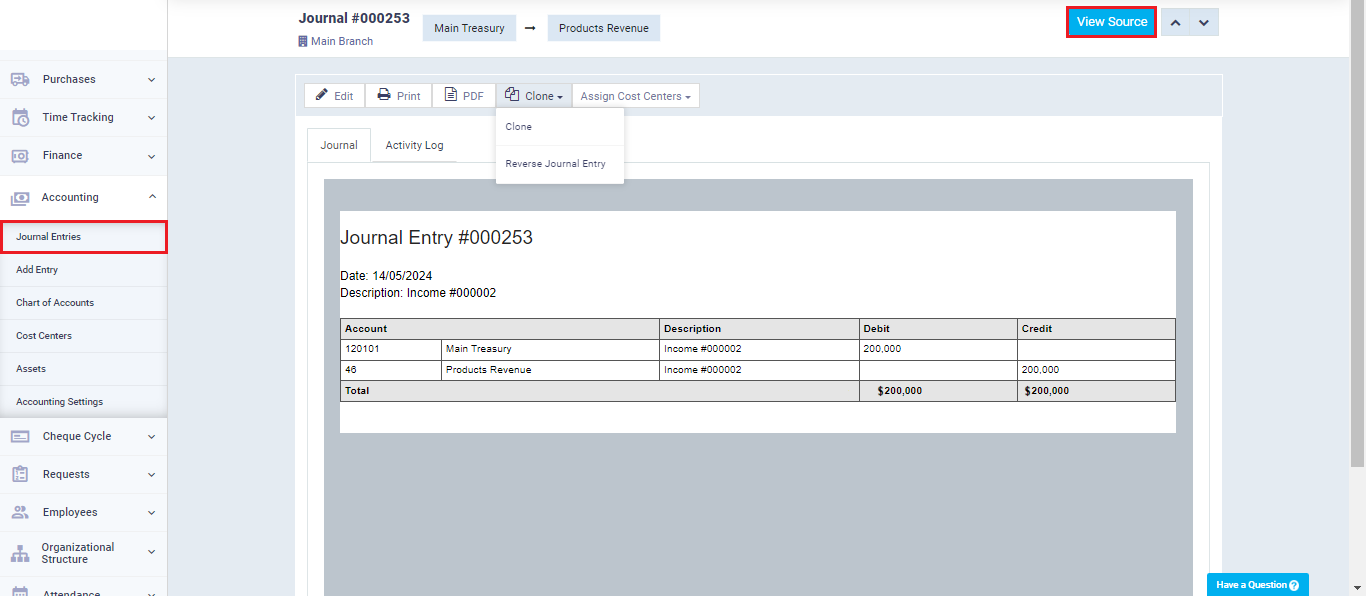
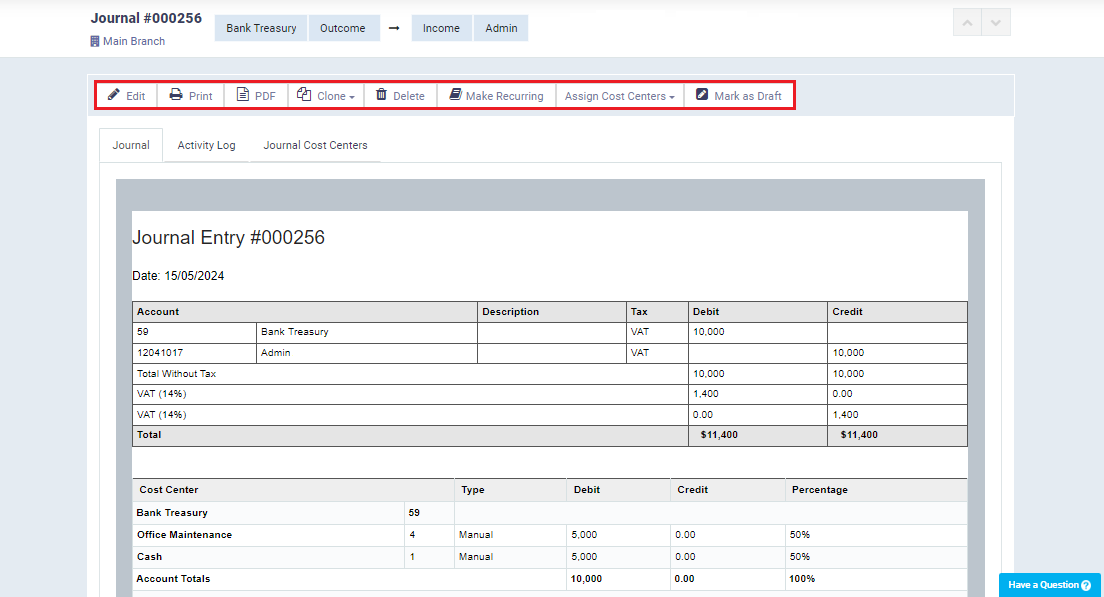
When viewing the entry, you will see the available actions such as:
- Edit.
- Print.
- PDF.
- Clone.
- Reverse Entry.
- Assign to Cost Center.
You can also view the entry source by clicking on the “View Source” button.
Viewing the entry source directs you to the page of the primary transaction, whatever the type of transaction. If it’s an invoice, you will be directed to the invoice editing page, and if it’s an asset addition, you will be directed to the asset editing page.
For example, if you are redirected to edit an income, where the entry originated from this transaction, you can edit the revaluation amount or the transaction itself and save it to change the resulting entry accordingly.
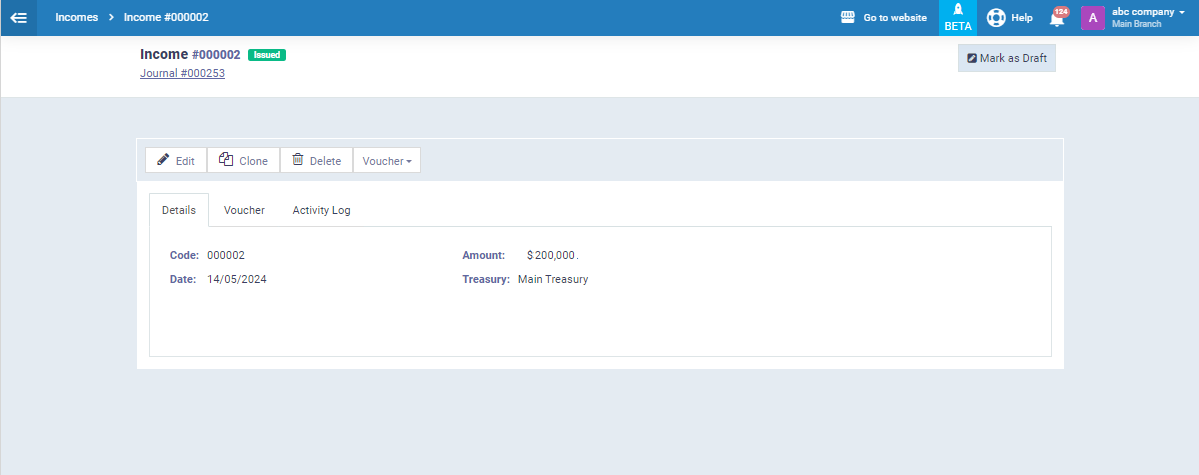
Adding a Manual Journal Entry
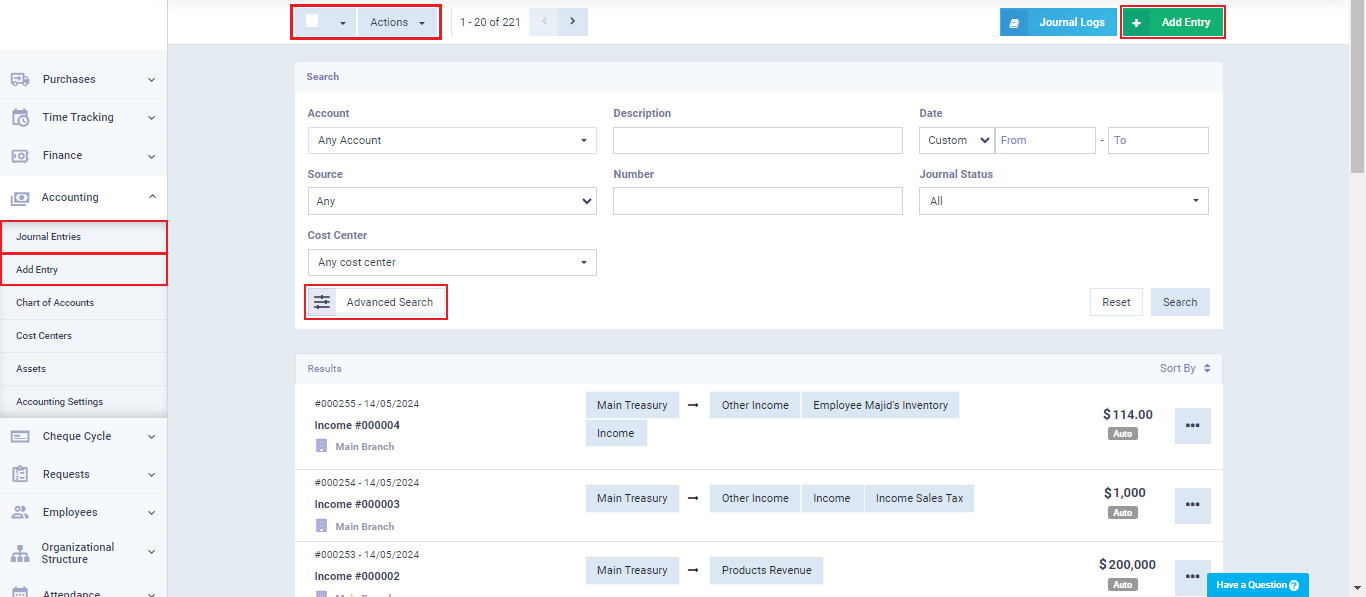
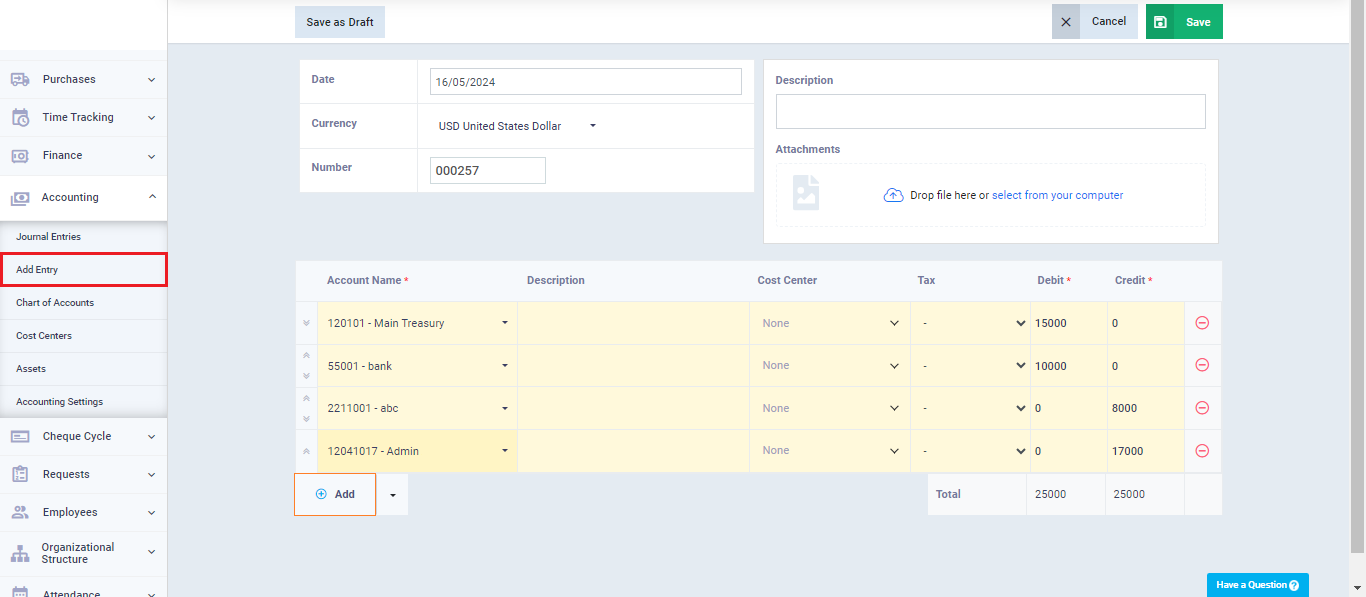
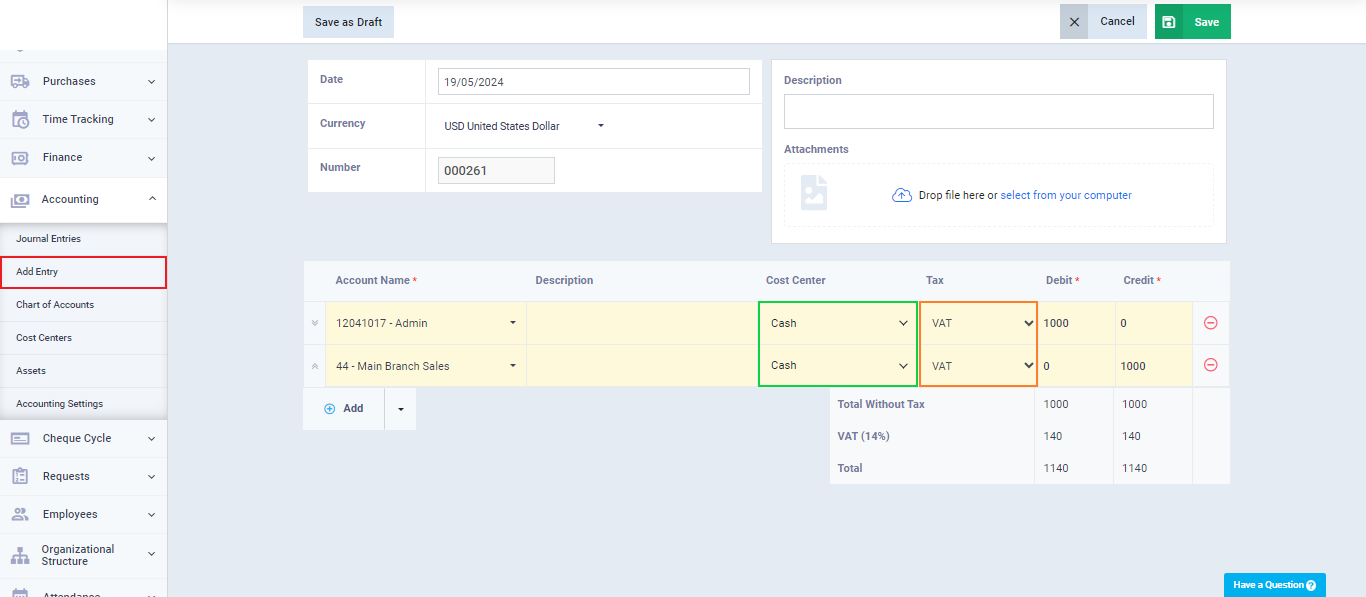
You can review the entries list and take some actions on them, using search and filtering tools by clicking on the “Journal Entries” dropdown under “Accounting” in the main menu, to find all automatically generated entries. You can also create a new manual journal entry by clicking the “Add Entry” button.
Alternatively, you can directly click on the “Add Entry” dropdown under “Journal Entries“.
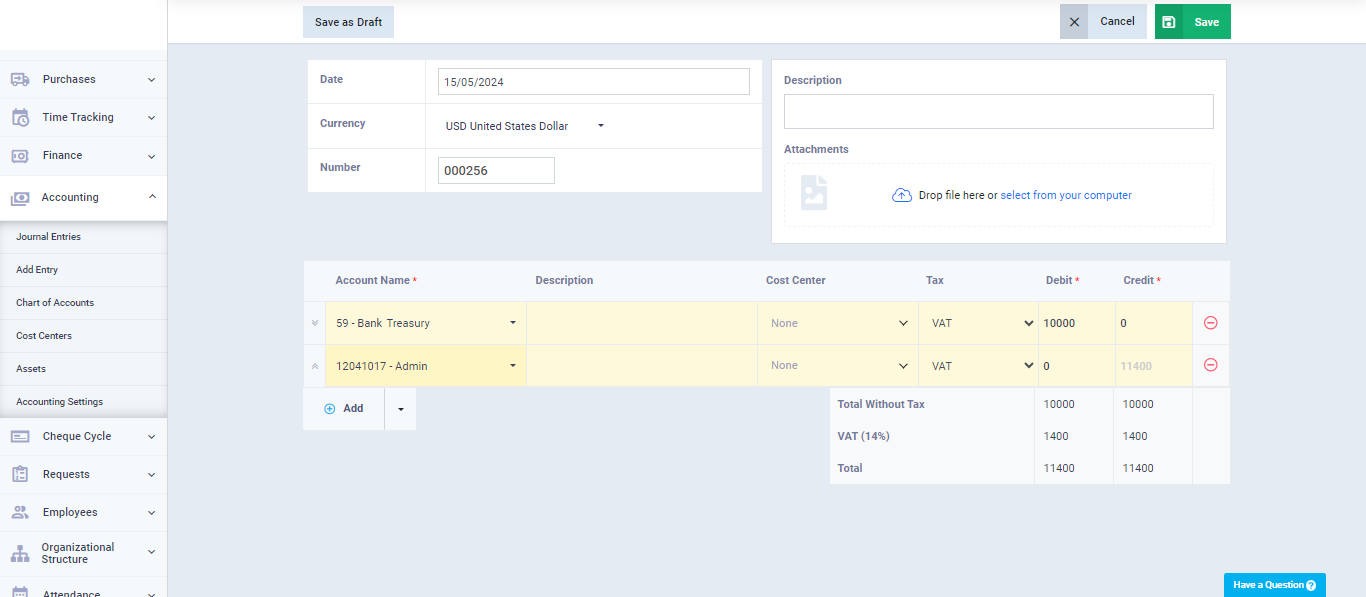
Enter the following entry details:
- Enter the “Date” field to specify the date of the journal entry.
- Select the “Currency” associated with the entry.
- Enter a “Description” for the entry.
- Upload any relevant “Attachments” related to the entry if available.
Enter the two sides of the entry, directing the debit side (usually) to the credit side:
Debit Side:
Account Name: Select the desired account from the chart of accounts to represent the debit side of the entry.
Description: Enter the description specific to the debit account in the entry.
Debit: Enter the amount of the debit entry.
Credit: Leave it blank as this side of the entry is debited.
Credit Side:
Account Name: Select the desired account from the chart of accounts to represent the credit side of the entry.
Description: Enter the description specific to the credit account in the entry.
Debit: Leave it blank as this side of the entry is credited.
Credit: Enter the amount of the credit entry, which equals the value of the debit entry.
Click on the “Save” button.
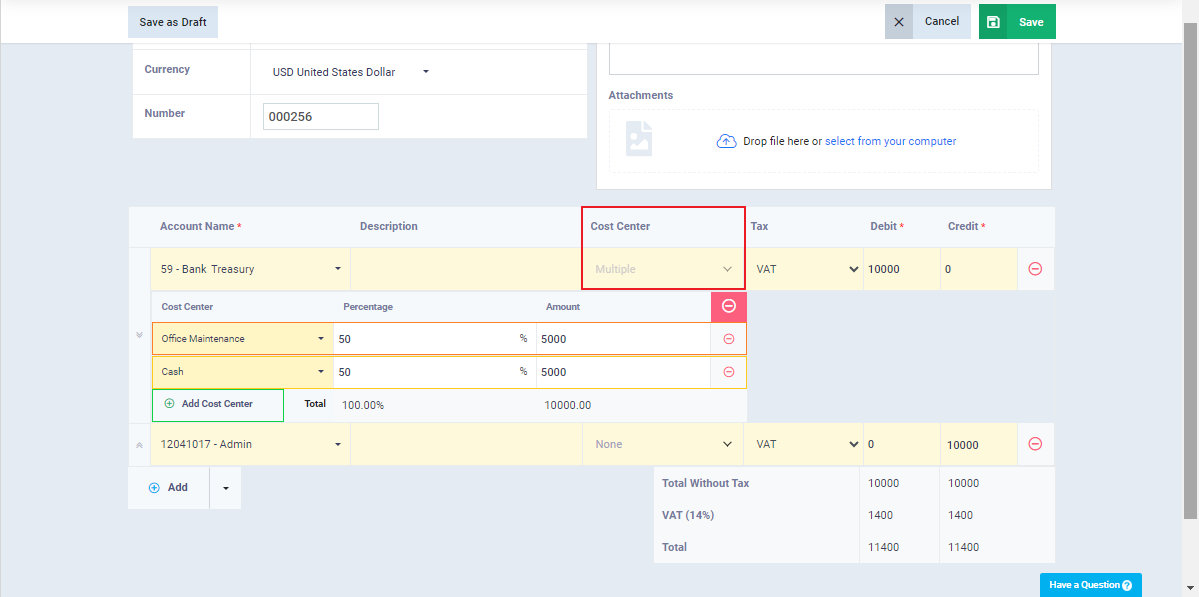
After saving the entry, you can take some actions on it, such as:
- Edit
- Clone
- Assign Cost Centers
- Mark as a Draft
Simple and Compound Entries
A simple entry consists of only two accounts, credit, and debit, representing the two sides of the usual double-entry entry. On the other hand, a compound entry contains several parties; it may have more than one creditor more than one debtor, or more than one creditor and debtor. In the end, these parties are aggregated to calculate the total creditor parties against the total debtor parties.
We have explained how to add a simple entry in previous sections of this guide. We will now explain how to add a compound entry.
Click on “Add Entry” under “Accounting” in the main menu, and click on the “+ Add” button below the entry fields according to the number of entry parties. Then complete the data and click on the “Save” button.
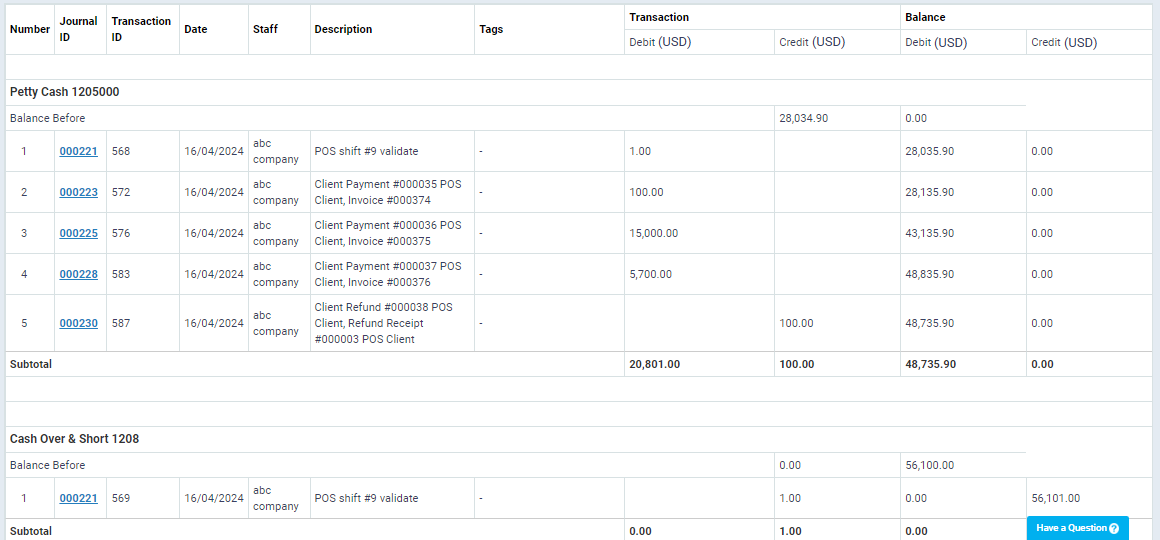
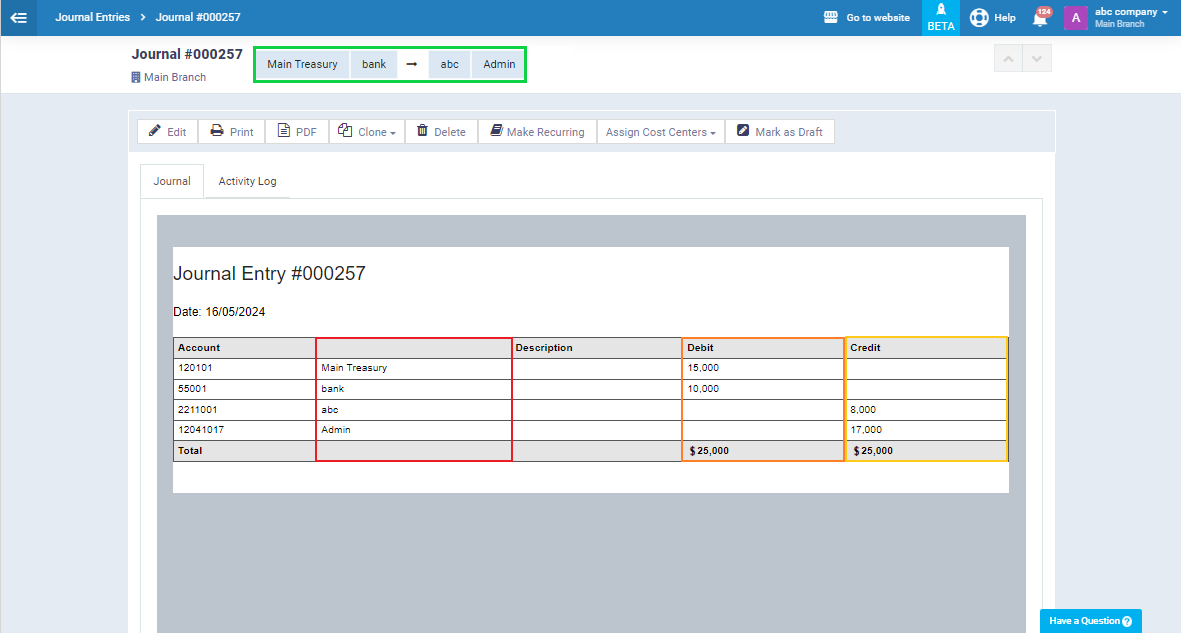
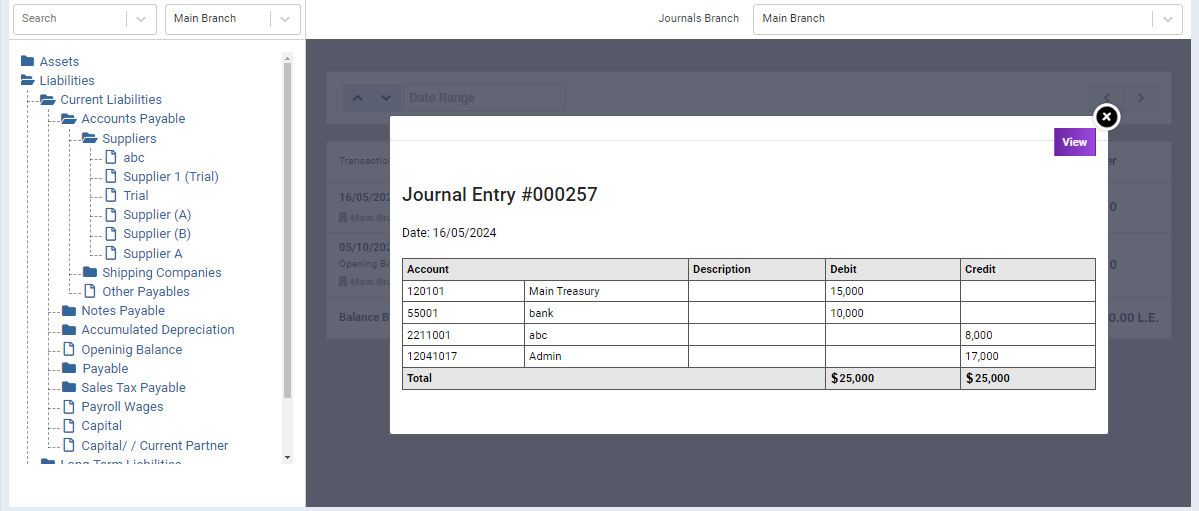
After saving the compound entry, you will find all its parties along with clarifications of the creditor and debtor for each of them, as well as for the total of the compound entry. By clicking on any of the parties above next to the entry number, you can navigate to it in the chart of accounts.
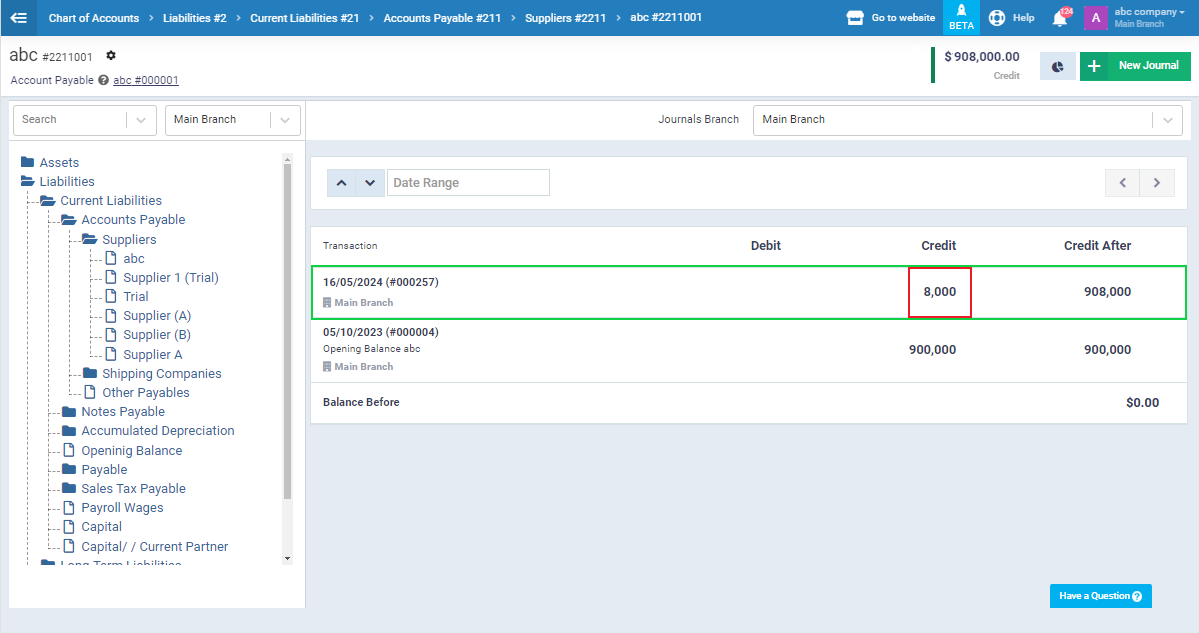
After clicking on “ABC Company,” one of the creditor parties of the entry, you will find only the creditor side related to this party. However, after clicking on it, all the details of the compound entry vary, as shown in the following image.
Reversed Entries and Their Uses
From an accounting standpoint, it’s not appropriate to delete confirmed entries for your financial transactions to avoid affecting financial statements or being seen as manipulation. But what if you need to reverse some entries after creating them?
In such cases, we resort to creating a reversed entry associated with the entry we want to reverse, where the reversed entry cancels the value of the original entry.
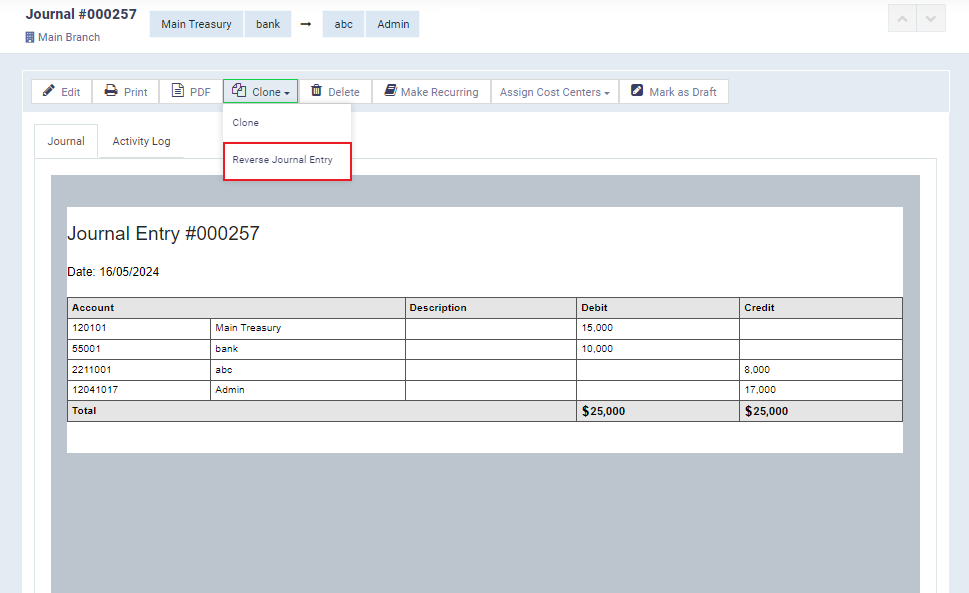
To create a reversed entry in the ledger, go to the entry you want by clicking on it from the daily entries menu, then click on “Clone” and select “Reversed Entry” to create a similar reversed entry with the same data, switching the creditor with the debtor.
Here you will find the data of the reversed entry automatically generated, with the treasury account credited and the supplier debited, which is opposite to what we created in the original entry shown in the previous image.
Make sure of the data and then click on the “Save” button.
Filtering Entries
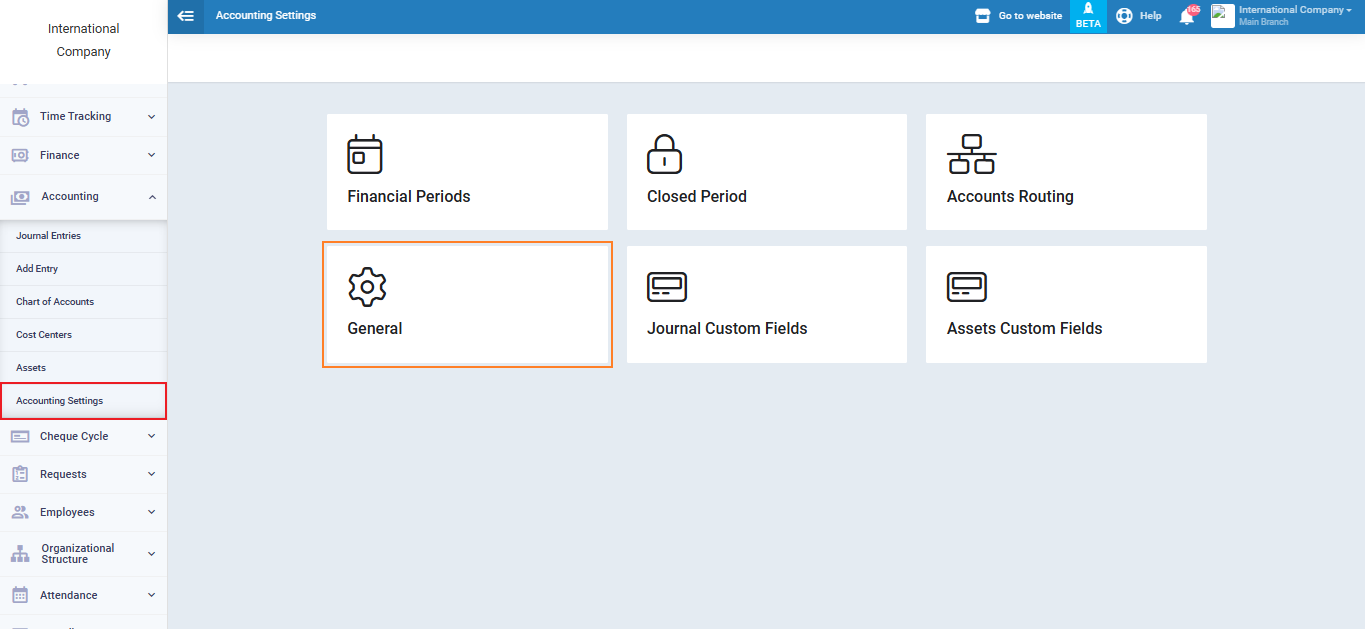
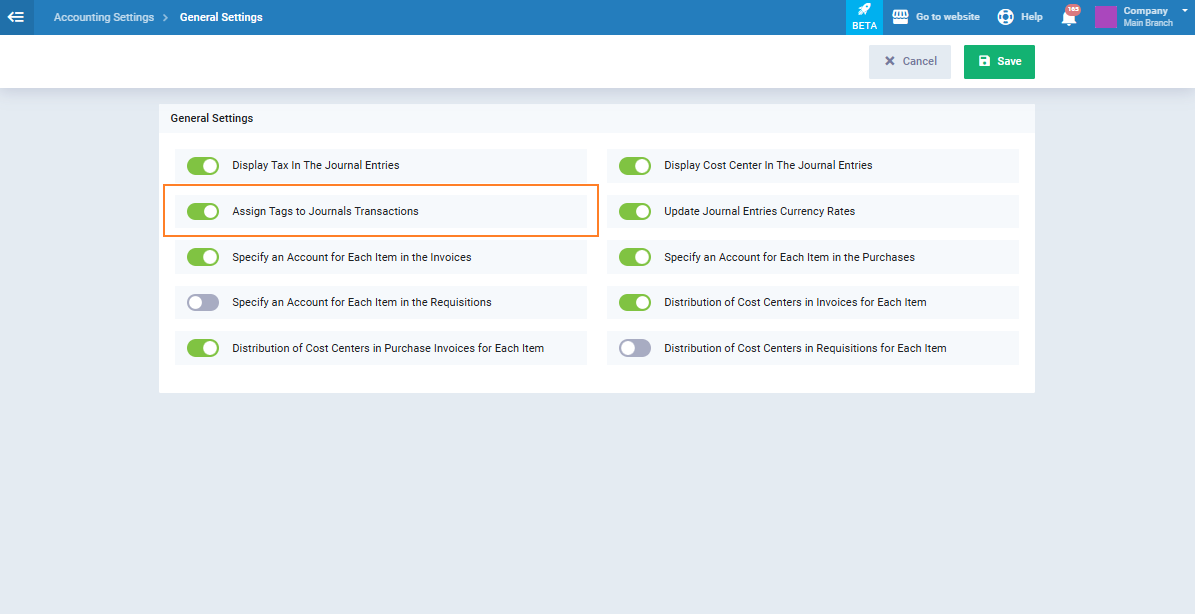
Activate the settings button for assigning tags to journal transactions,
then click on the “Save” button.
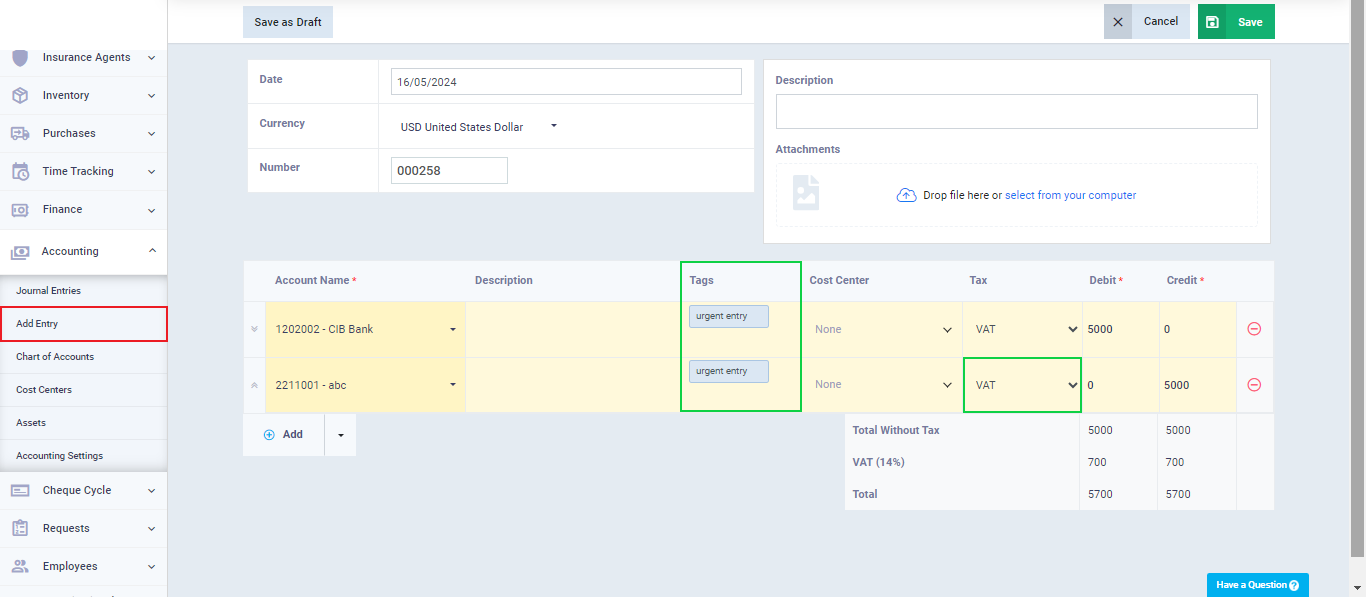
After activating the tags setting for entries, go to create a new entry or edit an existing one, and you will find the tags field visible. Enter the tag you want to associate with this entry for classification and ease of finding it when searching and filtering.
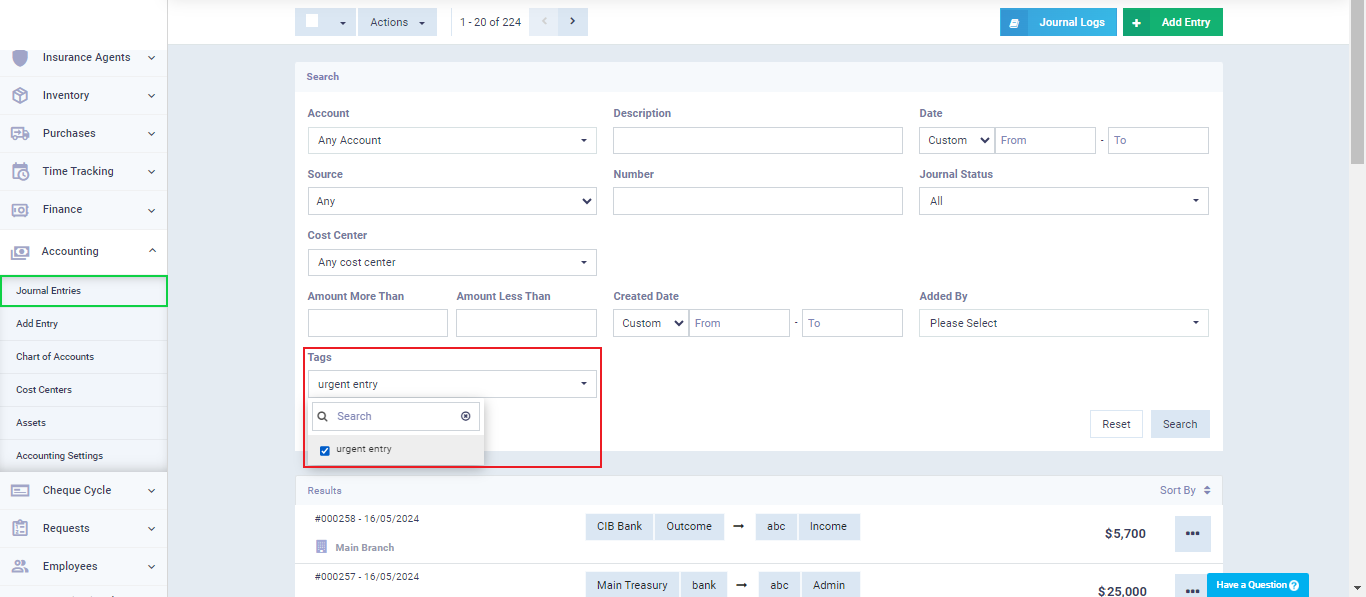
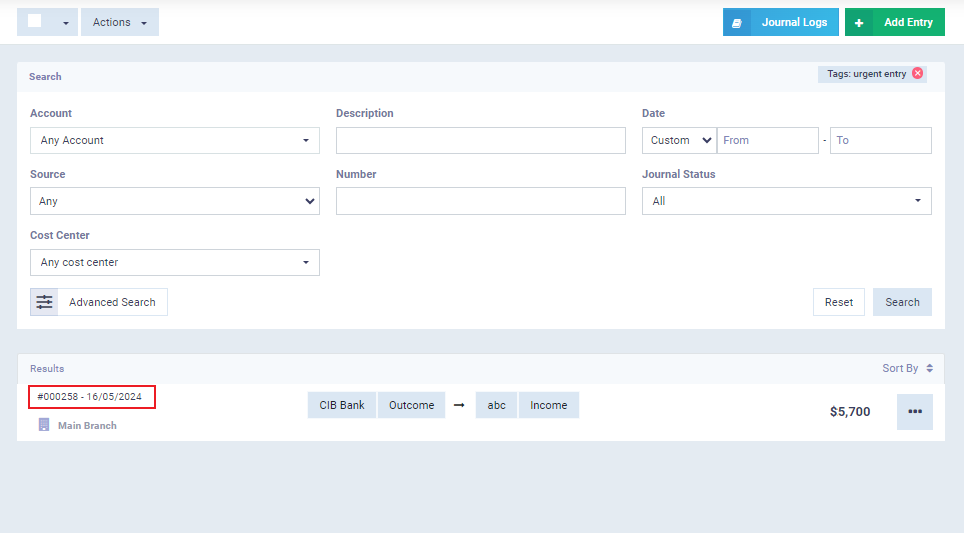
All entries associated with this tag will appear.
Recurring Journal Entries
Through the recurring journal, you can automatically repeat some entries periodically.
Click on “Journal Entries” under “Accounting” in the main menu, then select the entry you want to repeat periodically and click on the “Make Recurring” button.
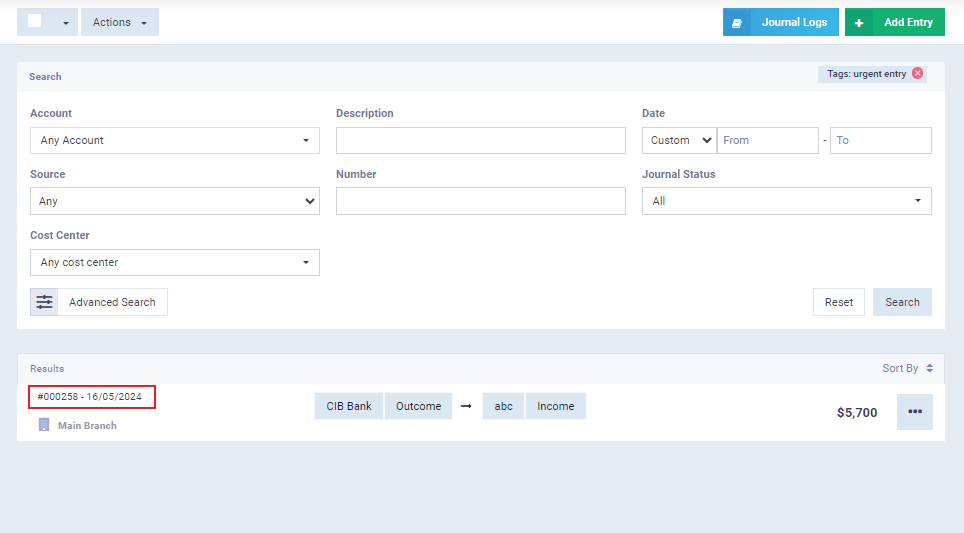
Here are the details for recurring journal entries:
- Recurring entry name
- Entry start date
- Entry end date
- Frequency
Then click on “Save“.

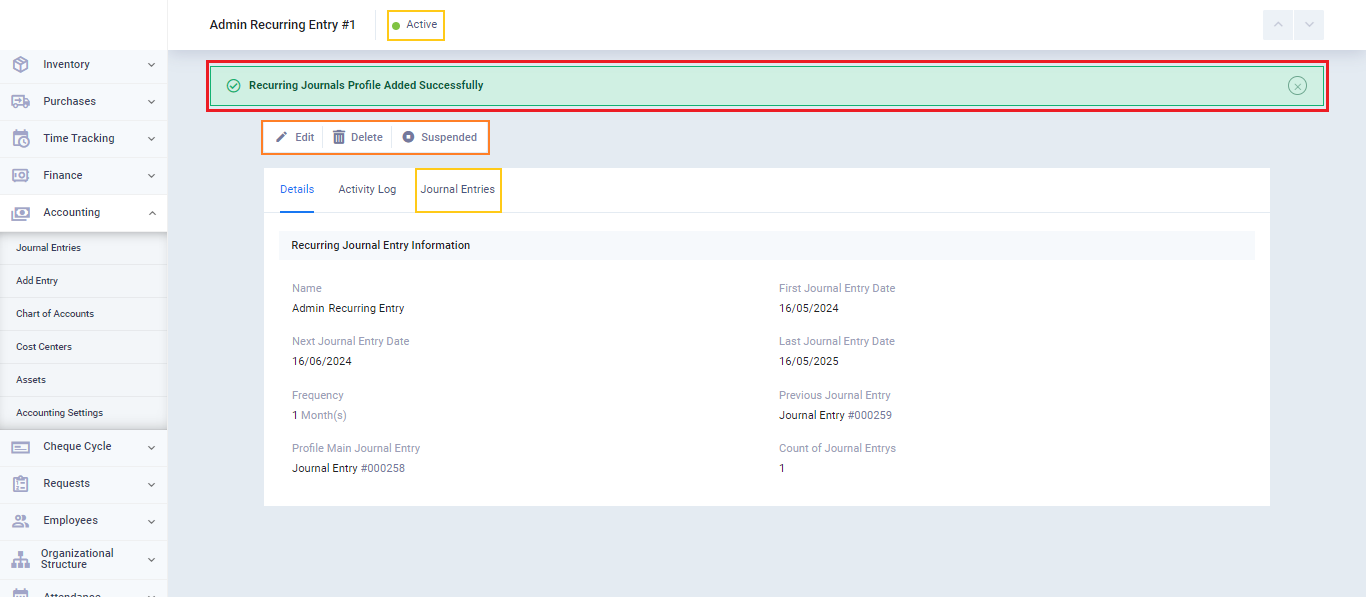
After creating the recurrence, you will find its details along with the activity log and the tab for all entries generated by the recurrence on their respective dates. You can modify, delete, or suspend the recurrence.
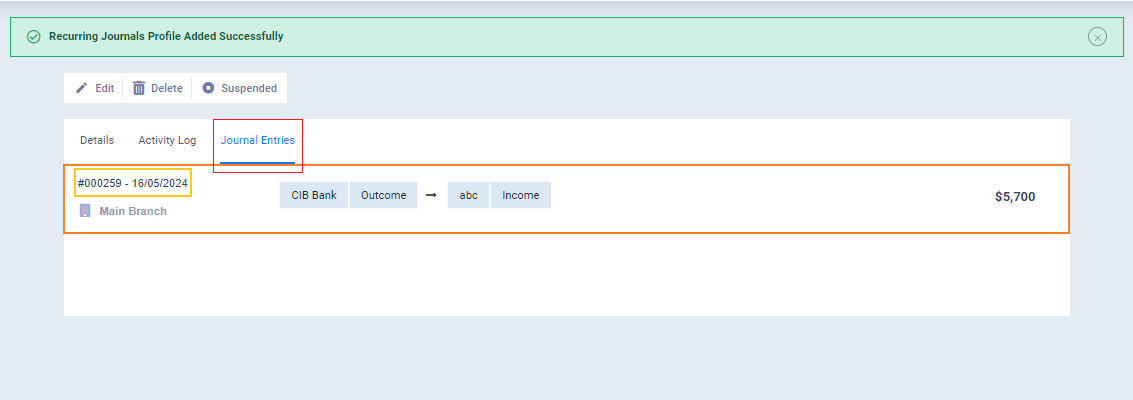
By clicking on the tab for journal entries, you’ll find the entries created based on this recurring entry. Here, only one entry is shown as the dates for the rest of the entries haven’t occurred yet. However, they will appear sequentially in this tab after their creation.
Journal Entries Logs and Reports
You can review the logs of automatic and recurring entries and access reports related to these entries or financial statements built on them.
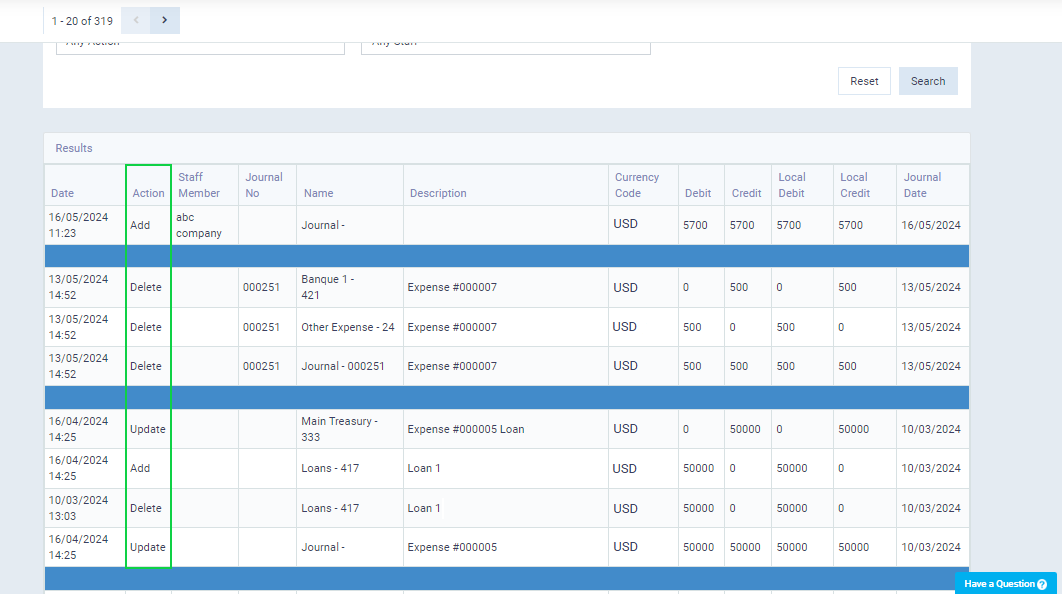
To review the logs of entries, click on “Journal Entries” under “Accounting” in the main menu, then click on the “Journal Logs” button.
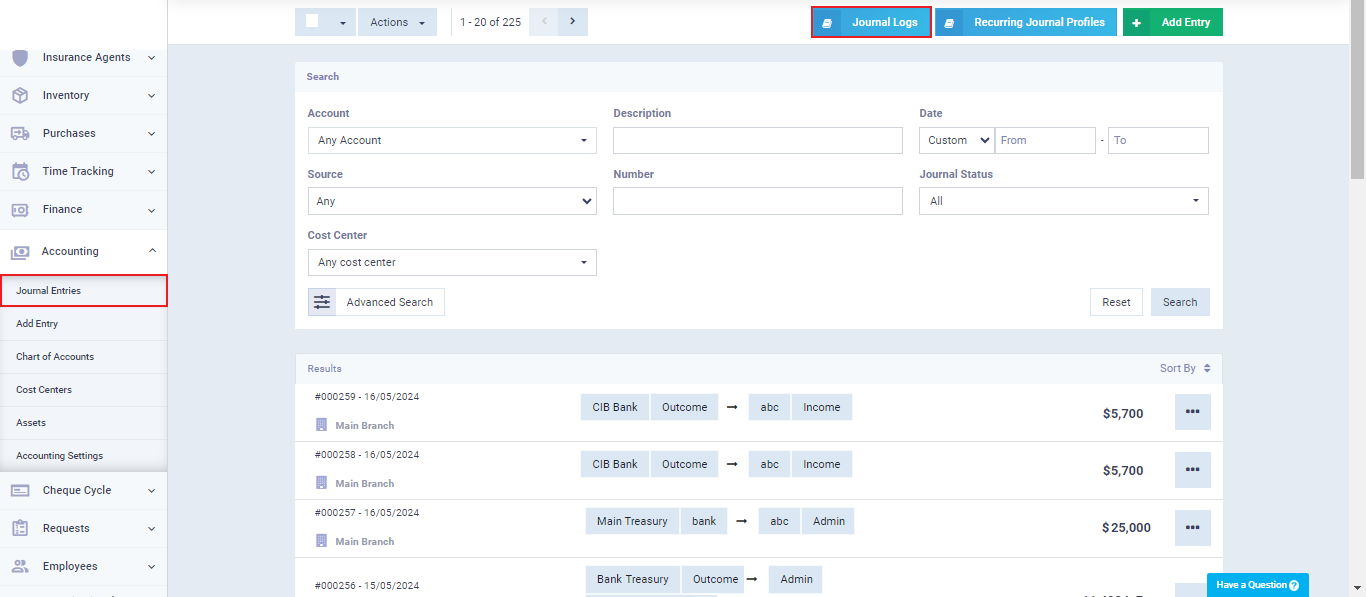
You will find a list of all entries in the system, as well as the actions made to those entries, detailing the entry and the type of action taken, whether it was adding a new entry or editing an existing one.
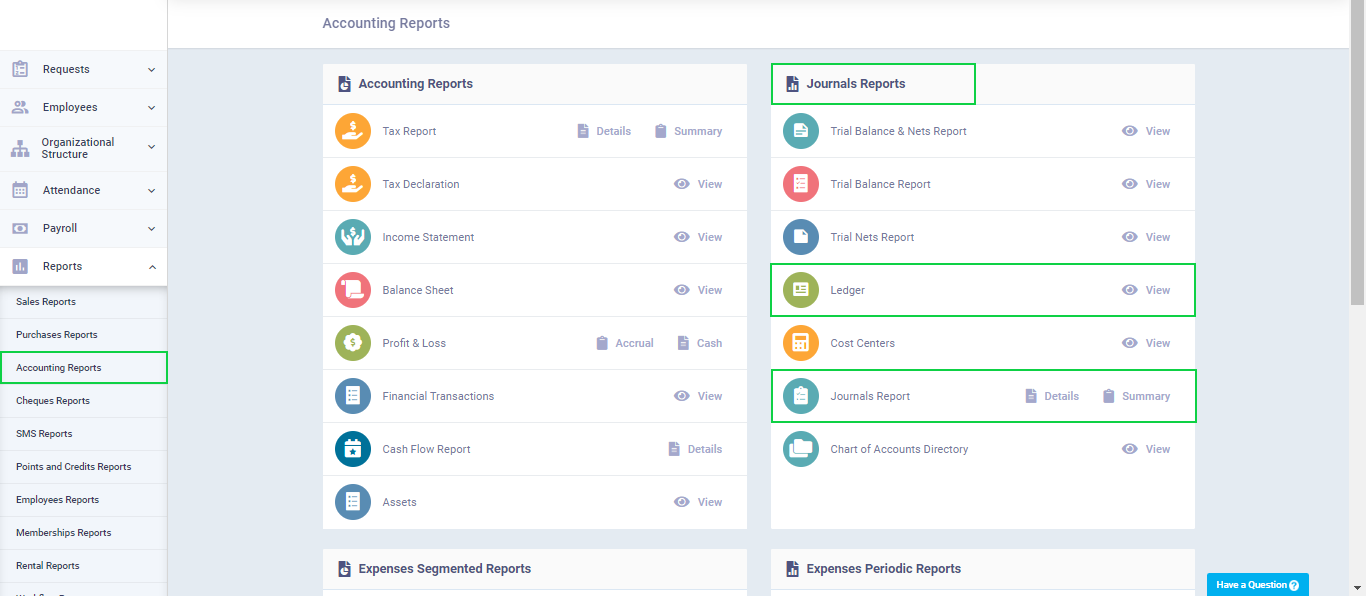
You can also generate reports for entries by clicking on “Accounting Reports” under “Reports” in the main menu. Under the “Journal Entries Reports” section, you will find a variety of reports that you can review.
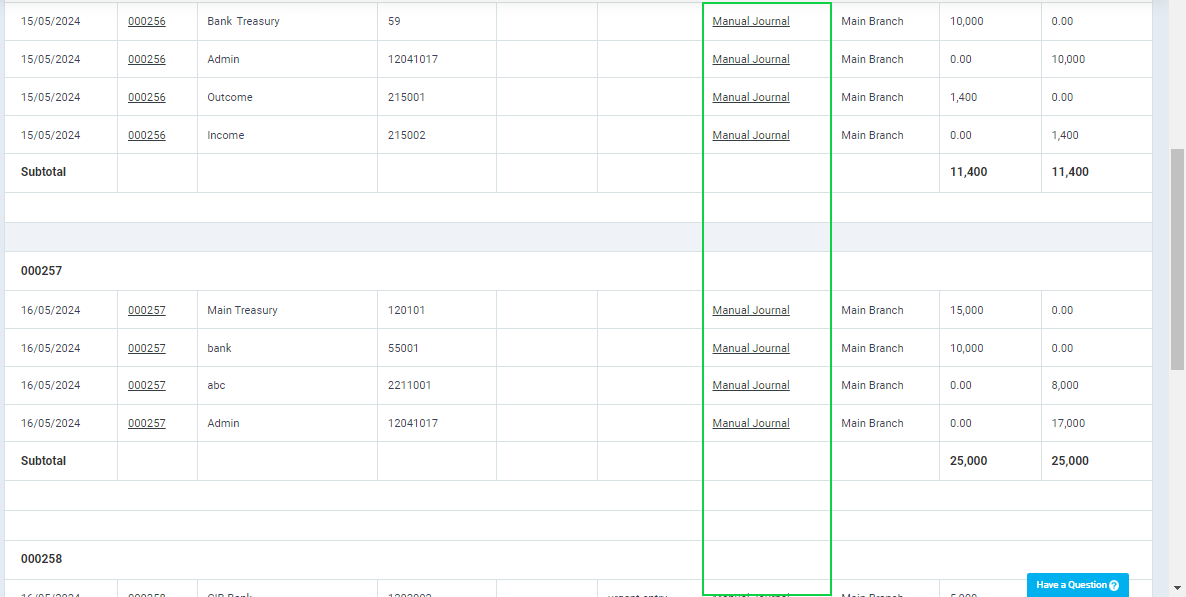
Here you will see a report of entries, with each entry numbered, allowing you to navigate to it. It specifies whether the entry type is manual or automatic, along with some additional data.
Here you will see the ledger, where the entries have been posted, some of them have been carried forward, and temporary entries have been disposed of.
