Purchases and Returns Accounting Entries
The purchasing process involves various accounting transactions. Each transaction is crucial for accurately recording your business’s financial activities.
Accounting entries resulting from a purchase transaction can vary based on two cases:
-
- Enable Requisitions for Purchase Invoices: In this case, the system automatically generates the purchase entry, while the warehouse entry necessitates manual confirmation of the inbound requisition.
- Disable Requisitions for Purchase Invoices: Here, the system automatically generates both the purchase and warehouse entries without any manual intervention.
In this article, we will detail the accounting entries that result from creating a purchase invoice in Daftra, based on each case.
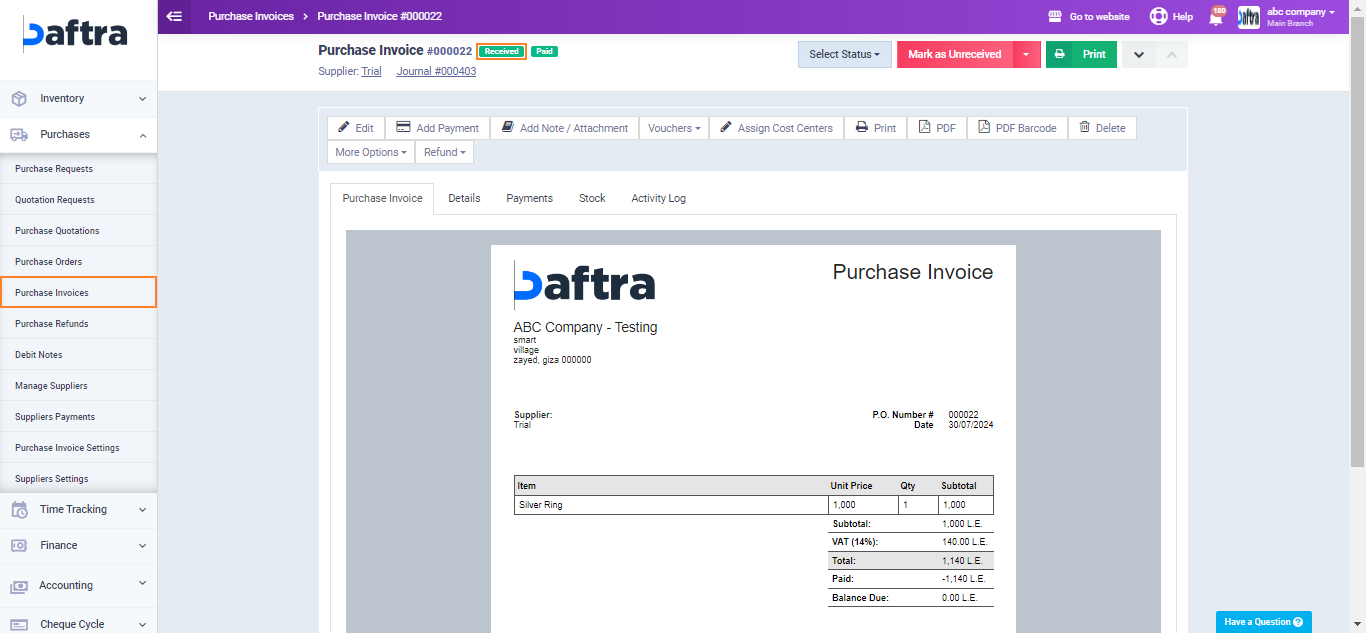
To create a purchase refund receipt click on “Purchase invoices” in the dropdown of “Purchases” and select the desired invoice.
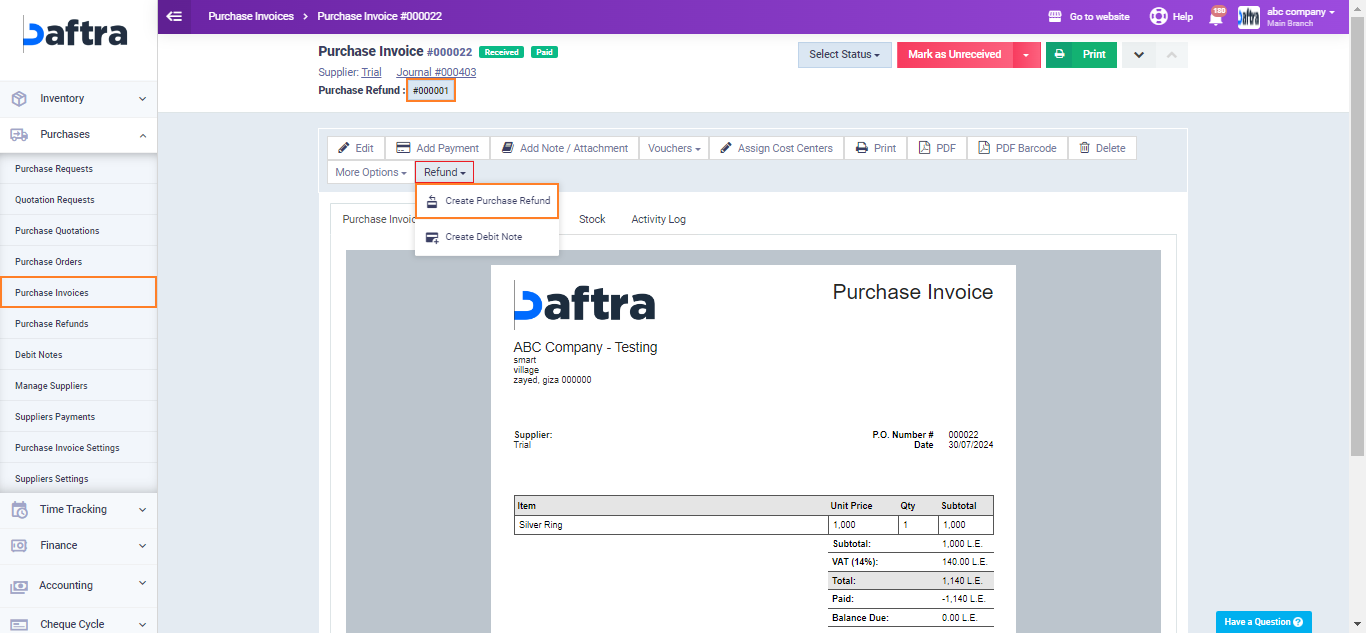
Click 0n “Refund” in the invoice task bar then select “Create Purchase Refund“.

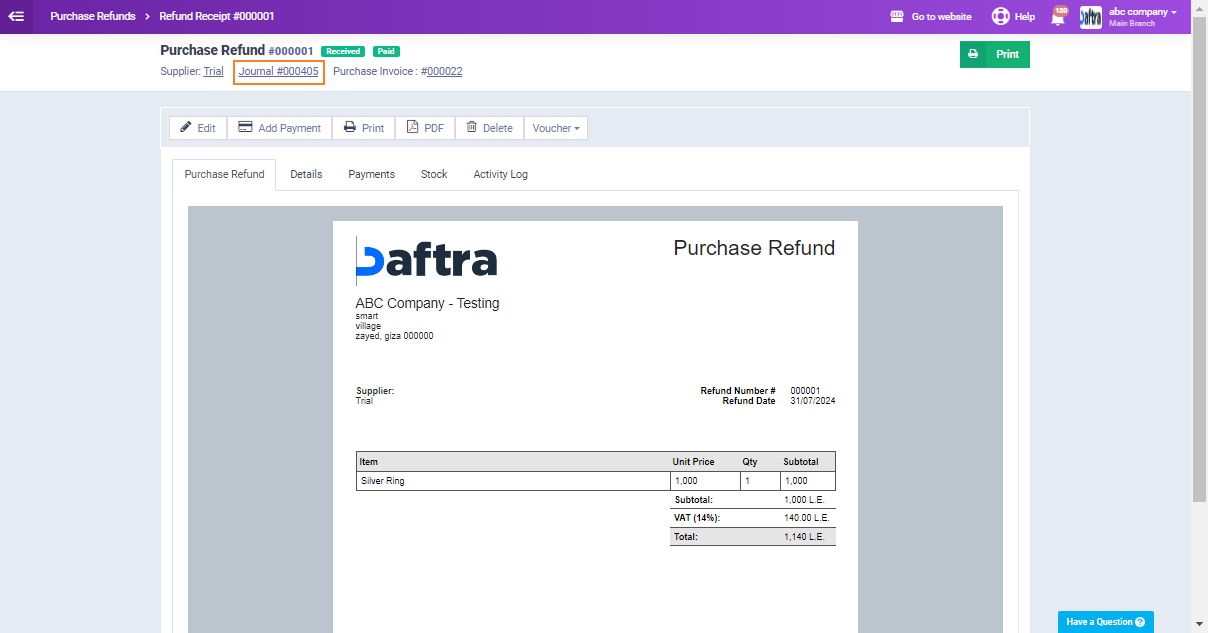
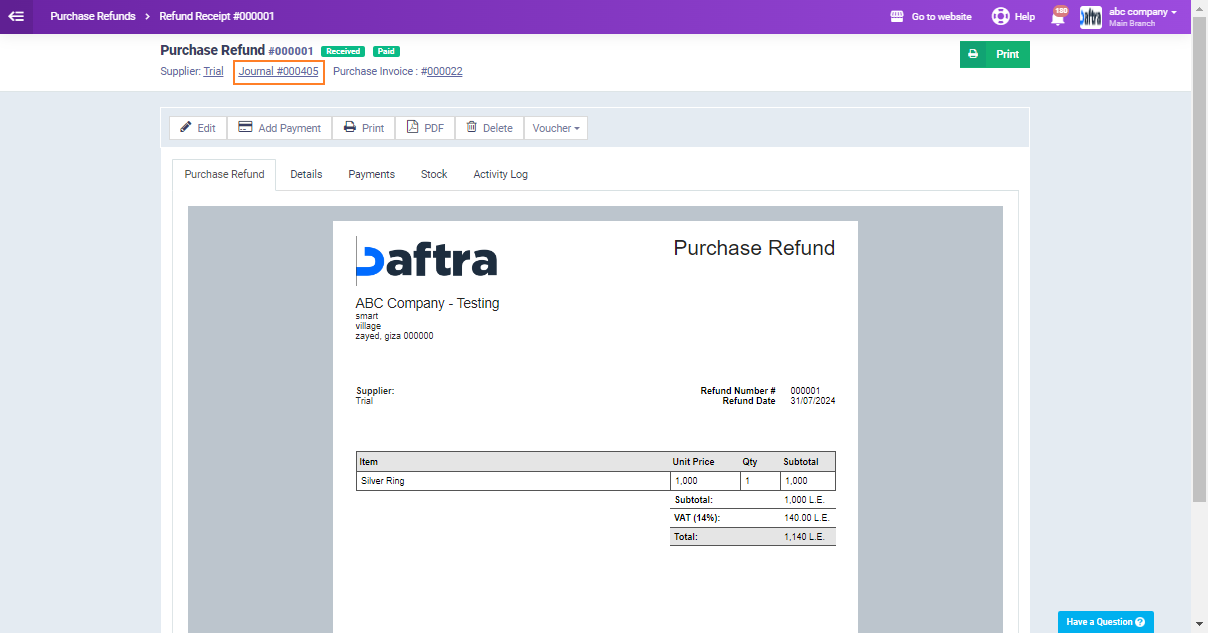
Click on the created “Purchase Refund,” which will appear below the invoice information after the refund is generated.
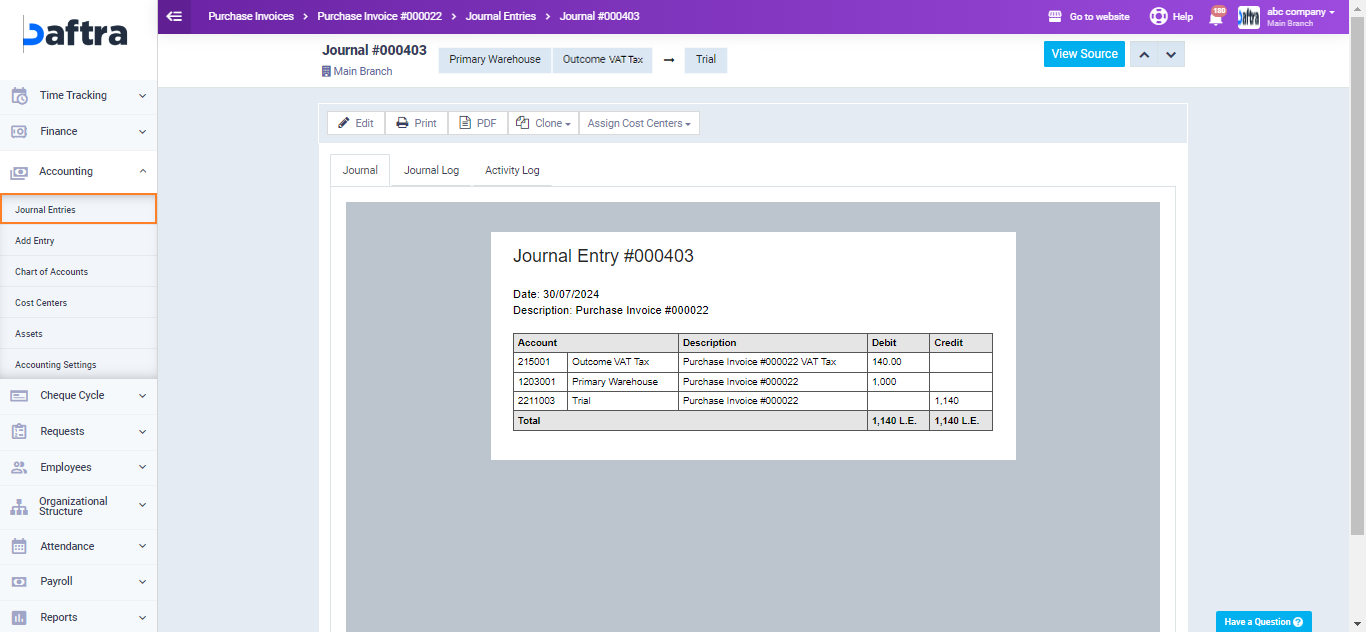
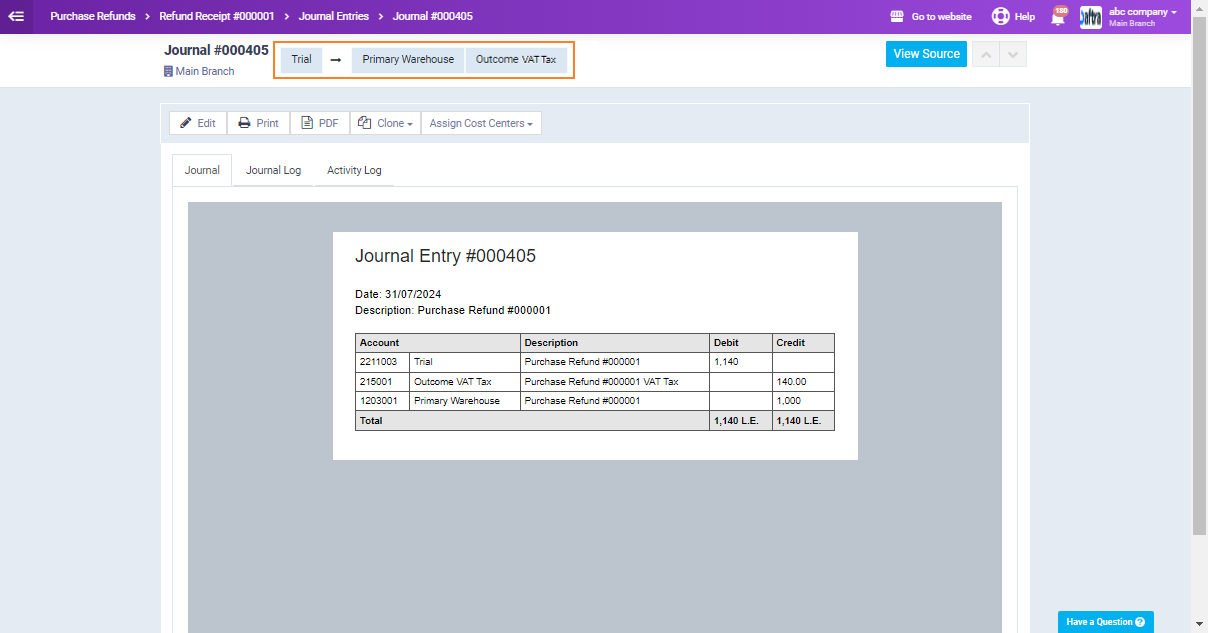
This entry records that the transaction is refunded from the “Supplier” account to the “Warehouse” and “Tax” accounts.
From the “Purchases” dropdown menu choose “Purchase Invoice“. Fill in the invoice info then click on the “Save” button.
In this case, the purchase invoice automatically produces both entries automatically.
Enable Requisitions For Purchase Invoices
First, you need to check whether the requisition for the purchase invoice is enabled or disabled, as this will affect the generated entries from the purchase invoice.
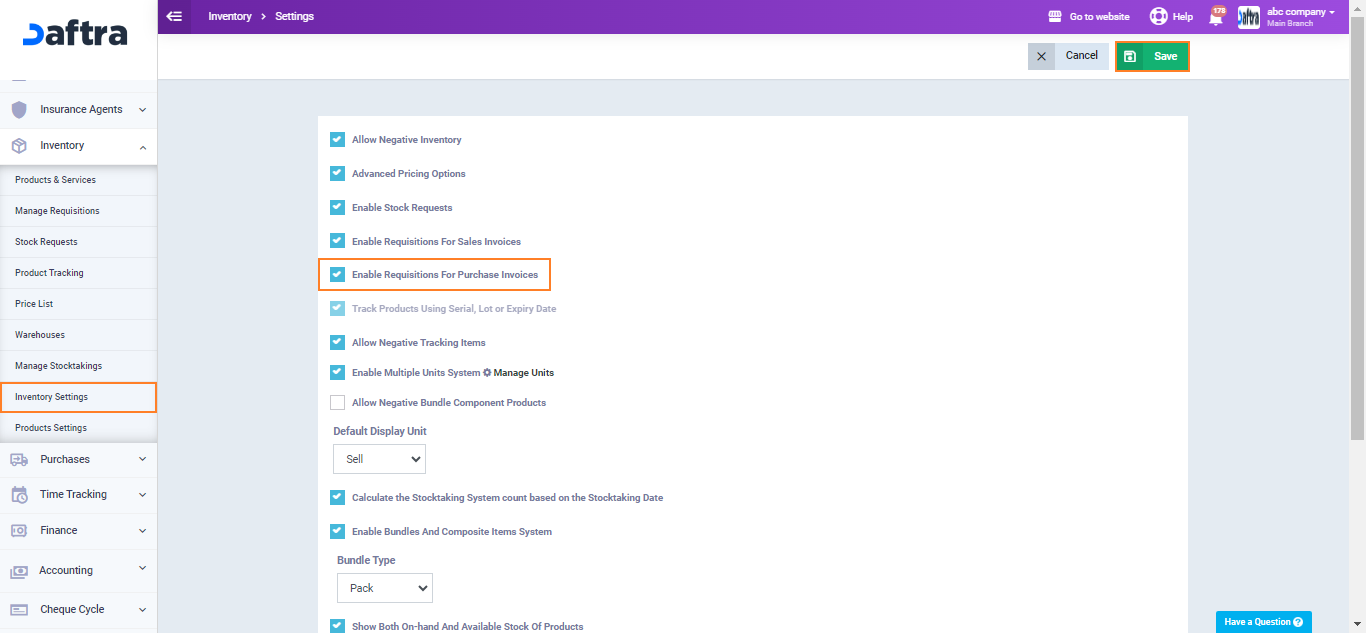
From the main menu click on “Inventory settings” then choose “General“.
When the “Enable Requisitions For Purchase Invoices” setting is activated, a purchase entry will be automatically generated upon the issuance of a purchase invoice.
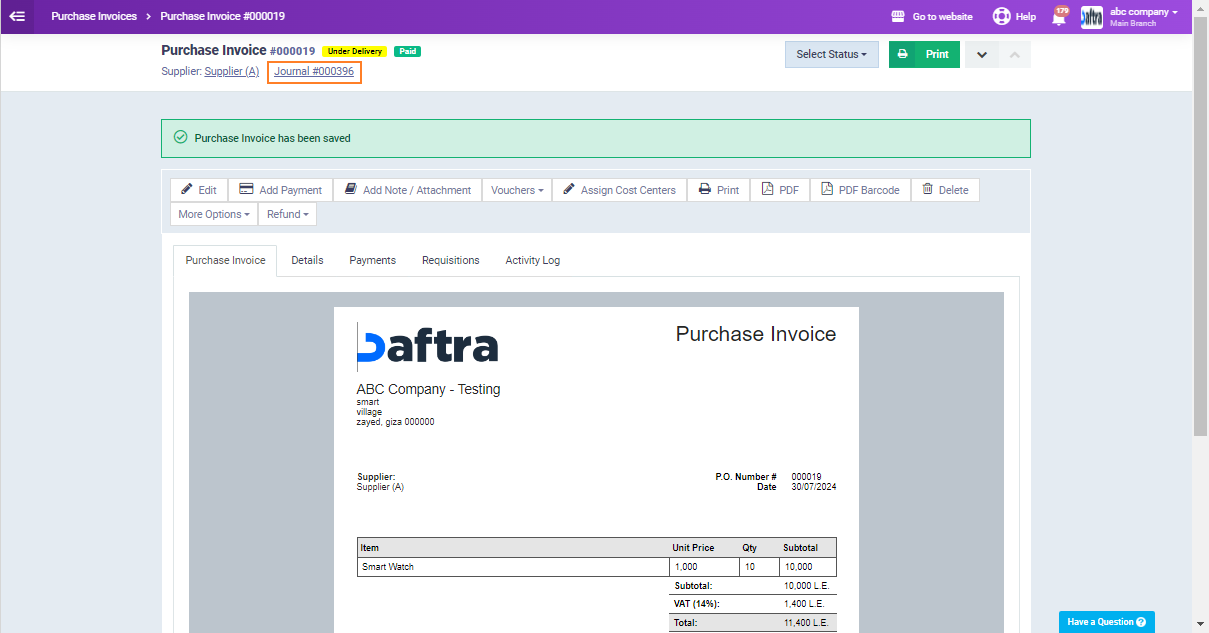
From the dropdown menu of “Purchases” in the main menu click on “Purchase Invoices“, then “+Add Purchase Invoice“. Fill in the invoice info then click the “Save” button.
Click on the entry number located beneath the invoice number and status.
Note that the invoice status here is “Under Delivery” as the inbound requisition is yet to be confirmed.
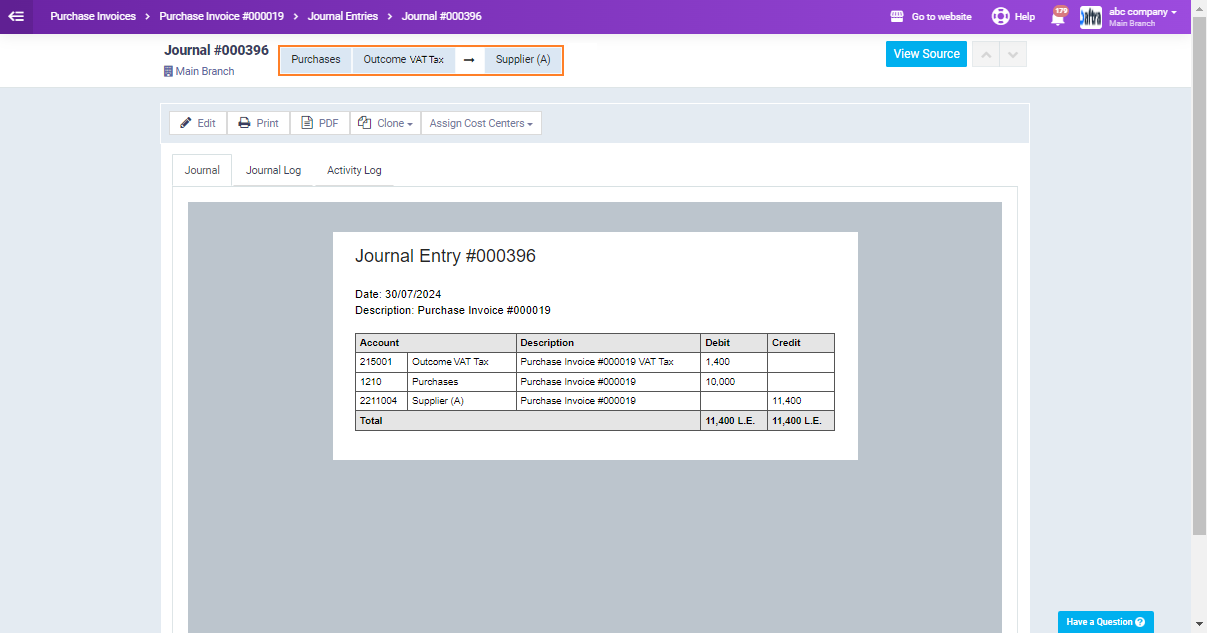
The resulting journal entry will reflect a debit to the purchase and tax accounts and a corresponding credit to the supplier as displayed in the image below.
The system also automatically generates an inbound requisition, which requires manual confirmation.
From the “Inventory” dropdown click on “Manage Requisitions“.
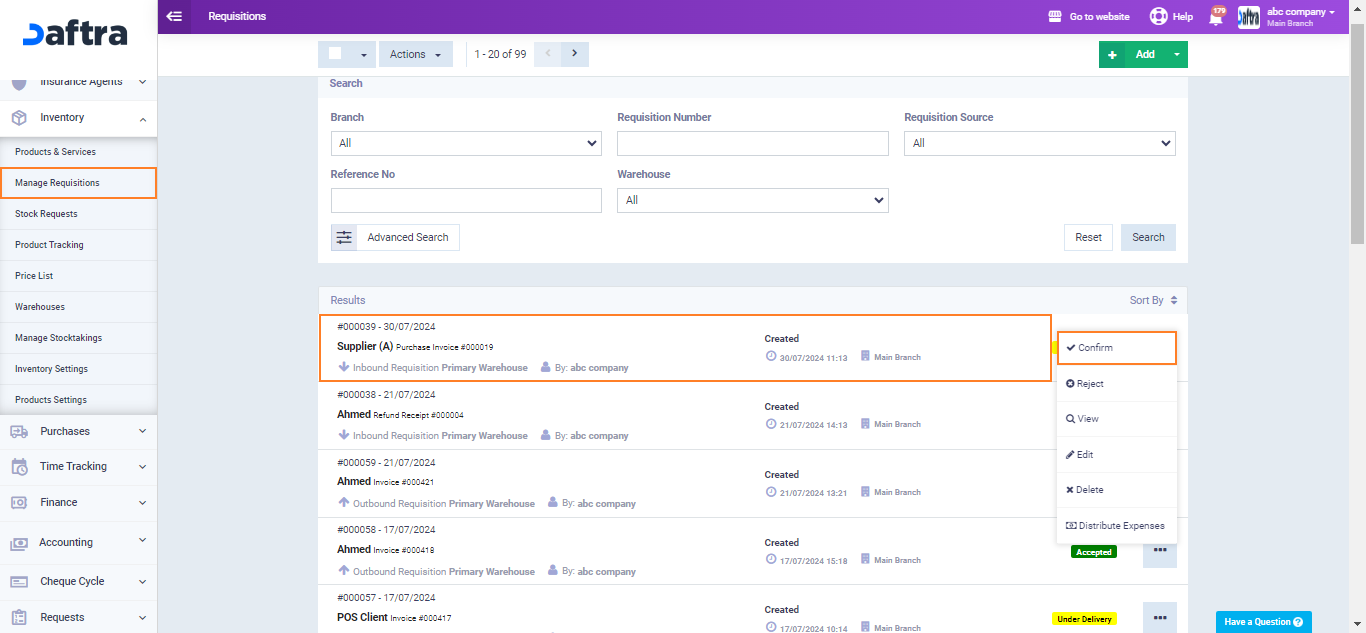
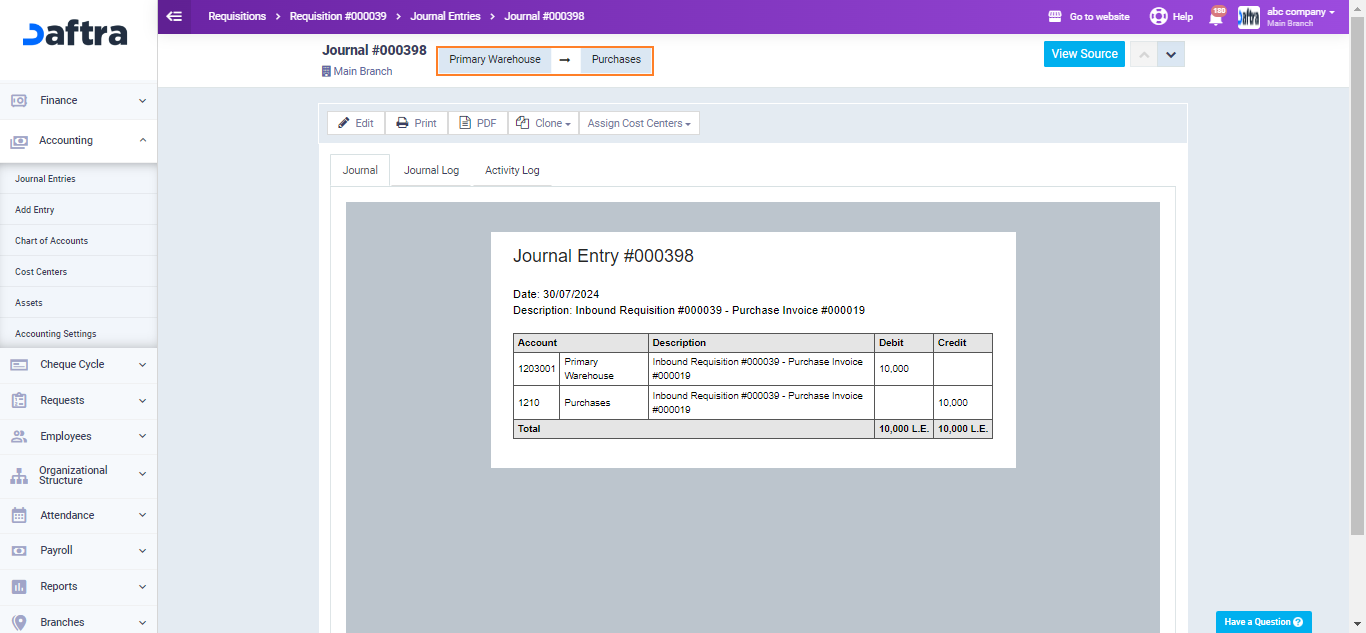
Once the requisition is confirmed, the system will automatically create an entry that debits the Warehouse account and credits the Purchase account. This ensures accurate financial records.
Disable Requisitions For Purchase Invoices
From the “Purchases” dropdown menu choose “Purchase Invoice“. Fill in the invoice info then click on the “Save” button.
In this case, the purchase invoice automatically produces both entries.
Click on “Journal Entries” from the dropdown menu of “Accounting“. You’ll find that both the purchase and warehouse entries are issued already.

