






A Complete Guide to M-PESA Payments
The system allows you to accept M-PESA payments on your invoices directly — the client receives an STK Push request on their phone, enters their PIN to complete the payment, and the system updates automatically once Safaricom confirms the transaction. This guide covers the complete workflow: from activation and credential setup, through executing a payment and handling errors.
Before You Begin
- Make sure you have the “Edit Payment Options” permission to access M-PESA settings. Users without this permission will not see the Payment Methods menu item.
- To activate M-PESA you will need the following Daraja credentials, obtained from Safaricom: Consumer Key and Consumer Secret (from the Daraja portal under My Apps), Business Shortcode (your Paybill or Till number registered with Safaricom), and Passkey (sent to you by Safaricom via email after your app is approved for production).
Part 1: Enabling M-PESA and Configuring Credentials
To enable M-PESA, an account administrator navigates to “Payment Methods” and toggles M-PESA on — the credentials form opens immediately. The form requires the Daraja credentials listed above, along with selecting the operating environment:
- Production: For live payments — uses
https://api.safaricom.co.ke. - Sandbox: For testing only — uses
https://sandbox.safaricom.co.ke.
A “Test Connection” button is available in the form to verify the credentials before saving. Once saved successfully, M-PESA becomes active and appears as a payment option on invoices.
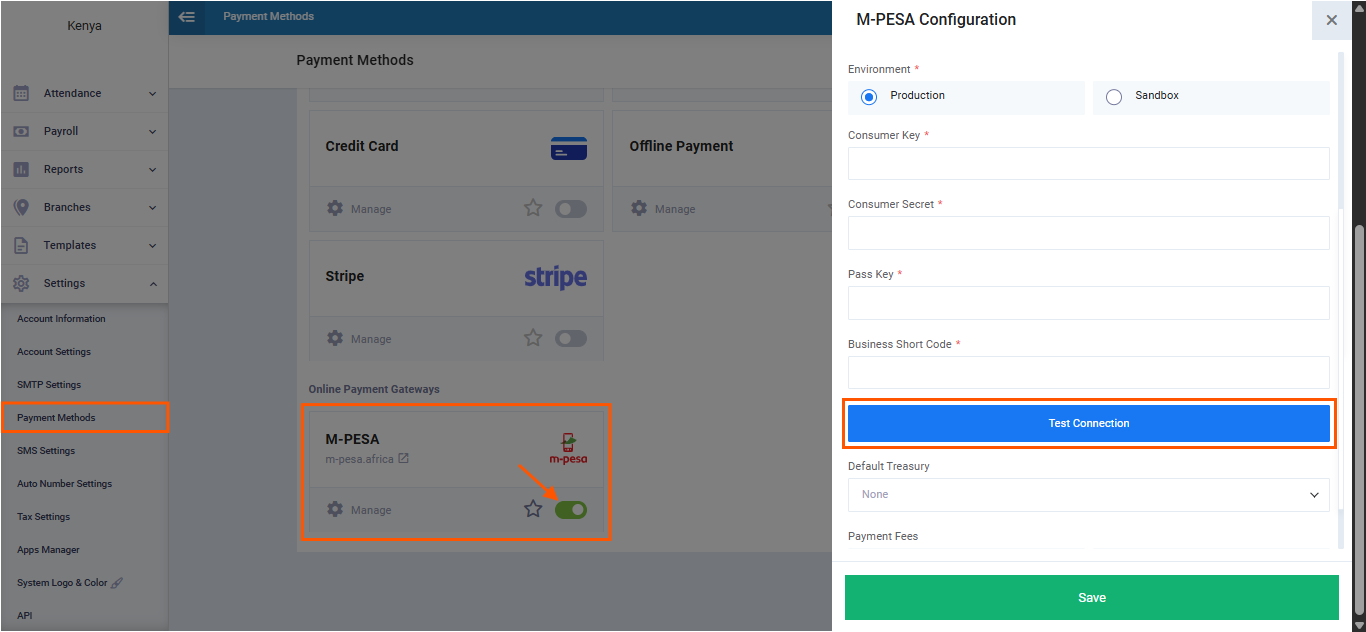
If the form is closed before saving, the M-PESA card shows a “Configuration required” warning badge — click the settings link on the card to complete the setup. M-PESA will not appear on invoices until the setup is complete.
Part 2: Updating Credentials
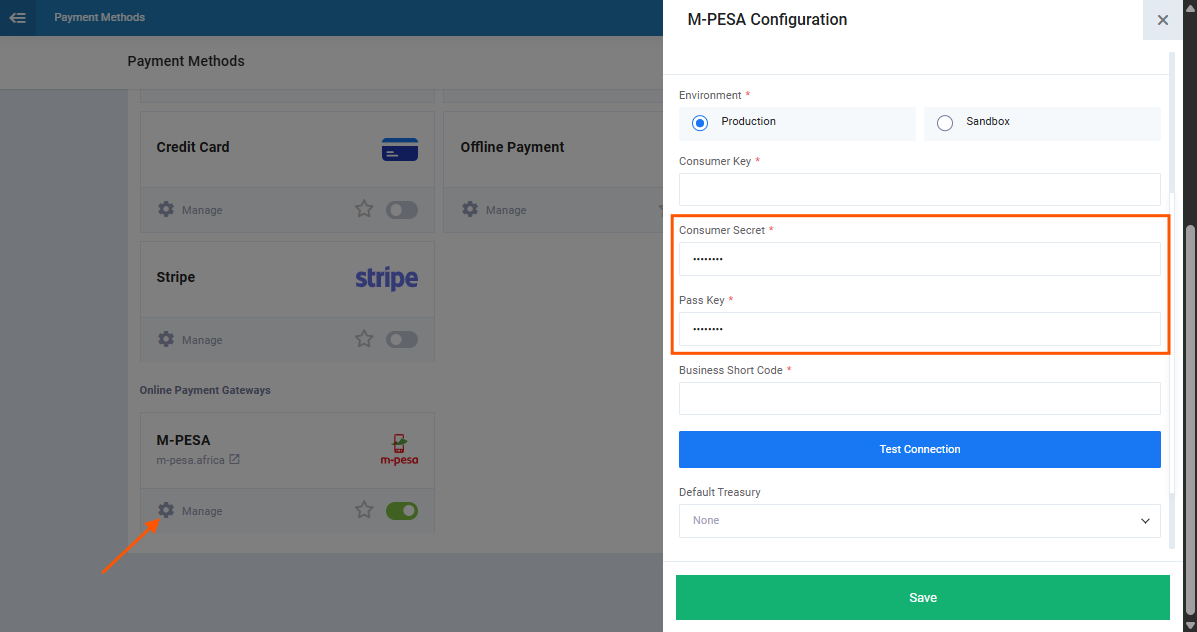
Daraja credentials can be updated at any time from the settings icon (⚙) on the M-PESA card on the Payment Methods page. Sensitive fields (Consumer Secret and Passkey) are displayed masked as ••••••••[last 4 characters] and are only enabled for editing when clicked. Updating credentials only affects future payments and does not impact historical records.
Part 3: Disabling M-PESA
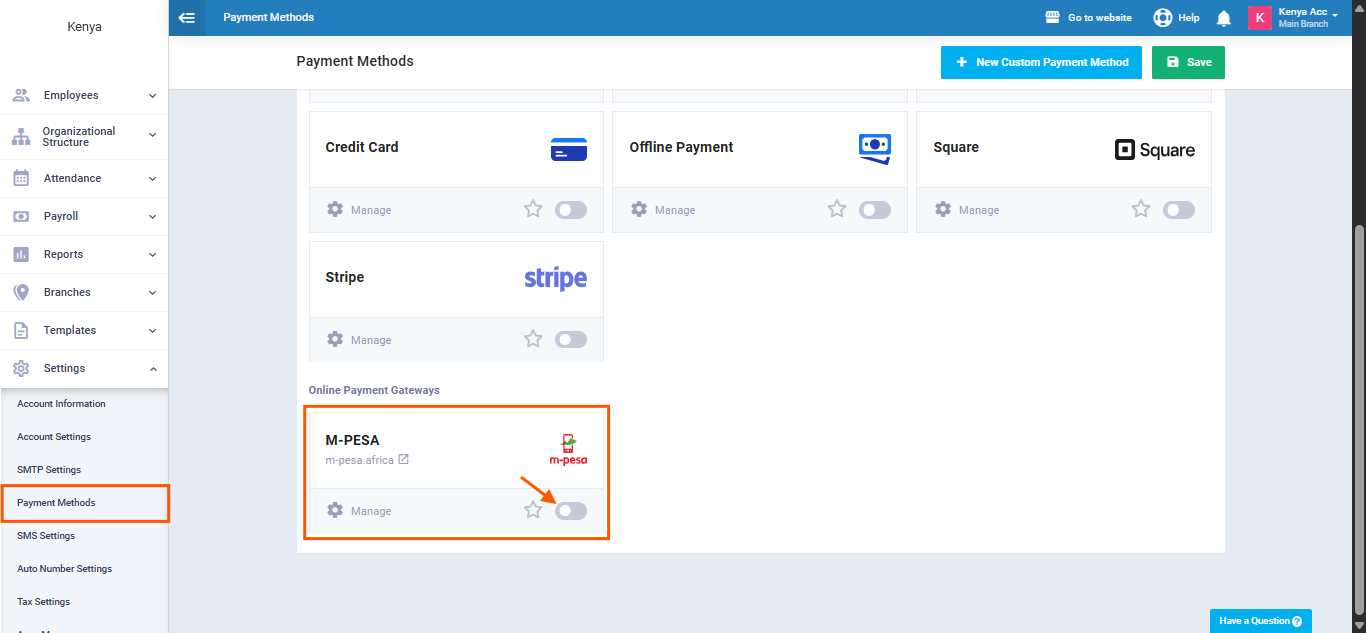
M-PESA can be turned off at any time by toggling it off from the “Payment Methods” page after confirming the prompt. Upon disabling, M-PESA is removed from all future invoice payment options, while historical payment records remain intact and unaffected.
Part 4: Paying an Invoice via M-PESA
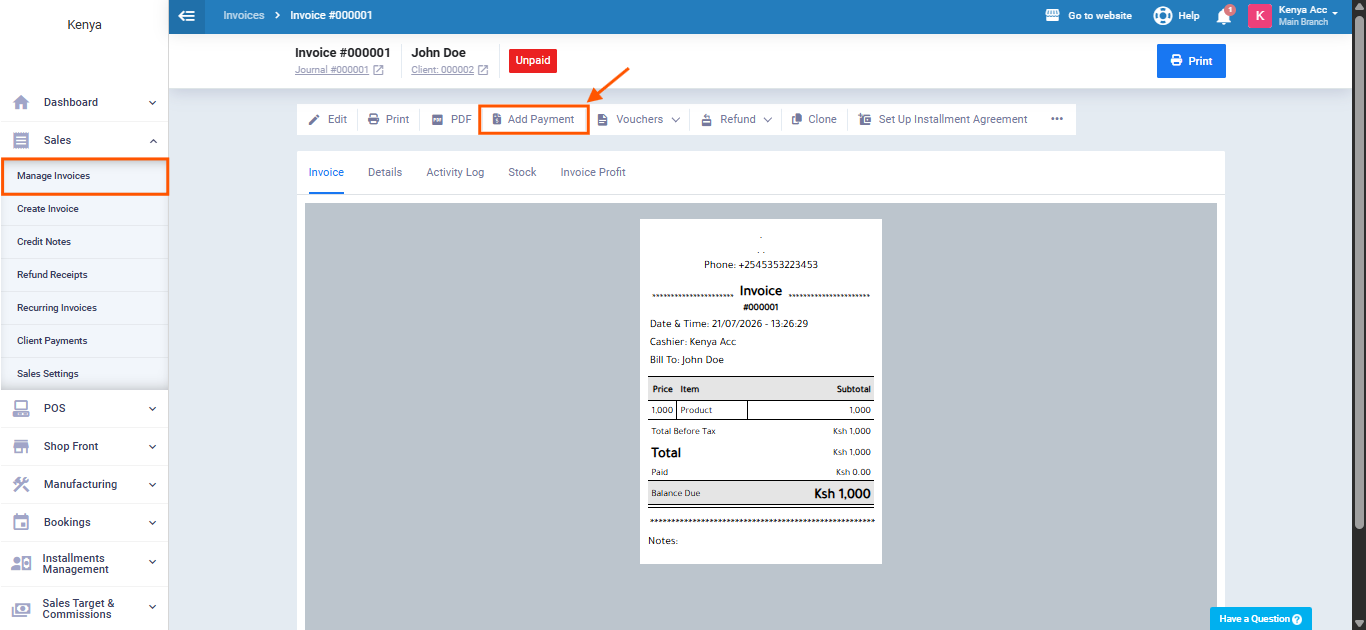
- Open the invoice you want to pay and click “Add Payment.”
- Select M-PESA from the available payment options.
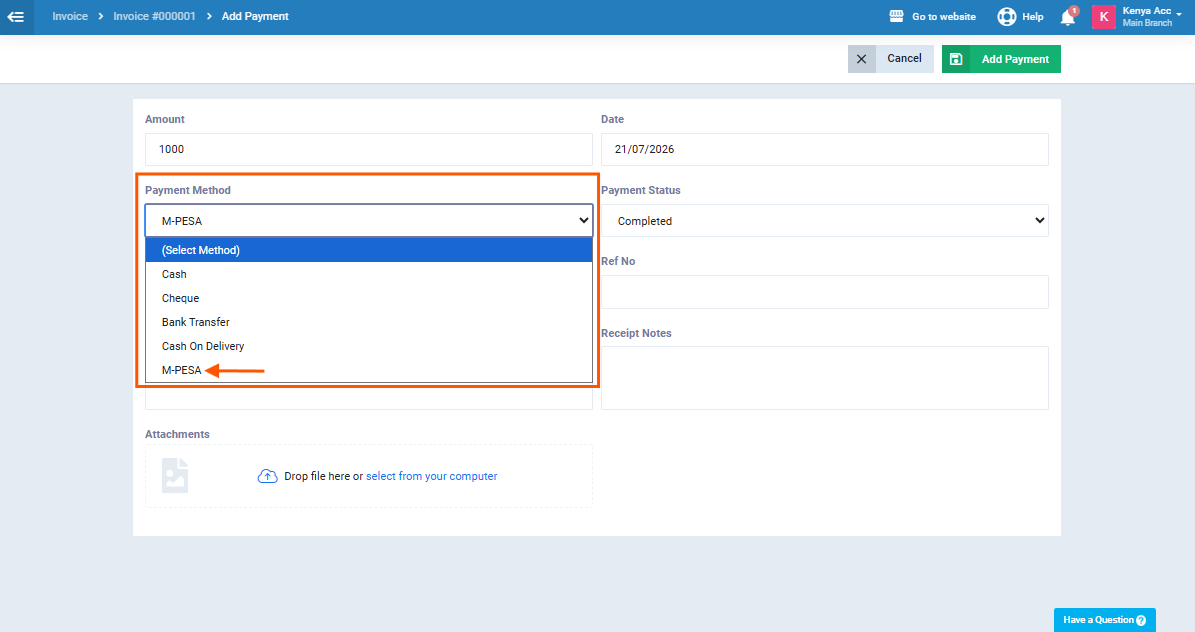
- A popup appears — enter the client’s M-PESA registered phone number in the format
254XXXXXXXXX(e.g. 254712345678).
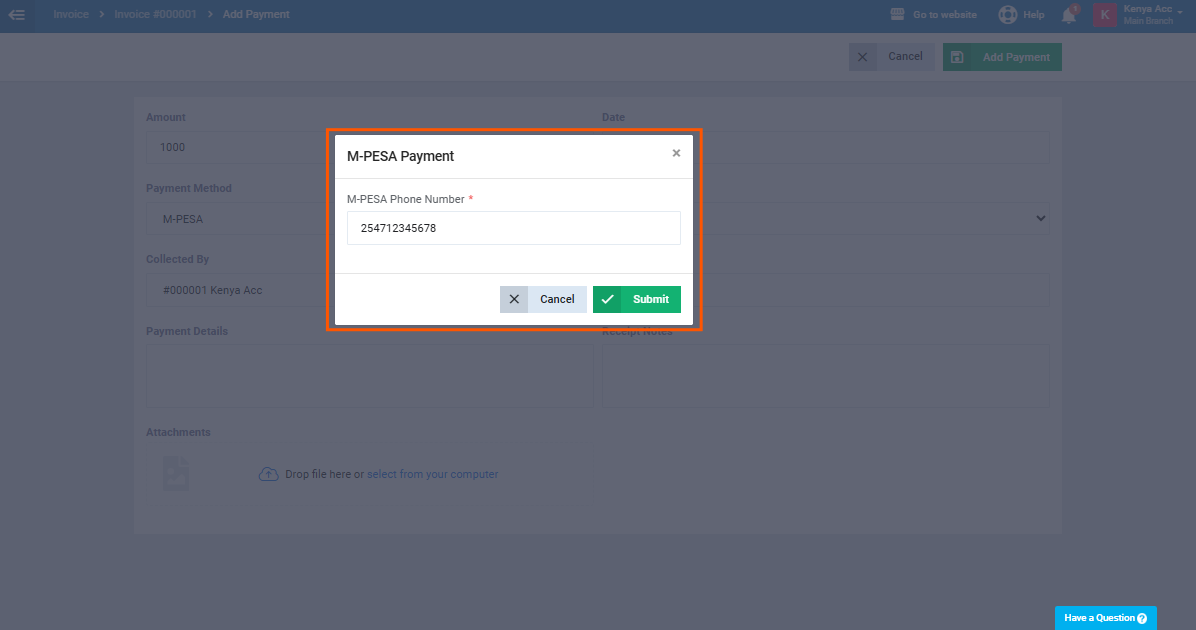
The phone number must always be entered manually — no pre-fill from the client record is applied. If the format is incorrect the message appears: “Please enter a valid M-PESA phone number in the format 254XXXXXXXXX.”
- Review the instruction on screen: “You will receive an M-PESA prompt on your phone. Enter your PIN to complete the payment.”
- Click “Submit” — the popup closes and the payment request is sent to Safaricom.
- A waiting screen appears with a countdown timer and the status “Waiting…” — keep this screen open.
- On the client’s phone, an STK Push prompt appears — enter the M-PESA PIN to authorize the payment.
- Once Safaricom confirms the payment, the screen redirects to the payment success page displaying the M-PESA receipt number.
Payment Amount
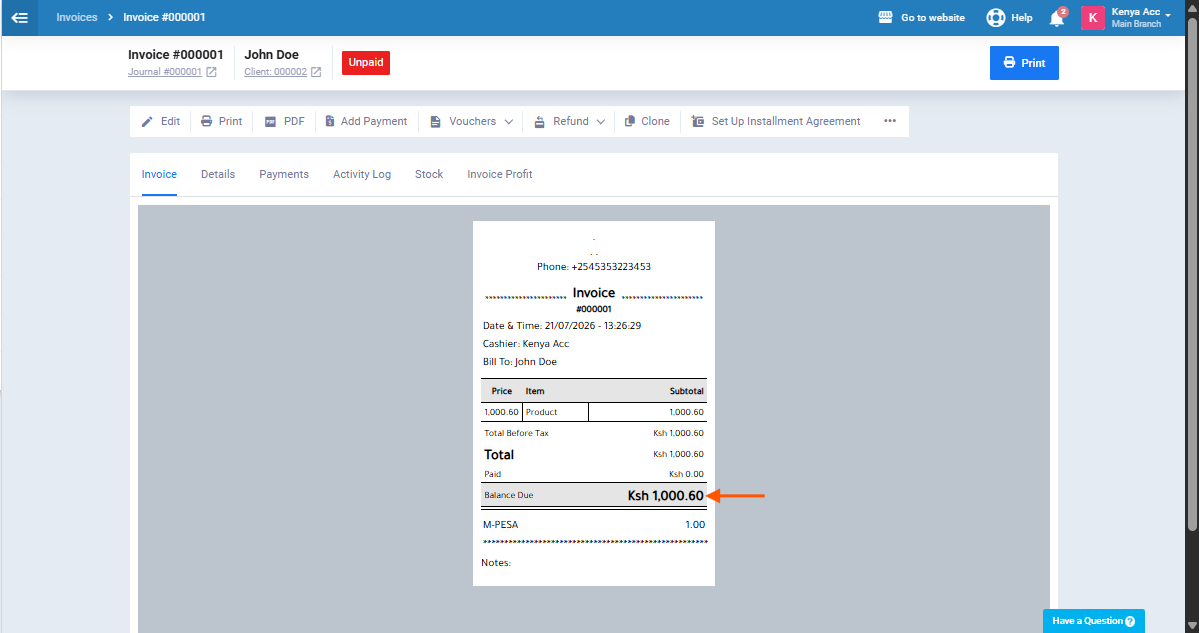
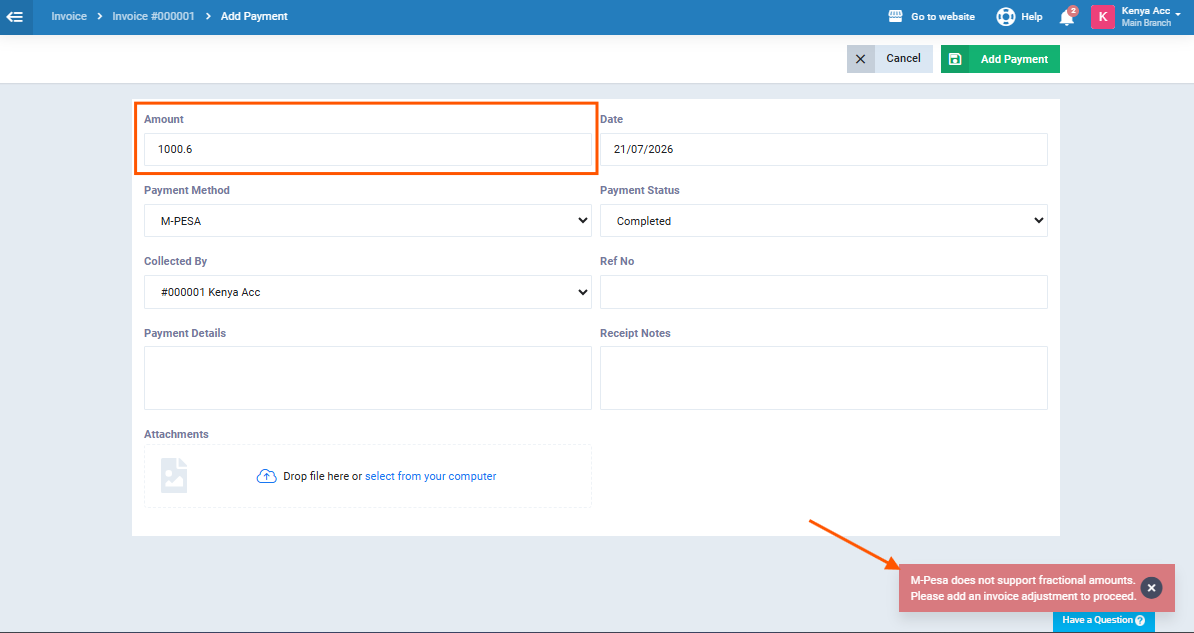
The payment amount is automatically set to the full outstanding invoice balance, rounded up to the nearest whole Kenyan Shilling (e.g. KES 1,500.50 is sent as KES 1,501). Partial payments are not supported in the standard flow.
What Happens After a Successful Payment
The invoice status changes to Paid and a payment record is created containing the M-PESA receipt number, the masked client phone number (e.g. 254•••••••78), the amount paid in KES, the payment timestamp, and the payment method. The payment is visible in the invoice’s Payment History tab and an accounting journal entry is created following the same rules as all other payment methods.
Part 5: If the Payment Does Not Complete
The waiting screen remains open while the system checks the payment status. If no confirmation is received within 60 seconds, the system automatically queries Safaricom and the screen updates to “Checking…” — retrying every 10 seconds for a maximum of 3 retries.
For most failure scenarios — including cancellation, timeout, insufficient funds, an active USSD session on the phone, or a temporarily unavailable service — a descriptive message appears alongside a “Try Again” button that returns to the phone number entry step.
Two scenarios do not offer a retry option: when the PIN has been entered incorrectly too many times (contact Safaricom as directed in the message), and when the payment status cannot be confirmed after all retries are exhausted. In the latter case the invoice remains as Pending and the message appears: “We could not confirm your payment status. Please check your M-PESA messages. If the amount was deducted, contact support with your receipt number.” Do not attempt to pay the invoice again before verifying with Safaricom whether the amount was deducted.