


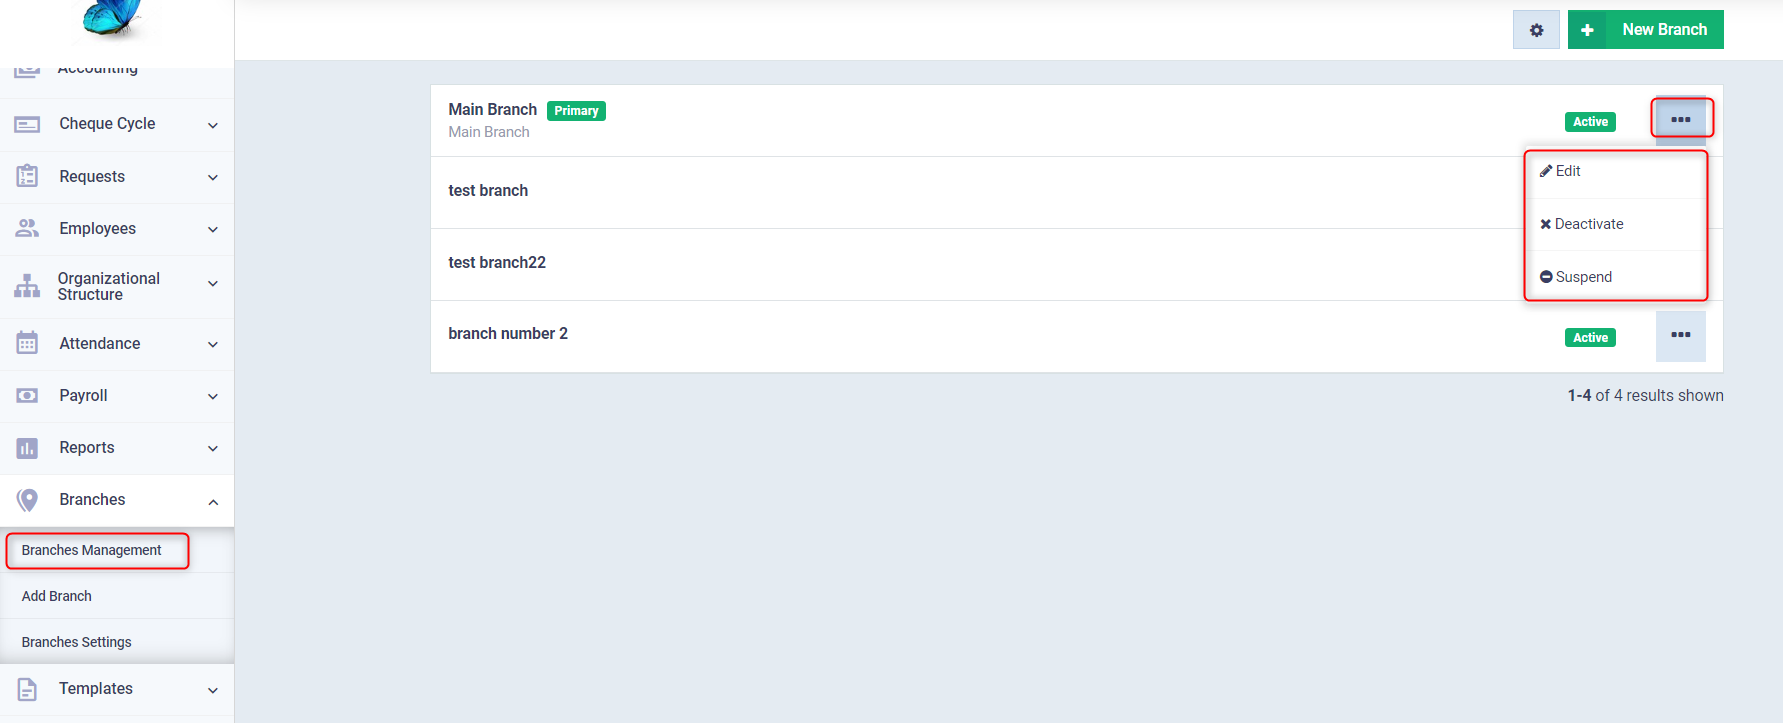
Adding and Managing Branches
Through the system, you can add as many branches as you want and easily control their settings.
Adding and Managing Branches
Click on “Branches Management” under “Branches” in the main menu, and click on the three dots next to the branch name if you want to edit, disable, or stop it.
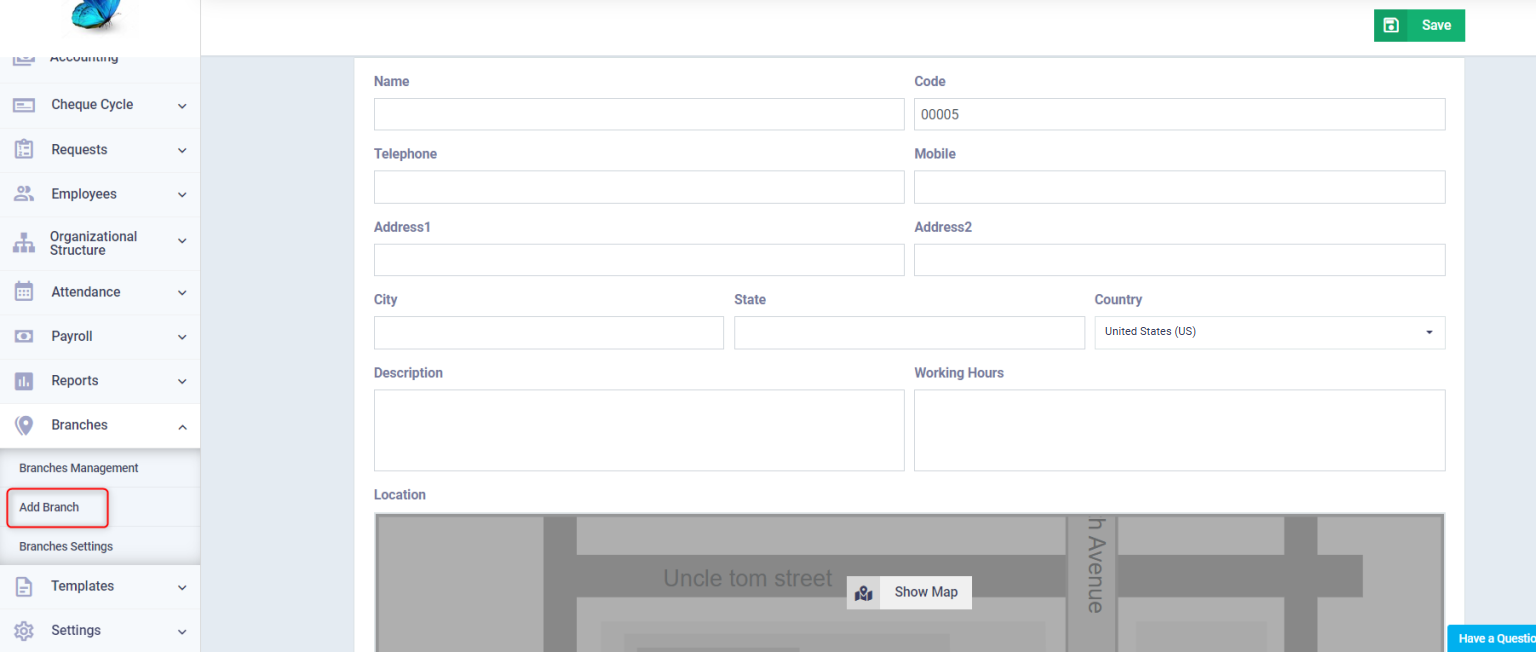
And click on the “New Branch” button to create a branch.
Enter the new branch details as follows:
- Name: Type the name of the new branch.
- Code: A serial number for the branches, which is automatically generated starting from number 1. For more details, refer to the guide on “Setting up Auto Numbering Settings“.
- Telephone: Enter the landline phone number of the branch.
- Mobile: Enter the mobile phone number of the branch.
- Address 1: Write the primary address of the branch.
- Address 2: Write another address for the branch, if any.
- City: Select the city of the branch.
- State: Select the province where the branch is located.
- Country: Select from the dropdown menu the country of the added branch, while the country specified in your account data will be selected automatically.
- Description: Write a description for the new branch.
- Working Hours: Enter the working hours at the added branch.
- Location: Mark the branch location on the map
- Note: Please agree to the program’s request to determine your location.
Click the “Save” button once you are done.
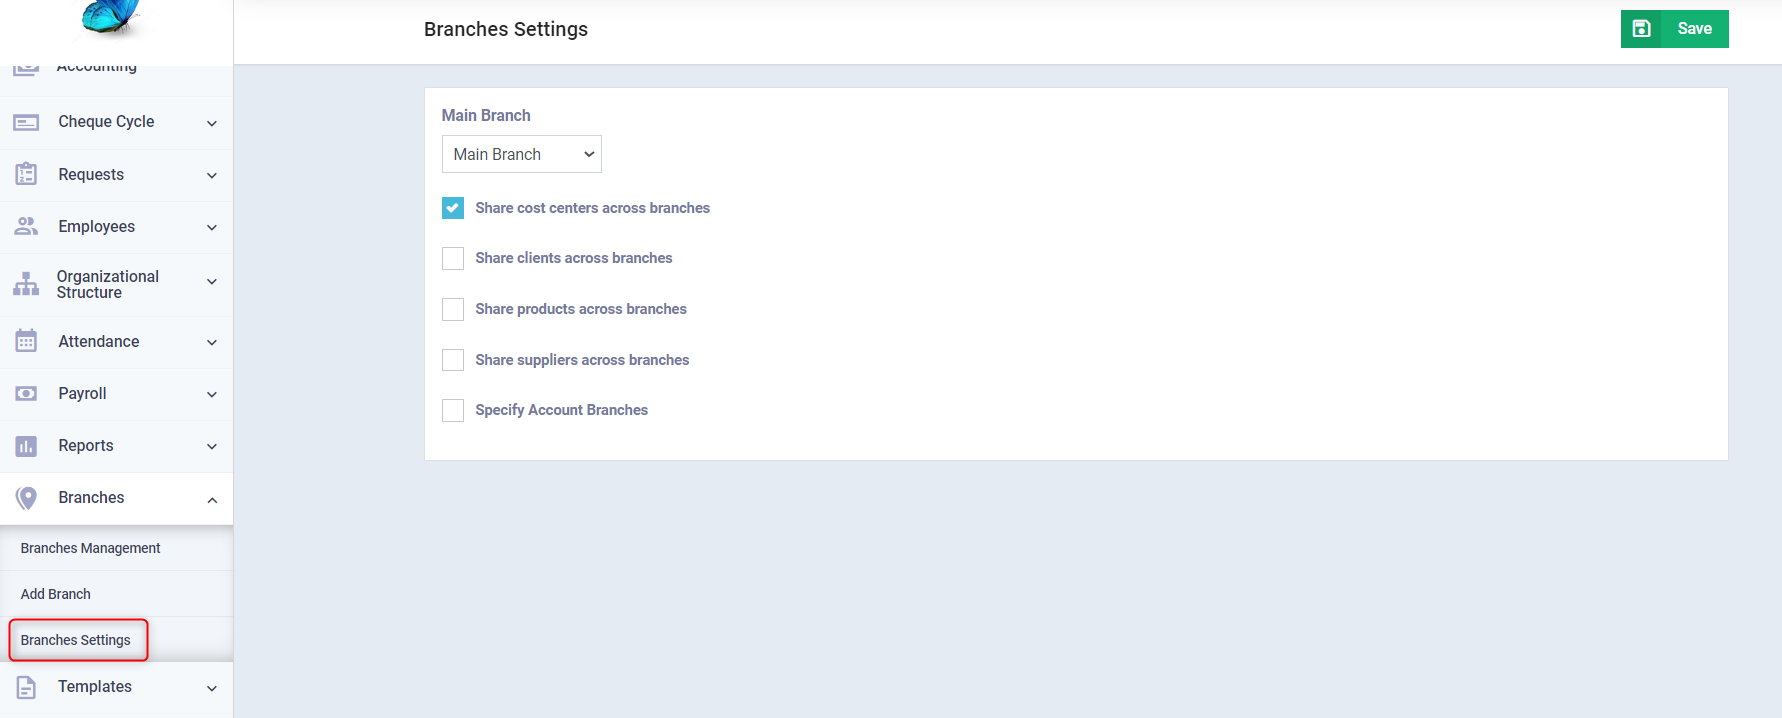
Branches Settings
From the main menu, click on “Branches“.
Click on “Branches Settings“.
Set the settings as follows:
- Main Branch: Select your main branch from the dropdown menu.
- Share clients across branches: Click this checkbox to allow sharing your clients’ data among all branches.
- Share products across branches: Click this checkbox to allow sharing of the products/services your business provides among all branches.
- Specify Account Branches: Click this checkbox to enable creating a separate account for each branch in the chart of accounts, where financial accounting is carried out separately for each account based on the specified branch.
- Note: For more details on how to create an account in the chart of accounts, please refer to the guide “Adding a New Account in the Chart of Accounts“.
Click on the “Save” button.