


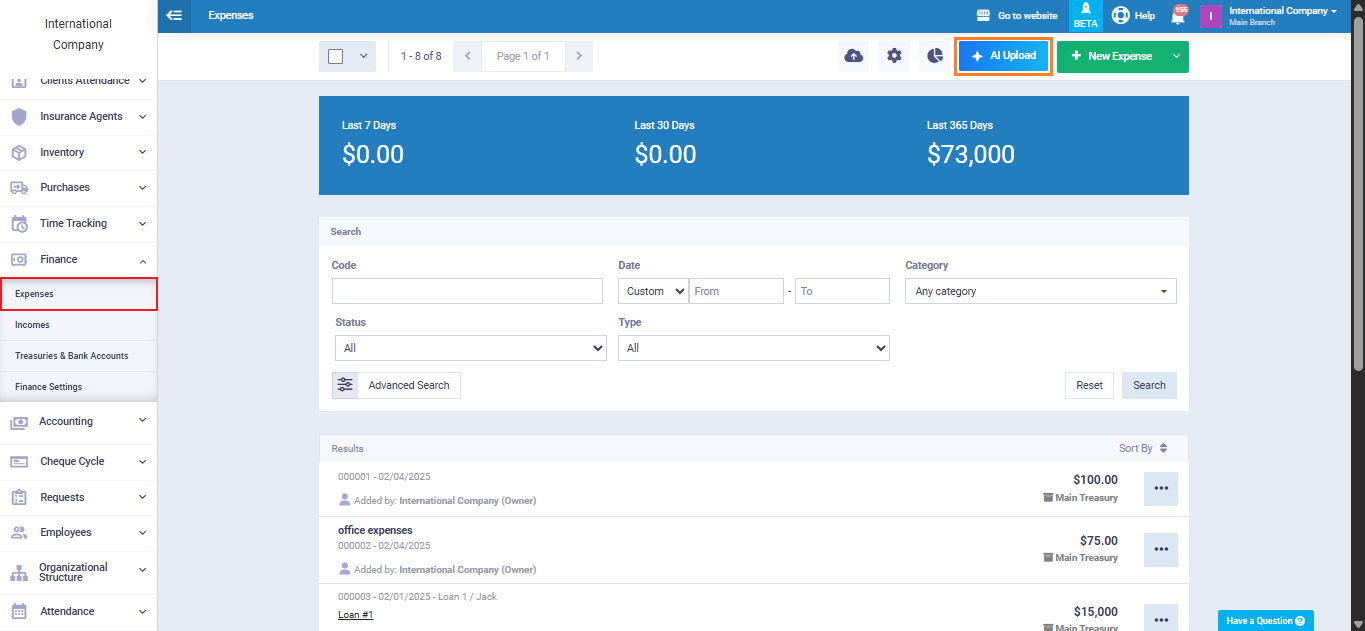
Uploading Expenses via AI
Manually entering expenses can be time-consuming and labor-intensive. The system allows you to create expenses automatically with AI assistance, simply upload an invoice or receipt, and the system extracts the data and fills in the fields for you.
Uploading Files and Starting Processing
From the main menu, click “Finance”, and select “Expenses” from the dropdown menu, then click “AI Uploads.”
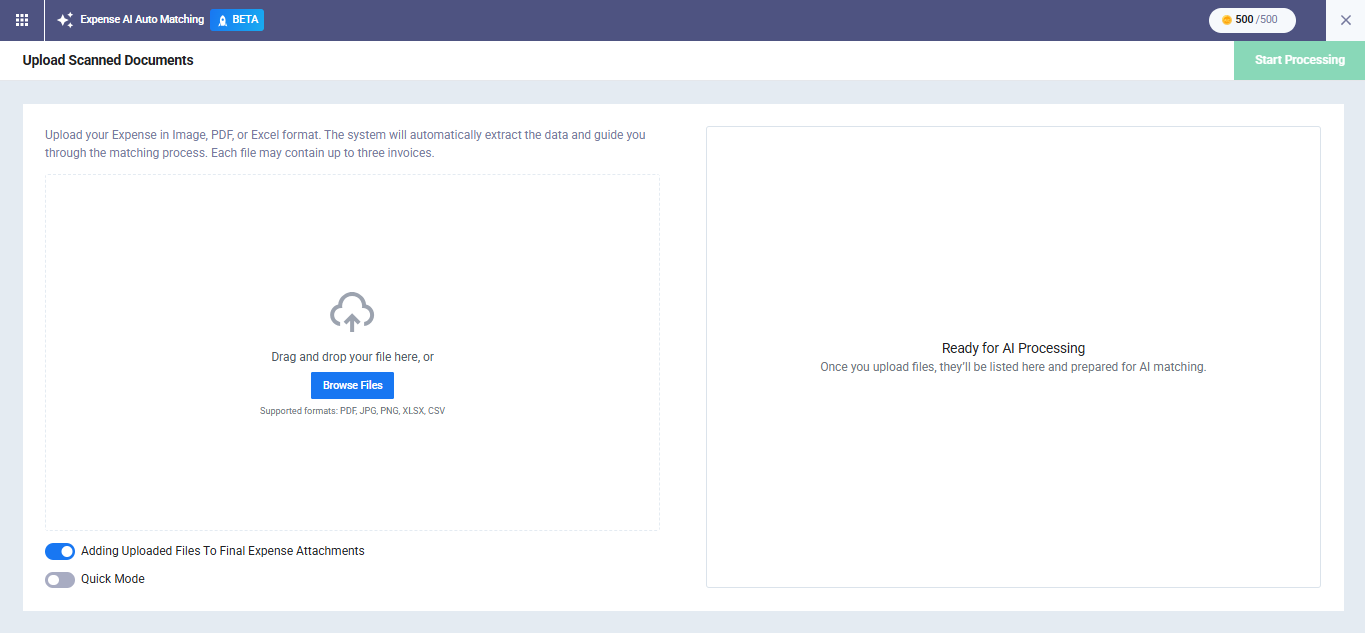
The system accepts files in the following formats: PDF, PNG, JPG, XLSX, with a maximum size of 10 MB per file, and you can upload up to 100 files at once.
You will see the file upload interface, which supports two methods:
- Drag and drop files directly into the designated area.
- Click “Browse Files” to open a browsing window on your device.
Once files are selected, the system automatically performs several checks to verify each file before processing:
- File type: Is it supported (PDF, PNG, JPG, XLSX)?
- Size: Does it exceed 10 MB?
- File integrity: Is it not corrupted or encrypted?
- Duplicate check: Has this file been uploaded before in the same batch?
Below the “Attachment” field, a list displays all added files showing: name, size, status, progress bar, and buttons for preview, delete, or cancel processing.
File Processing Stages and Statuses
After uploading, each file goes through sequential statuses reflecting its stage in the processing cycle:
- Queued: The file is waiting in line; processing has not started.
- Processing: AI is currently extracting data from the file.
- Ready for Review: Extraction is complete and awaiting your review and confirmation.
- Completed: The file has been reviewed and the expense successfully saved.
- Limit Reached: Your AI Credits balance is depleted; remaining files will not be processed until recharged.
- Failed: The system could not read or process the file; you can retry using the Retry button.
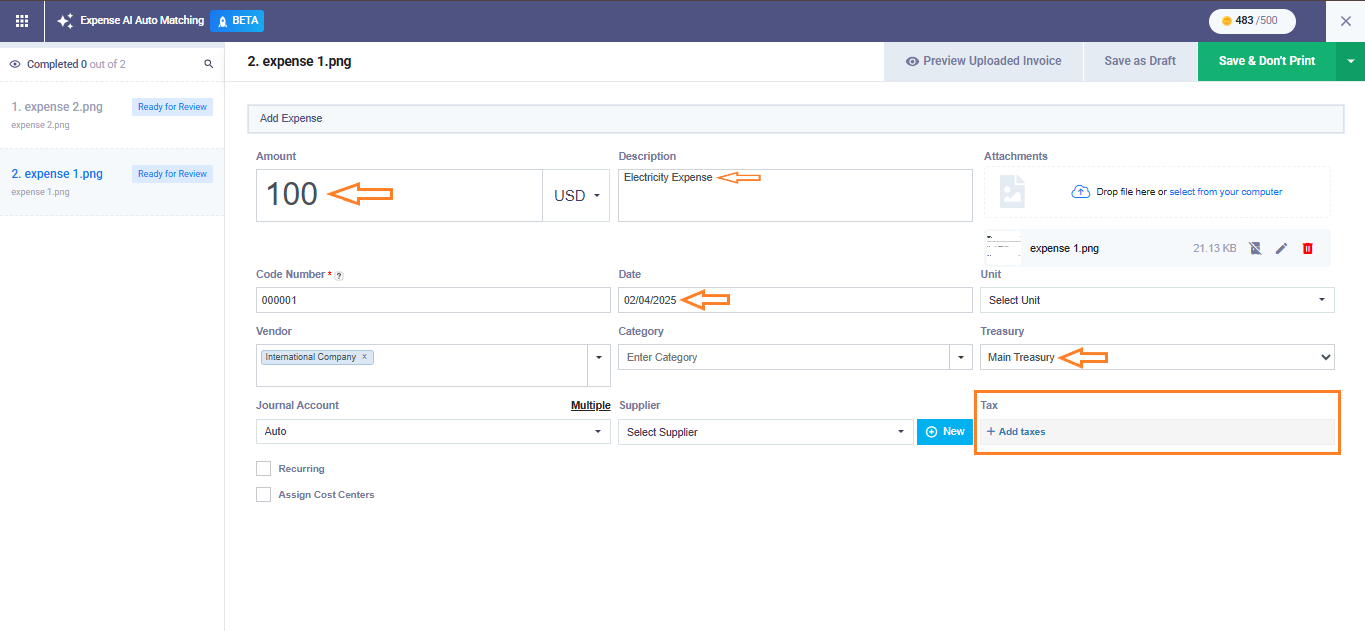
AI Data Extraction and Confidence Level
Once a file is processed, the system automatically extracts the following fields and attempts to match them with your account data:
- Amount: Extracted directly from the file.
- Currency: Matched using the currency code from your account.
- Description: Extracted directly from the file.
- Date: Extracted directly from the file.
- Vendor: Matched first by tax ID / commercial registration number, then by supplier name, then other data.
- Tax: Matched by percentage first, then by name.
Each extracted field includes a confidence level indicating the accuracy of the match:
- High Confidence: The field is filled automatically; you can edit it.
- Medium Confidence: The field is filled automatically with a warning to review before saving.
- Low Confidence / No Match: The field is left empty or displays the extracted value as “New”, prompting manual verification.
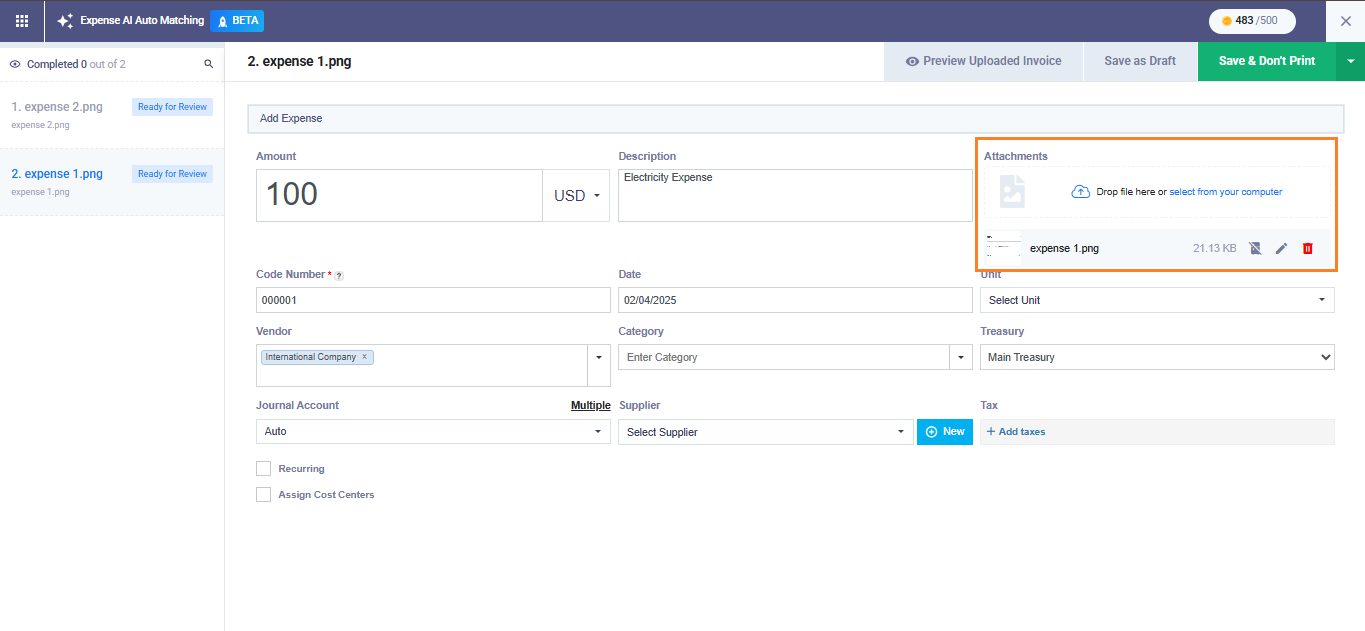
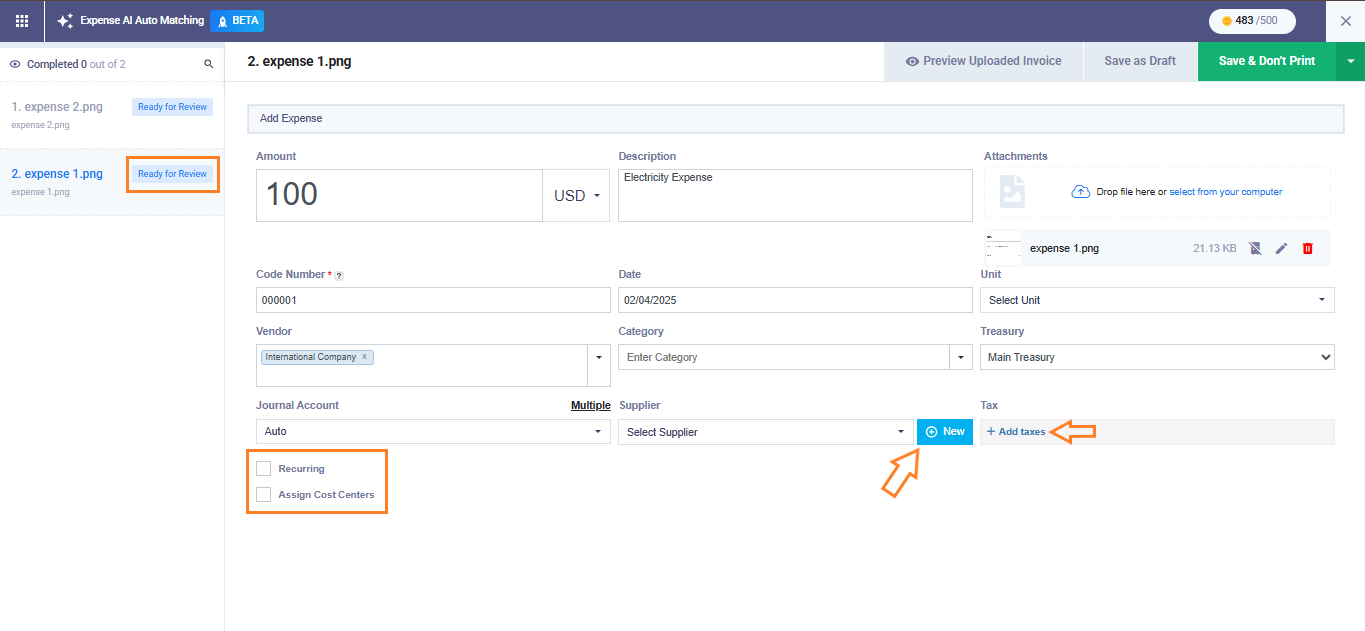
Reviewing Data and Creating the Expense
Once the file reaches “Ready for Review”, click it to open the expense form. All fields are pre-filled with extracted data, and you can manually adjust any field before saving.
Adding a Supplier or Tax Not in the System
If the system does not find a match for a supplier or tax, it shows a suggestion in the dropdown in the format: “Add“. By clicking on it:
- Supplier: Opens a popup screen to create the new supplier.
- Tax: Opens a sidebar to add the new tax.
You can also assign a cost center for the expense or enable “Recurring” to make it a recurring expense.
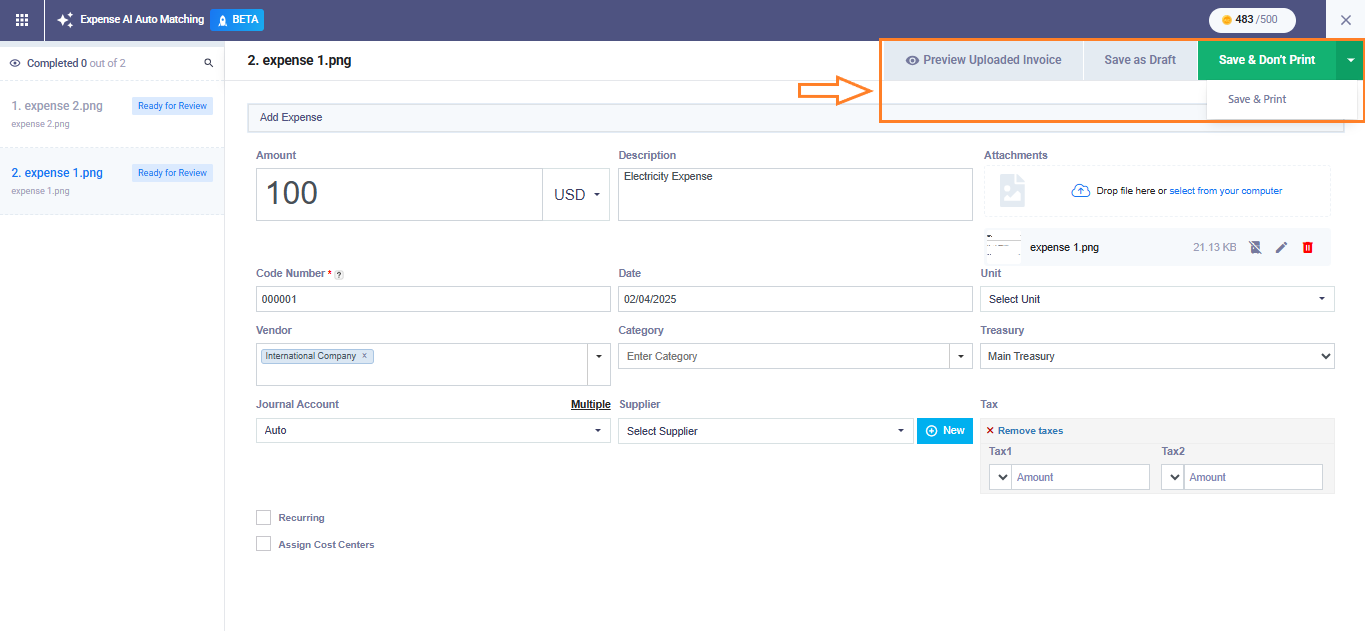
Save Options:
- Preview Uploaded Invoice: View the final expense before saving.
- Save as Draft: Save without approval.
- Save & Print: Save and immediately print the expense.
- Save & Don’t Print: Save and approve the expense directly.
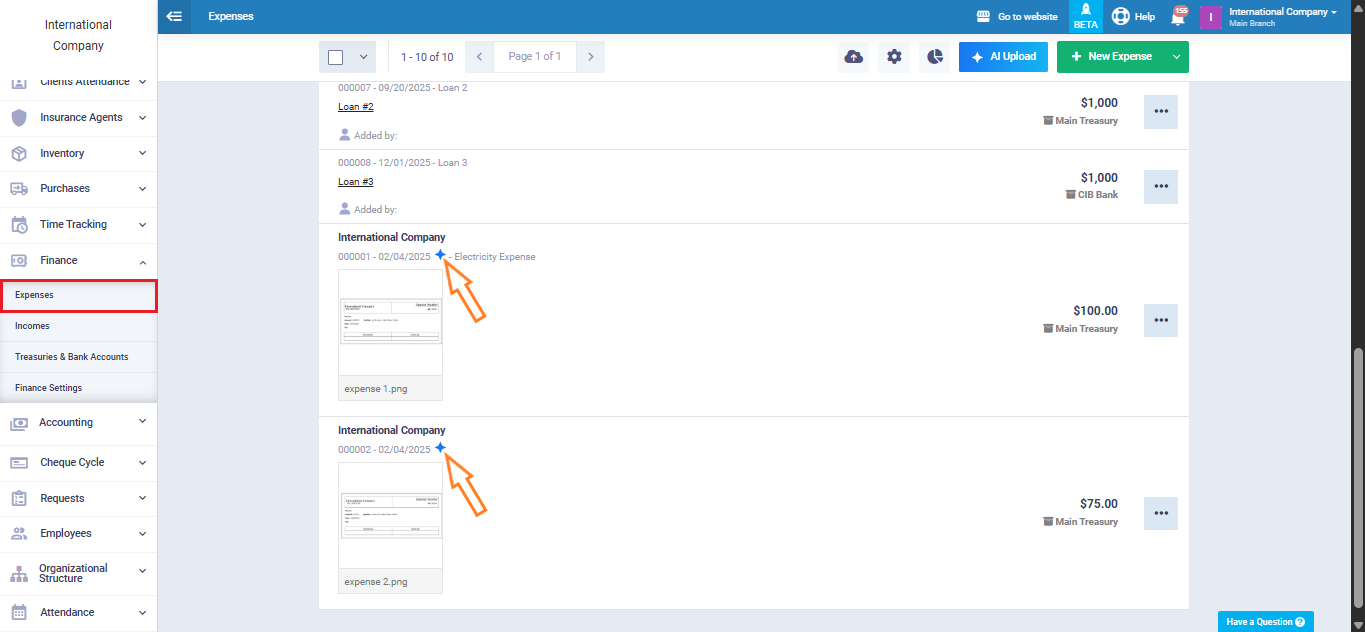
Identifying AI-Created Expenses
After saving, AI-created expenses appear in the “Expense” page with an AI icon next to them, making it easy to distinguish between automated and manually entered expenses.
Tracking AI Coins Consumption
The “AIC Consumption Report” provides a comprehensive overview of how “Artificial Intelligence Credits” are used within your account. It allows you to monitor your current balance, track total credit usage during the billing cycle, and review detailed records of each AI operation performed in the system.
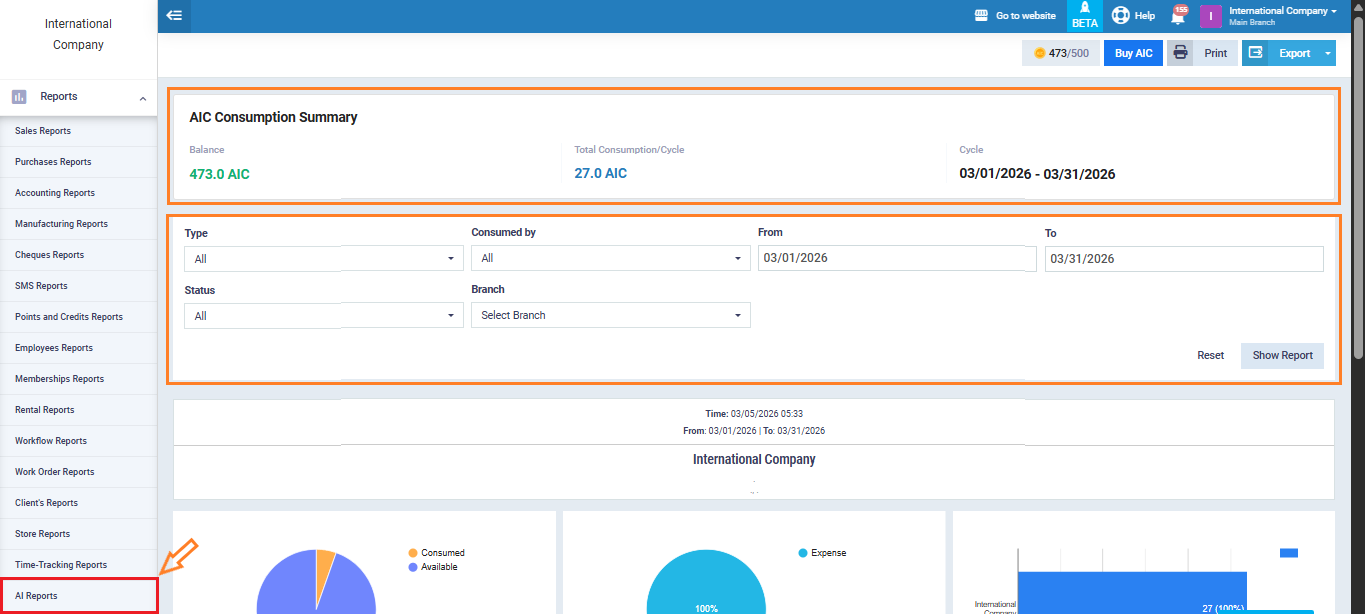
AIC Consumption Summary
At the top of the report, a summary section displays key information about your AI credit usage:
- Balance: Shows the current number of AI Credits (AIC) remaining in your account.
- Total Consumption / Cycle: Displays the total number of AI Credits used during the current billing cycle.
- Cycle: Indicates the active billing cycle during which AI credit consumption is tracked.
Report Filters
You can refine the report results using several filters to locate specific AI operations:
- Type: Filter operations by the type of AI process performed (e.g., data extraction, document processing).
- Consumed by: View consumption based on the user who performed the AI action.
- From / To: Specify a date range to display AI credit usage within a selected time period.
- Status: Filter records by their processing status (such as completed or failed operations).
- Branch: Display AI credit usage related to a specific branch if the multi-branch feature is enabled.
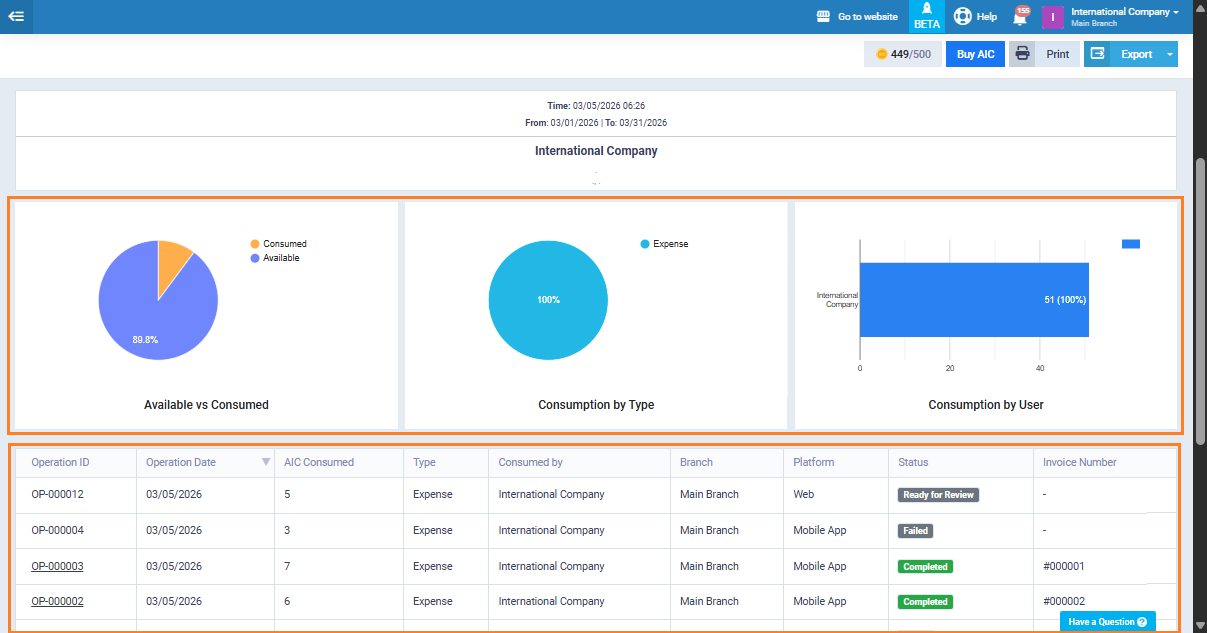
The report provides three charts to help you quickly understand AI credit usage:
- Available vs Consumed: Shows the portion of AI Credits used versus remaining (e.g., 89.8% available).
- Consumption by Type: Displays which operation types consumed credits (e.g., 100% for Expense processing).
- Consumption by User: Highlights credit usage per user (e.g., all 51 credits used by a single user).
This table below the charts is an the “AIC Consumption Report” summarizing operations for a company. It shows:
- Operation ID & Date: Unique identifiers and execution dates for each operation.
- AIC Consumed: The number of AI credits used per operation.
- Type: All operations are categorized as “Expense.”
- Consumed by: The entity using the credits.
- Branch & Platform: The branch and platform used.
- Status: Current status of each operation (Ready for Review, Failed, Completed).
- Invoice Number: Linked invoice if available; otherwise, empty.
You can filter the table and export the results as a CSV file, maintaining the exact view after filtering and sorting.