Managing Employee Loans
Due to certain events that may affect an employee, they might need to request a loan from the Human Resources department. The loan is approved as long as it meets conditions such as:
- The loan amount should not be less than the minimum amount according to the employee’s salary and should not exceed the maximum limit.
- The employee should not have other outstanding loans.
- There must be a compelling reason for requesting the loan.
These are among the loan policies followed by the institution. Daftra’s Human Resources Management software allows you to add loans for employees, set installments, and monitor the repayment process until the full amount owed by the employee is repaid.
How to record an Employee Loan and set its Installments
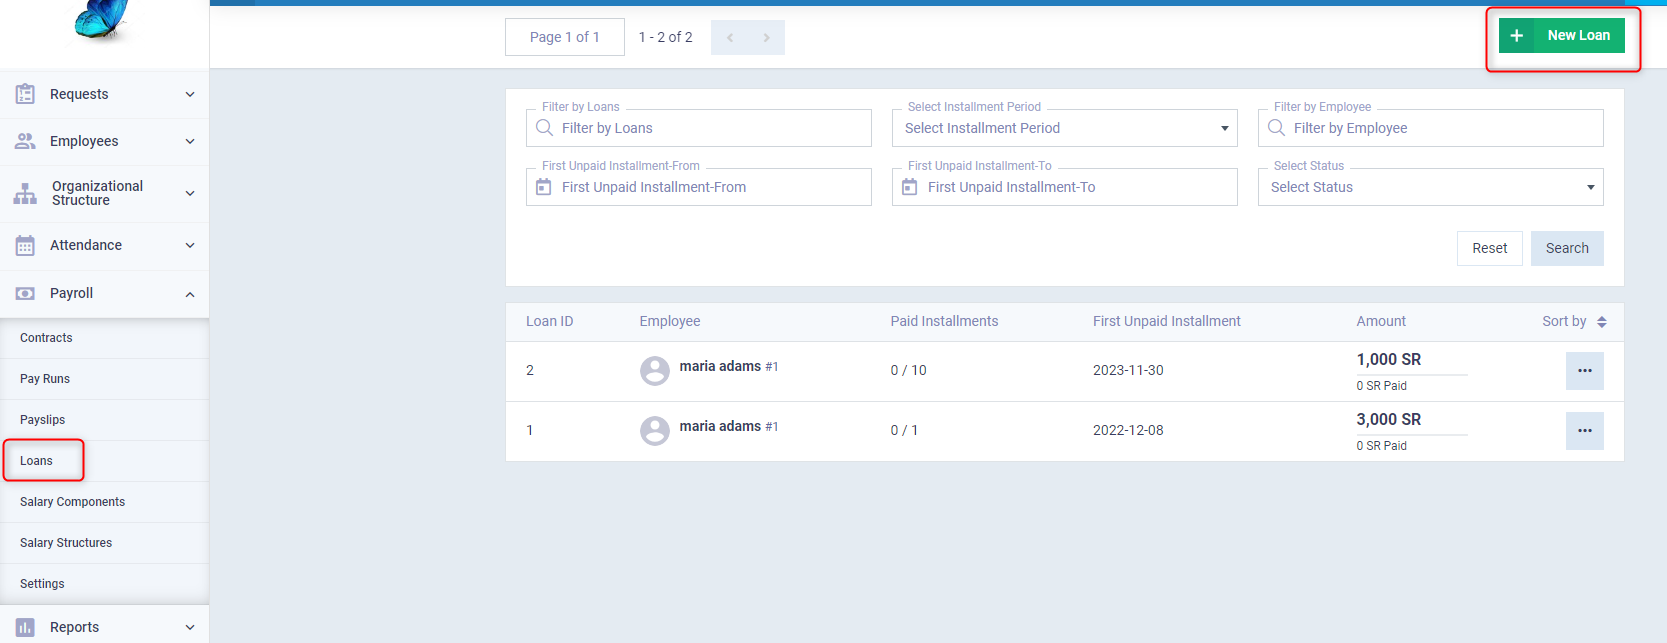
The process involves recording the loan amount, the installment amount, the period between each installment, and specifying the treasury from which the loan is paid and to which the installments are returned, all through a single screen. This is done by navigating to “Loans” under “Payroll” in the main menu. Then click on the “New Loan” button.
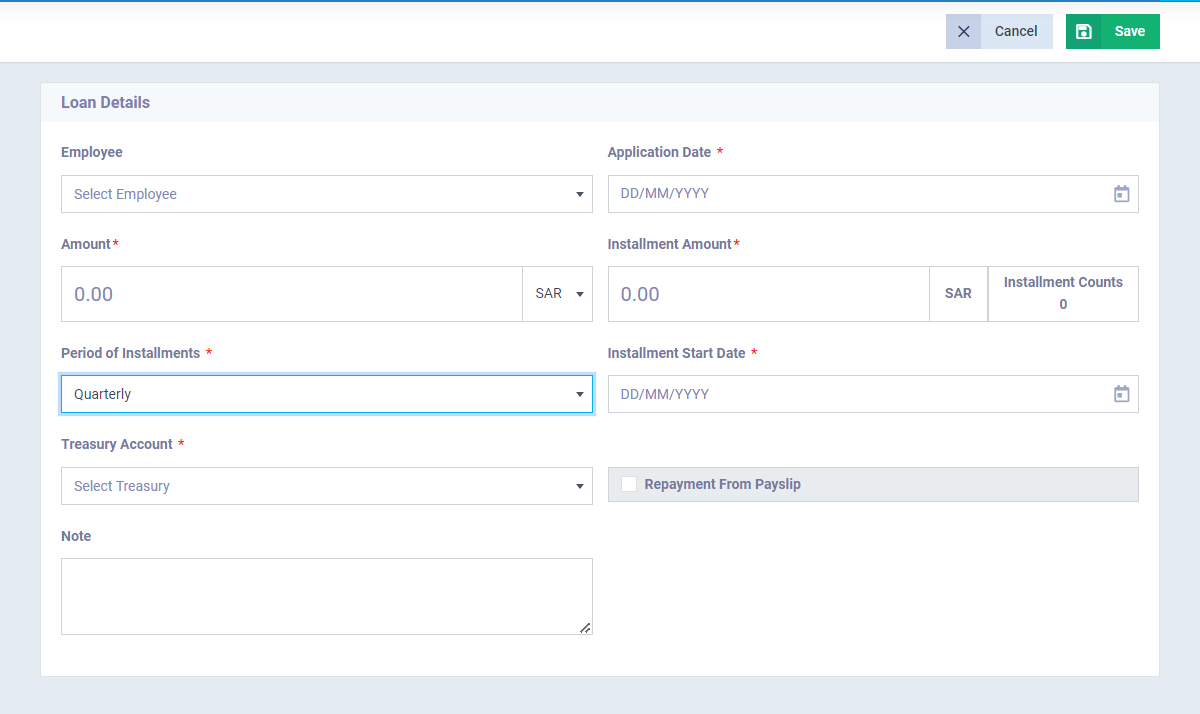
The Loan details screen contains information related to the employee, the loan, and its installments. After saving, you can proceed to make and track installment payments.
Loan Details:
Employee: Select the employee applying for the loan. Ensure that the employee is already registered in the system.
Application Date: This refers to the date the loan was requested.
Amount: The total amount of the loan paid to the employee.
Installment Amount: The amount that will be deducted from the employee’s salary to repay the loan installments. The number of installments is automatically determined based on this amount.
Period of Installments: This refers to the time interval between each installment, whether it’s monthly, quarterly, or annually.
Installment Start Date: The initial date for repaying the installments, which triggers the deduction of the specified amount from the employee’s payslip.
Treasury Account: You can assign the loan to the main account and choose a specific treasury for disbursing and repaying the loan.
Repayment From Payslip: If activated, the loan is automatically deducted from the payslip. If deactivated, the loan repayments by the employee are recorded as incomes paid by the employee instead of being auto-deducted from the salary.
Note: Any additional information related to the employee’s loan.
Then click the “Save” button.
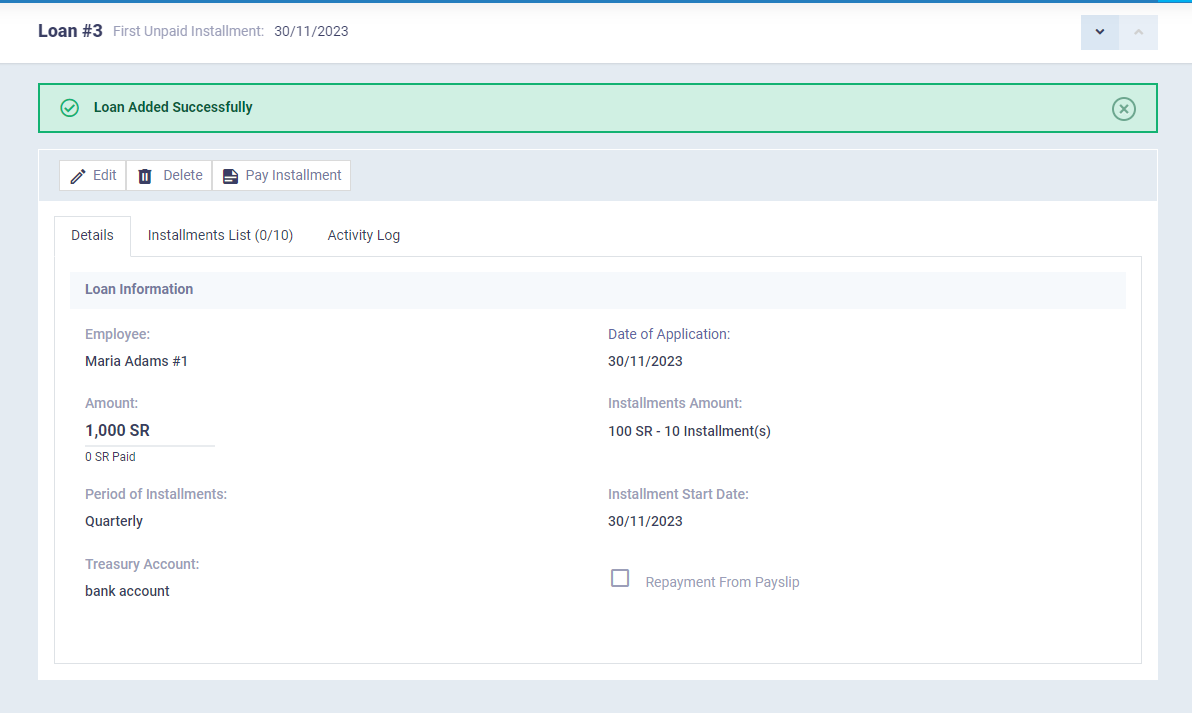
After saving the loan, details of the loan and its installments will be displayed. You can click the “Pay Installment” button to pay the due installment. You can also review all installments and select a specific installment to pay.
The installment payment screen appears as follows, with the installment number to be paid automatically indicated. You need to set the payment date according to the current date or a different date if the installment is recorded on a date different from the actual payment date. You must also specify the payment account to which the loan is credited in your chart of accounts.
Then click the “Save” button to confirm.

Viewing the Journal Entry for the Loan Issuance
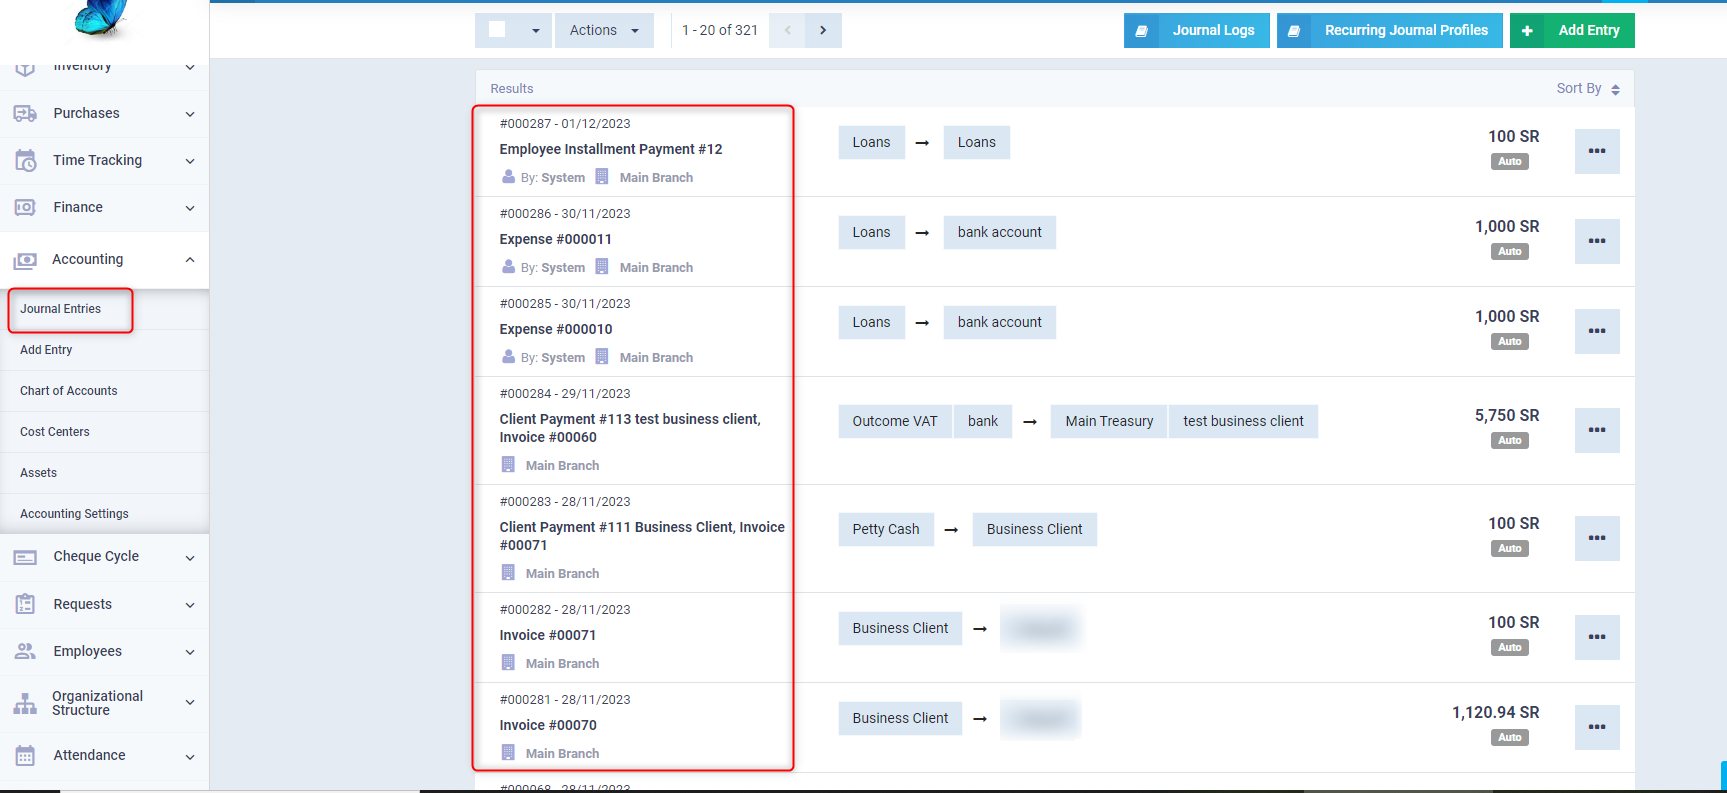
After recording a loan for an employee, the system automatically creates a journal entry with the date of the loan request. All you need to do is go to the journal entries in the program by clicking on “Journal Entries” under “Accounting” in the main menu of the program. There, you will find the list of entries; click on the entry related to the loan to review it.
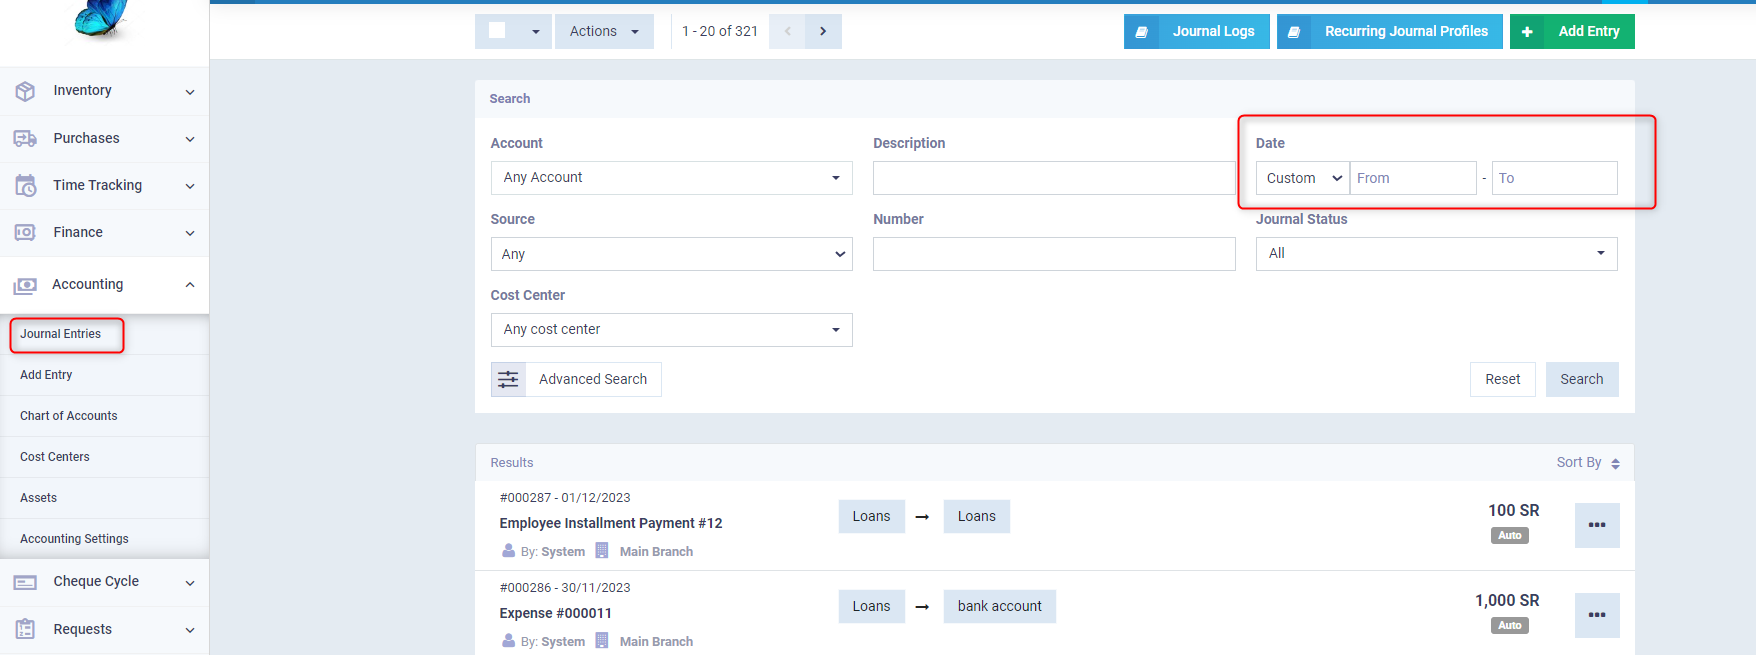
If the date of the loan request is much older than the current date such that it does not appear in the latest entries in the list of entries, you can search by the date of the loan request and specify the duration, then click on the “Search” button.
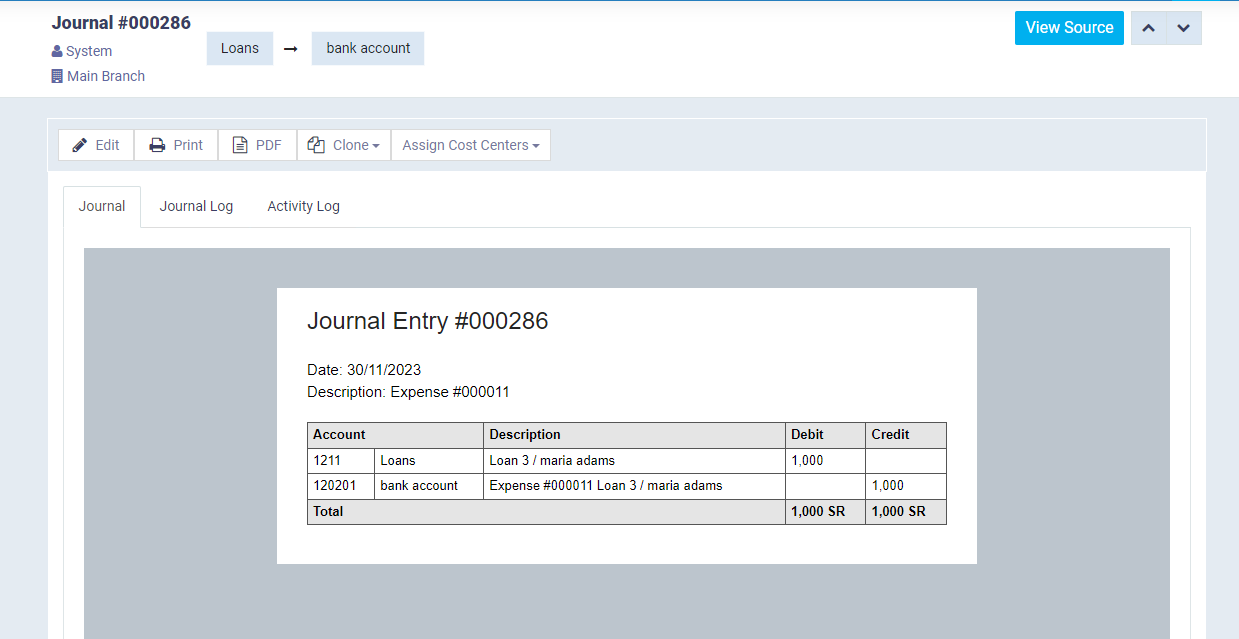
Click on the entry you want to review or to display the source, or if you want to perform more actions on it.
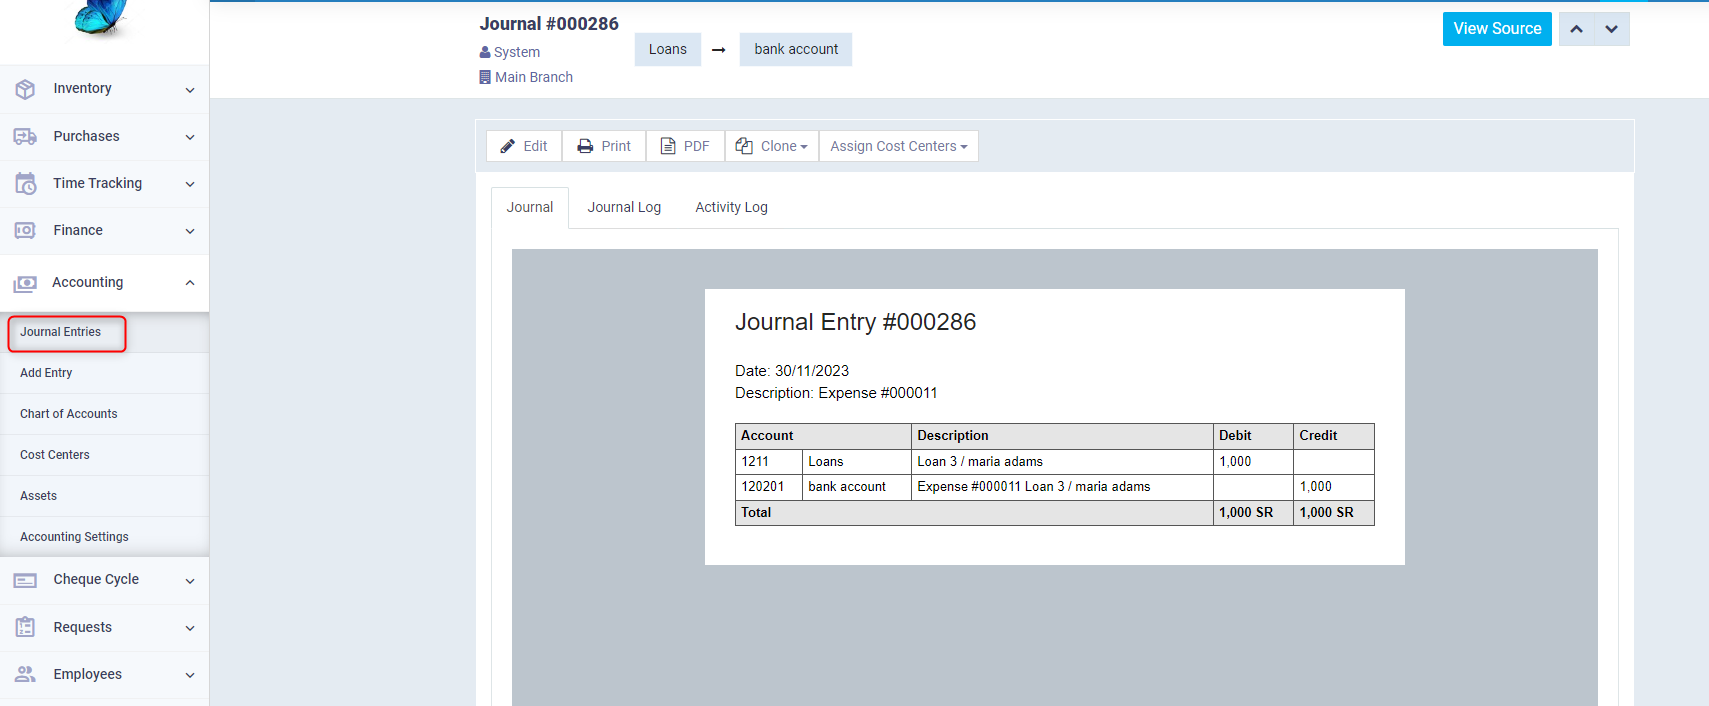
In addition to the loan entry, an entry is created for each installment paid by the employee from the loan. You can find this entry in the list of journal entries and also search for it by the date of installment payment.
Viewing a Sample of deducting the Loan Installment from the Employee's Salary
In the case of specifying the payment of the loan installment from the payslip, you can go to the loan details in the payslip you add by clicking on “Payslips” under “Payroll” in the main menu, then click on “New Payslip”.
Loan Details in the Slip:
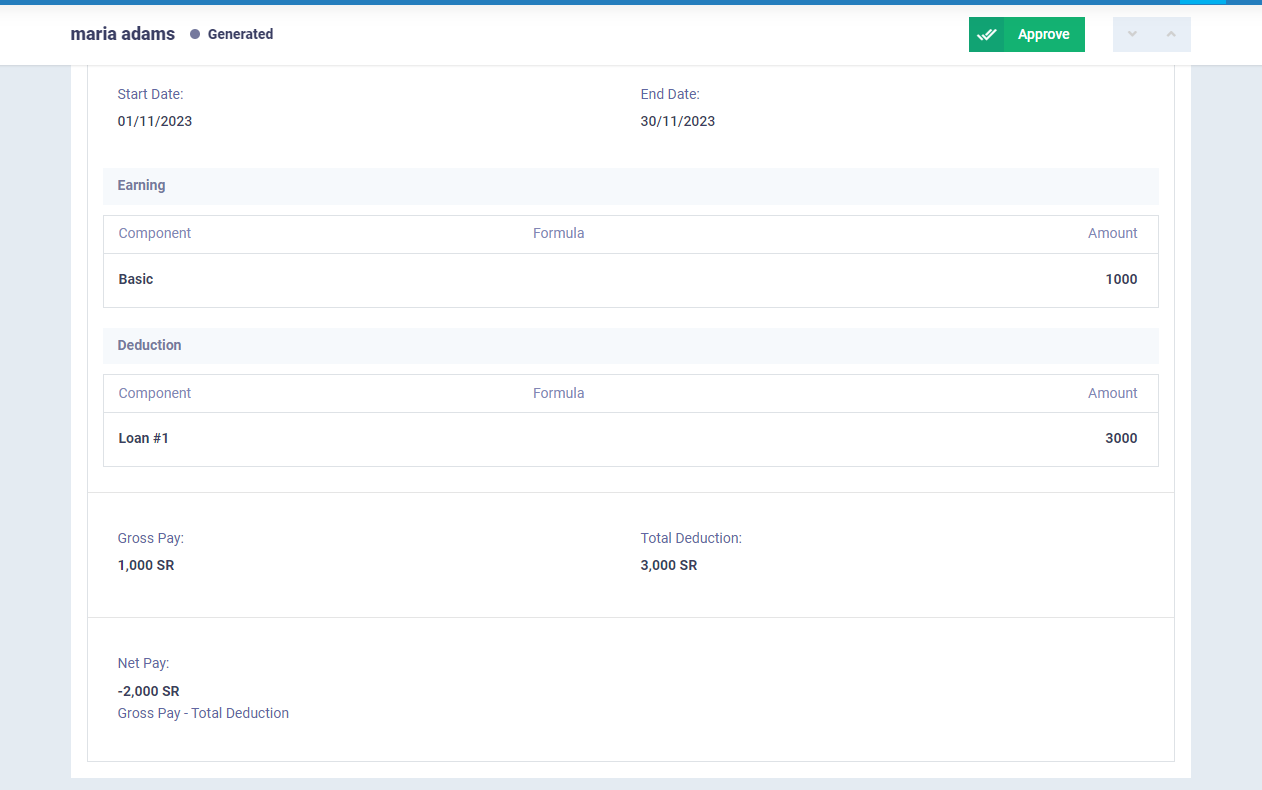
Select the loan number you want to pay off from this payslip, and you will automatically see the Gross Pay and Total Deduction fields appear according to the system’s previous data about the employee’s salary and the value of the loan installment. The Net Pay after deducting the loan from the total will also be displayed.
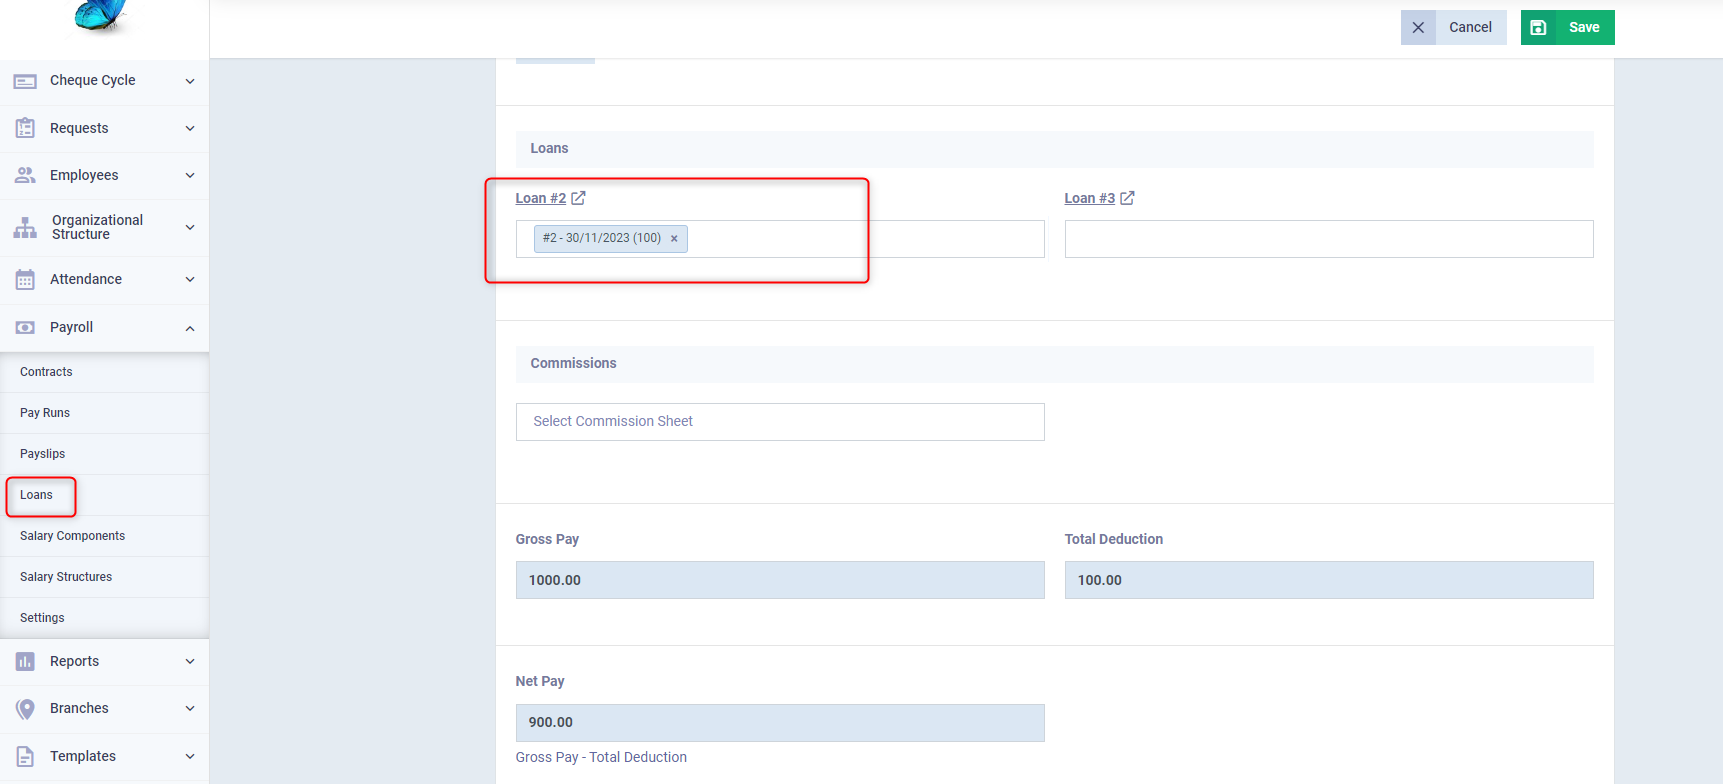
After saving the slip, the loan installment appears in the deductions section, as well as the net pay after the deduction. All you have to do is review the complete data of the payslip and click on the “Approve” button to confirm it, and confirm the status of the installment as “Paid”.
