Comprehensive Guide: Creating Employee Contracts
The legal relationship between the company and the employee begins with the creation of a contract, which documents their professional information, such as job title and level, as well as the duration of the contract and detailed salary data. The system offers a wide range of options to create the contract suitably for you and the nature of each job.
Initially, you can add a new contract from the “Contracts” drop-down menu under payroll in the main menu. You can click on “New Contract” or edit the clauses of a contract that was previously created.
The contract data is divided into 4 sections:
- Contract information.
- Salary Information.
- Attachments (optional).
- Contract More Information, for which you can create custom fields.
Contract Information
Information varies between mandatory fields (*) and optional fields, and some fields require prior setup such as:
- Adding a file for the employee to whom the contract is to be assigned from “Employees” in the main menu.
- Adding employment designations and levels through “Organizational Structure” in the main menu.
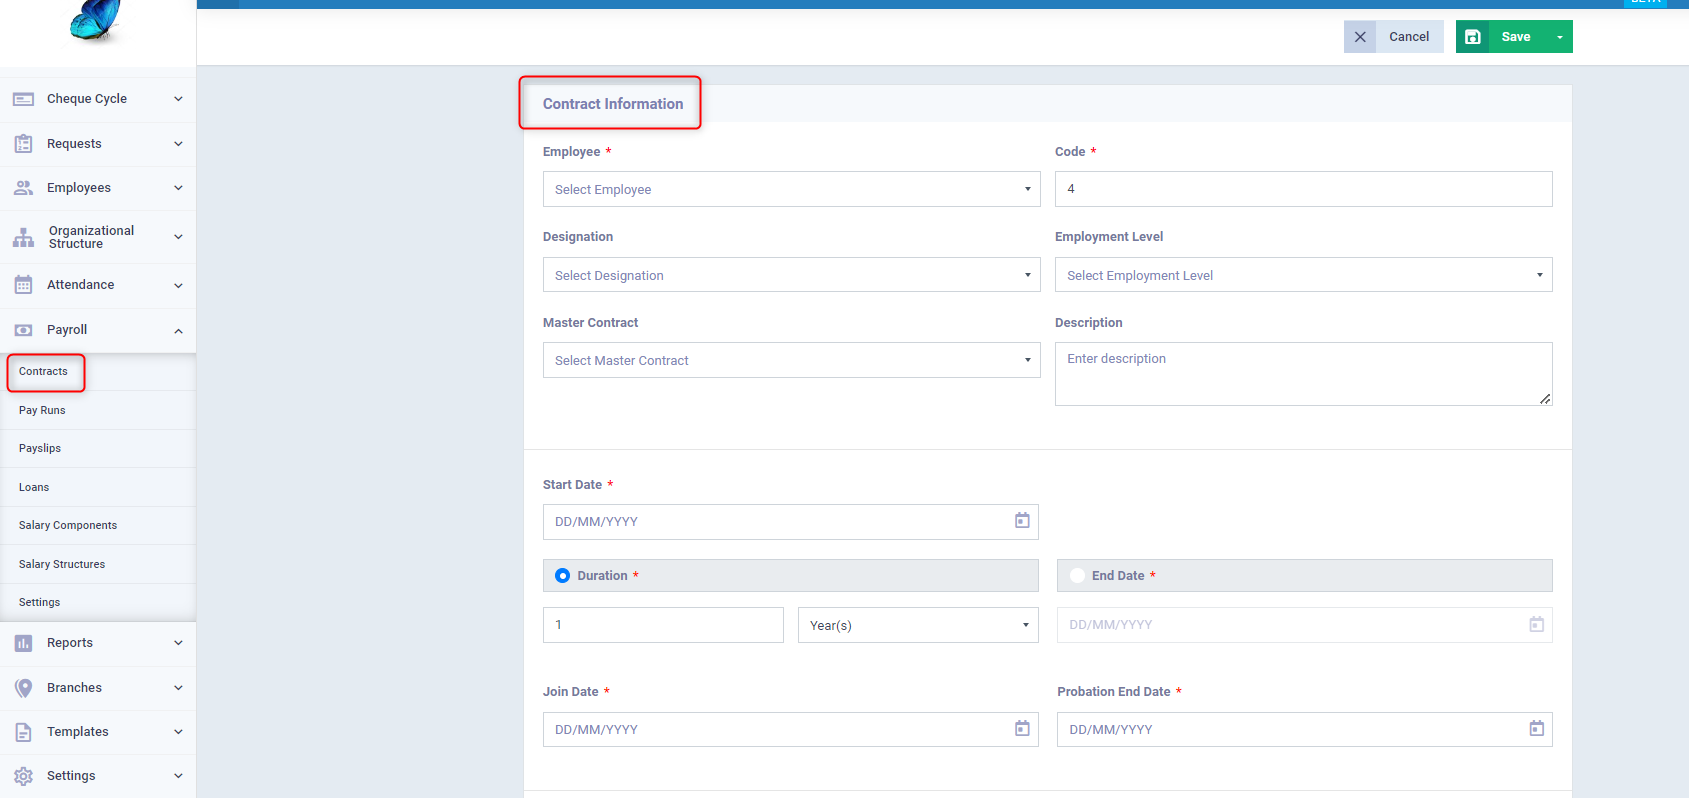
Choosing the employee is essential for creating any contract, as this is the method of assigning the contract to the employee. All you need to do is search for the employee’s name or their specific code, and select them.
Salary Information
Salary data can be formulated entirely during the creation of the contract from the same screen, or you can use ready-made salary structures (templates), created independently and then attached to all contracts suitable for the salary structure to save time.
For example, you can create the following salary structures:
- Marketing employee salary structure.
- Marketing manager salary structure.
- Junior accountant salary structure.
- Senior accountant salary structure.
Ensure that the salary amount, formula of calculating additional earning such as commission, as well as deductions and penalties related and unrelated to attendance, have fixed values for each template, and assign the appropriate salary structure for each contract according to the employee.
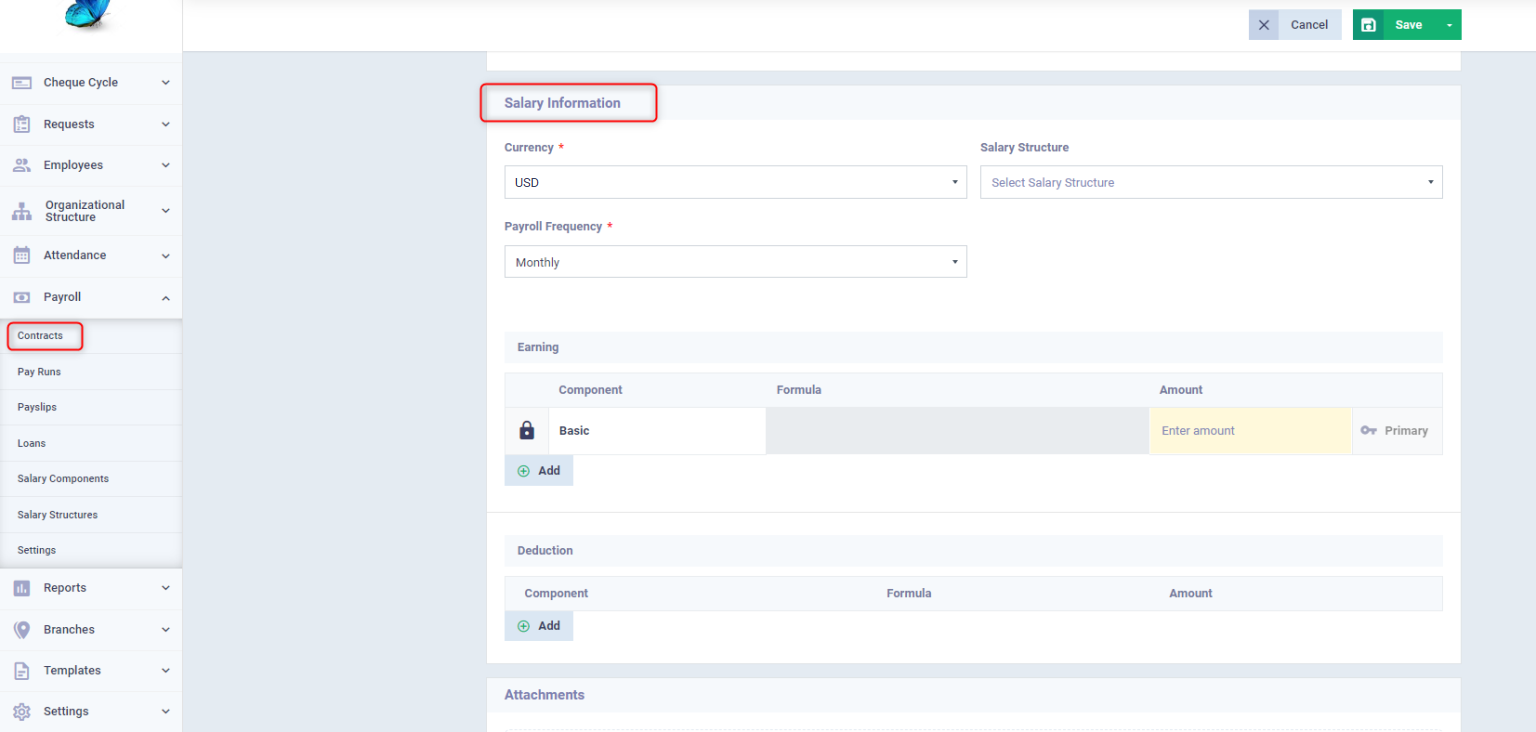
You can choose the currency in which the salary is paid for each employee and each contract, which can be helpful in cases where employees of different nationalities are paid in their home country’s currency.

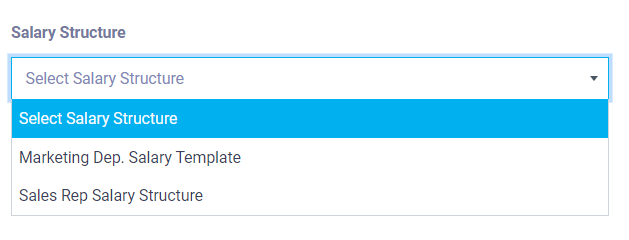
Salary structure if you have added salary structures to the program as previously explained, which is through “Salary Structures” dropdown under “Payroll” in the main menu. You can omit this field and manually add salary data in the contract.
The salary cycle varies from company to company, usually monthly or annually, and can differ within the same company if there are permanent employees and workers who are paid daily or weekly.
The salary is divided into:
- Earning:
- Basic: Enter the full basic salary value.
- Other components: Choose a salary component you have added from “Salary Components” and you can add a new salary component by clicking on “Add New Earning Component”, where you can specify the earning type (bonuses, profit sharing, transportation allowance, official holidays allowance, etc.)
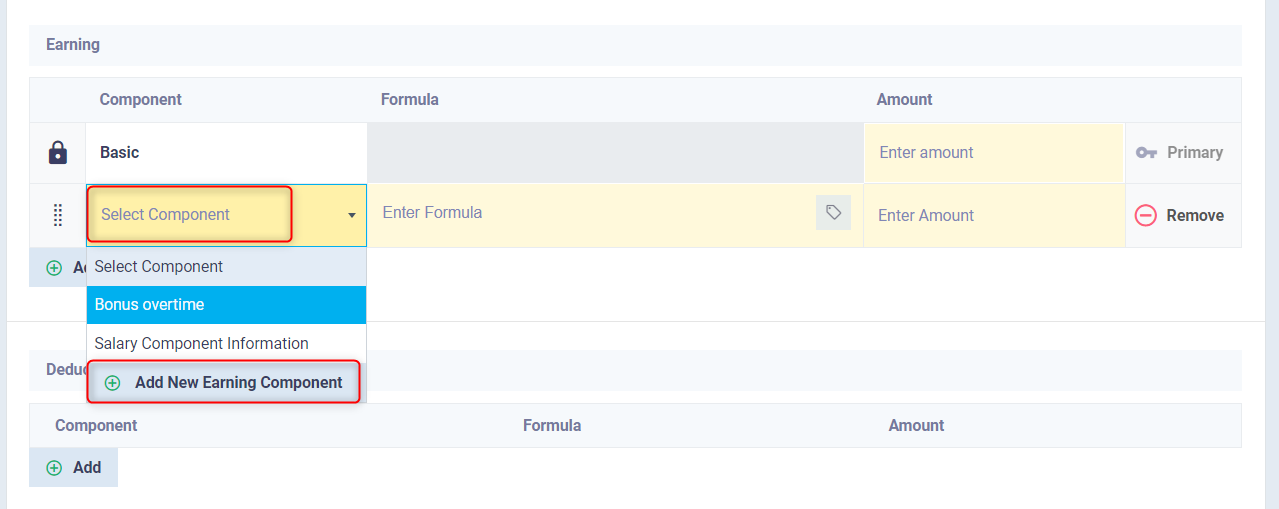
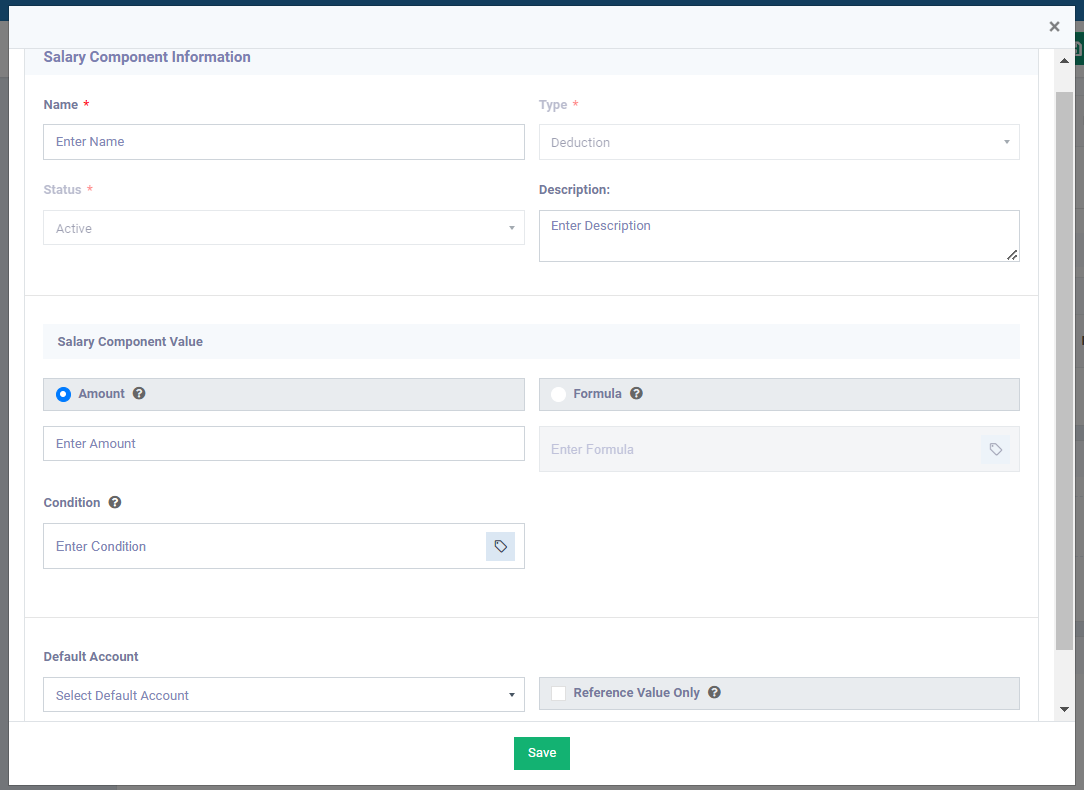
- Deduction: This includes deductions from the employee’s salary, like insurance and penalties, which can be added from “Salary Components” or by clicking on “Add New Deduction Component”.
- You can enter the amount in numbers or a flexible formula in the salary component (earning/deduction), linking a percentage increase or deduction to the salary under certain conditions such as being late for work.
- If you activate “Reference Value Only”, the earning/deduction will not appear in the chart of accounts or the entries, but it will naturally appear when paying the payslip or viewing the contract details.
- If you leave the default account as it is, the entry will be transferred automatically to Salaries and Wages under Expenses in the chart of accounts, or you can choose any account in the chart of accounts for the transfer.
If you wish to attach employee files to the contract, you can do so by dragging and dropping the file into the attachments area, and you can access these files anytime through the employee’s contract.

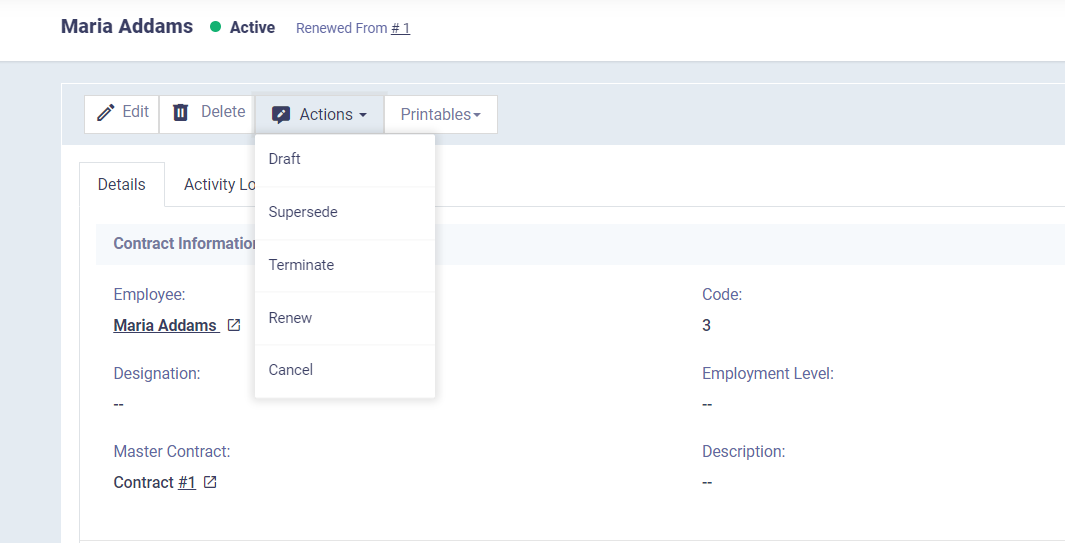
After saving the contract, you can change its status by clicking on it and selecting from the actions dropdown. The actions vary as follows:
- Draft: Used when you want to keep the contract in its inactive state until you start activating it.
- Supersede: If you want to replace this contract with an old one.
- Terminate: To assign a new contract for the employee, you must stop any contract for them during the same time period using this button.
- Renew: If you want to extend the contract’s duration and repeat it.
- Cancel: For the complete cancellation of the contract, not a temporary stop.
Contracts Settings
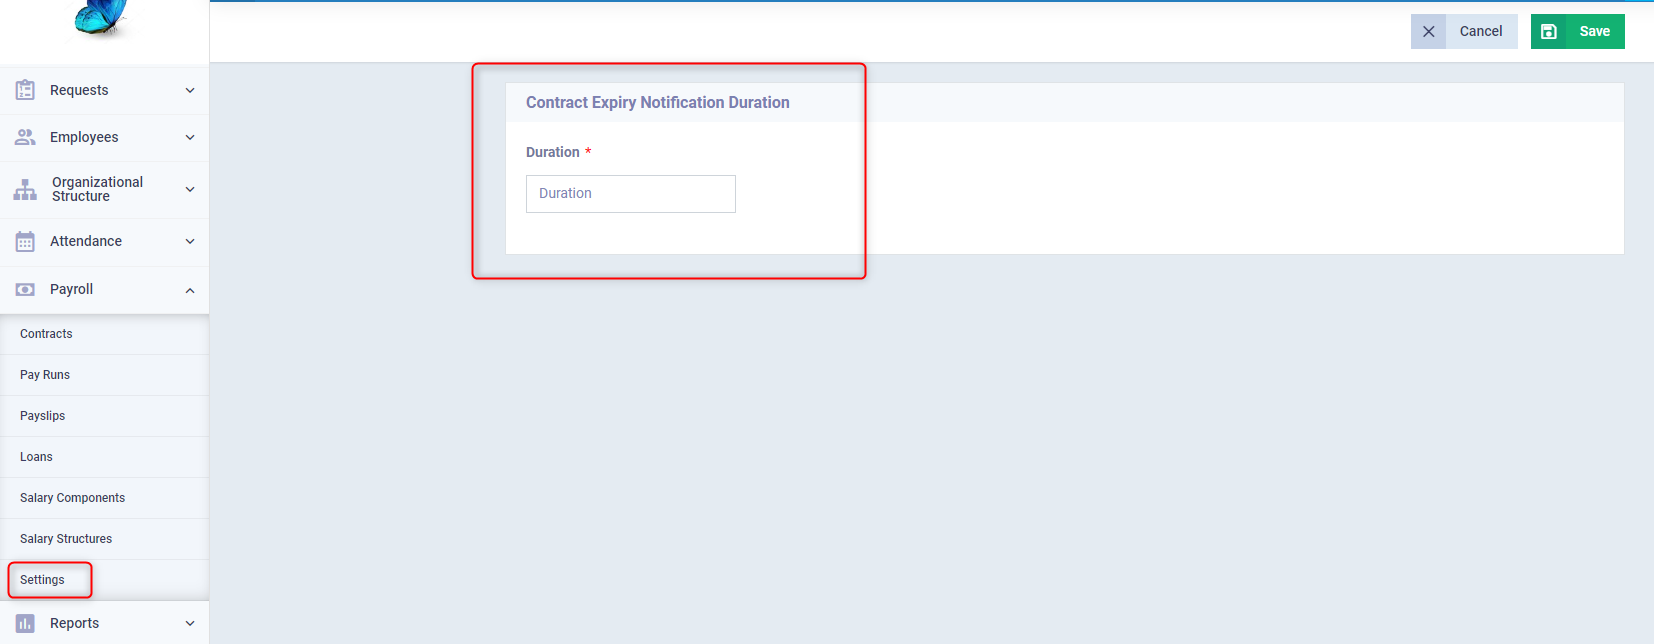
Contract settings allow for high flexibility. Click on the “Contract Custom Fields” card in the “Settings” dropdown under “Payroll” in the main menu.
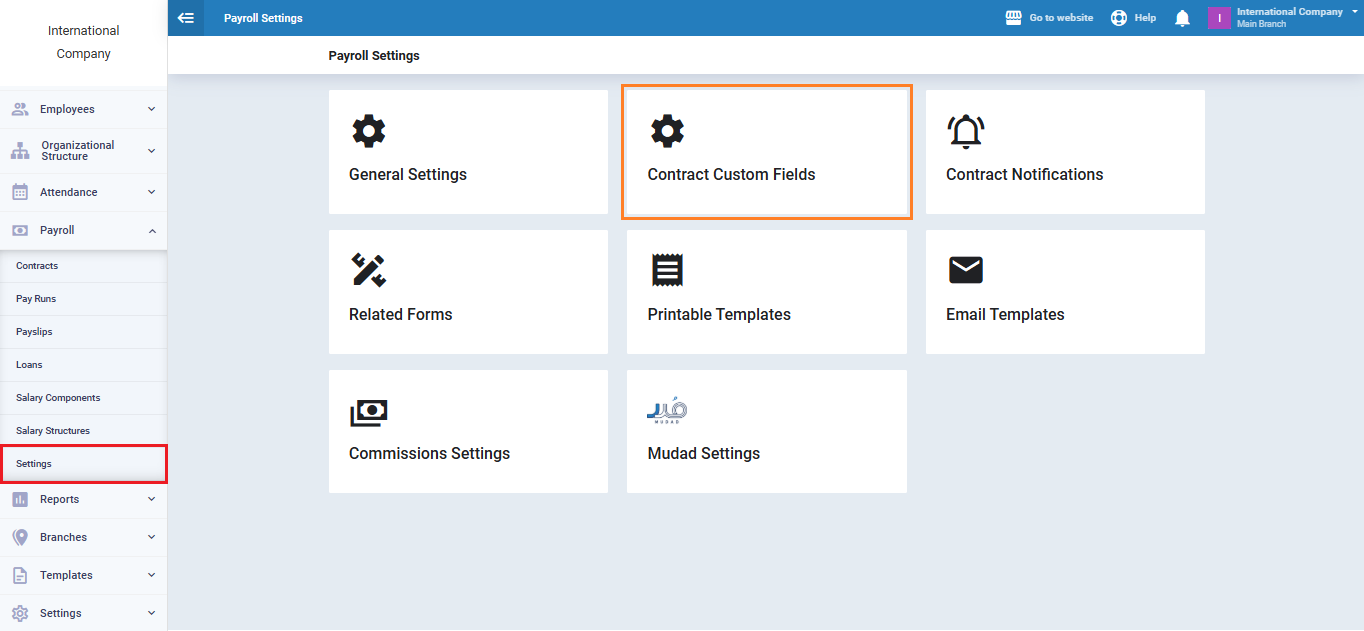
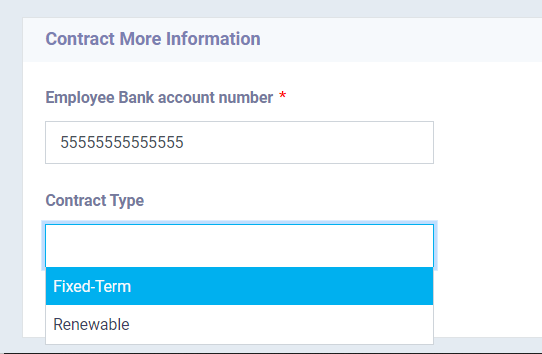
Drag and match the field type for the information you want to add to the contract. For example, if you chose a Multiple Choice Dropdown to enter the type of contract and made it two types:
- Renewable
- Fixed-term
Save the changes
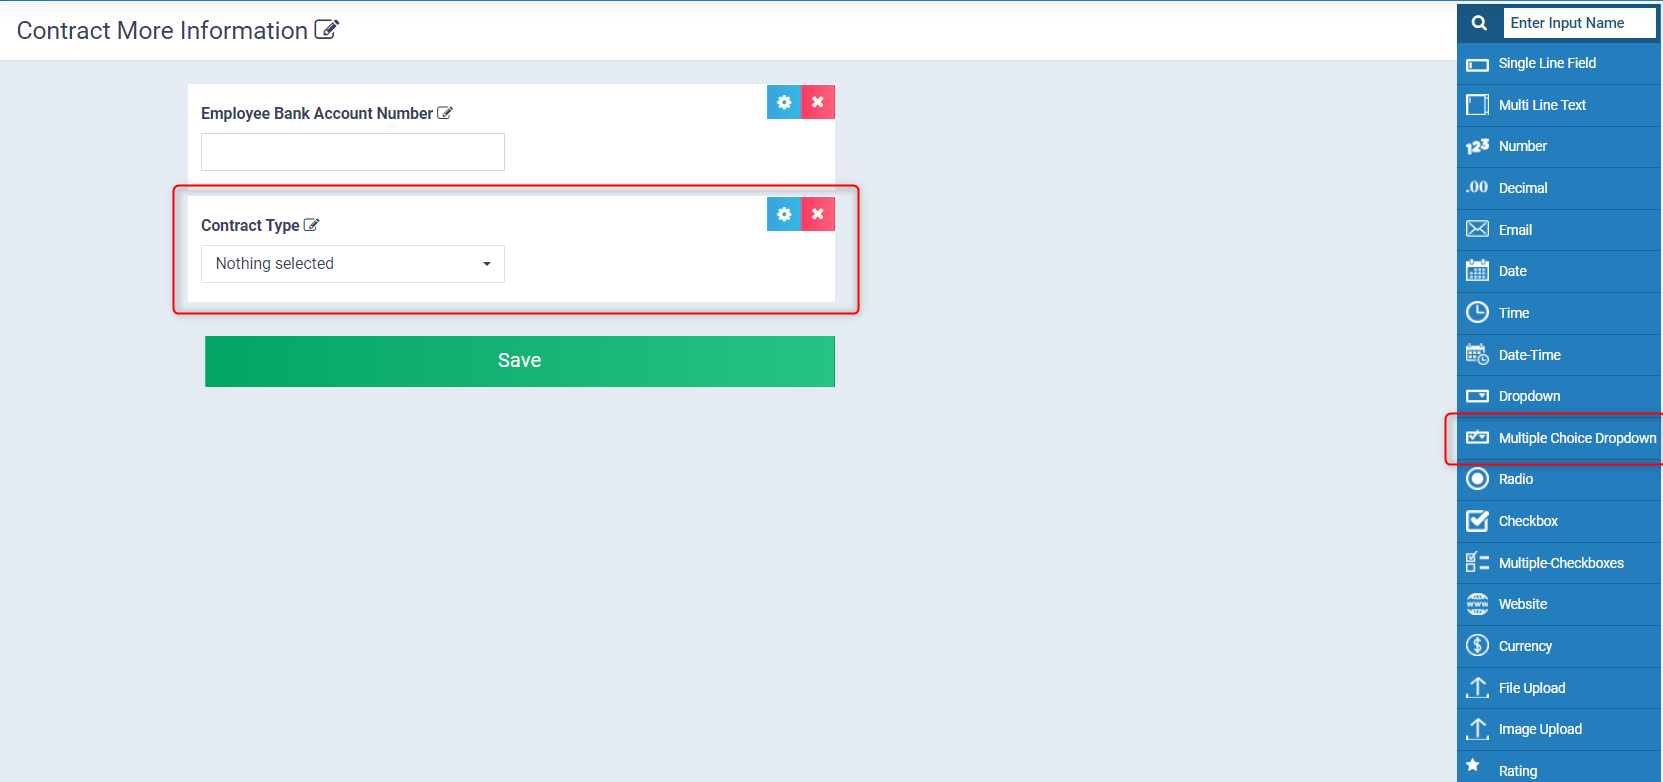
Then go to create a new contract or modify an existing one, and you will find the field at the end to choose the type of contract.
Also, through contract settings, you can control the notice period for the contract’s expiration. Click on the “Contract Notifications” card. It is set to 30 days by default, which you can change as you wish. The employee will be notified of the expiration according to the specified period here.
Contracts Reports
Click on ‘Employee Reports‘ from the dropdown menu under ‘Reports‘ in the main menu, then click on ‘Employee Contracts Reports‘.
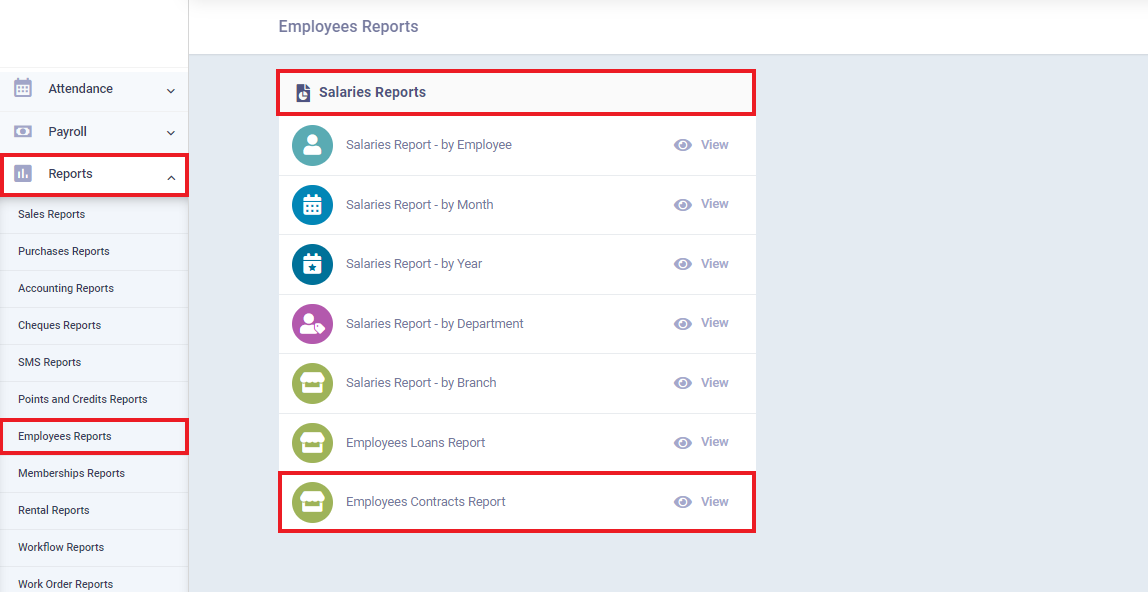
Through the search and filtering tools of the report, you can control the items to be displayed and the timing. After clicking on ‘View Report,’ you will find a detailed report showing contract statuses, deductions, and increases. You can print it or export it as an Excel file.
