


Difference between an Employee and a User in the System
The Human Resources Management module takes care of all job-related matters for your employees; starting from creating contracts and salaries to calculating attendance, absences, and arranging leaves and shifts. Human Resources managers are the main beneficiaries and deal with employee files. However, in addition to employees, the system has an Add Users feature. These users have full employee privileges, and beyond that, they have the ability to access the system and interact with it. Their permissions are determined based on their staff role, allowing each user to manage tasks related to that role.
Main Differences between the Employee and the User
- Both users and employees can access the system. For employees, system access can be enabled through the Allow Access to The System option.
- The user can view their own attendance and absence records, while employees can also view their own attendance and absence records if they have the required permissions, such as View His Own Attendance Log and View His Own Attendance Sheet.
- The user can submit their own leave requests and has the right to approve or reject them. Employees can also submit their own leave requests if they have the Add Leave Application permission. They can also edit or delete their own leave applications if they have the Edit / Delete His Own Leave Applications permission.
- Contracts, salaries, deductions, and earnings are matters that the user can track. Employees can also view their own salary information if they have the relevant permissions, such as View His Own Payslip.
- The user has the ability to perform their duties based on the permissions set for them in the system. For instance, they have the right to approve or decline requisitions if they are the warehouse keeper. They also have the right to follow up with the client and attach notes related to communication with them if they are part of the sales team or customer service. Similarly, you can determine the permissions for the user based on their role and employment level, but the employee will not be able to interact with the system in any case.
How you can add a new Employee/ User?
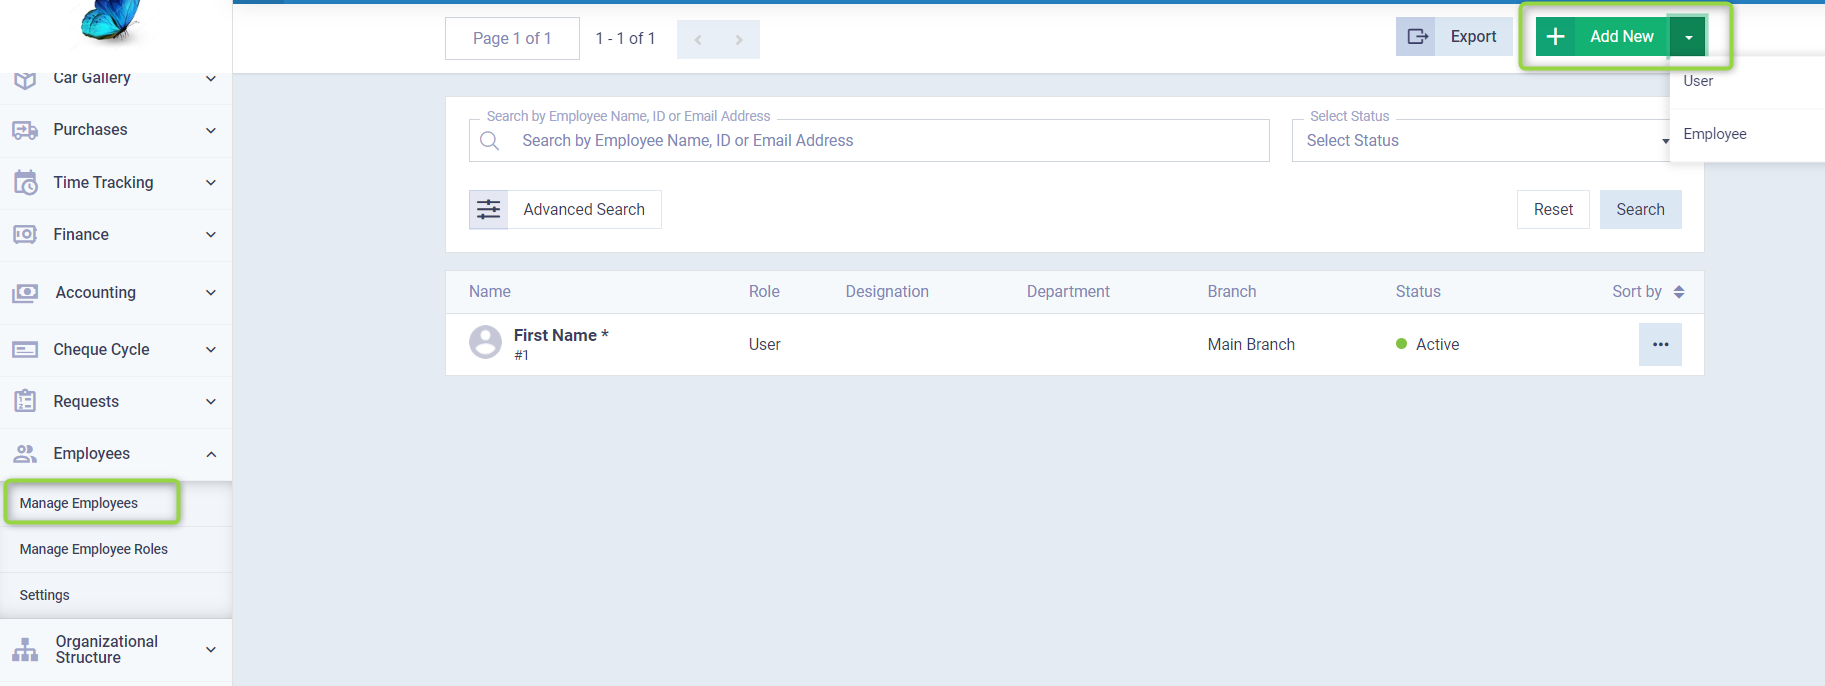
By heading to the “Manage Employees” dropdown from “Employees” in the main menu, click the arrow next to the “Add New” button and choose “Employee” or “User” based on what you want.
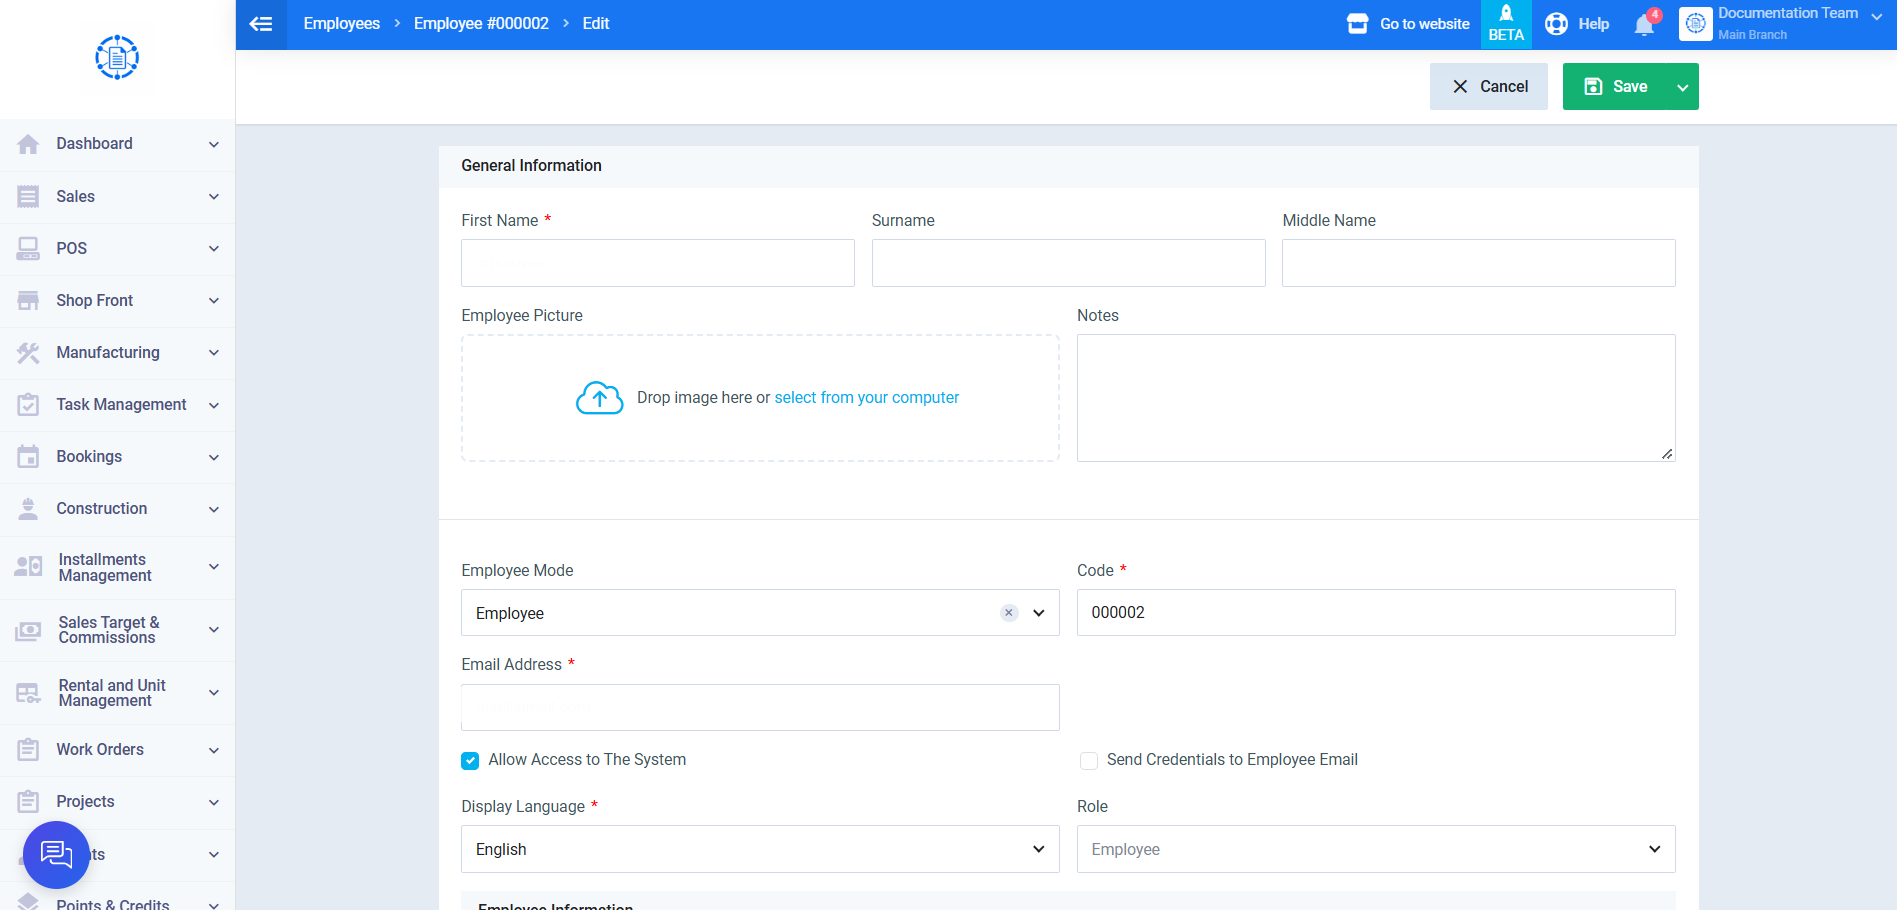
In case of adding an Employee, the General Information are entered as follows:
- First Name: Employee’s name.
- Code: This is an auto number or identifier added by the system.
- Employee’s Picture: You can upload a personal photo for him.
- Employee Mode: The employee mode is mandatorily determined as “Employee” as a result of your selection when clicking the “Add Employee” button.
- Email: You can add the email as optional data.
- Status: When choosing “Active” and activating the employee’s profile, you can add a new contract for him, request a leave, and other features available for the employee in the system. When “Deactivating” the employee’s profile, you won’t be able to apply any of the actions available for employees on him.
- Allow Access to the System: It’s mandatorily disabled, as the regular employee who isn’t of type “User” is not allowed to log in to the system.
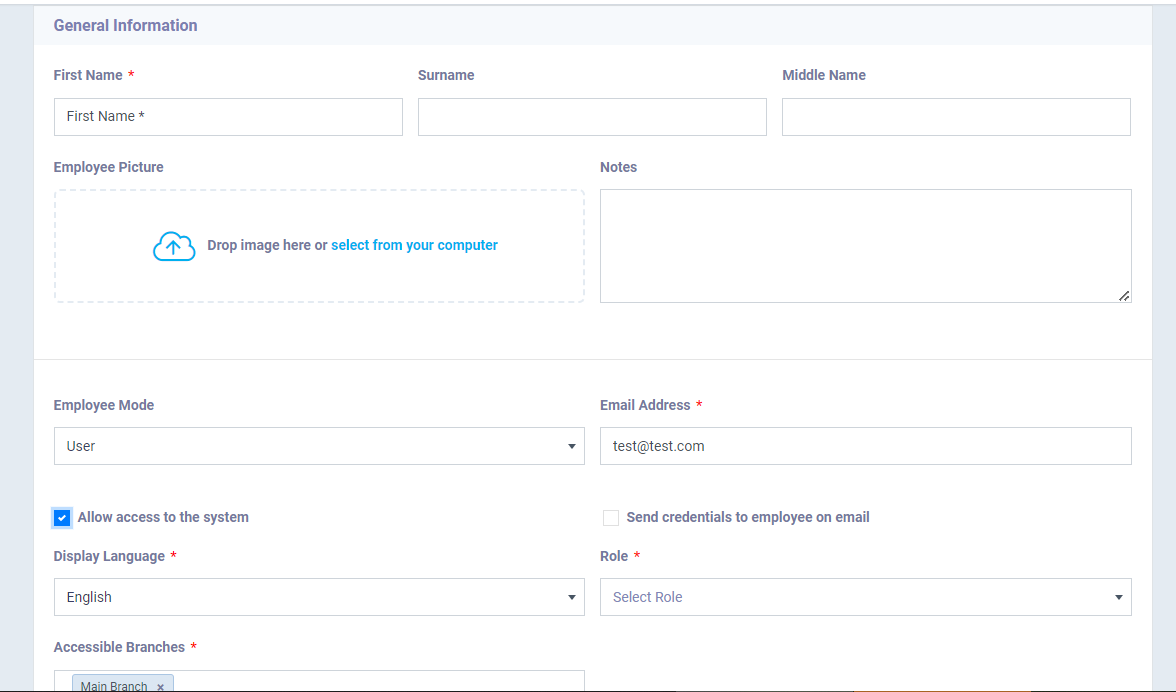
In Case of adding a User, the General Information are entered as follows:
- First Name: User’s name.
- Employee Picture: You can upload a personal photo for him/her.
- Employee Mode: The employee mode is mandatorily determined as “User” due to your choice when clicking on the “Add User” button.
- Email: Email is not necessary if the feature “Allow Access to the System” is not activated, but it becomes mandatory if “Allow Access to the System” is activated.
- Status: When choosing “Active” and activating the user profile, you can add a new contract for him/her, request a leave, and other available features. The user can also initiate his/her permissions in the system. When “Deactivating” the user profile, you won’t be able to apply any of the available actions for users and the user will not commence their work.
- Allow Access to the System: When it’s deactivated, the user’s permissions are limited as if he/she is a regular employee. When activated, the permissions related to the user’s staff role are activated. Its importance lies in case the “Admin” wants to temporarily grant permissions to a user with the right to revoke them whenever he/she wants by deactivating it.
- Role: The staff role determines the available permissions for the user.
- Accessible Branches: If you want to specify a branch for the user in case there are multiple branches.
- Send credentials to employee on email: When activated, an automatic message is sent to the user’s email with their data to enable them to log into the system.
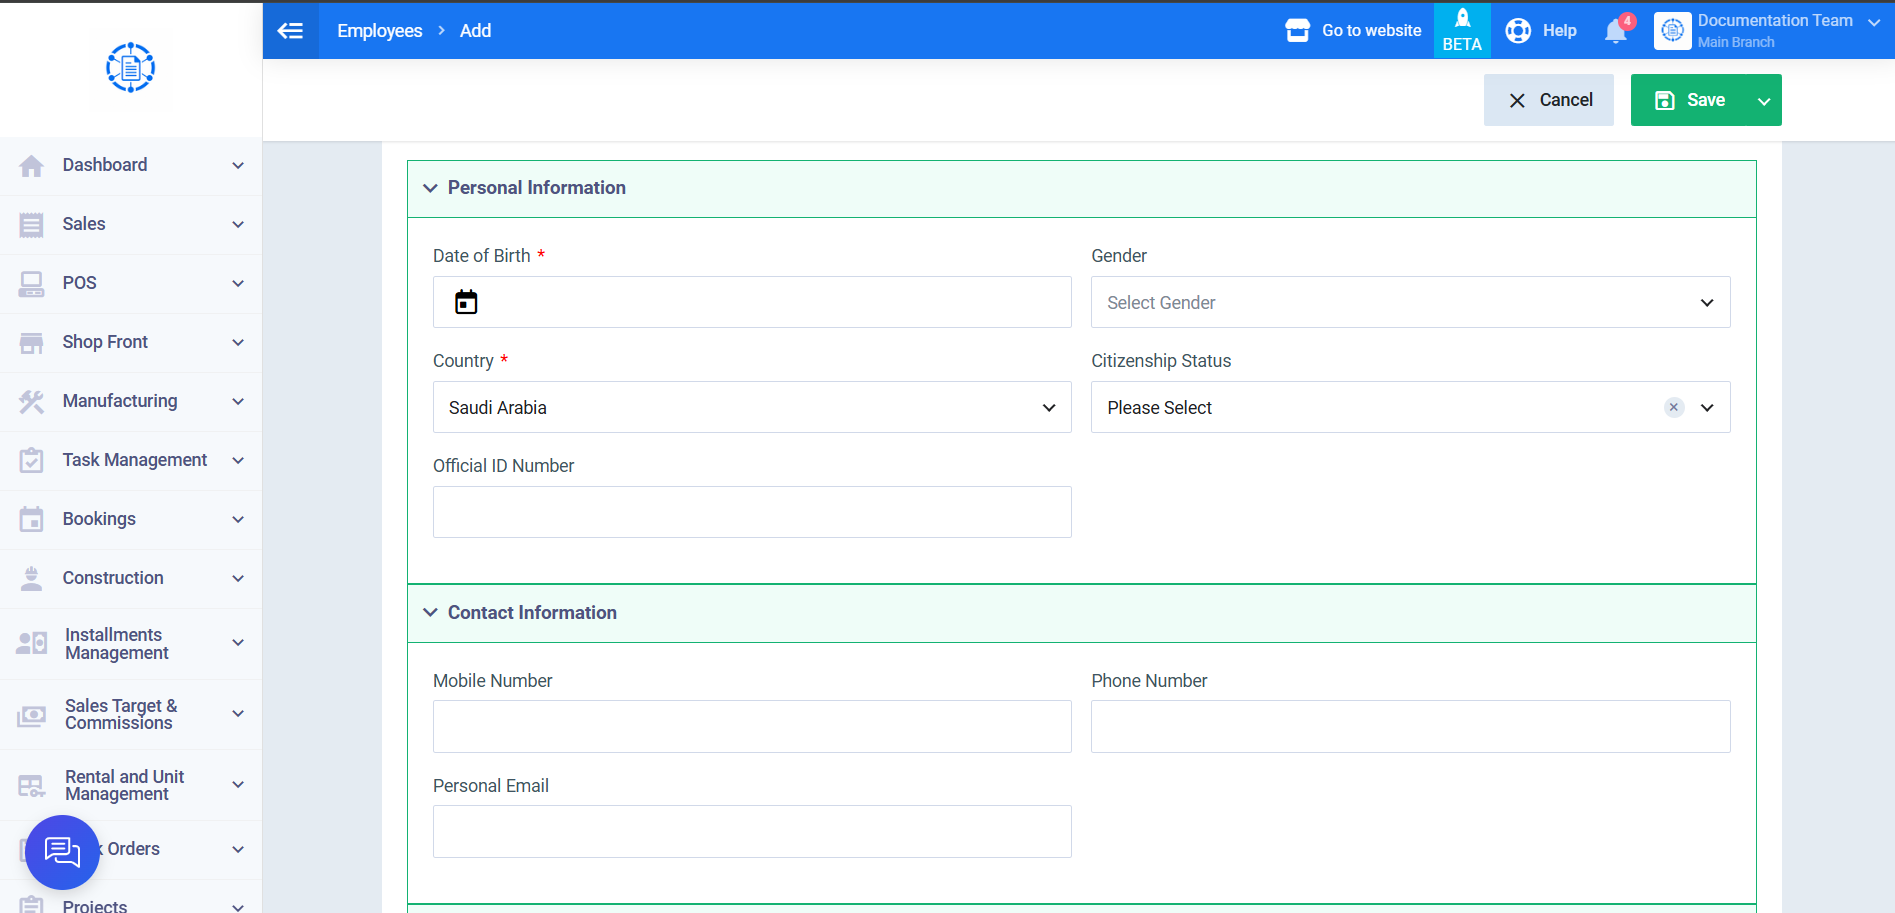
Personal and Contact Information:
The information required for the employee is the same as the information required for the user, and they are as follows:
- Date of Birth: Select the employee’s birthdate from the calendar that will be shown to you.
- Gender: Determine whether the employee is male or female.
- Country: Specify the employee’s country.
- Citizenship Status: choose either citizen or resident.
- Official ID Number: Enter your official ID number.
- Mobile Number: Mobile phone number.
- Phone Number: Landline number.
- Personal Email: Referring to the employee’s personal email, not the work email.
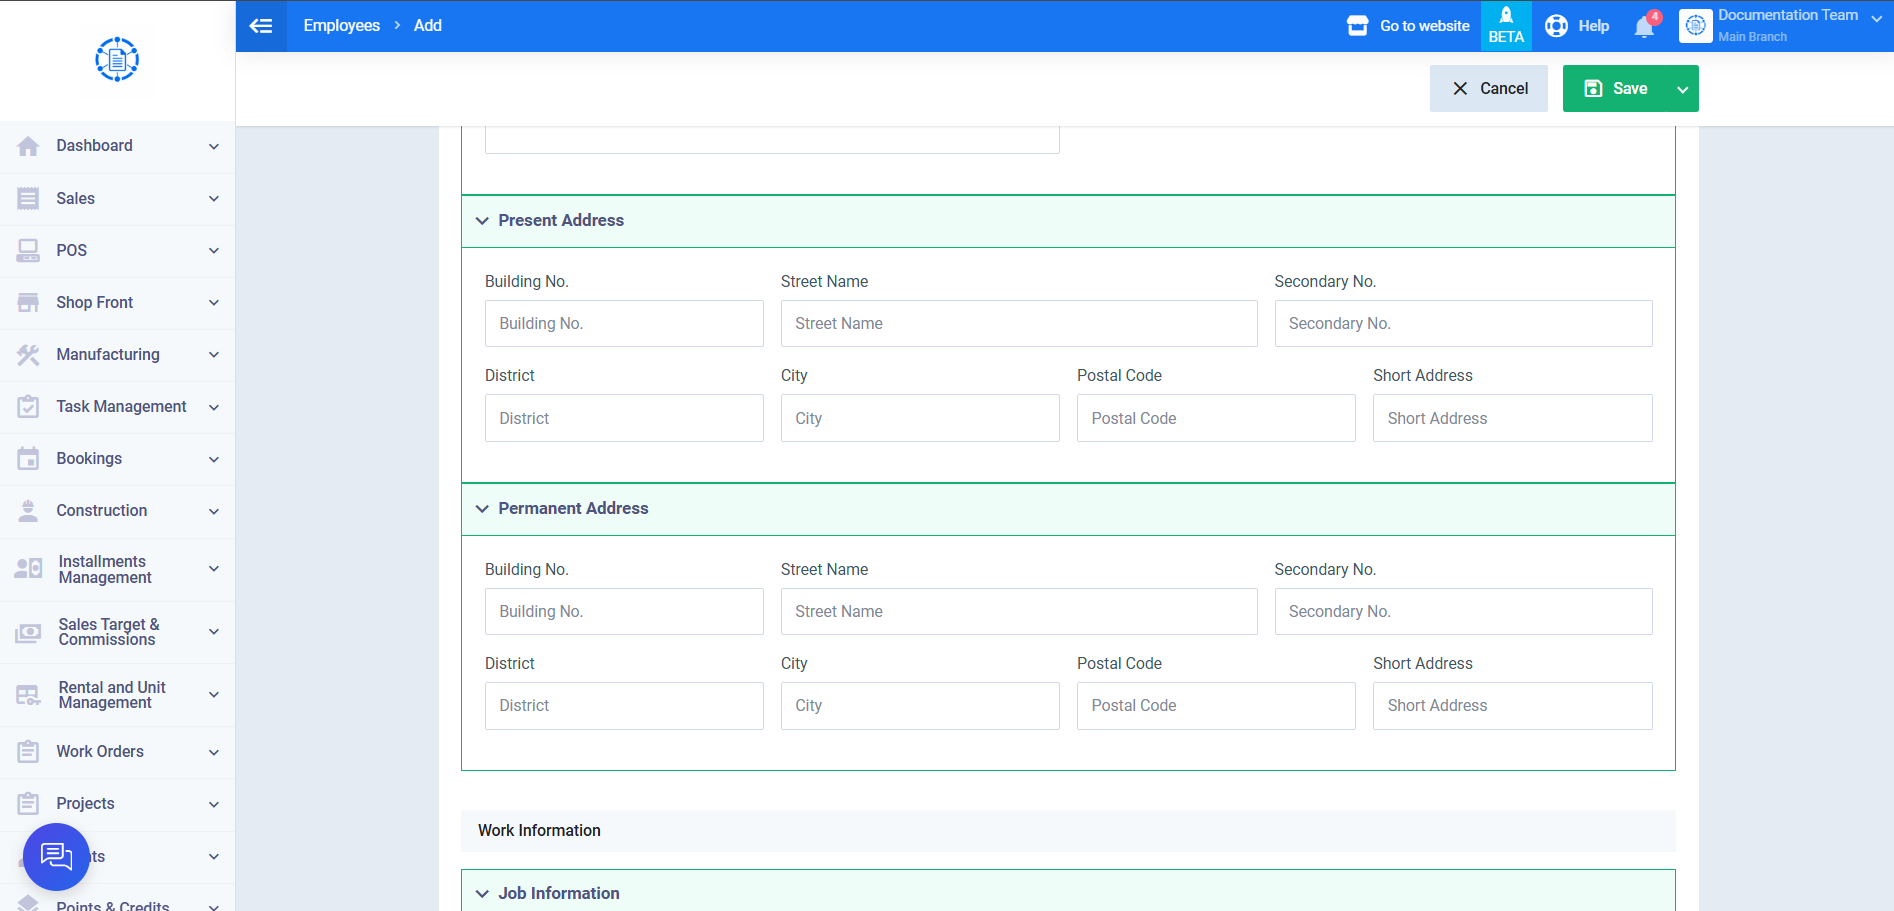
Present Address and Permanent Address
The information required for the employee is the same as the information required for the user, and they are as follows:
Work Information
The information required for the employee is the same as the information required for the user, and they are as follows:
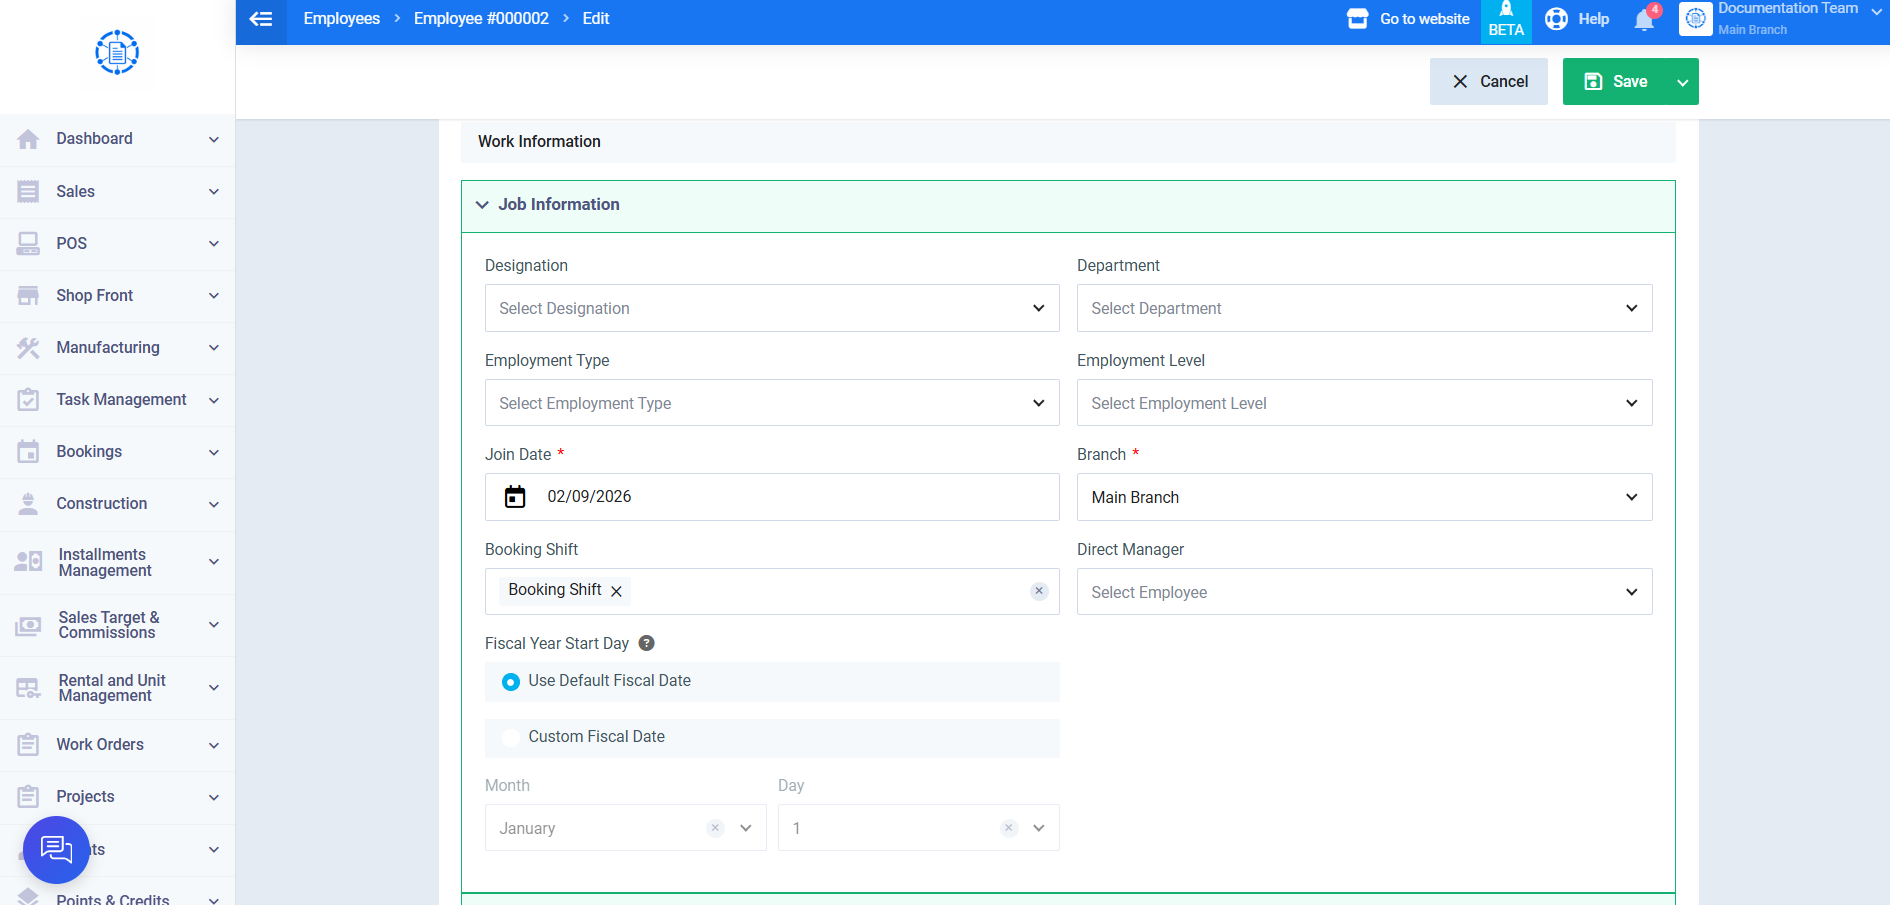
Job Information:
- Designation: Select the designation
- Department: Select the department
- Employment Type: Select the employment type
- Employment Level: Select the employment level
- Join Date: Enter the joining date
- Branch: Select the branch
- Booking Shift: Select the booking shift
- Direct Manager: Select the direct manager
- Fiscal Year Start Day: Select Use Default Fiscal Date to use the default fiscal year start date, or select Custom Fiscal Date and specify the Month and Day.
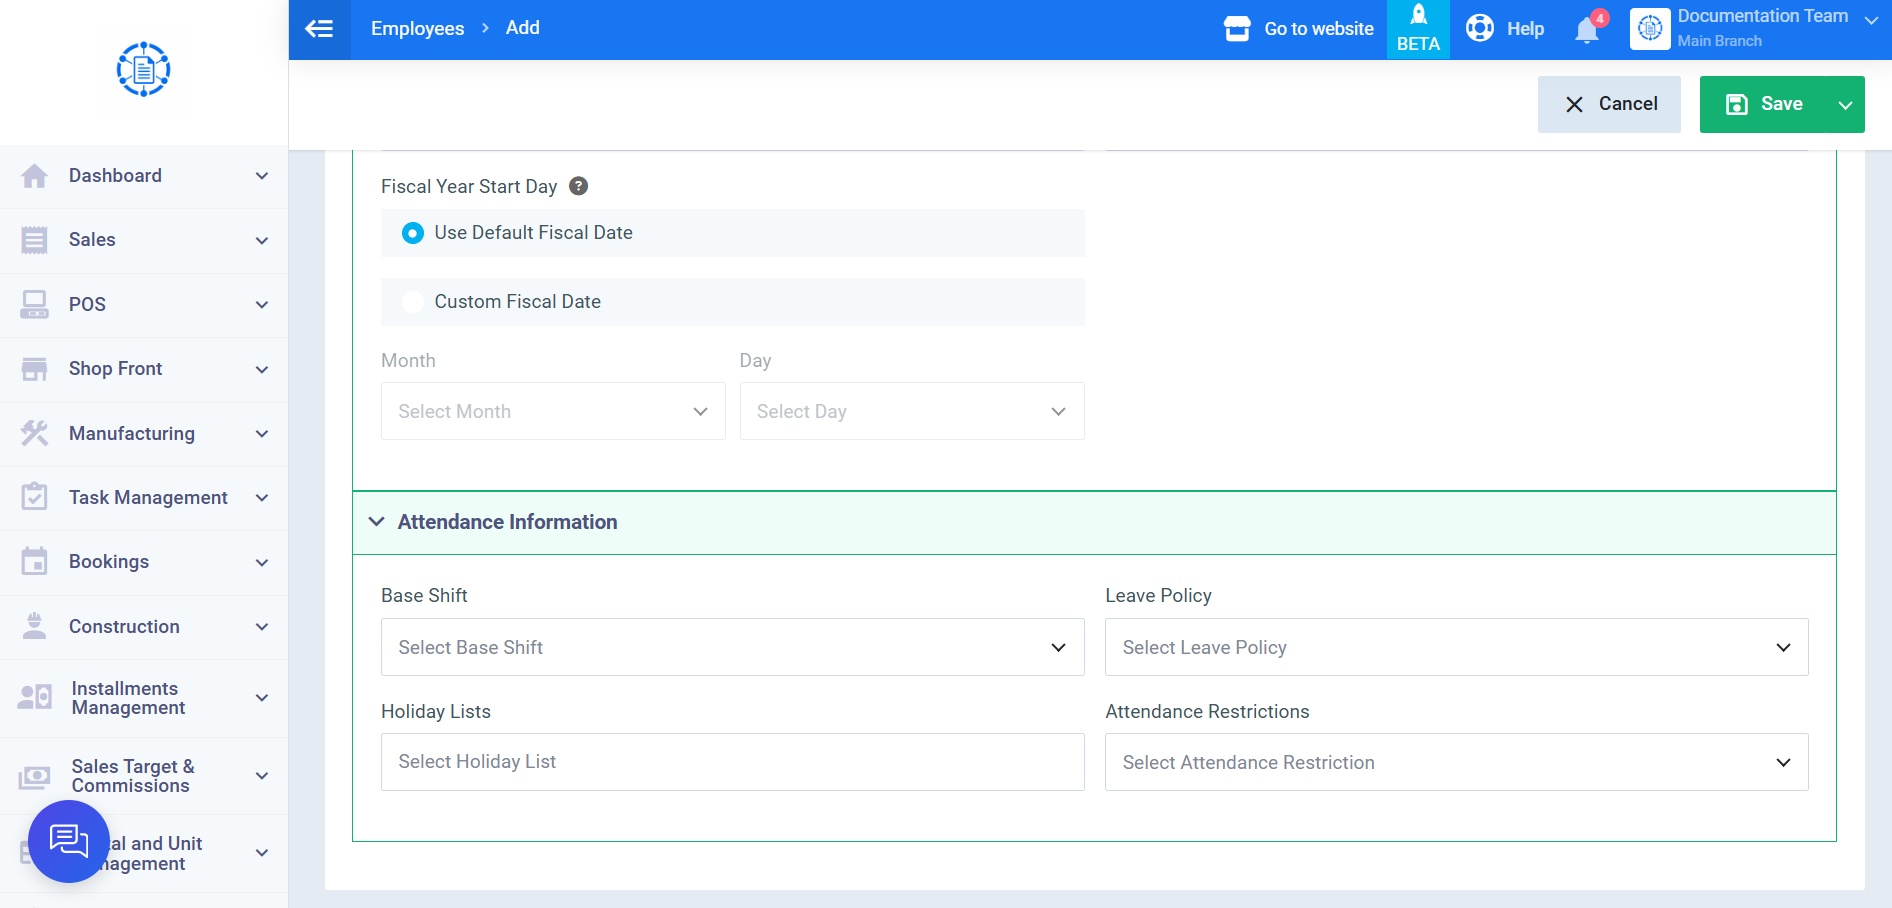
Attendance Information:
The information required for the employee is the same as the information required for the user, and they are as follows:
- Attendance Shift: Select the employee’s attendance shift from the dropdown menu.
- Leave Policy: Choose the leave policy applicable from the dropdown menu.
- Holiday Lists: Choose the holiday list applicable from the dropdown menu.
- Attendance Restrictions: Select the attendance restrictions from the list.
In conclusion, the differences between an employee and a user in the system lie in the more extensive privileges enjoyed by the user, determined by their staff role. As for other data related to adding an employee or user to the system, they are quite similar.