Adding a Leave Application
In this guide, you’ll find the steps to create and submit a new leave application. You’ll learn how to accurately fill out the form, check leave balances, and upload any required documents.
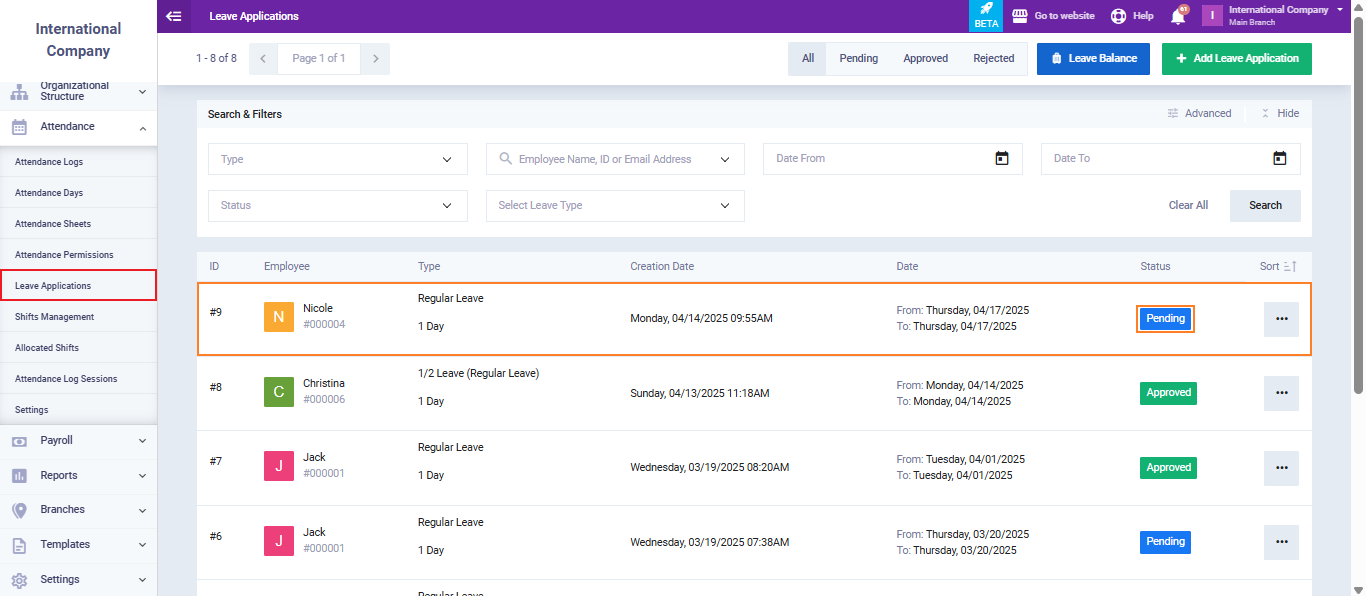
Adding a New Leave Application
From the main menu, click on “Attendance,” then select “Leave Applications” from the dropdown menu.
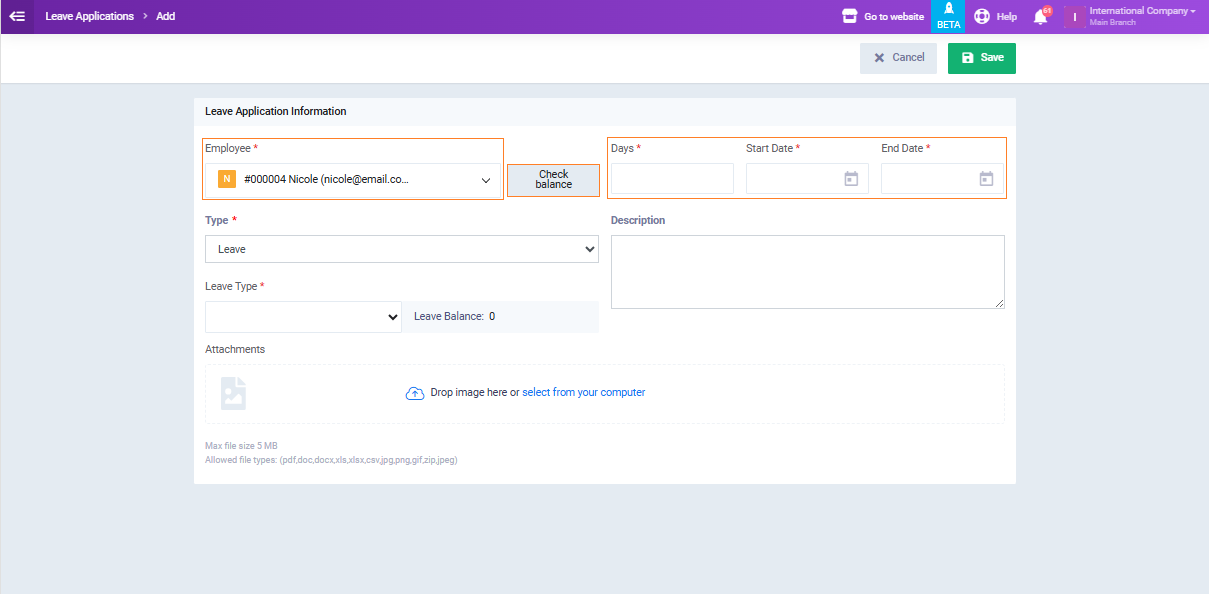
Click the “Add Leave Application” button located at the top right of the screen.

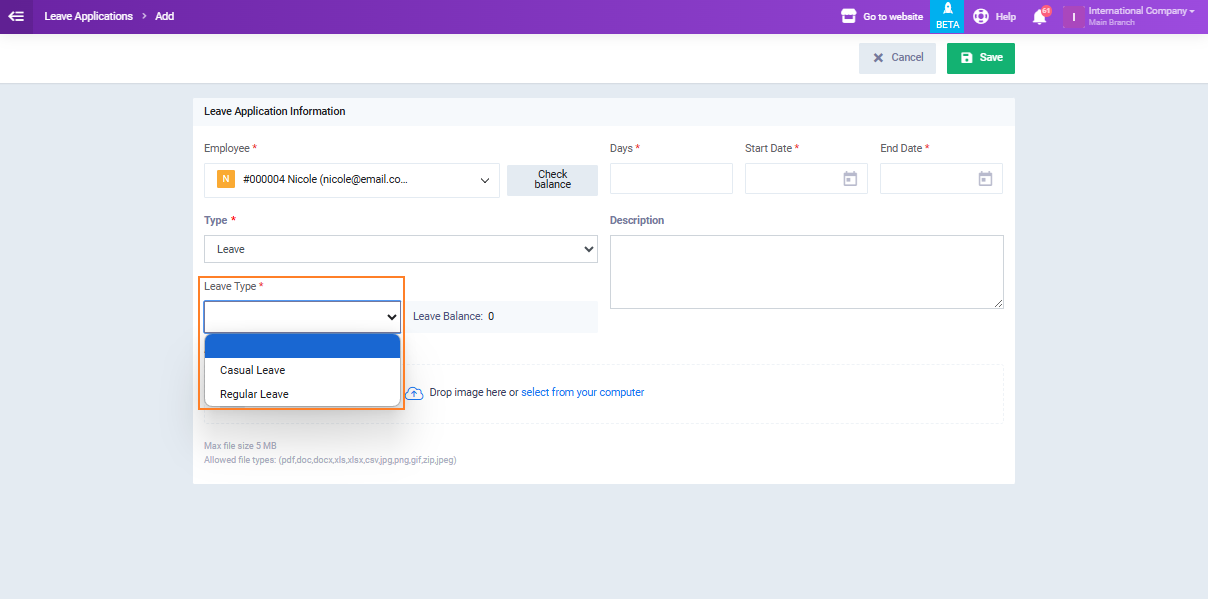
Fill in the below leave application info:
- Employee: A dropdown menu listing all employees. Once selected, the employee ID and email appear beside the name.
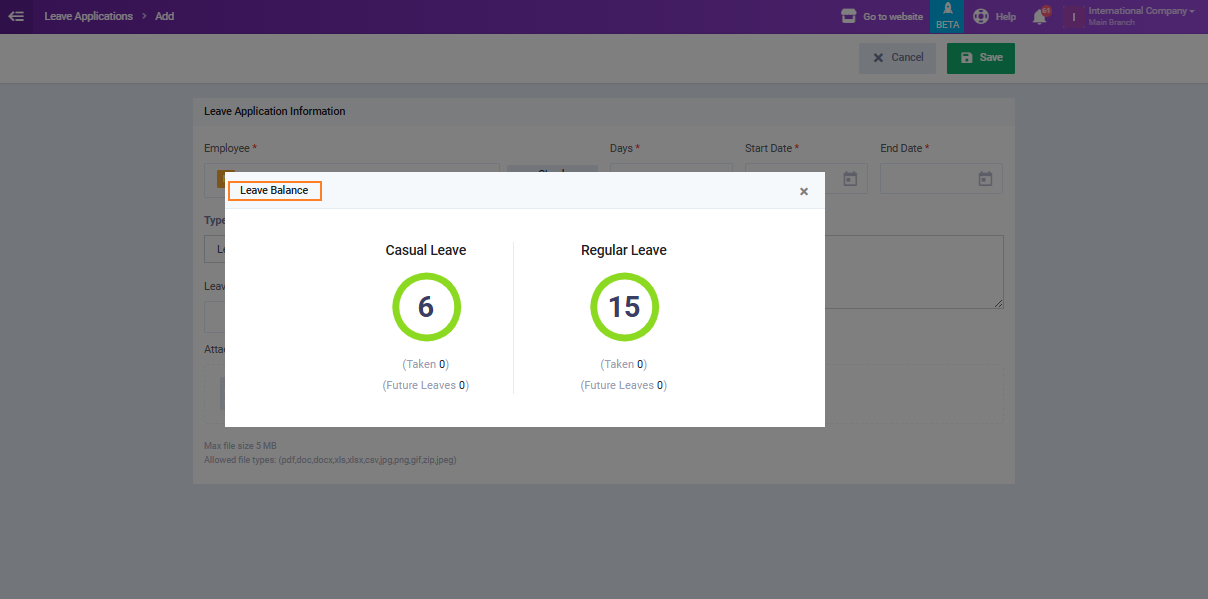
- Check Balance: To display the current available leave balance for the selected employee.
- Days: Enter the number of leave days requested.
- Start Date: Set the start date of the period of leave.
- End Date: Set the end date of the period of leave.
You can check an employee’s leave balance by clicking on the ‘Check Balance‘ button. The system will display an overview of the remaining days available for each leave type.
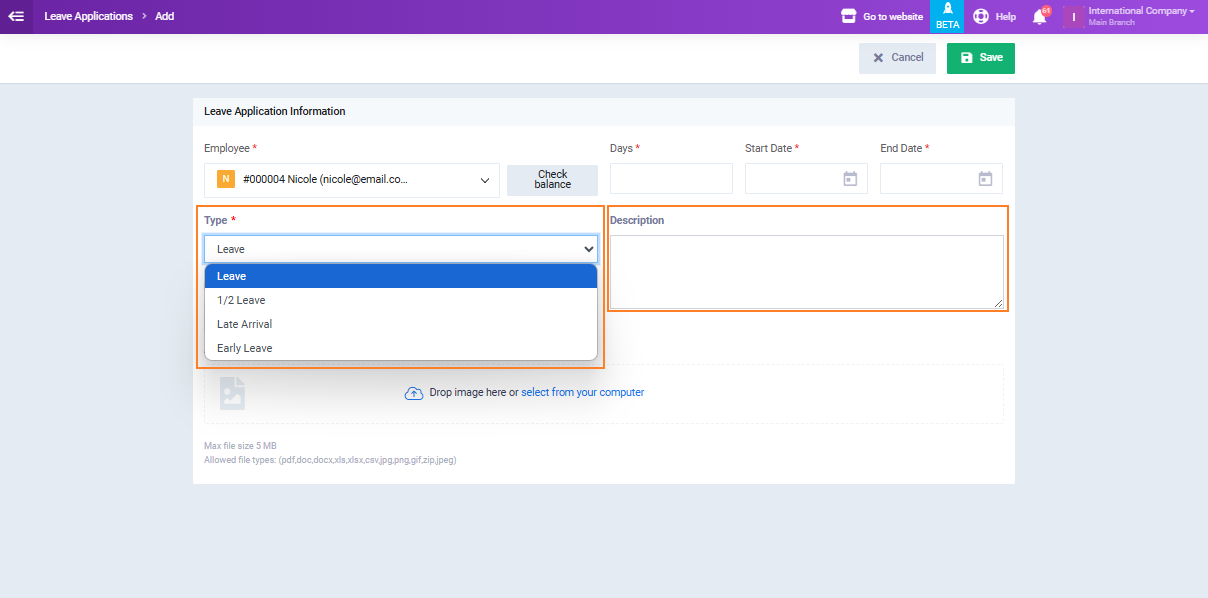
- Type: To identify the general category of leave.
- Description: Enter additional details or reasons for the leave.
- Leave Type: Specify the specific type of leave, such as “sick leave, casual, or regular”.
- Attachments: Upload supporting documents.
Once you’ve completed filling out all the leave application details, click the ‘Save‘ button to submit the request.
After successfully adding the request, your leave application’s status will be marked as ‘Pending‘ until it is reviewed and approved or rejected by the authorized manager.