


Starting Sales for a Specific Branch Guide
The system allows you to create and manage multiple branches within the same account, with separate screens and settings for each branch. Each branch has its own users, treasuries, warehouses, and devices, in addition to the ability to track its administrative and financial operations separately.
This flexibility gives you full control over the sales of each branch and allows you to manage them independently without interference from other branches.
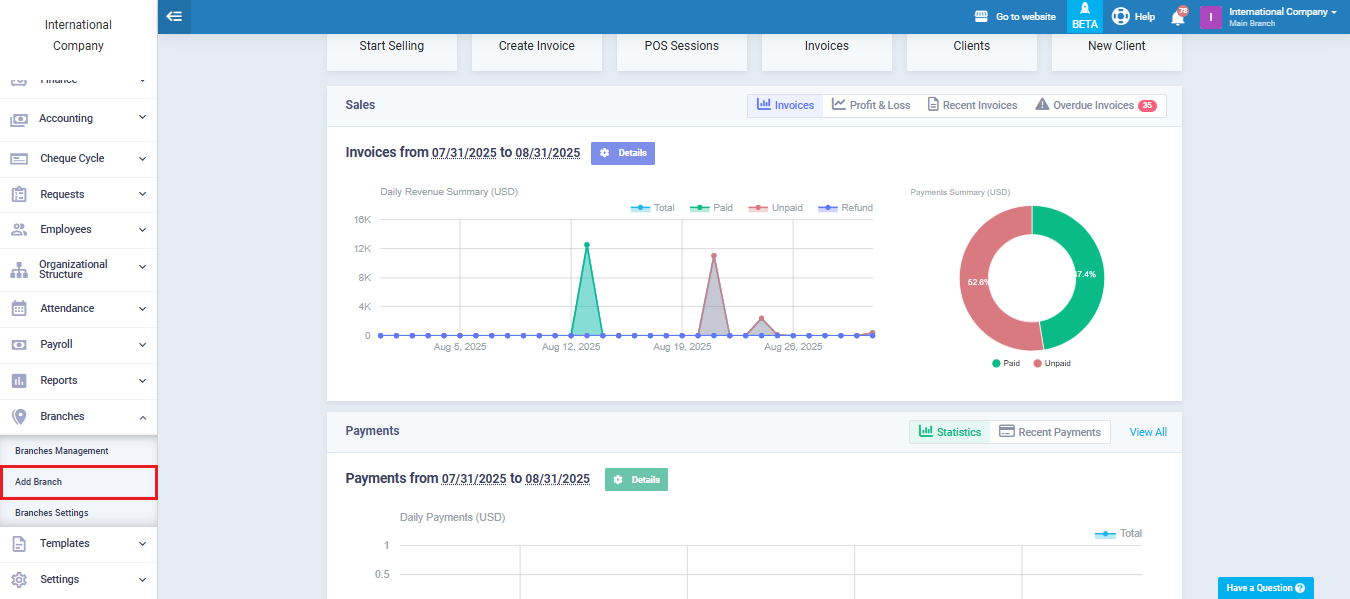
Adding a New Branch
From the main menu, click “Branches”, then click “Add Branch” from the dropdown menu.
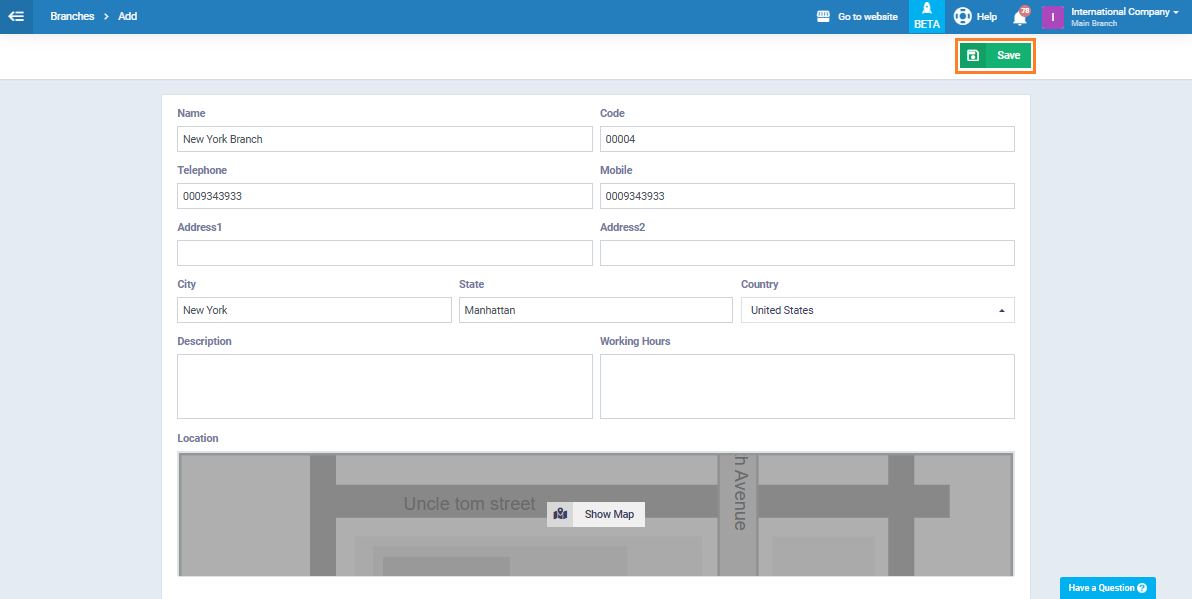
Enter the required data to add the branch, then click “Save.”
Assigning an Employee to a Branch
The system allows you to add employees and assign each one to a specific branch. This ensures that their access is limited only to the treasuries, warehouses, and sales screens of their branch, thereby organizing operations and distributing permissions accurately among different branches.
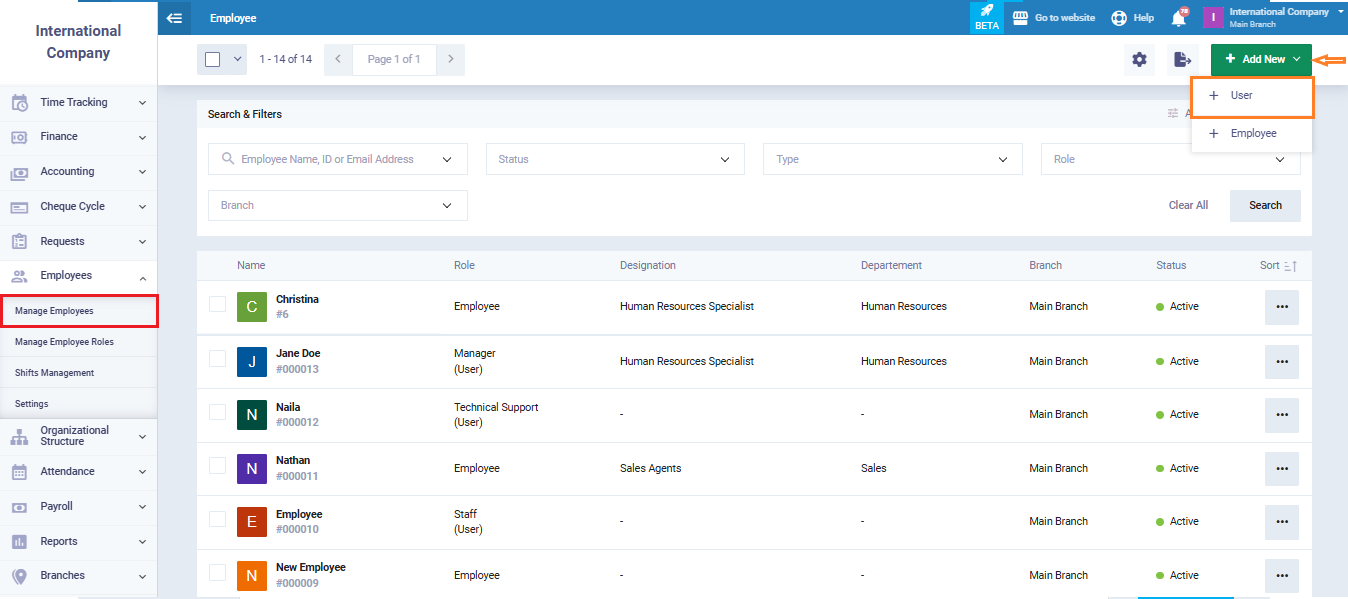
From the main menu, click “Employees”, then click “Manage Employees.”
Click “Add New”, then choose “+User.”
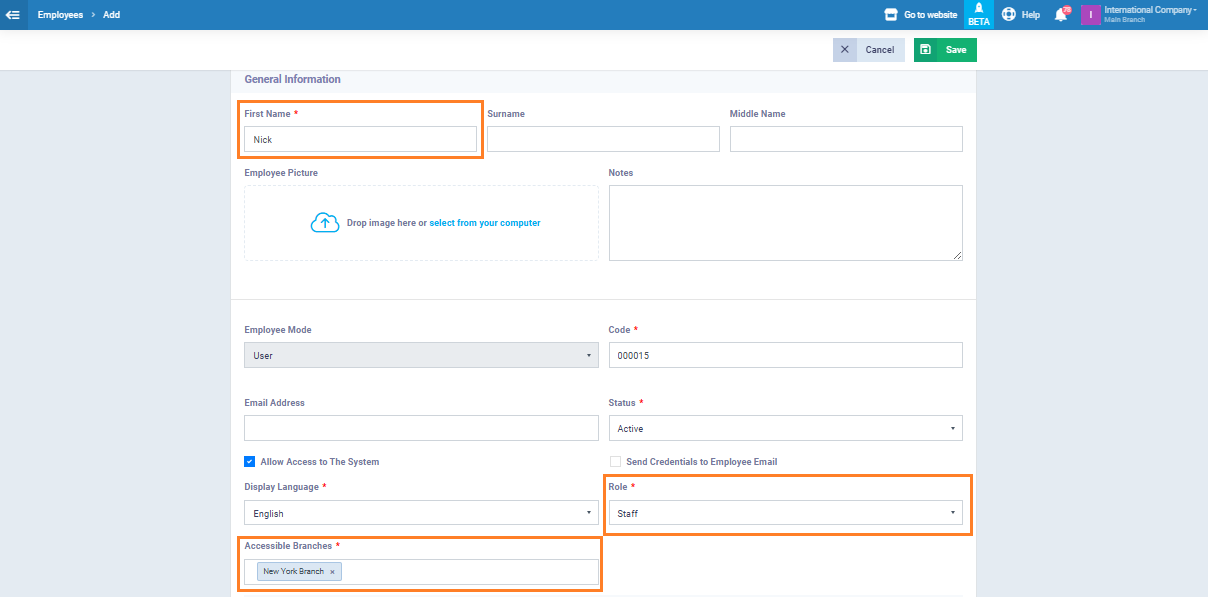
Enter the required basic information to save the user, including:
- First name: Enter the user’s first name.
- Accessible branches: Select the branches the user is permitted to access.
- Role: Select the user’s job role.
Complete the rest of the information and click “Save.”
Adding a Treasury and Linking It to a Branch
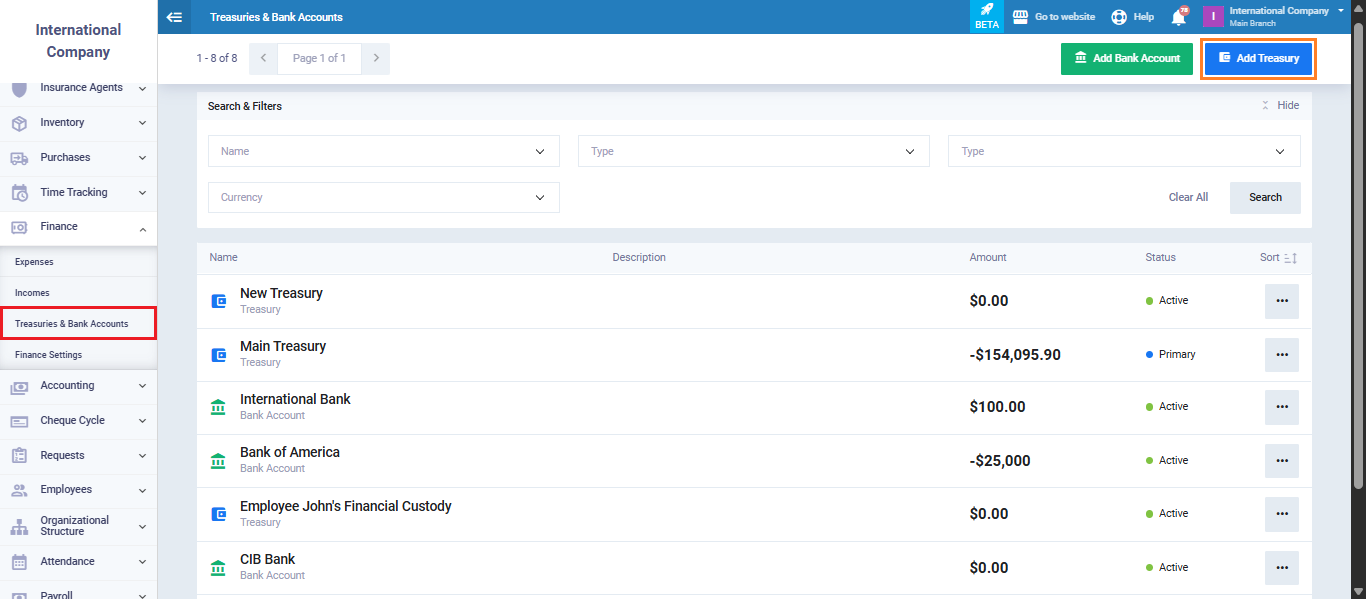
From the “Finance” menu, go to “Treasuries and Bank Accounts.”
Click “Add Treasury.”
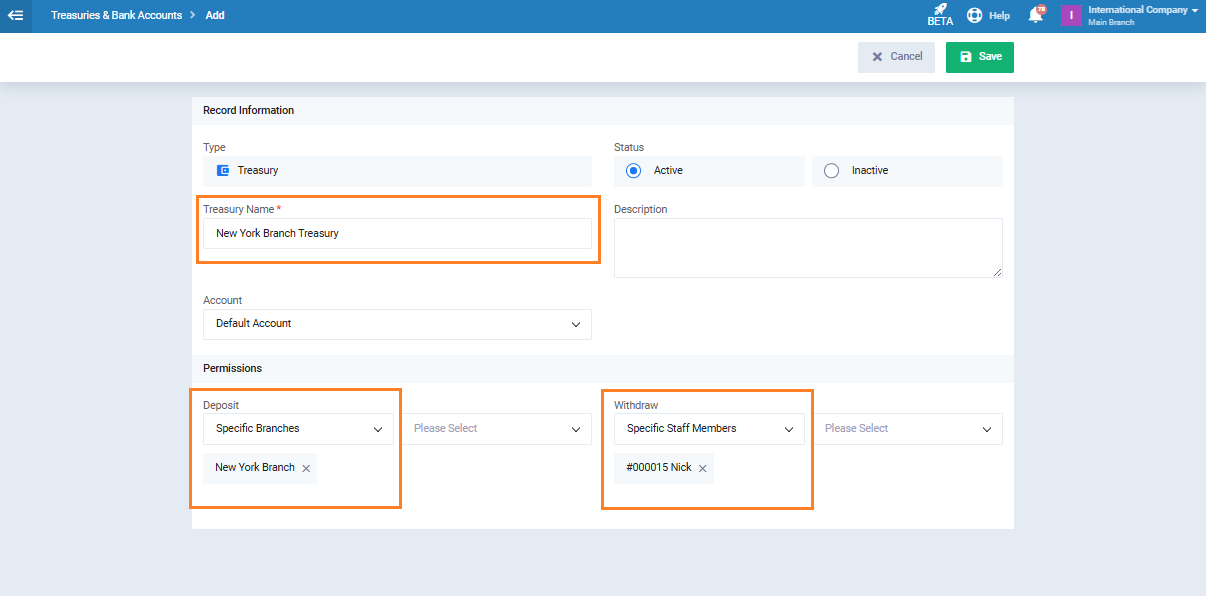
Enter the treasury name, then under permissions, assign deposit/withdrawal rights either to the branch employees only, or to a specific employee if necessary.
Linking a Warehouse to a Branch
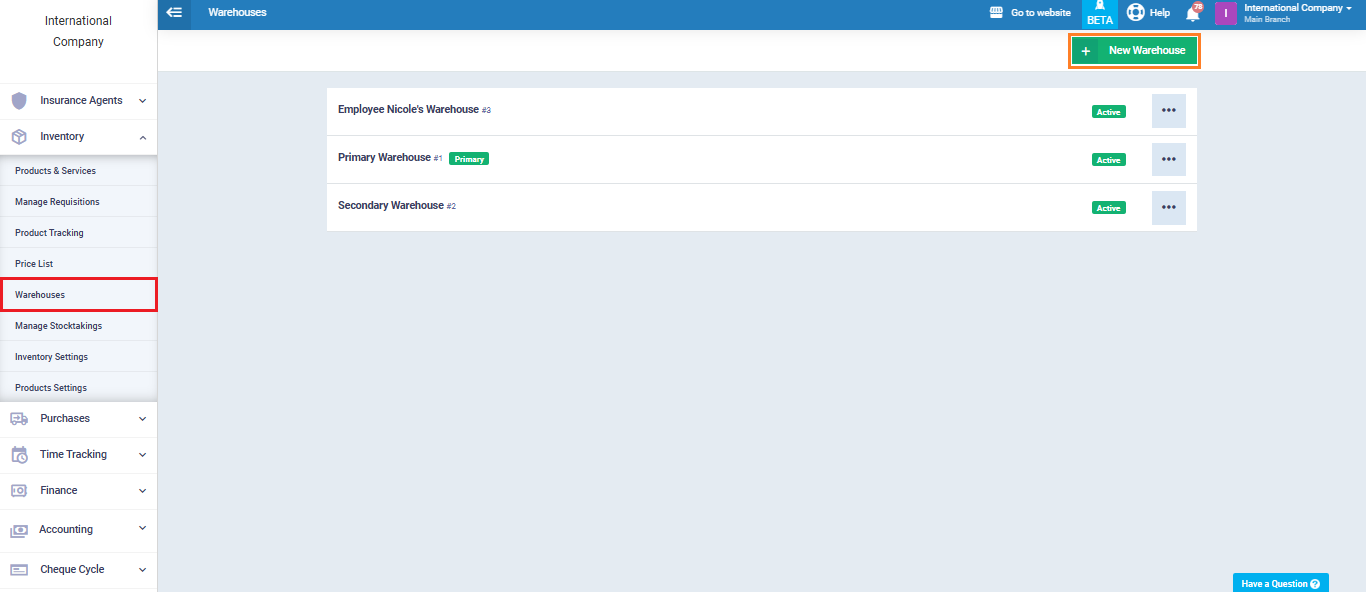
The next step is to create a warehouse and link it to the branch. From the main menu, click “Inventory”, then select “Warehouses” from the dropdown menu.
Click “New Warehouse.”
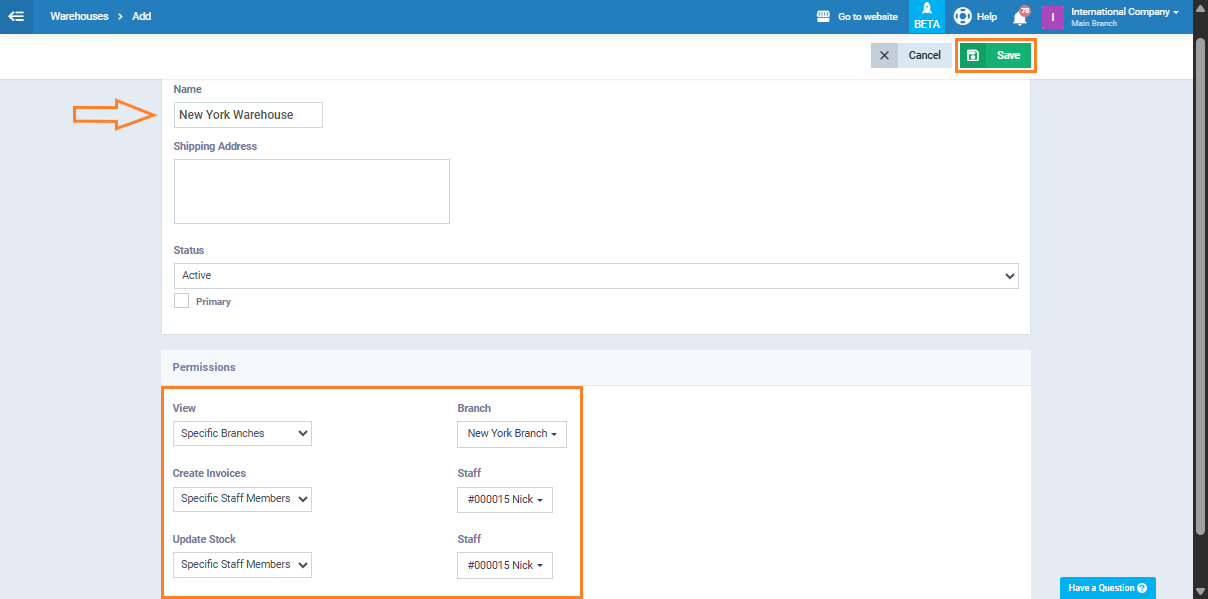
Enter the warehouse data such as name and address, then define its permissions (view warehouse – create invoice – edit inventory).
After setting the permissions and linking the warehouse to the desired branch, click “Save.”
Setting the Default Warehouse for a Branch
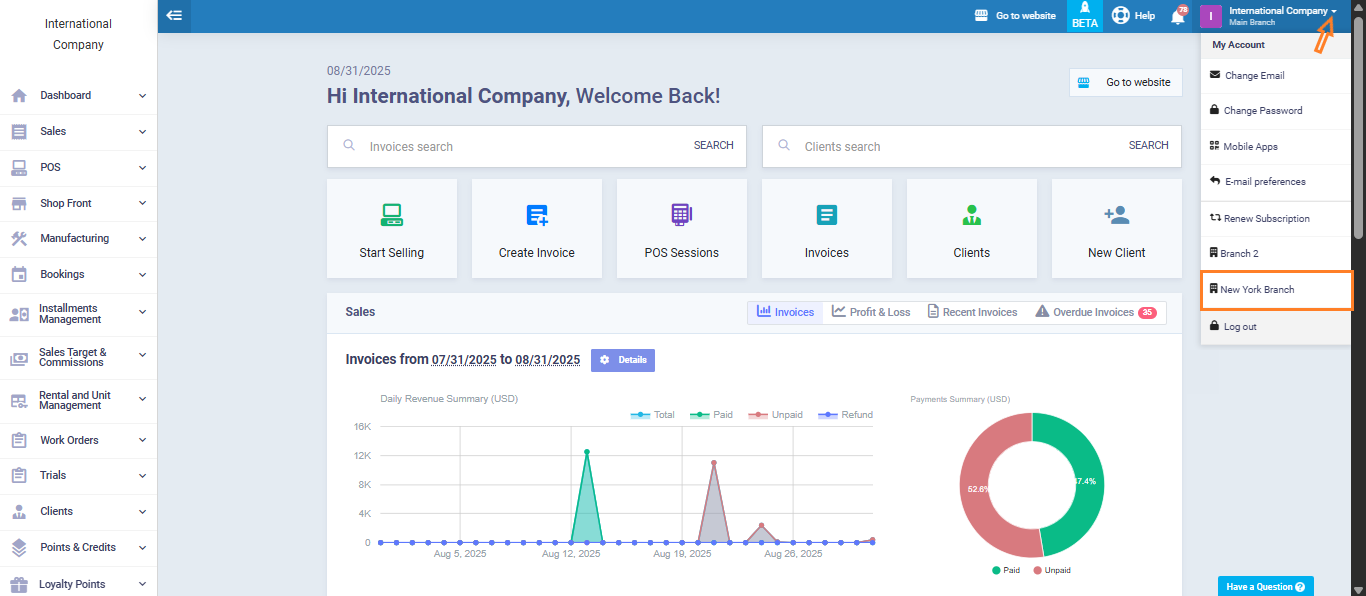
To complete this step and assign the created warehouse as the default for the branch, go to the branch screen by clicking on the account icon at the top left of the screen, then select the desired branch from the dropdown menu (e.g., “New York Branch”).
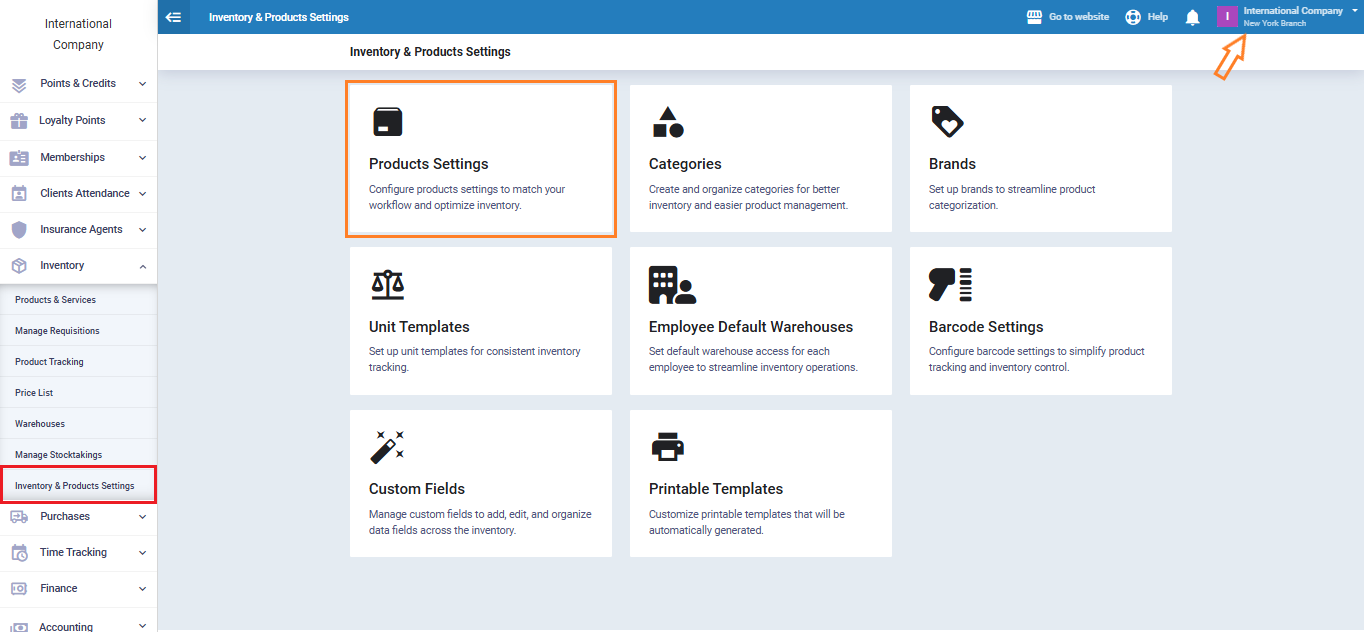
From the main menu, click “Inventory”, then “Inventory & Products Settings”, and choose “Products Settings.”
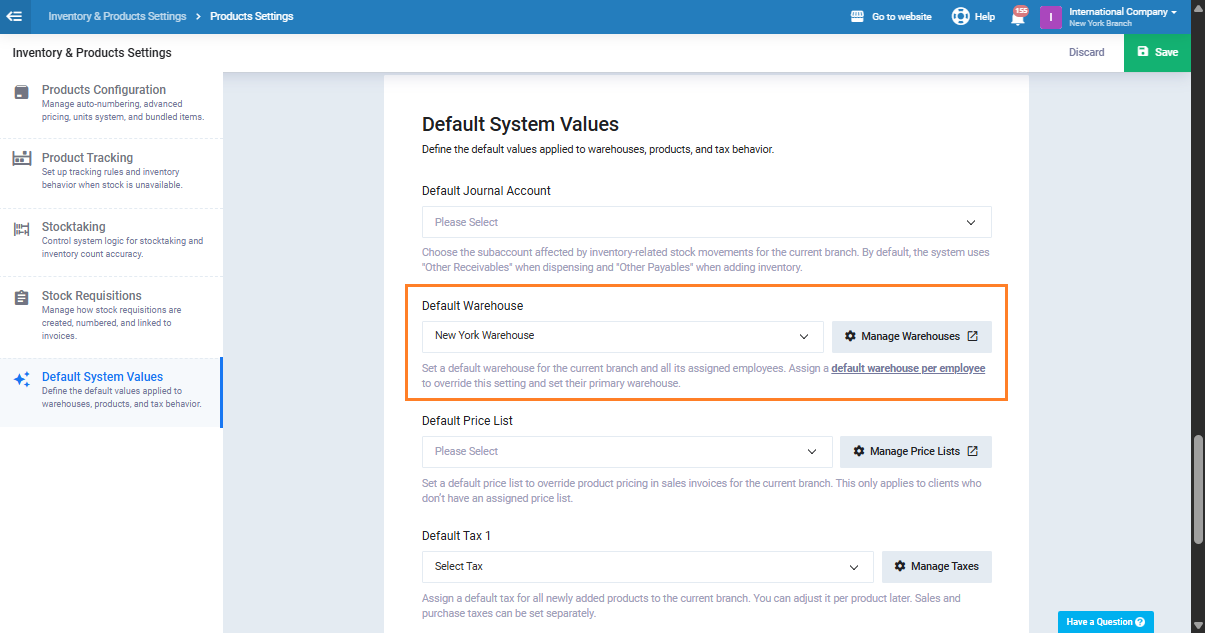
From the “Default Warehouse” field, select “New York Warehouse” (the one you created earlier).
Click “Save.”
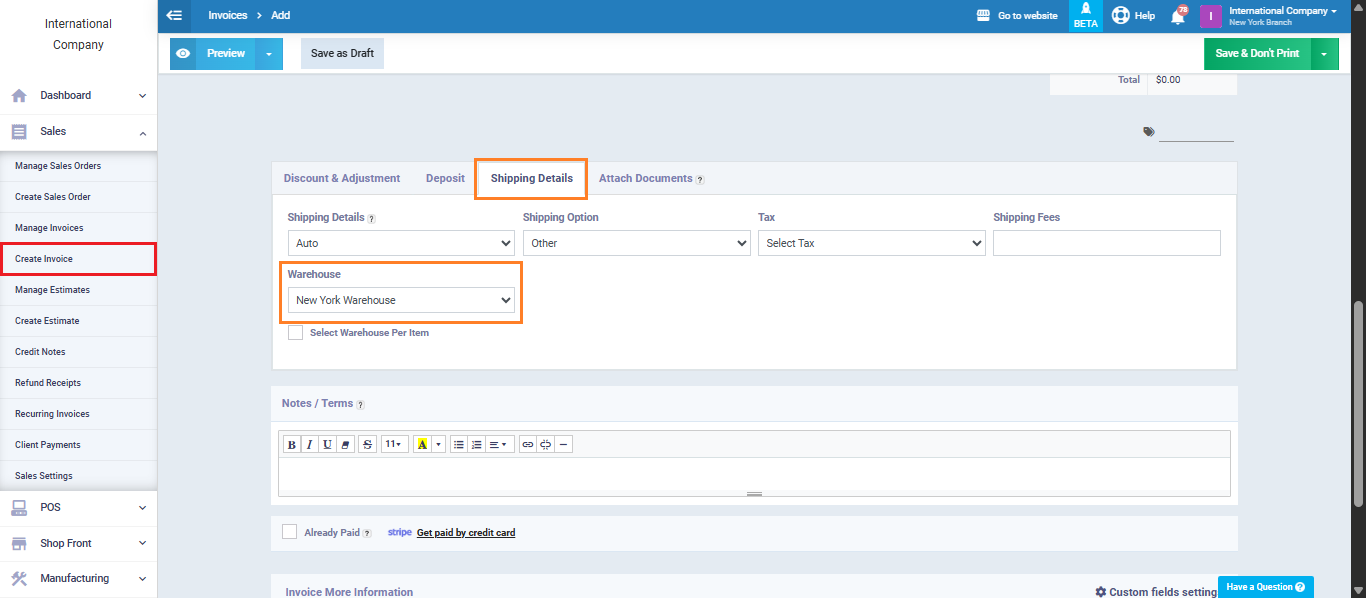
When creating an invoice and entering the required data, scroll down to the “Shipping Details” section. You will find that the warehouse field is automatically set to “New York Warehouse” by the system.
This confirms that the default warehouse has been successfully assigned to the branch.
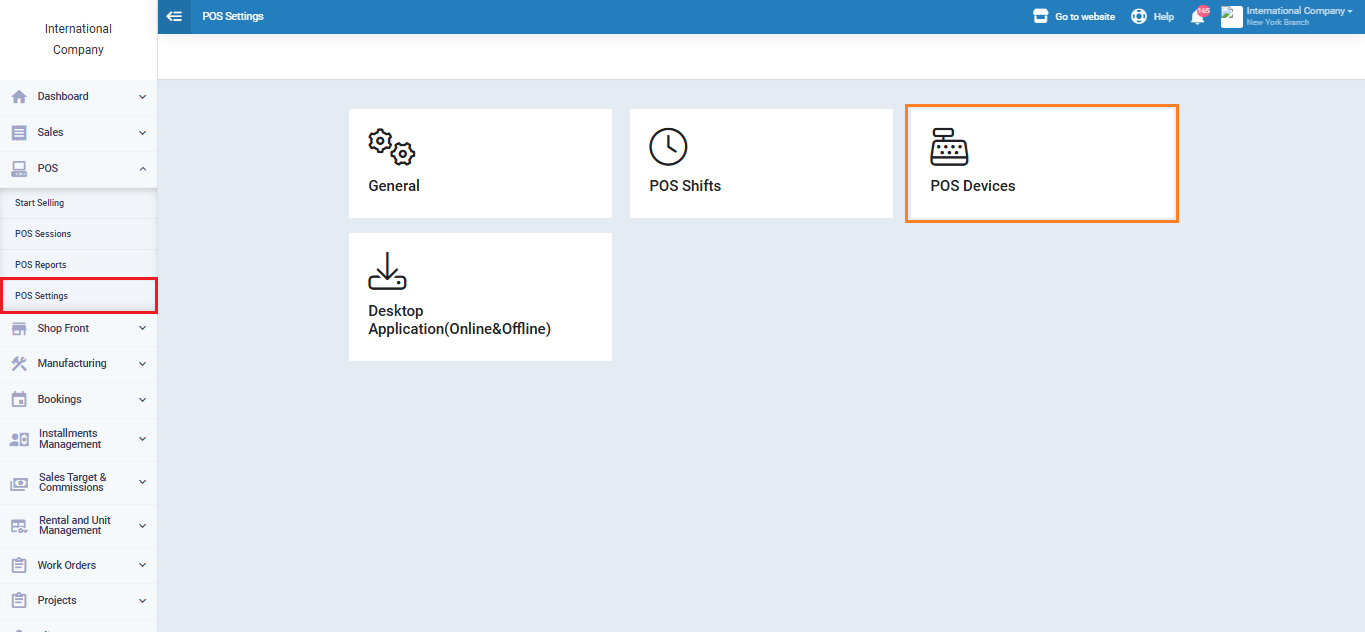
Creating a POS Device for the Branch and Linking It to a Warehouse
From the main menu, click “POS”, then from the dropdown menu choose “POS Settings”, and select “POS Devices.”
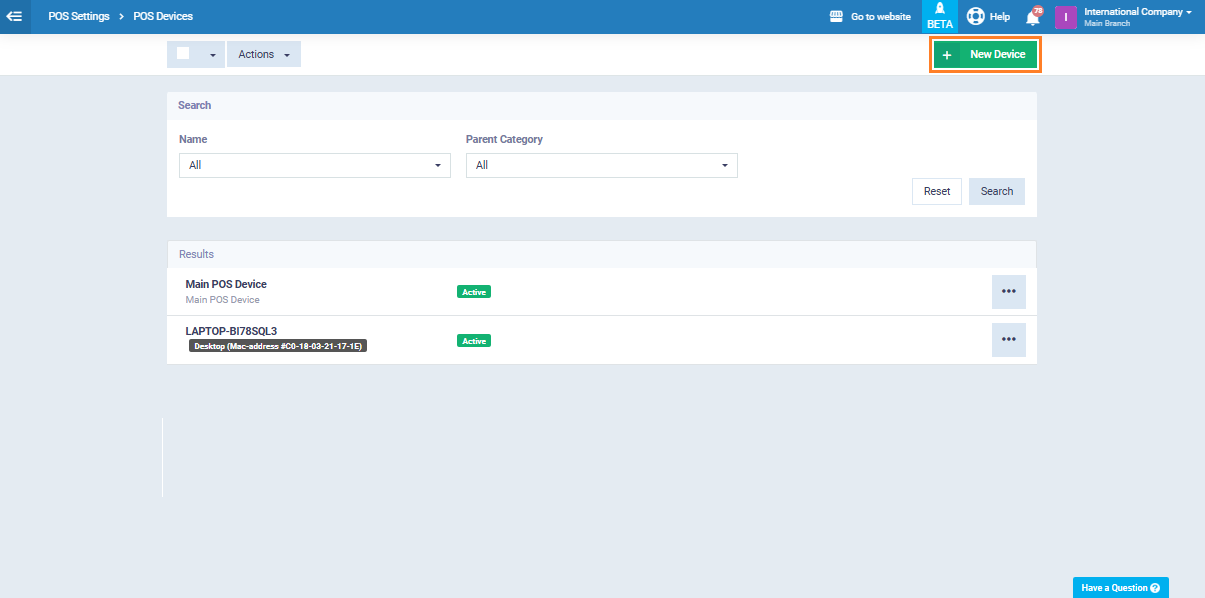
Click “New Device.”
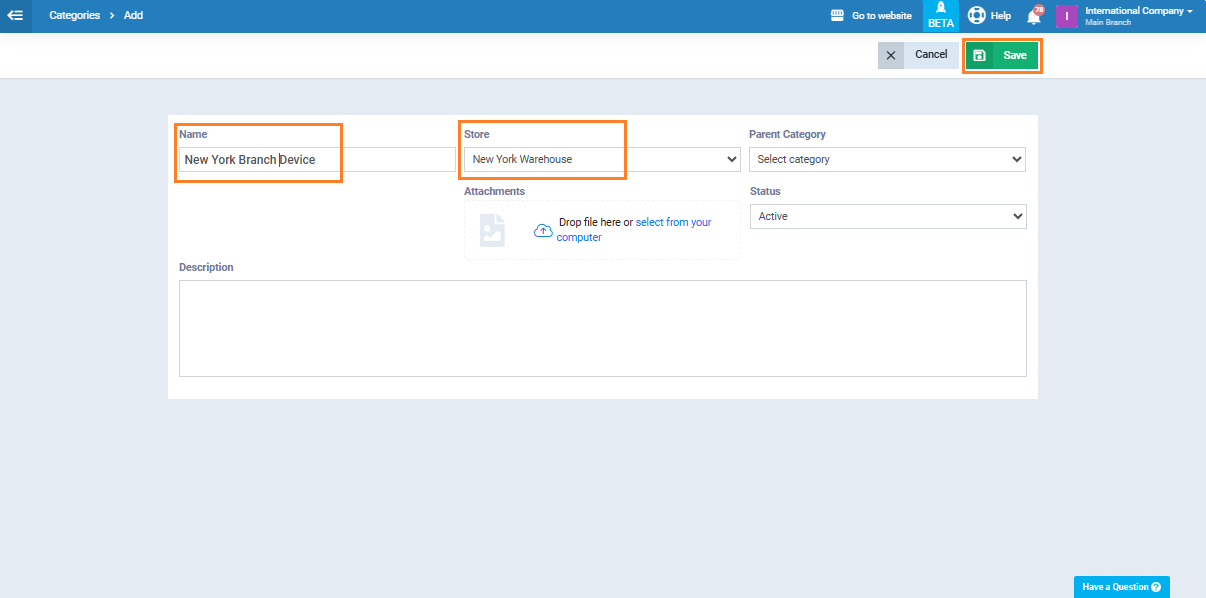
Enter the device name and select the warehouse to be linked to it. The system will automatically pull items from that warehouse during POS transactions on this device.
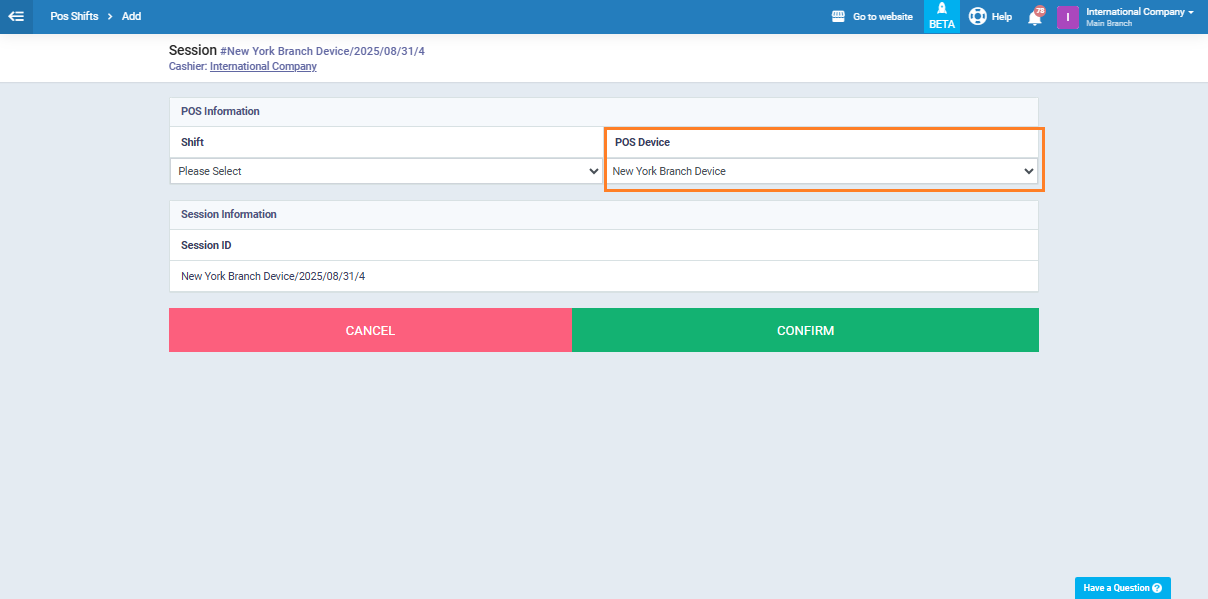
Next, go to the POS screen by clicking “POS” from the main menu, then select “POS Sessions.”
Click “New Session.”
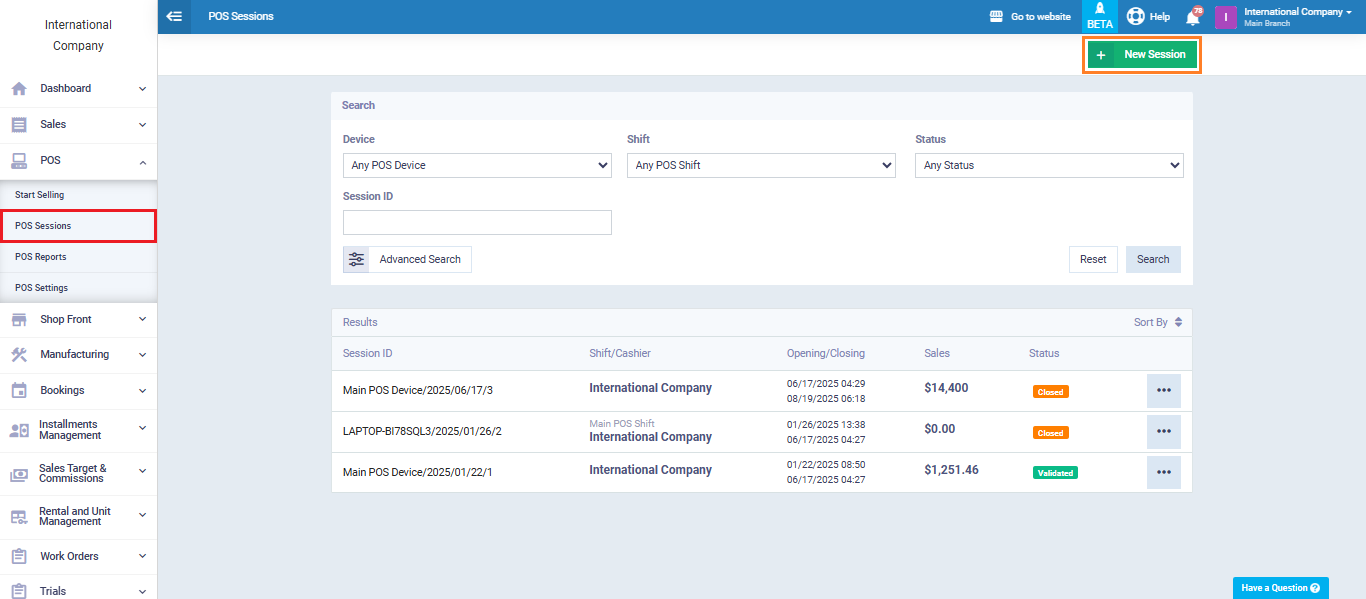
In the “Device” field, choose “New York Branch Device” (the one you previously created).
By following these steps, you have correctly set up the system to start sales in a specific branch. This process includes adding branches, assigning users, setting up treasuries and warehouses, designating the default warehouse, and creating POS devices linked to the branch’s warehouse. By applying these steps accurately, you ensure that sales operations are handled separately for each branch.