






How to Use the Invoice Net Position Report for Reconciliation
The Invoice Net Position report allows you to review every sales invoice within a specified period, along with all financial documents associated with it, including debit notes, returns, and credit notes. This enables you to reconcile each invoice and determine its actual value after adjustments without referring to multiple separate reports.
Steps to Use the Invoice Net Position Report for Reconciliation
Step 1: Navigate to the Report
From the main menu, click Reports, select Sales Reports, then Invoices Segmented Reports, and click Invoice Net Position.
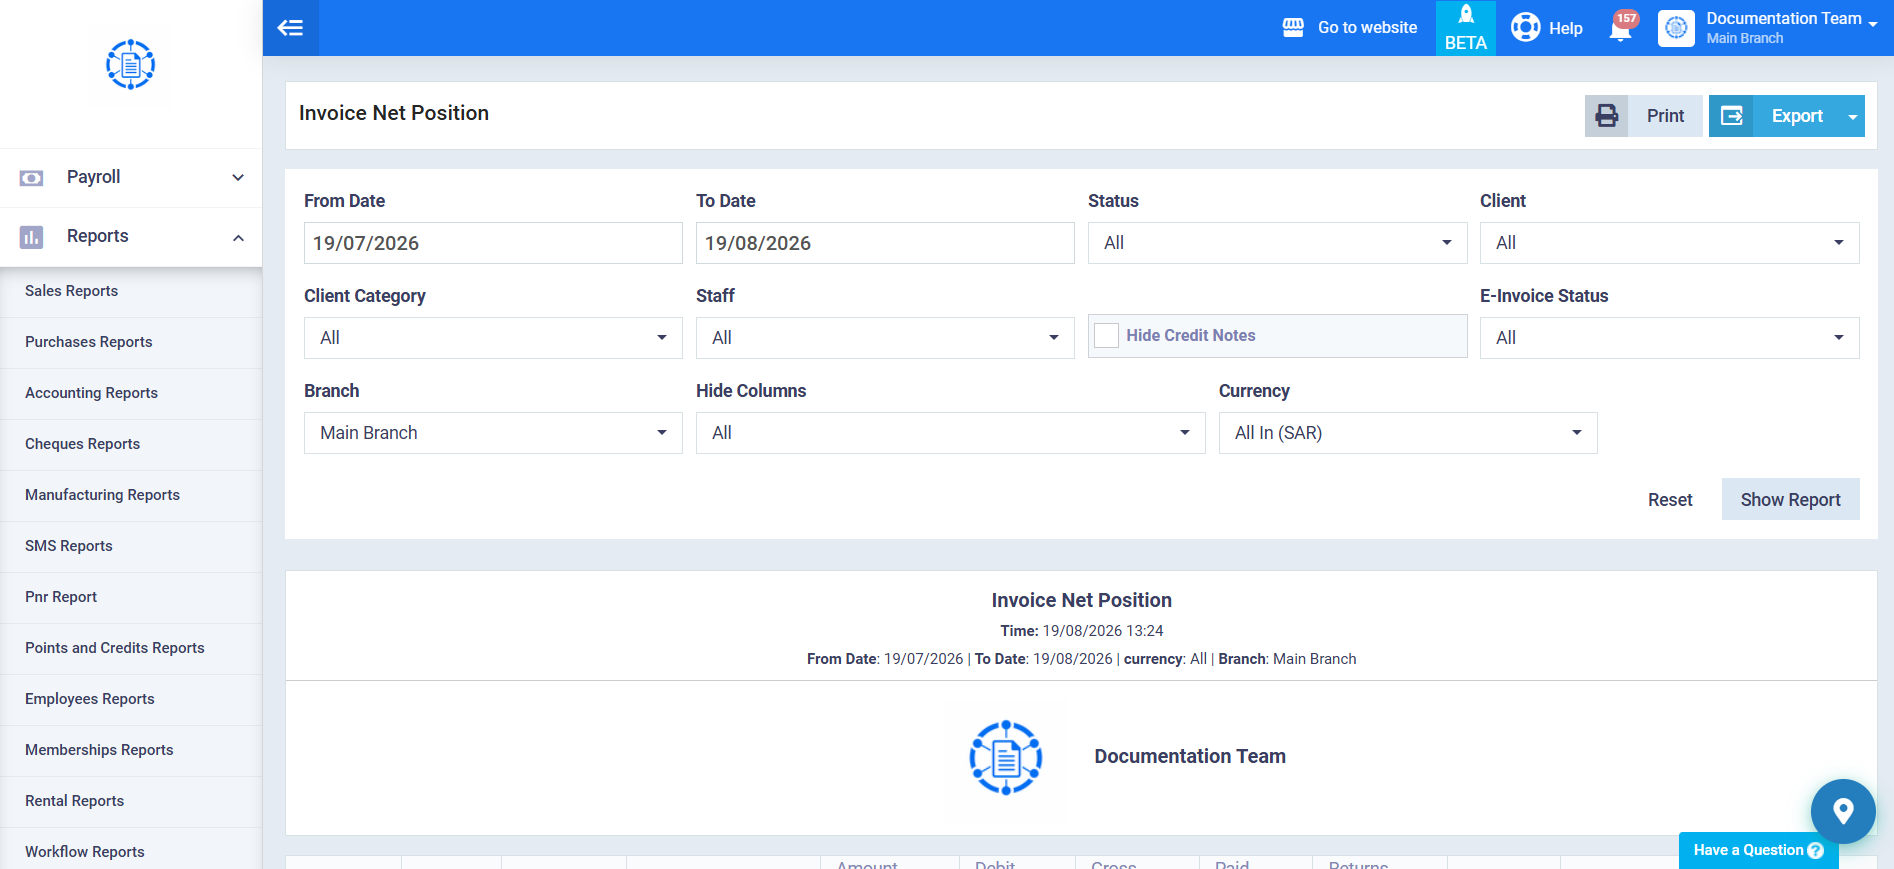
Step 2: Set the Filter Criteria
Set the criteria according to your requirements:
- From Date / To Date: Filters invoices based on the invoice date itself; the current month is selected by default.
- Status: All, Paid, Partially Paid, Unpaid, Returned, or Partially Returned.
- Client and Client Category: Searchable lists, with All selected by default.
- Staff: A searchable list.
- Currency: All currencies by default (without totals).
- Branch: Appears only if Branches is enabled.
- E-Invoice Status.
- Include Unlinked Credit/Debit Notes: enabled by default. When enabled, credit/debit notes that are not linked to any invoice appear as separate rows.
You can also select the columns you want to hide (Type, Date, Client, Status) and specify the grouping method (Daily, Weekly, Monthly, Yearly, By Client, By Sales Person, or By Staff).
Step 3: View the Report
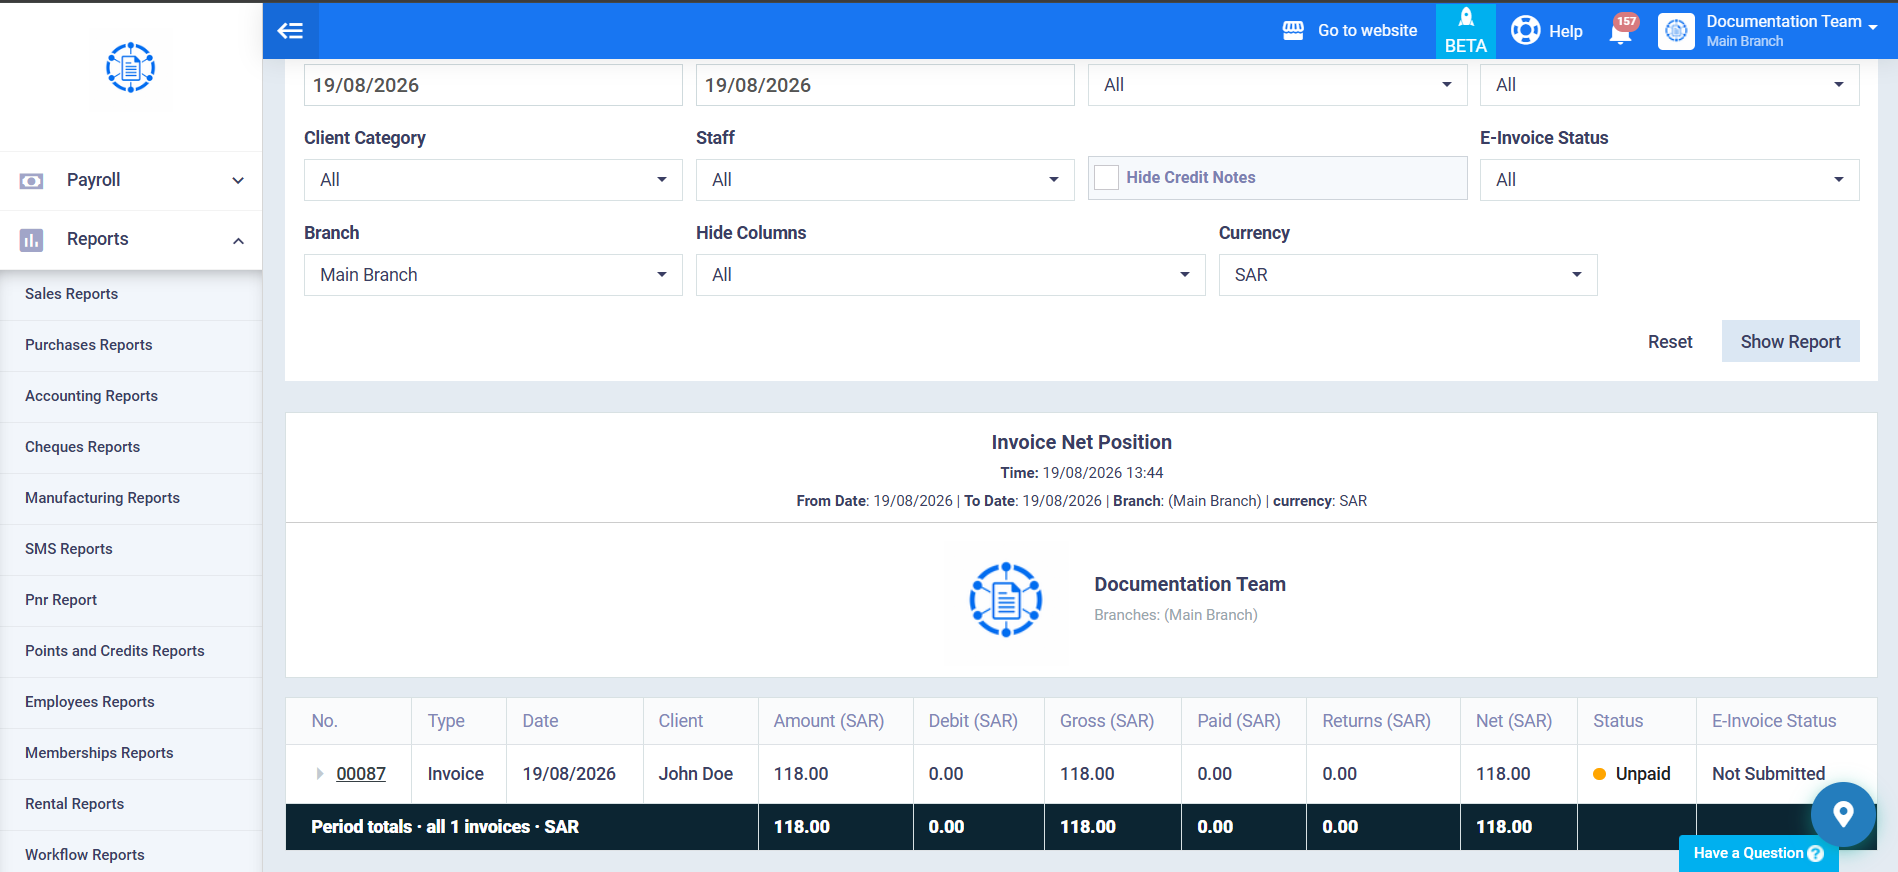
Click Show Report.
Step 4: Review Invoice Rows and Associated Documents
The report displays a row for each sales invoice, with nested sub-rows underneath for each debit note, return, or credit note associated with it. Each document type has a distinct visual indicator (Invoice, Debit Note, Return, Credit Note). Click any invoice number or sub-document to open it in a new tab.
Step 5: Understand the Returns Column
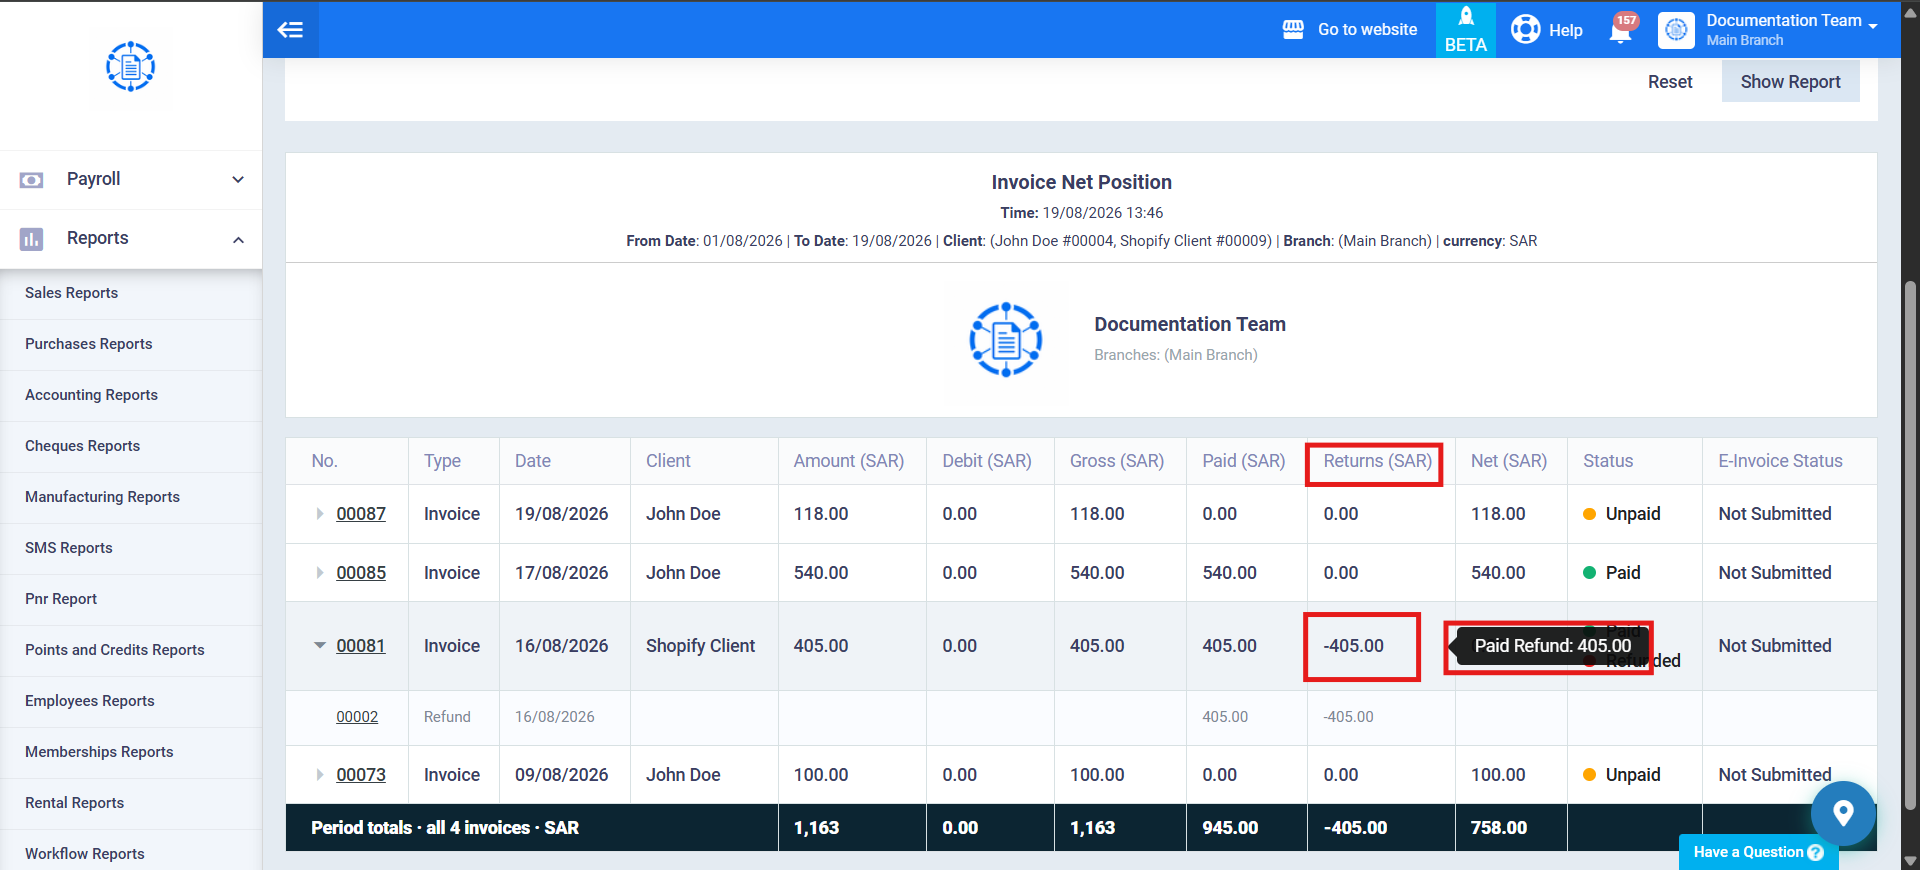
Hover over the Returns column for any invoice to view a breakdown of the amount (Unpaid Return, Paid Return, Credit Note) in a pop-up window. If there are more than two references to associated documents, an indicator such as “+2” appears. Click it to view the remaining references.
Step 6: Review the Net Amount
The Net amount is calculated by subtracting returns from the gross amount (Gross = Invoice Amount + Associated Debit Notes; Returns = Paid and Unpaid Returns + Credit Notes). If the net amount is negative, a red warning triangle icon appears next to the invoice number.
Step 7: Review the Invoice Total
The last row of the table displays the total for all invoices matching the selected period and search criteria, along with the number of invoices included in the total.
Step 8: Export or Print the Report
From the top of the report, you can export the report in PDF, Excel, or CSV format, or print it directly.