


Neoleap Payment Method Integration
One of the system’s advantages is that it provides multiple electronic payment options that simplify sales and collection processes for your business. Among them is the Neoleap POS payment method, which allows you to securely and quickly accept payments through the POS machine.
In this guide, we’ll go step by step on how to integrate Neoleap with the system so that all transactions processed on the POS machine are automatically recorded in the system.
Configure Basic Settings in the System
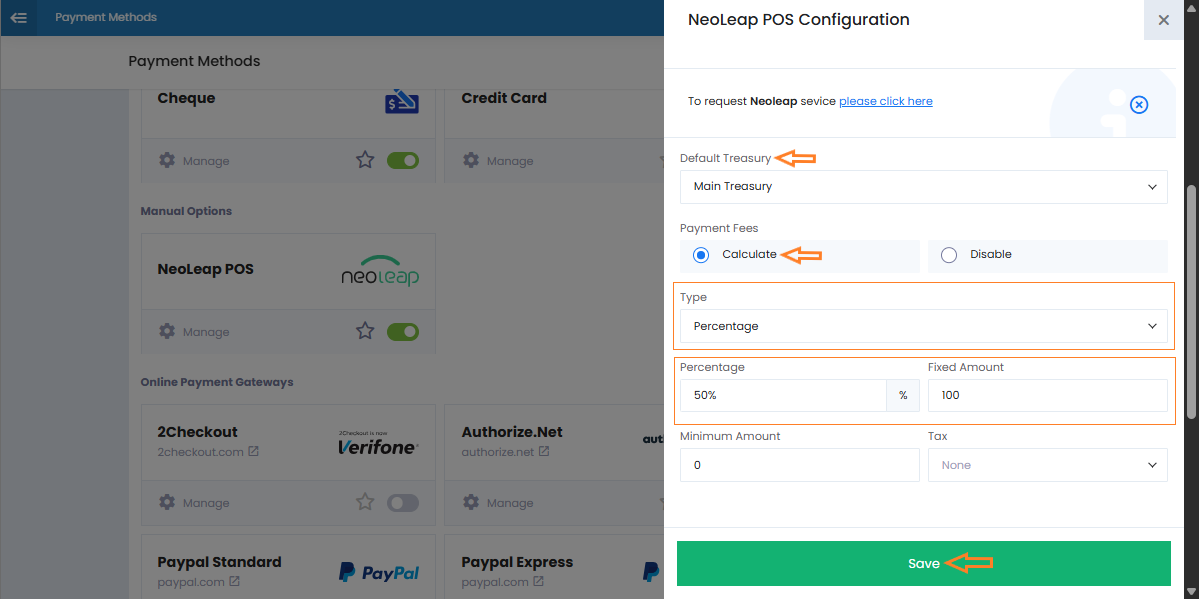
From the “Settings” in the main menu, go to “Payment Methods” and activate Neoleap.

In the “Payment Fees” section, select “Calculate“, then enter the fee value either as a percentage or a fixed amount.
If you choose a percentage, you can also add a fixed amount alongside it.
Click “Save” to confirm the settings.
Activate Neoleap in the POS
From the main menu, go to “POS“, then click on “POS Settings“.
Select the “General” tab.
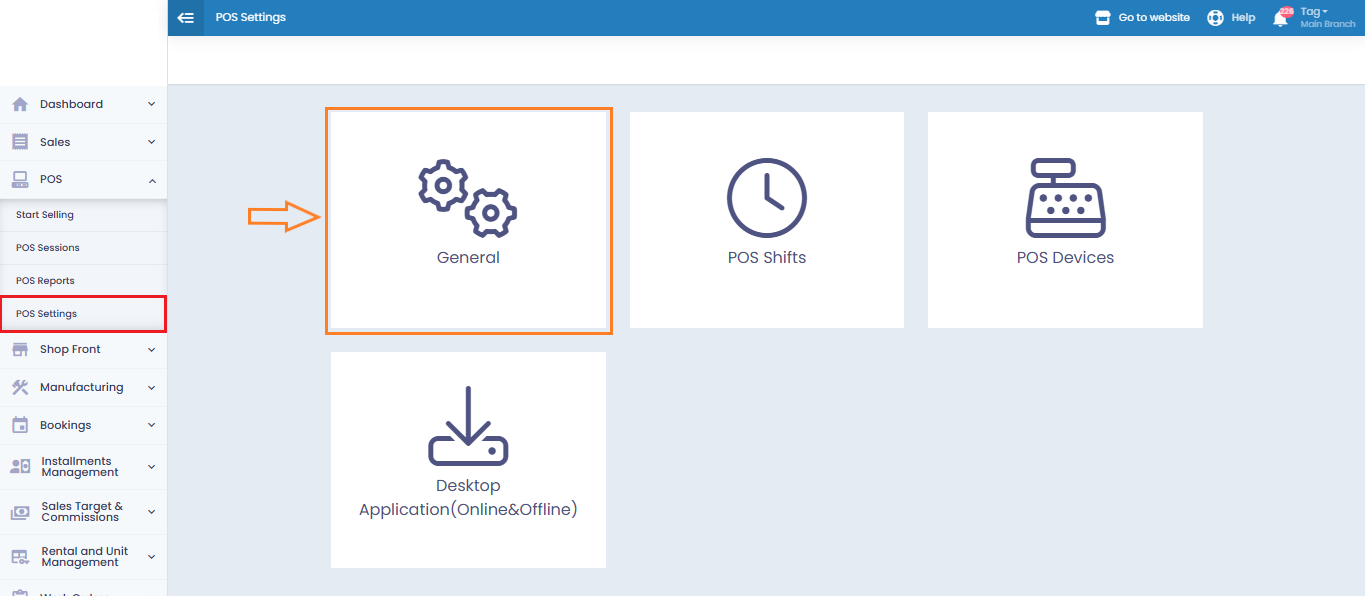
In the Enabled Payment Methods section, select Neoleap POS so the method becomes available for use in sales transactions.

Download and Extract Integration Files
You will need to download two essential files from the provided Google Drive link:
Integration setup
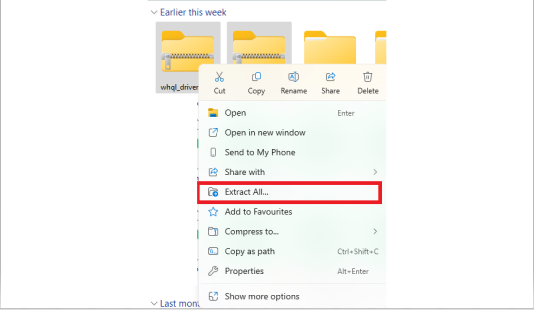
For each file, right-click and select “Extract All” to extract the contents.
Install the Programs from the Extracted Files
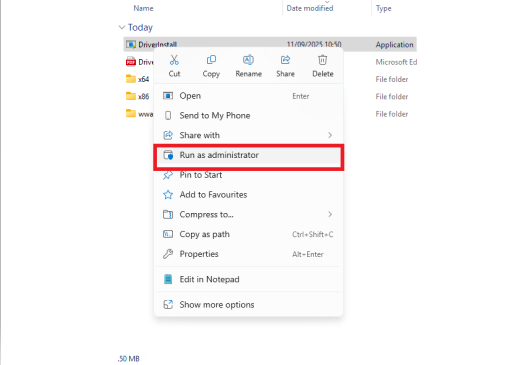
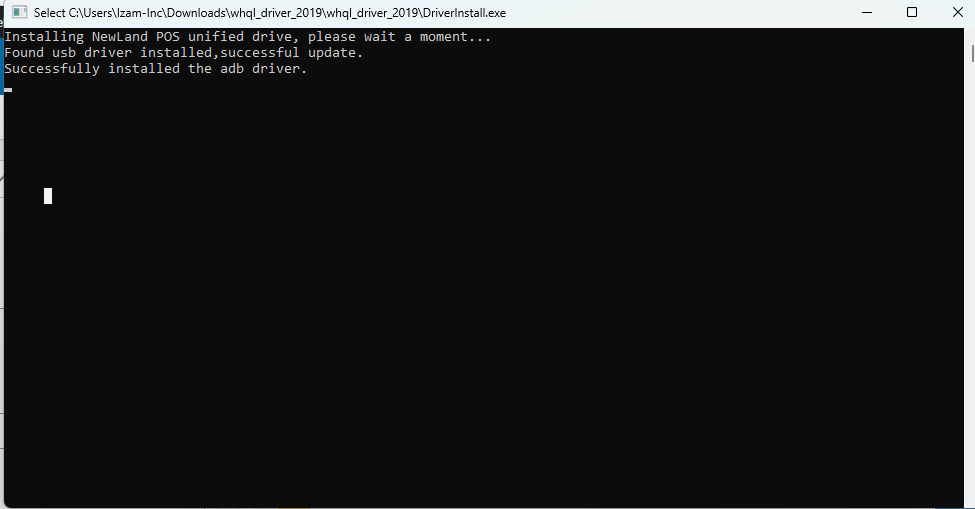
Open the extracted whql_driver folder, right-click on the DriverInstall file, and choose Run as administrator to install it.
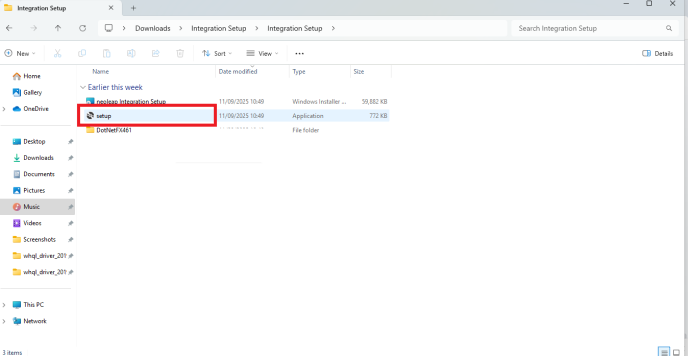
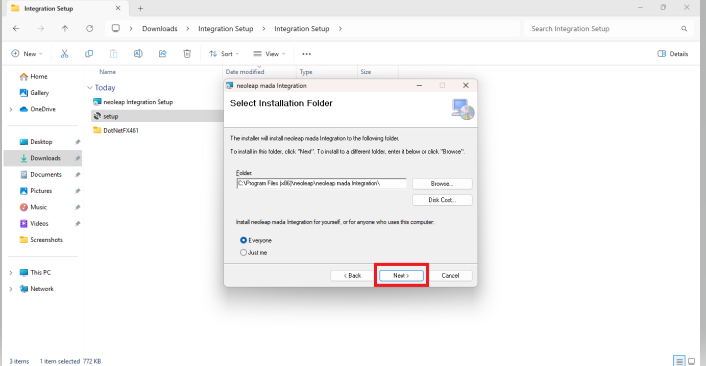
Next, open the extracted Integration setup folder, run the Setup file, click Next, and allow the installation to complete.
Modify Connection Settings
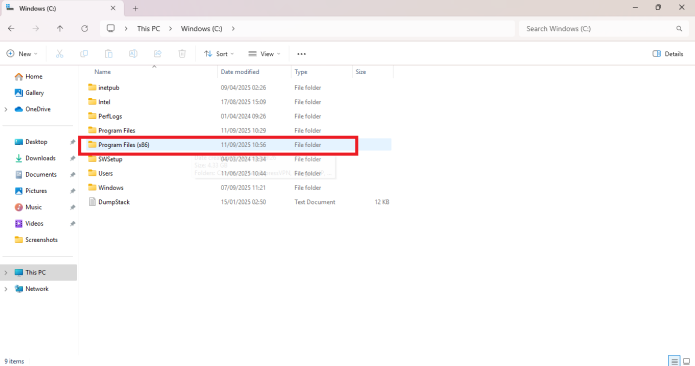
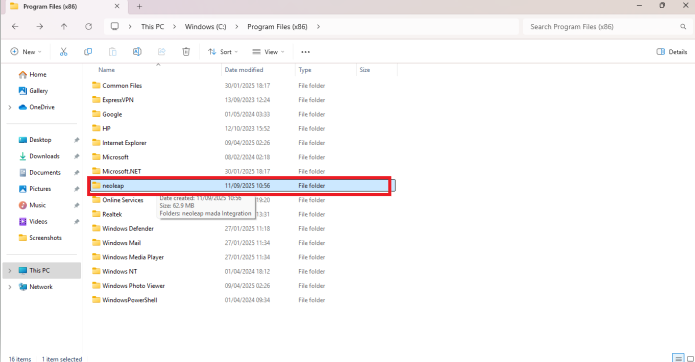
Once installation is complete, go to Windows (C:) > Program Files (x86).
Locate and open the Neoleap folder.
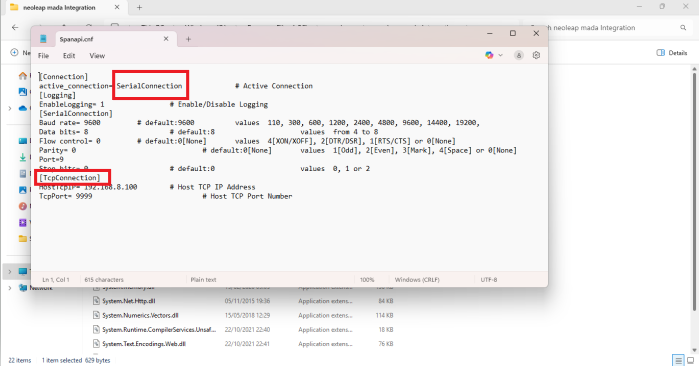
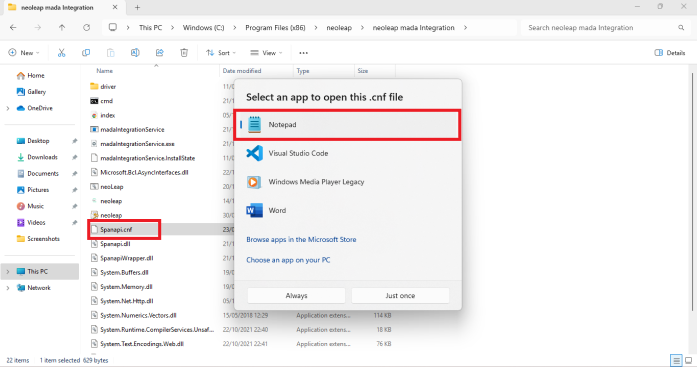
Inside, right-click on the file named spanapl.cnf and choose open with “Notepad“.
In the configuration, you’ll find a setting called serial connection, which indicates the POS machine is connected by cable.
If you are using Wi-Fi instead, replace this with tcp connection.
Press Ctrl + S to save your changes.