


Connecting your Account to Shopify
By linking your Shopify account with your account, you can effortlessly link your Shopify transactions, such as invoices and product movements, with the software. This integration allows for the automatic recording of invoices and inventory changes in the system, eliminating the need for manual data entry. This article outlines the steps to establish this connection.
Enabling the Shopify Integration
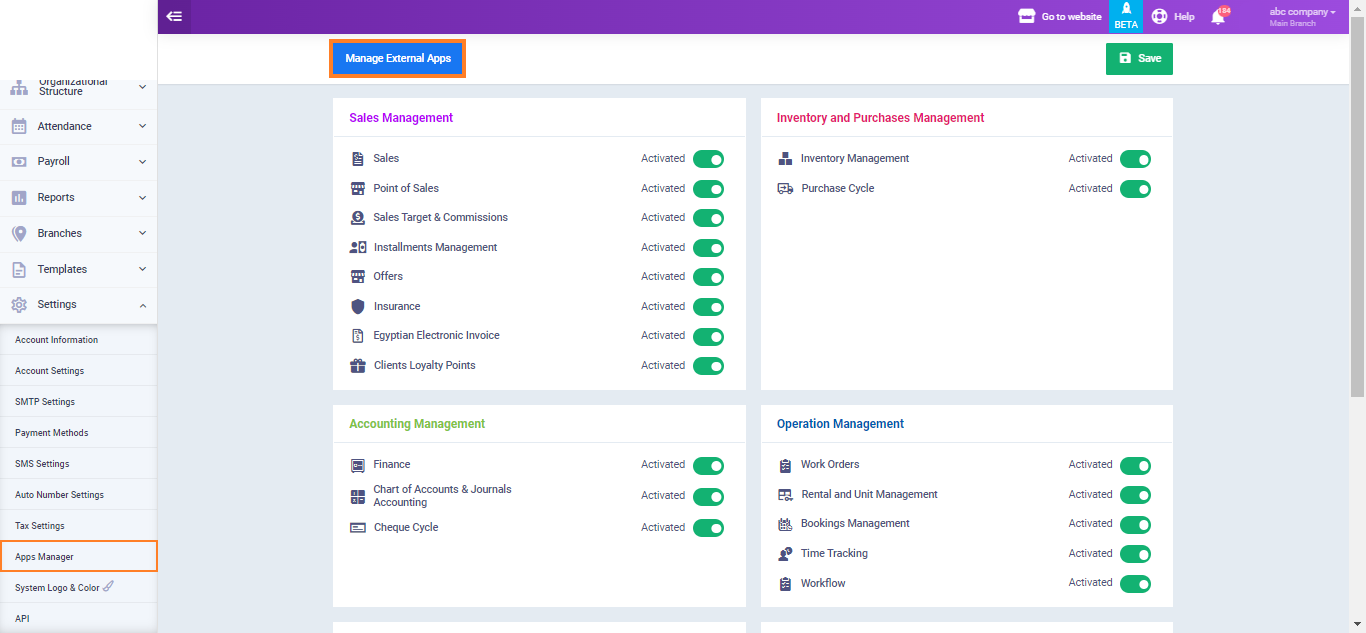
Click on “App Manager” from the “Settings” dropdown menu in the main navigation. Then, click on the “Manage External Apps” button.
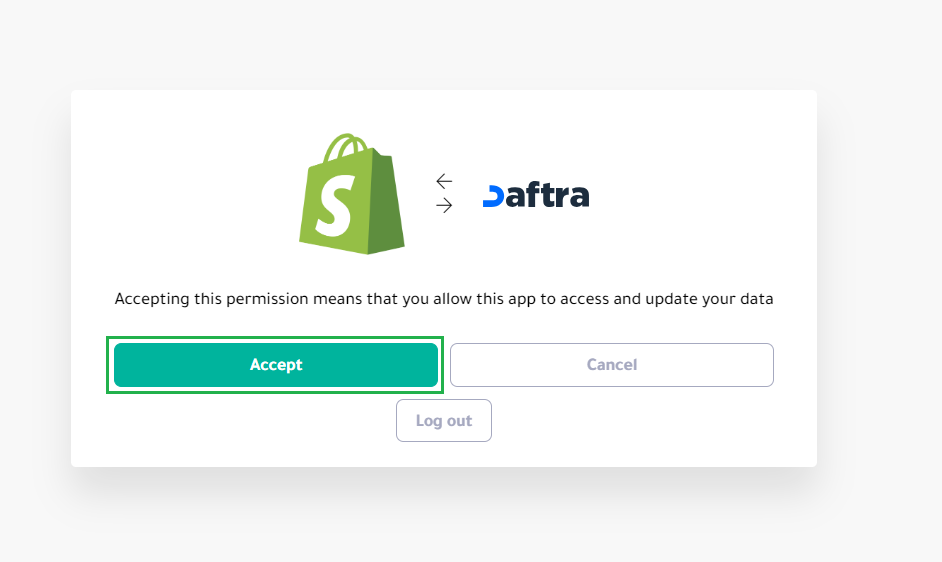
Activate the “Shopify” store button.

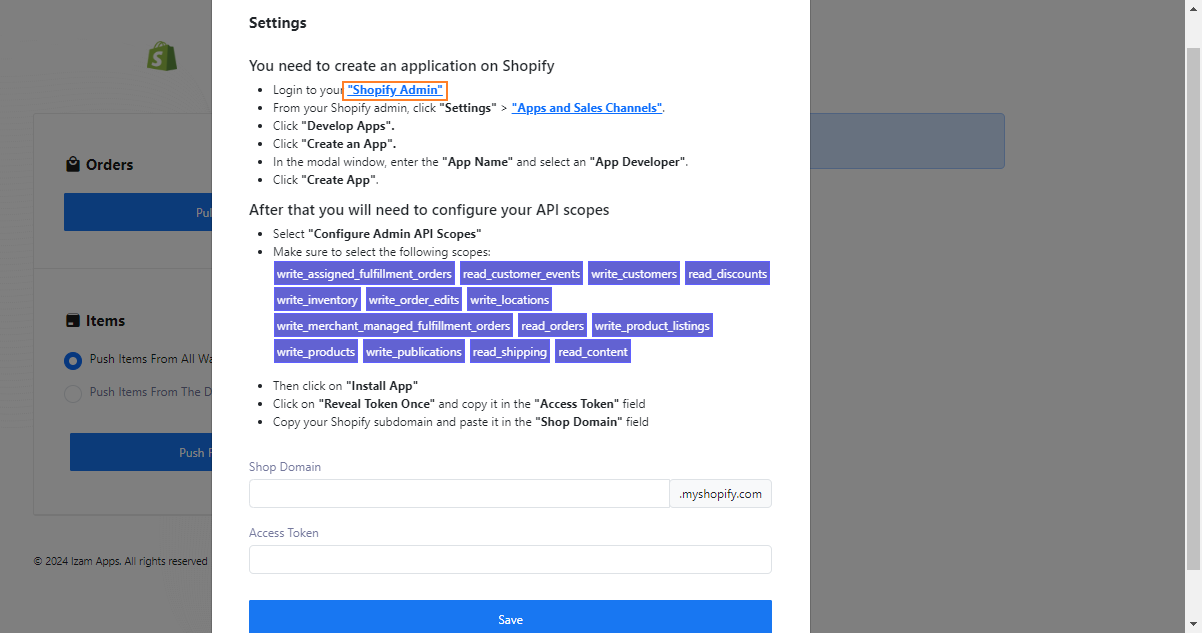
The steps for the integration process will appear. Click on “Shopify admin” to log in to your Shopify account and configure the integration settings from your Shopify account first.
Configuring the Integration Settings in Your Shopify Account
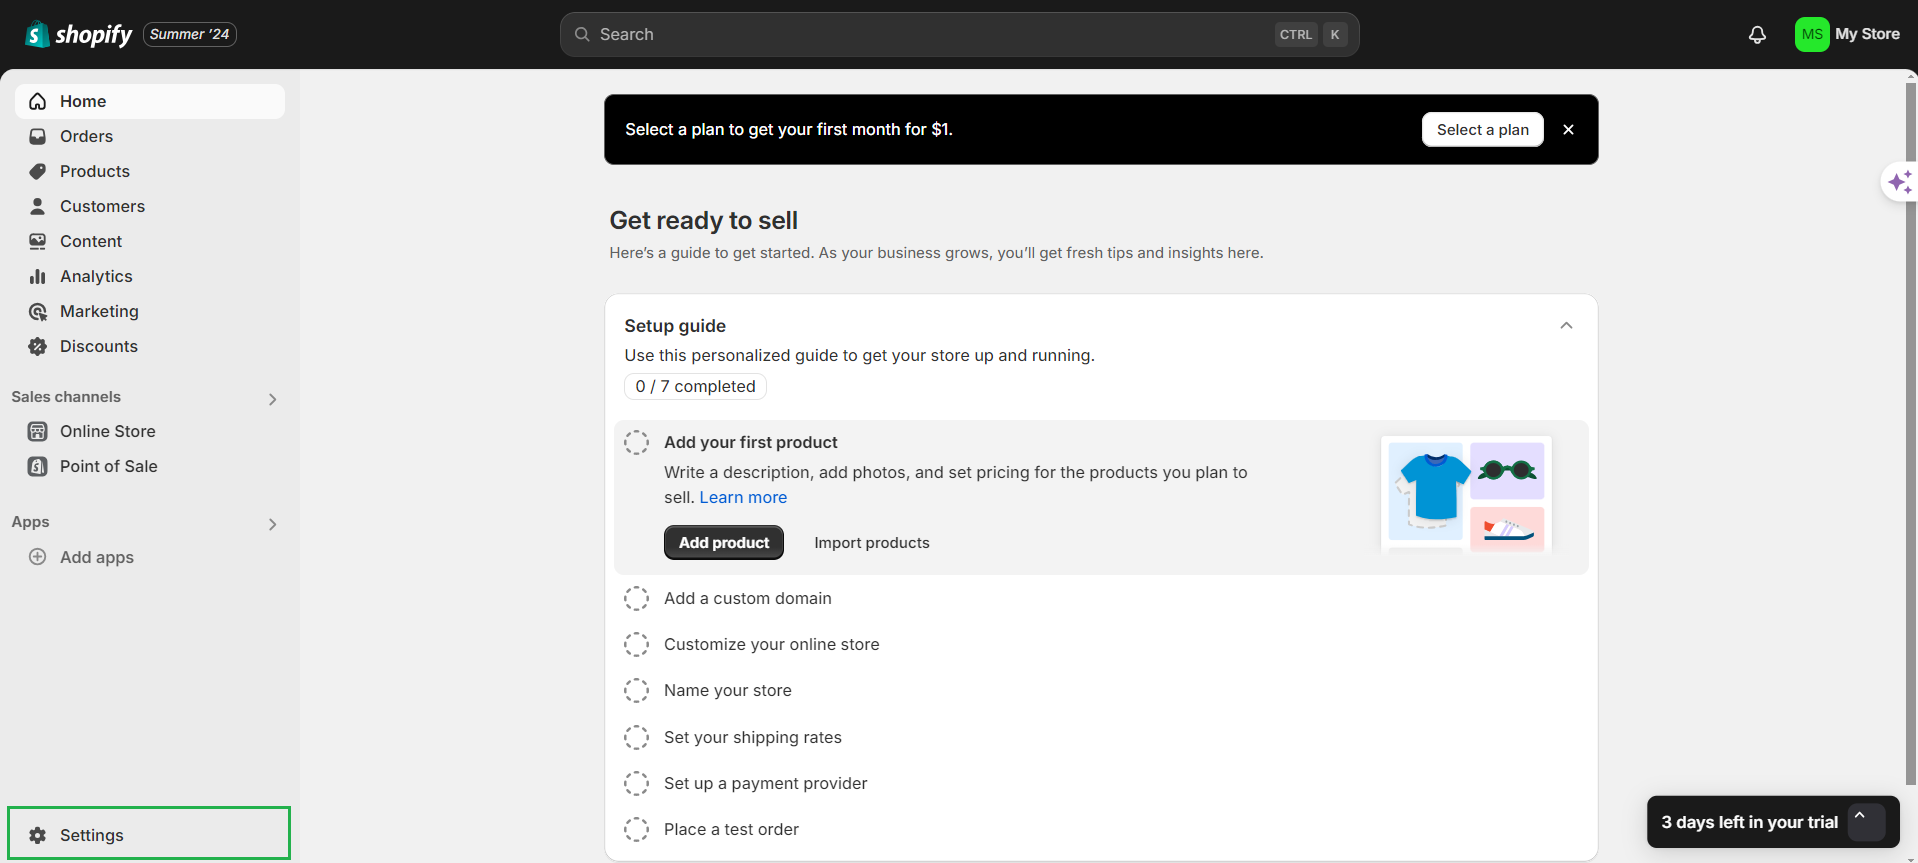
After logging into your Shopify account, click on “Settings” from the main menu.
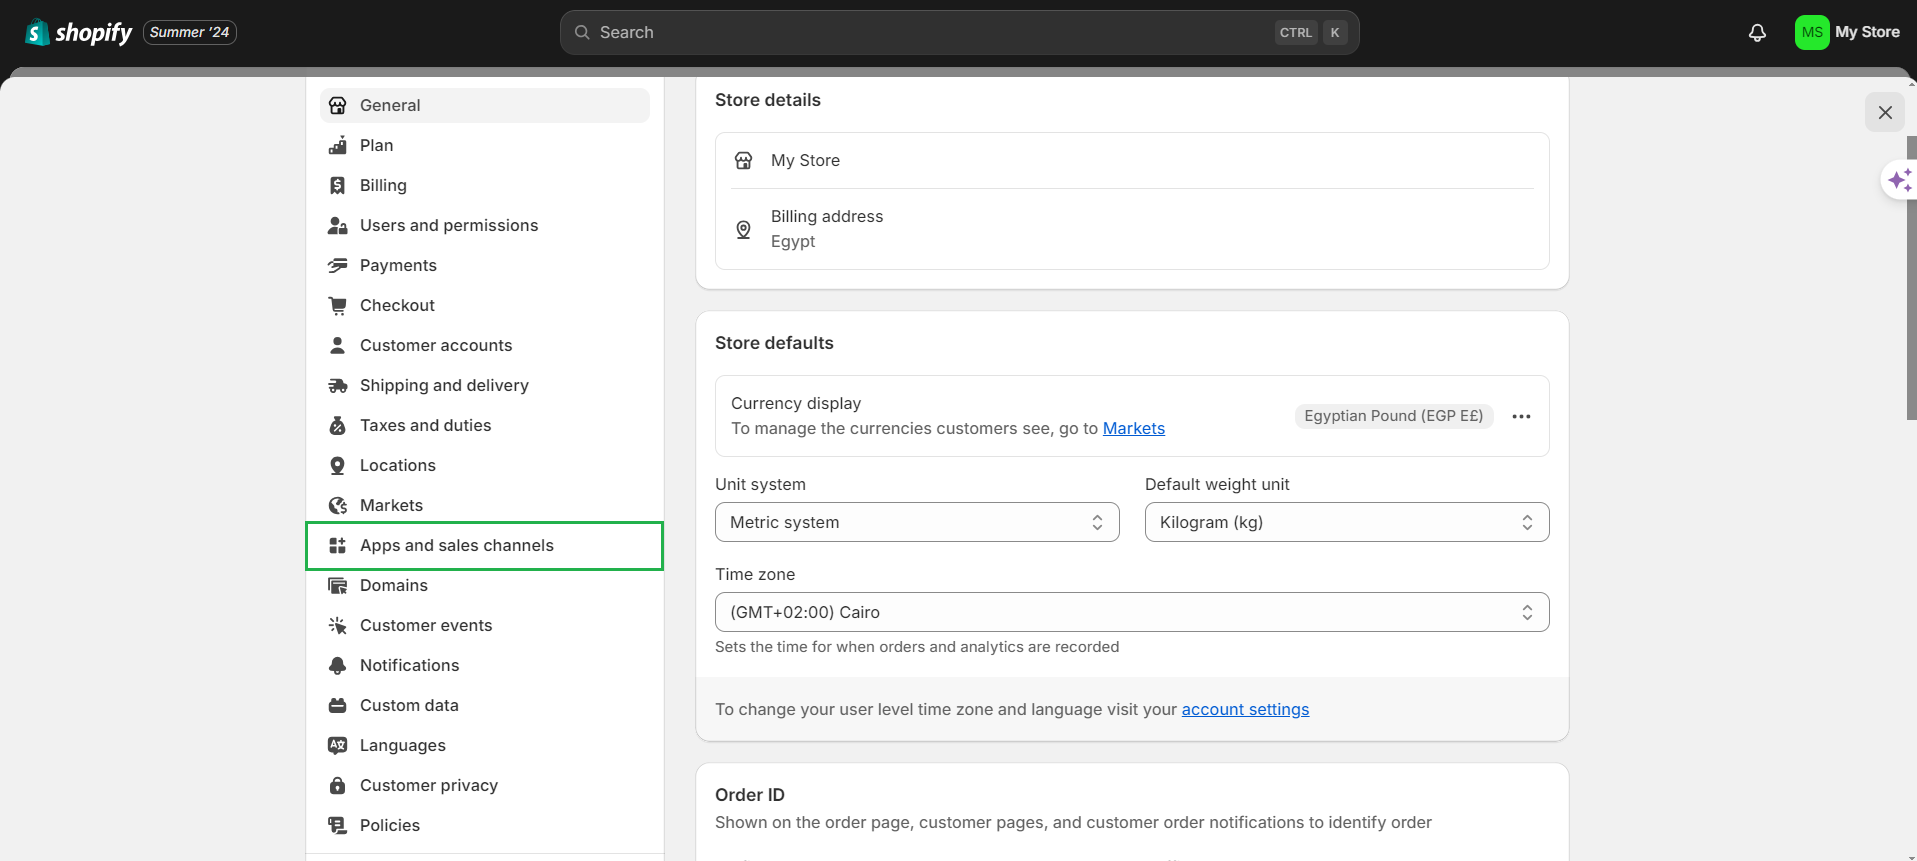
Click on “Apps and sales channels”.
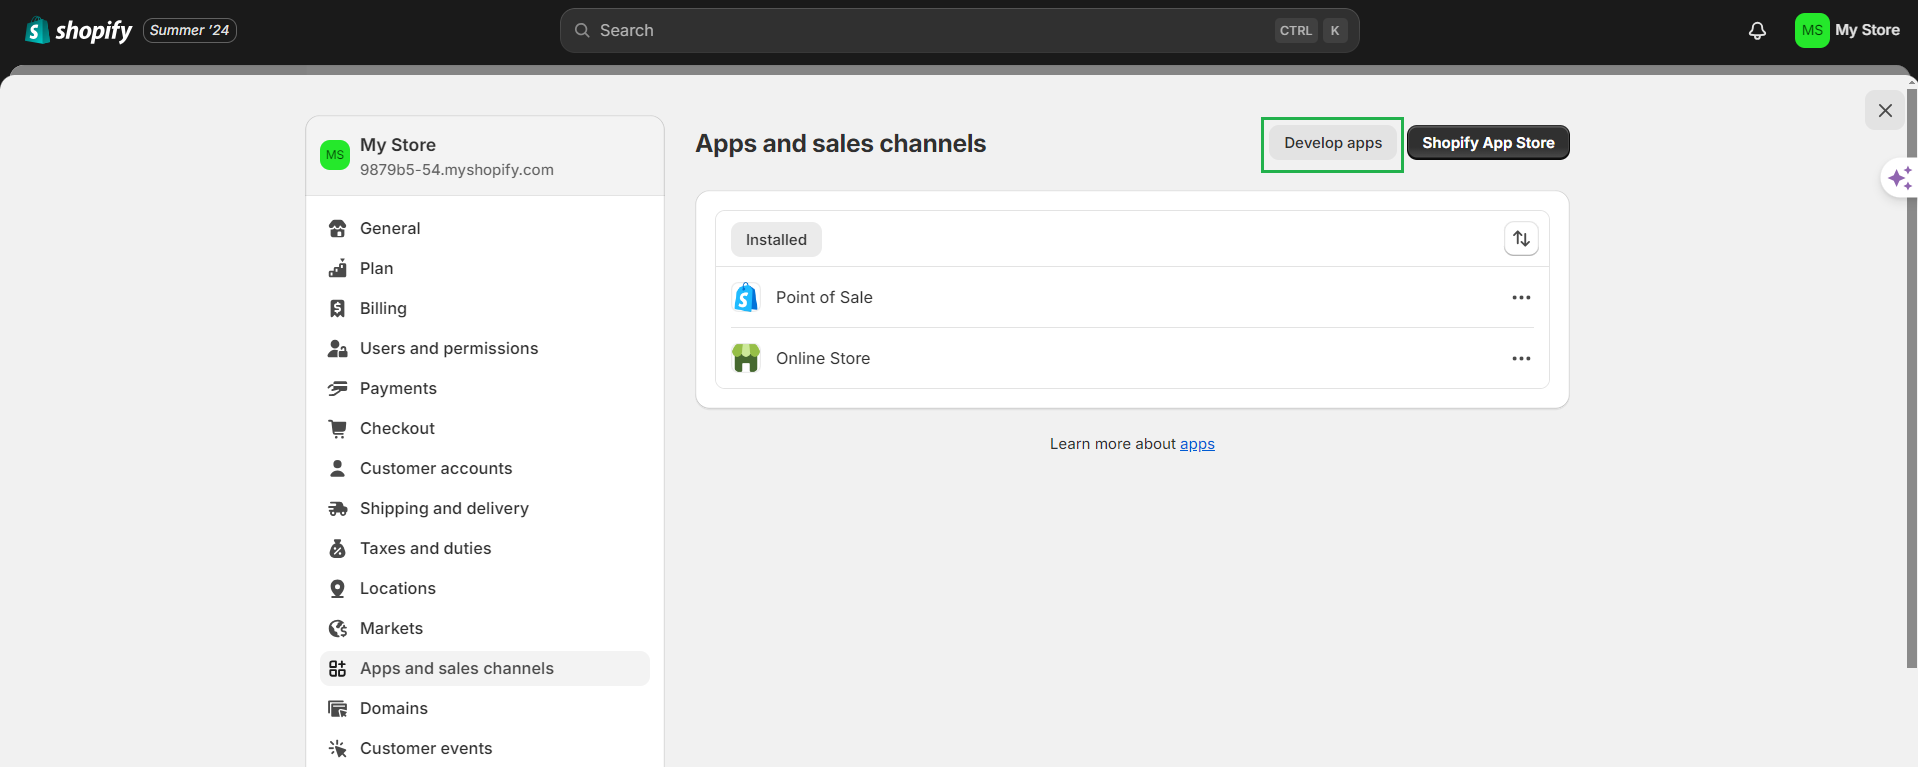
Click on the “Develop apps” button.
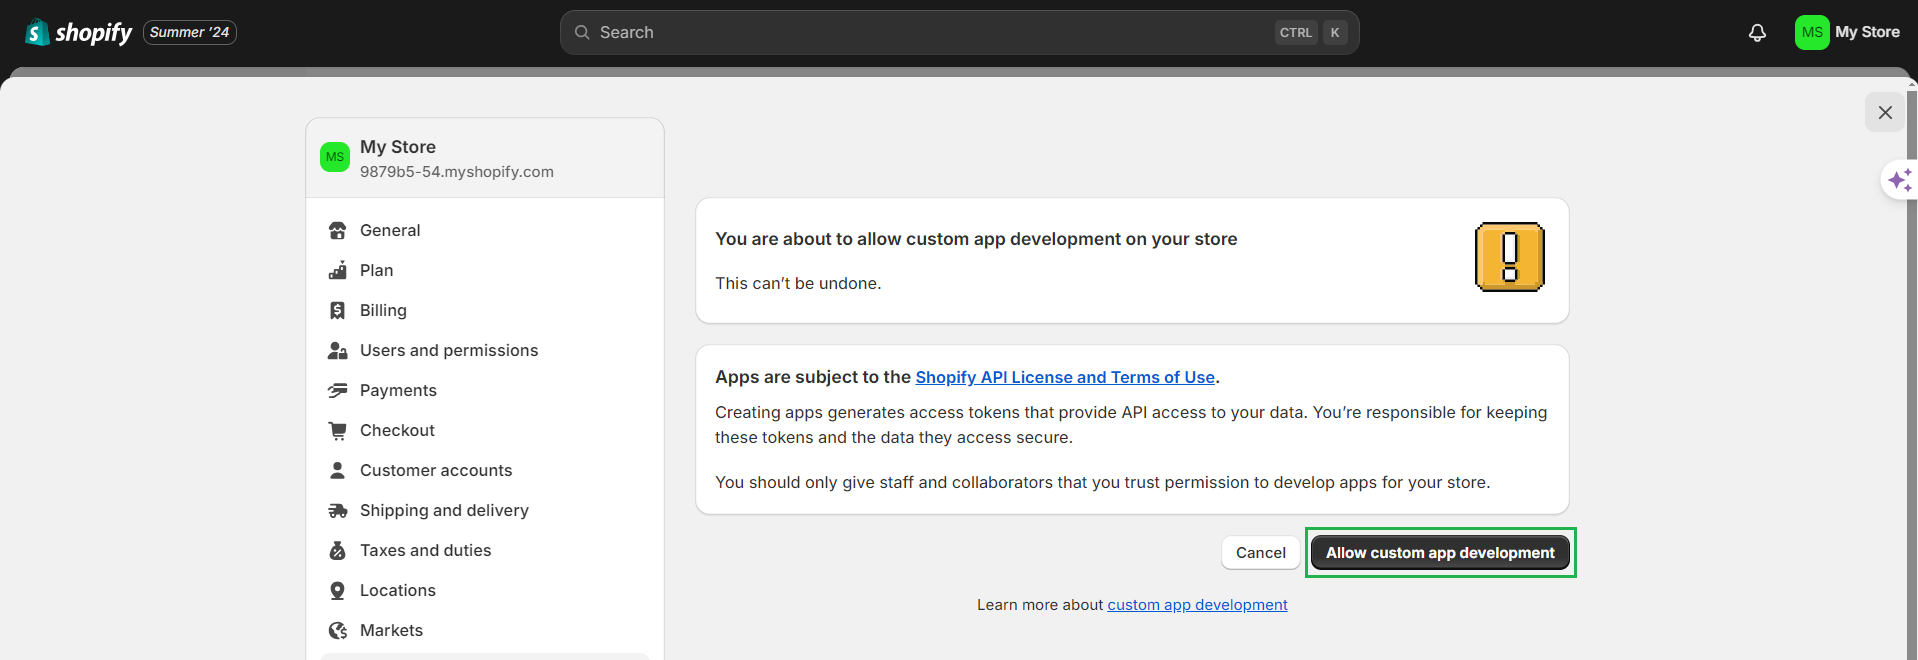
Then click “Allow custom app development”.
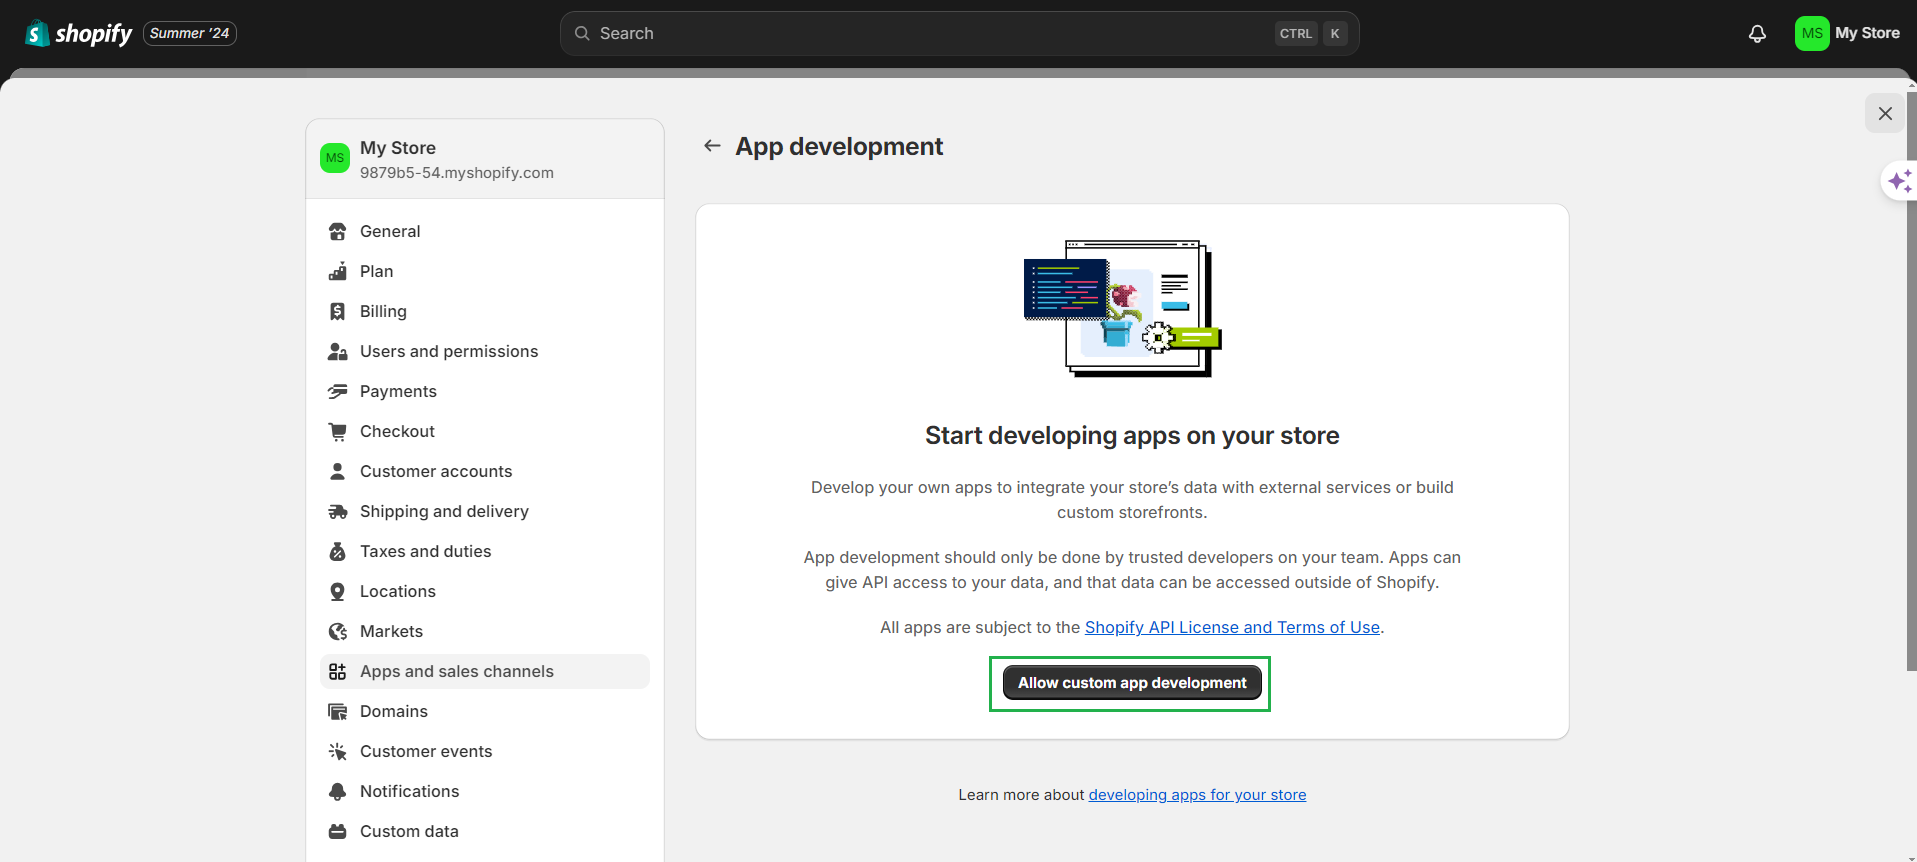
Then “Allow custom app development”.
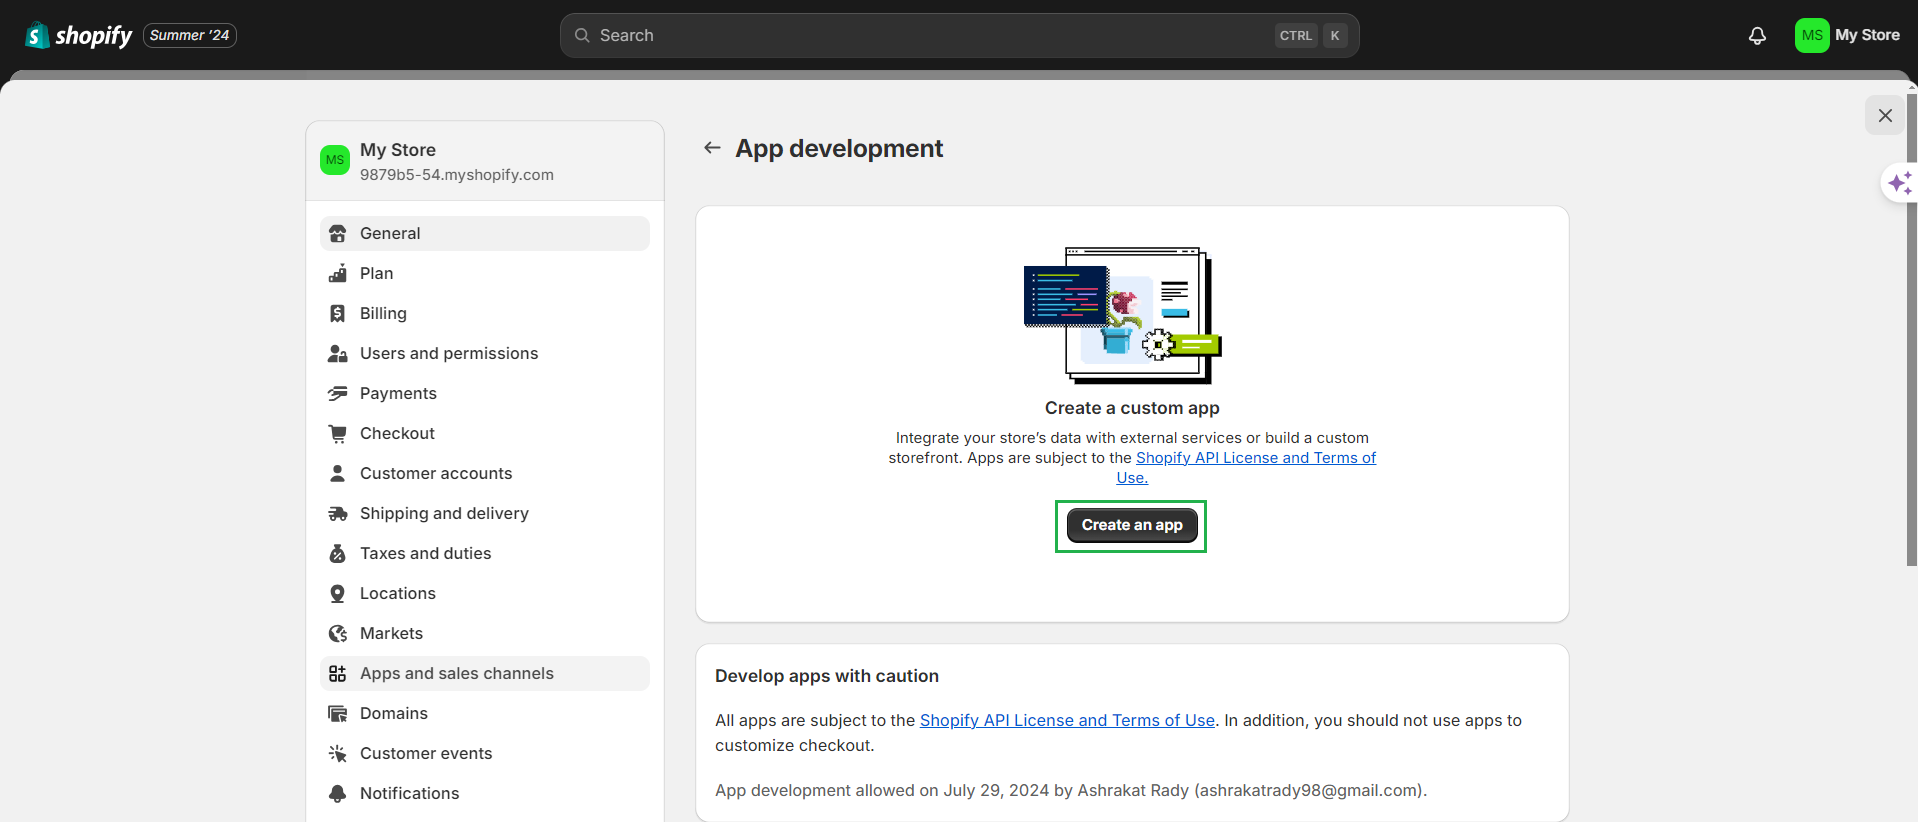
Click on “Create an app”.
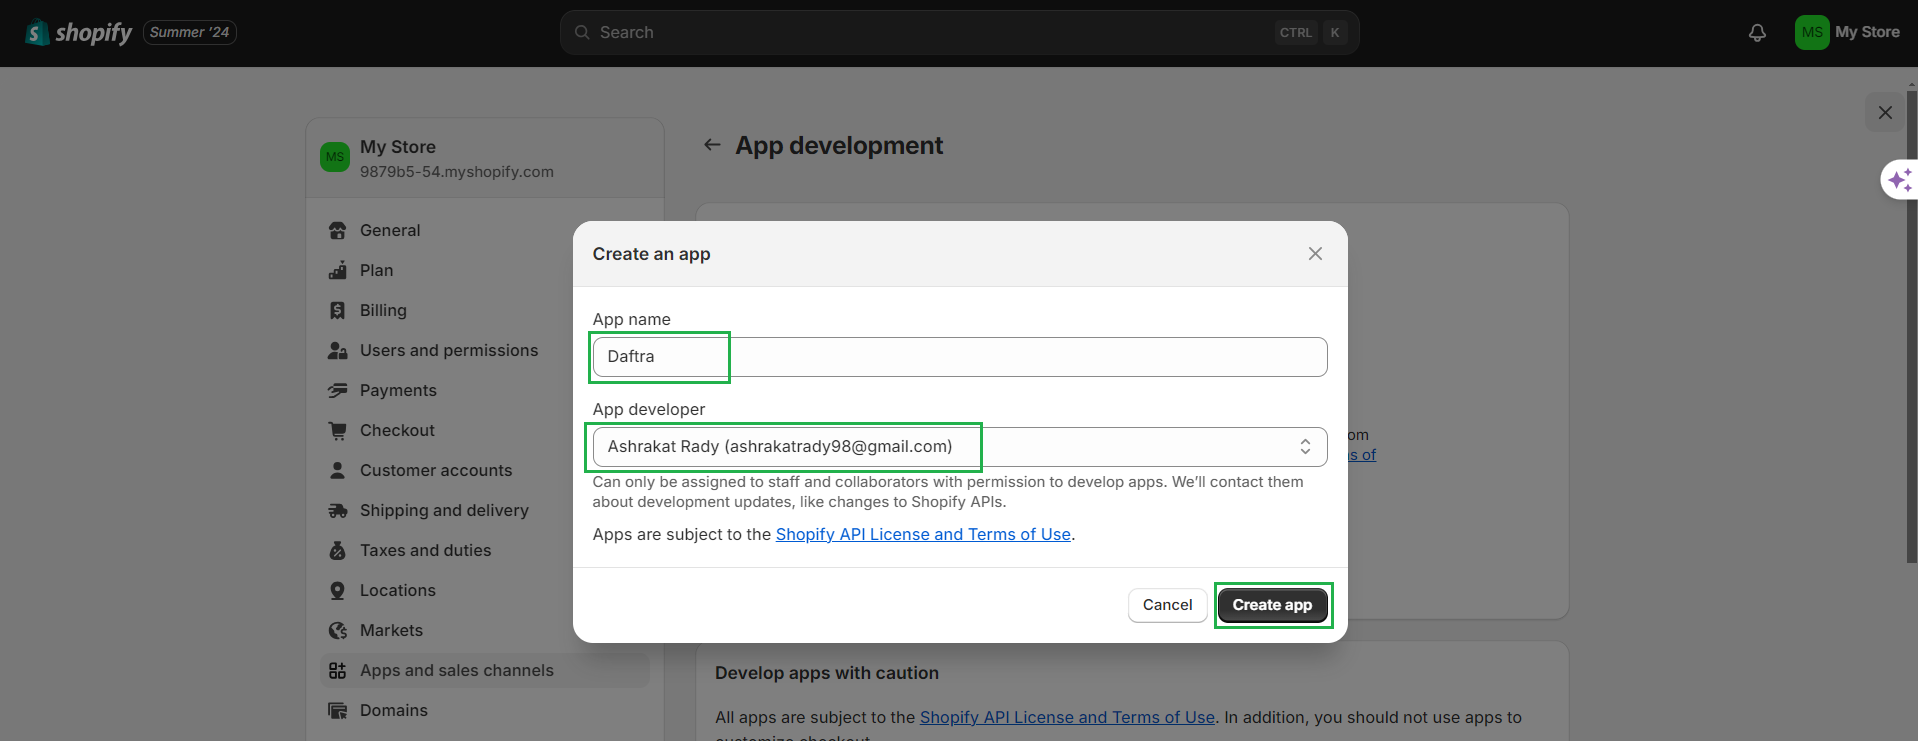
Enter the required fields as follows:
App name (the app you want to integrate with):
Daftra
App developer:
Enter the email address you used to sign up for your Shopify account.
Then, click the “Create an app” button.
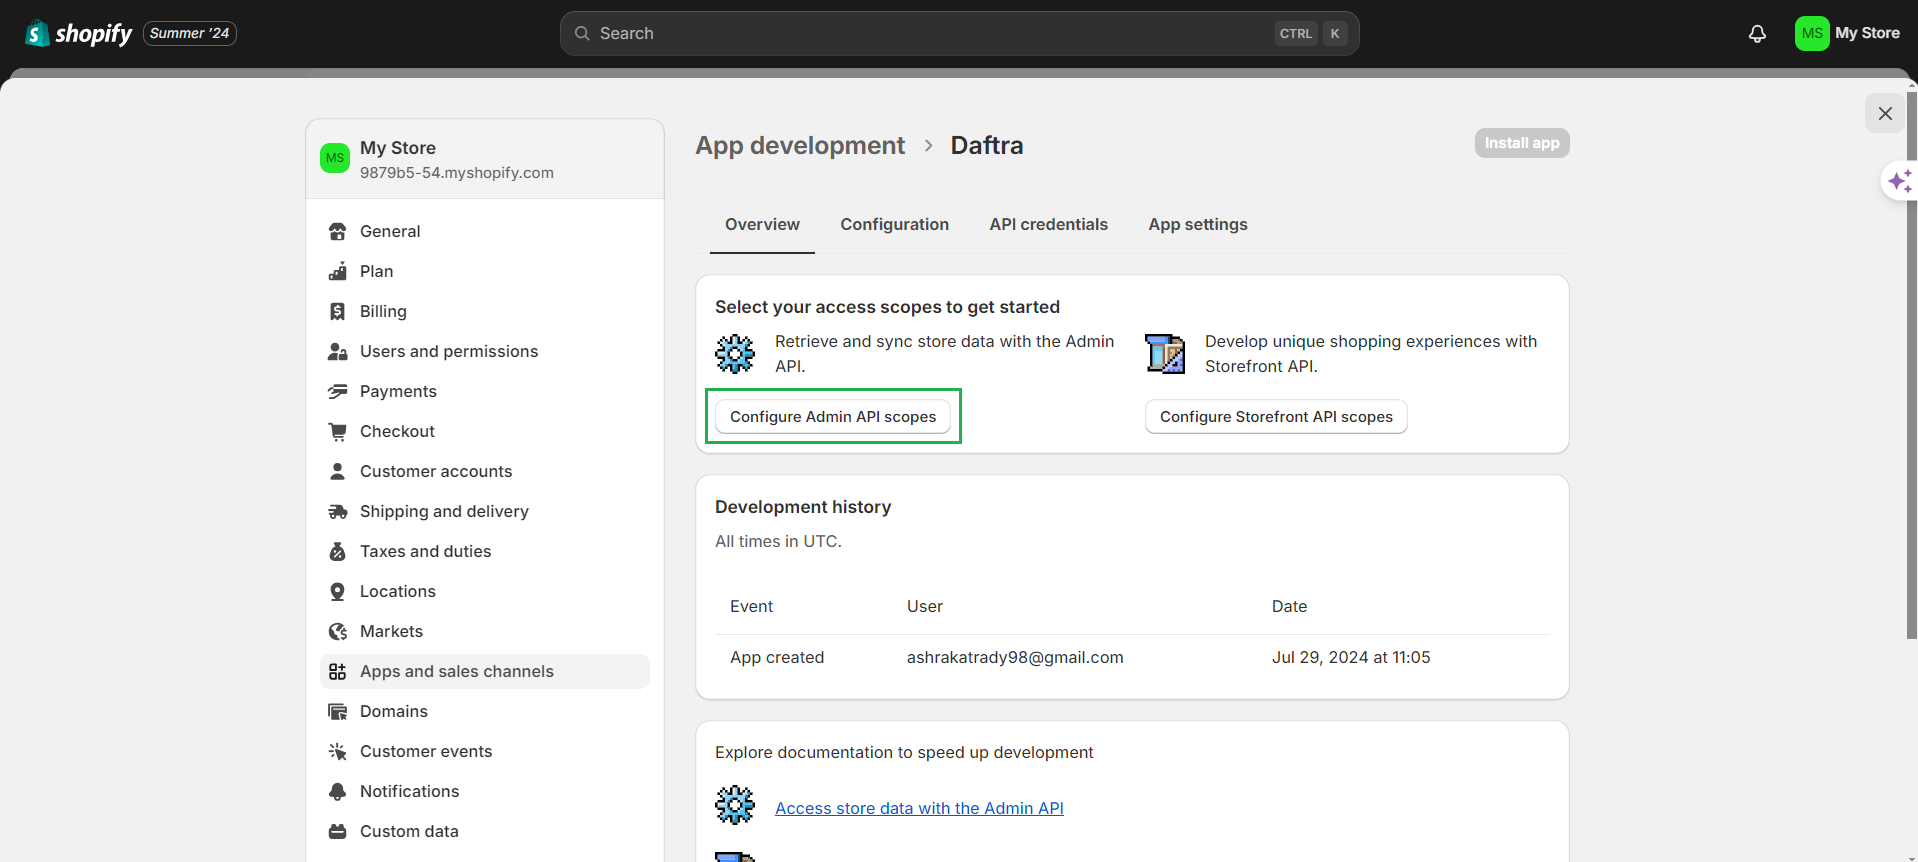
Click the “Configure Admin API scopes” button to start linking Shopify with Daftra.
In the next step, you need to copy the API credentials from Shopify. So, return to the integration page in the system.
Here, copy each API credential and then return to Shopify to paste and activate each credential.
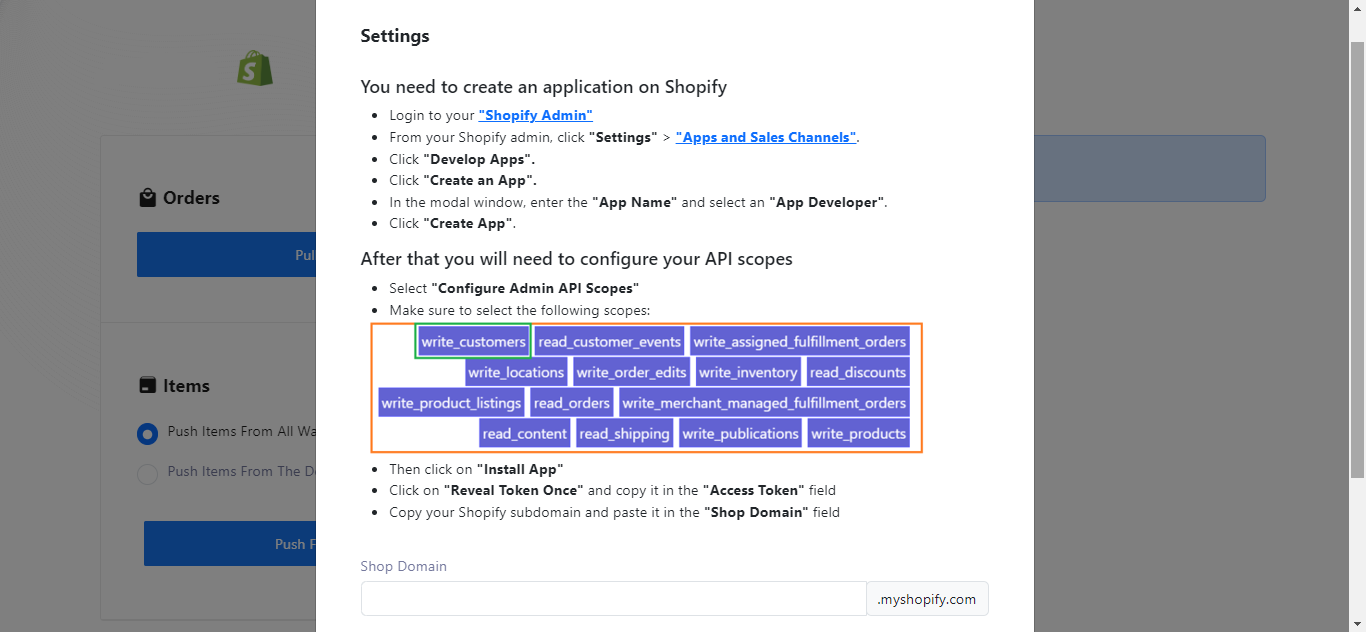
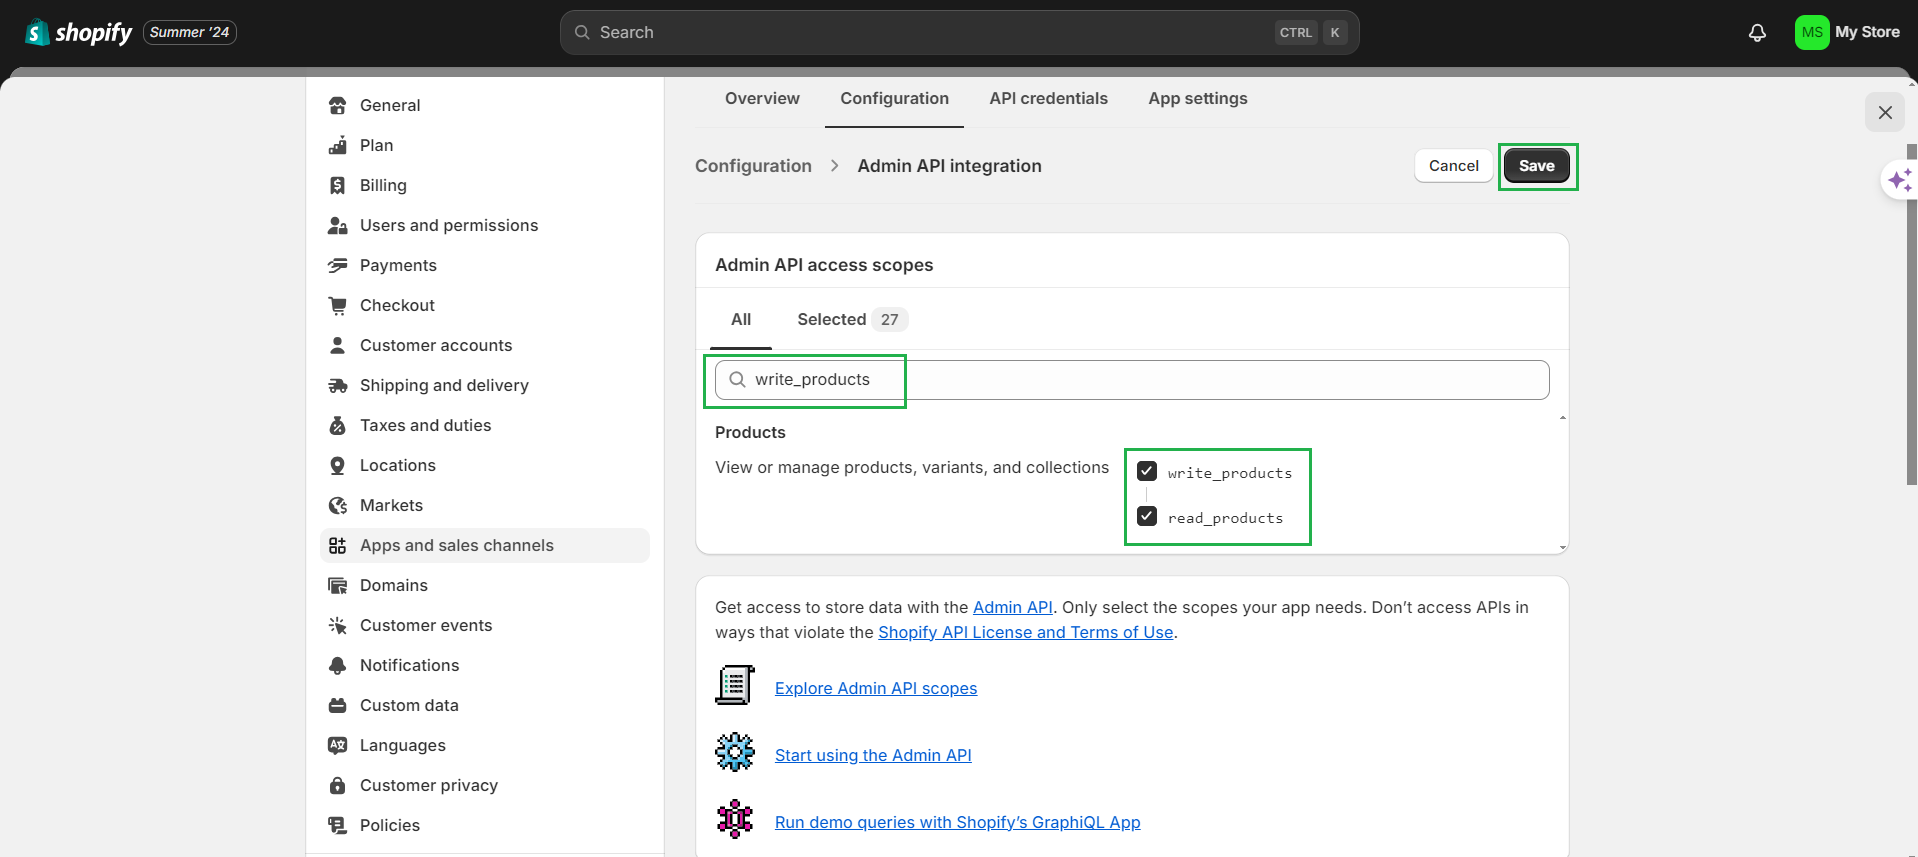
Here, you will see one of the API credentials that you copied from the system. After searching for it, you can activate it.
Complete the activation of all credentials, then click the “Save” button.
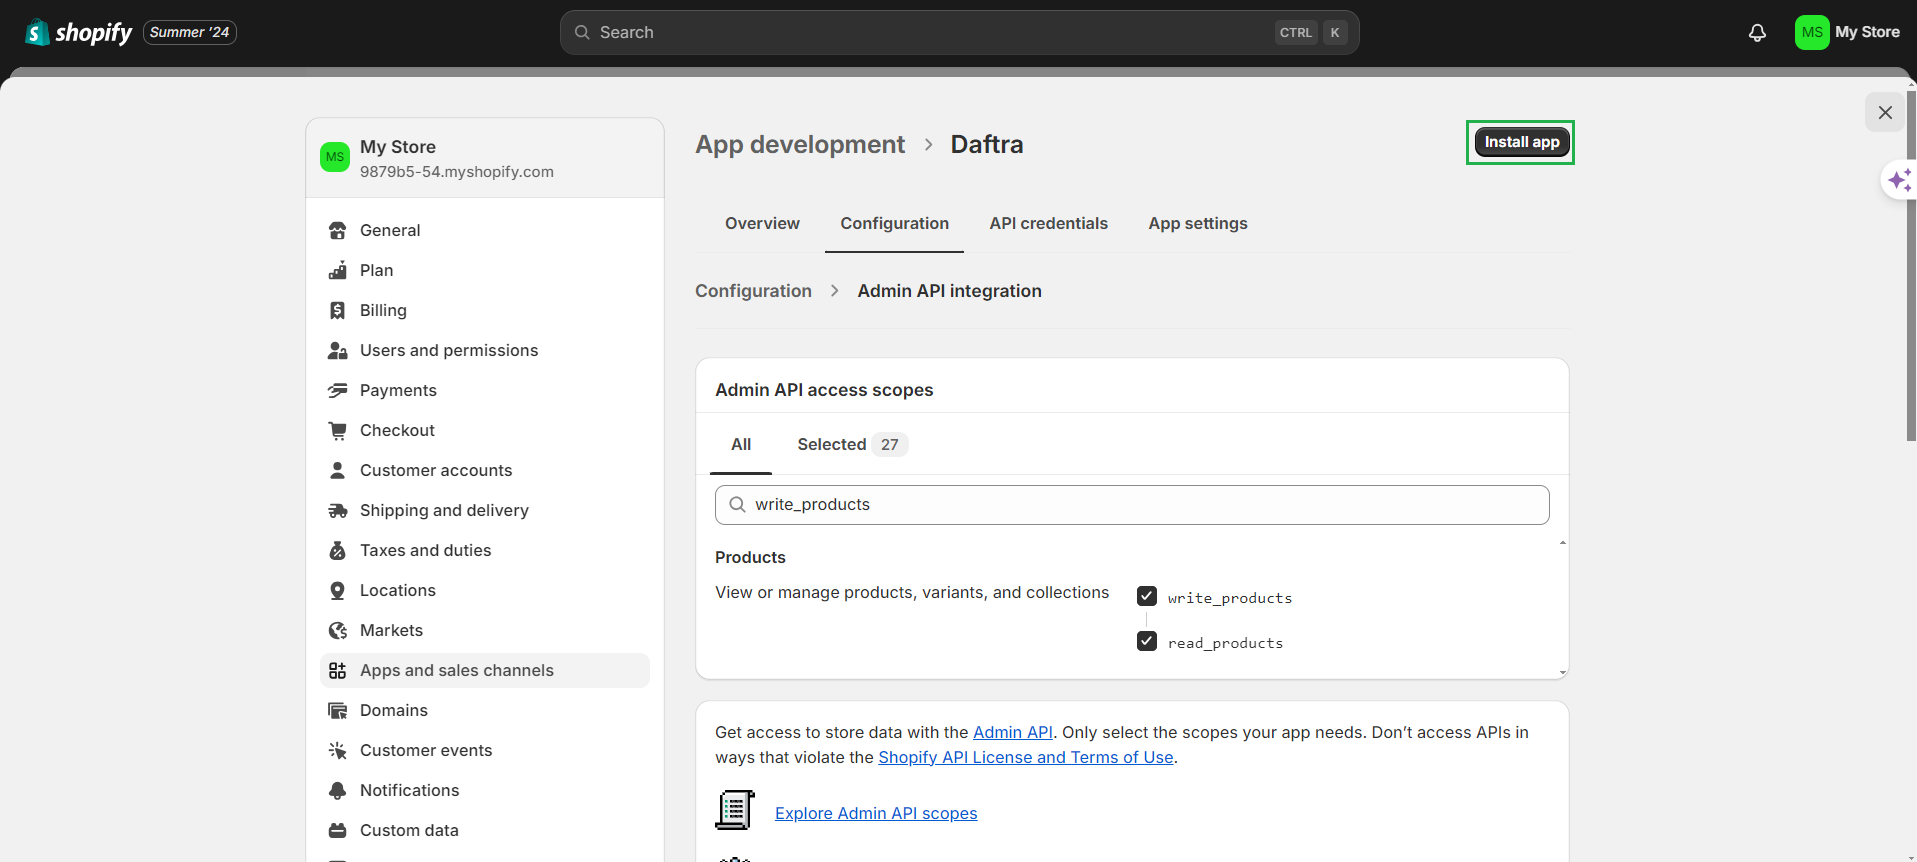
Then click on “Install app”.
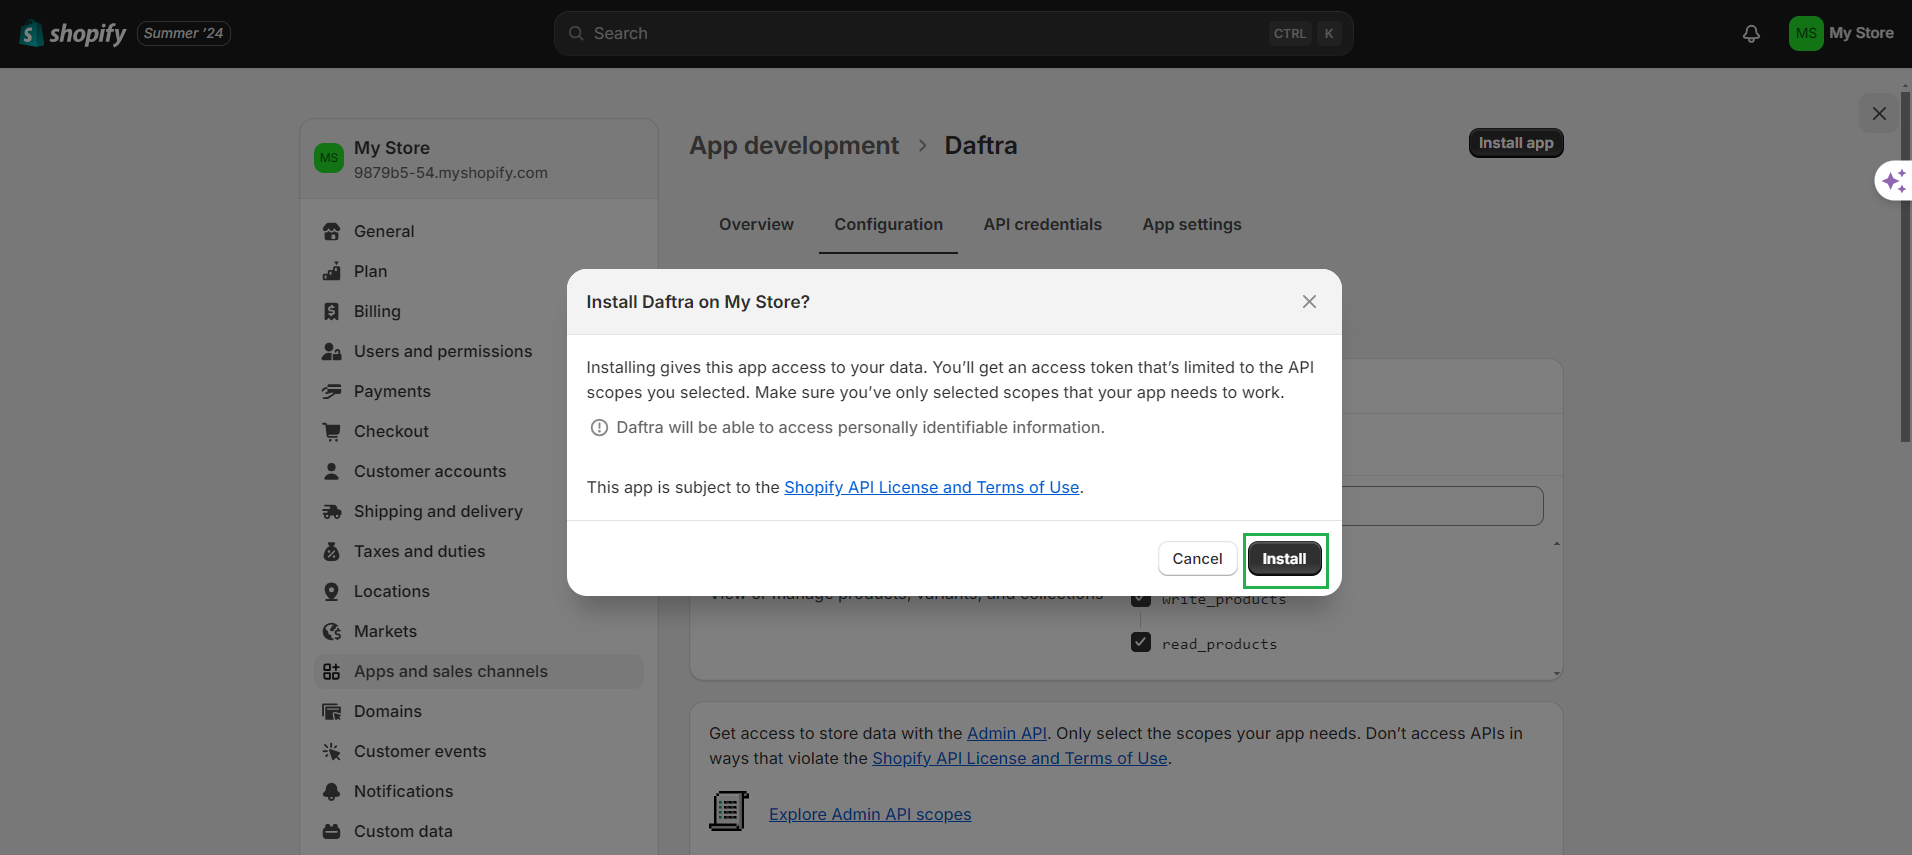
Click on the “Install” button.
Click the “Reveal token once” button to display the access token needed to paste into your account as part of the linking process.
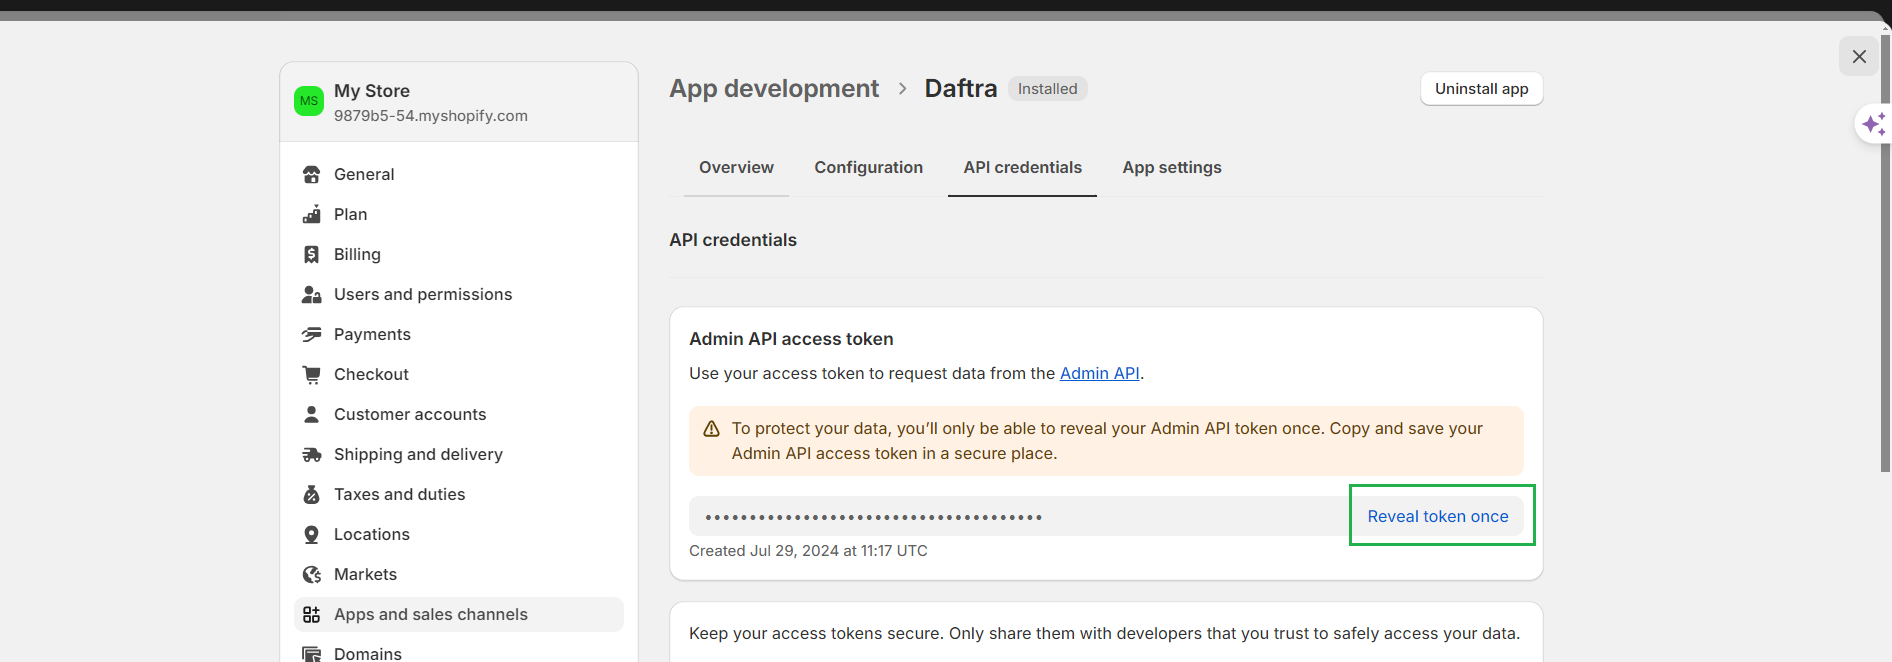
After the access token is displayed, copy it.

Paste it into the system in the “Access Token” field.
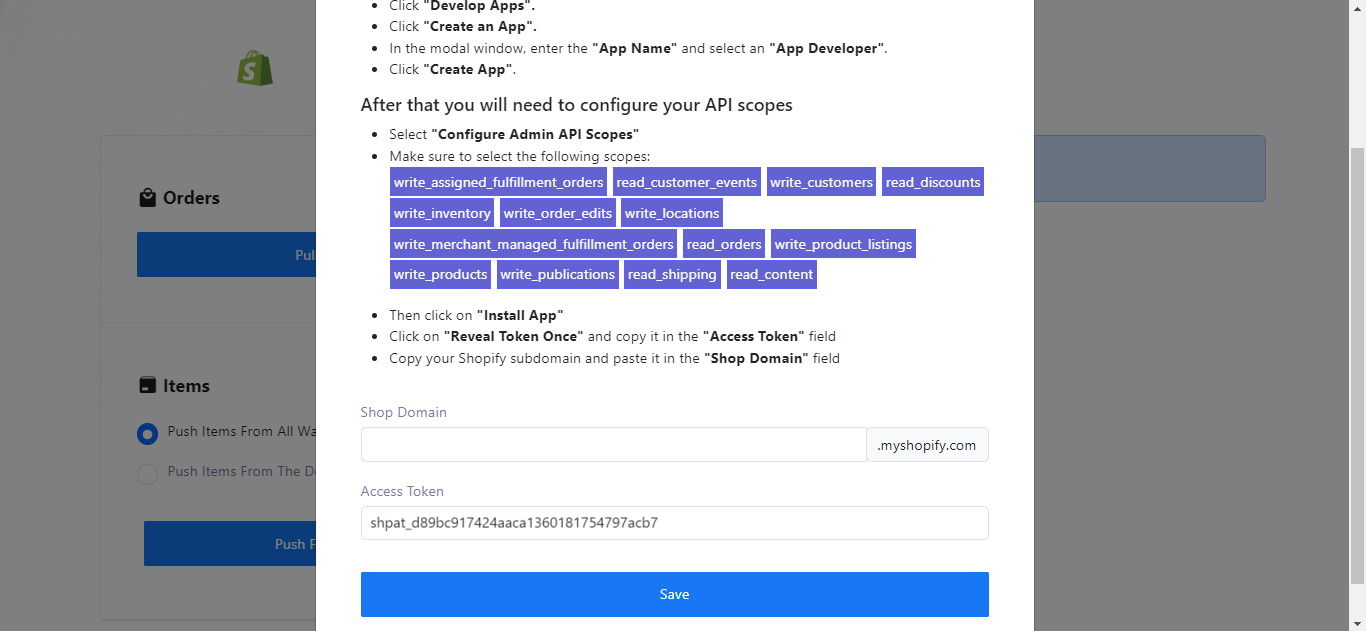
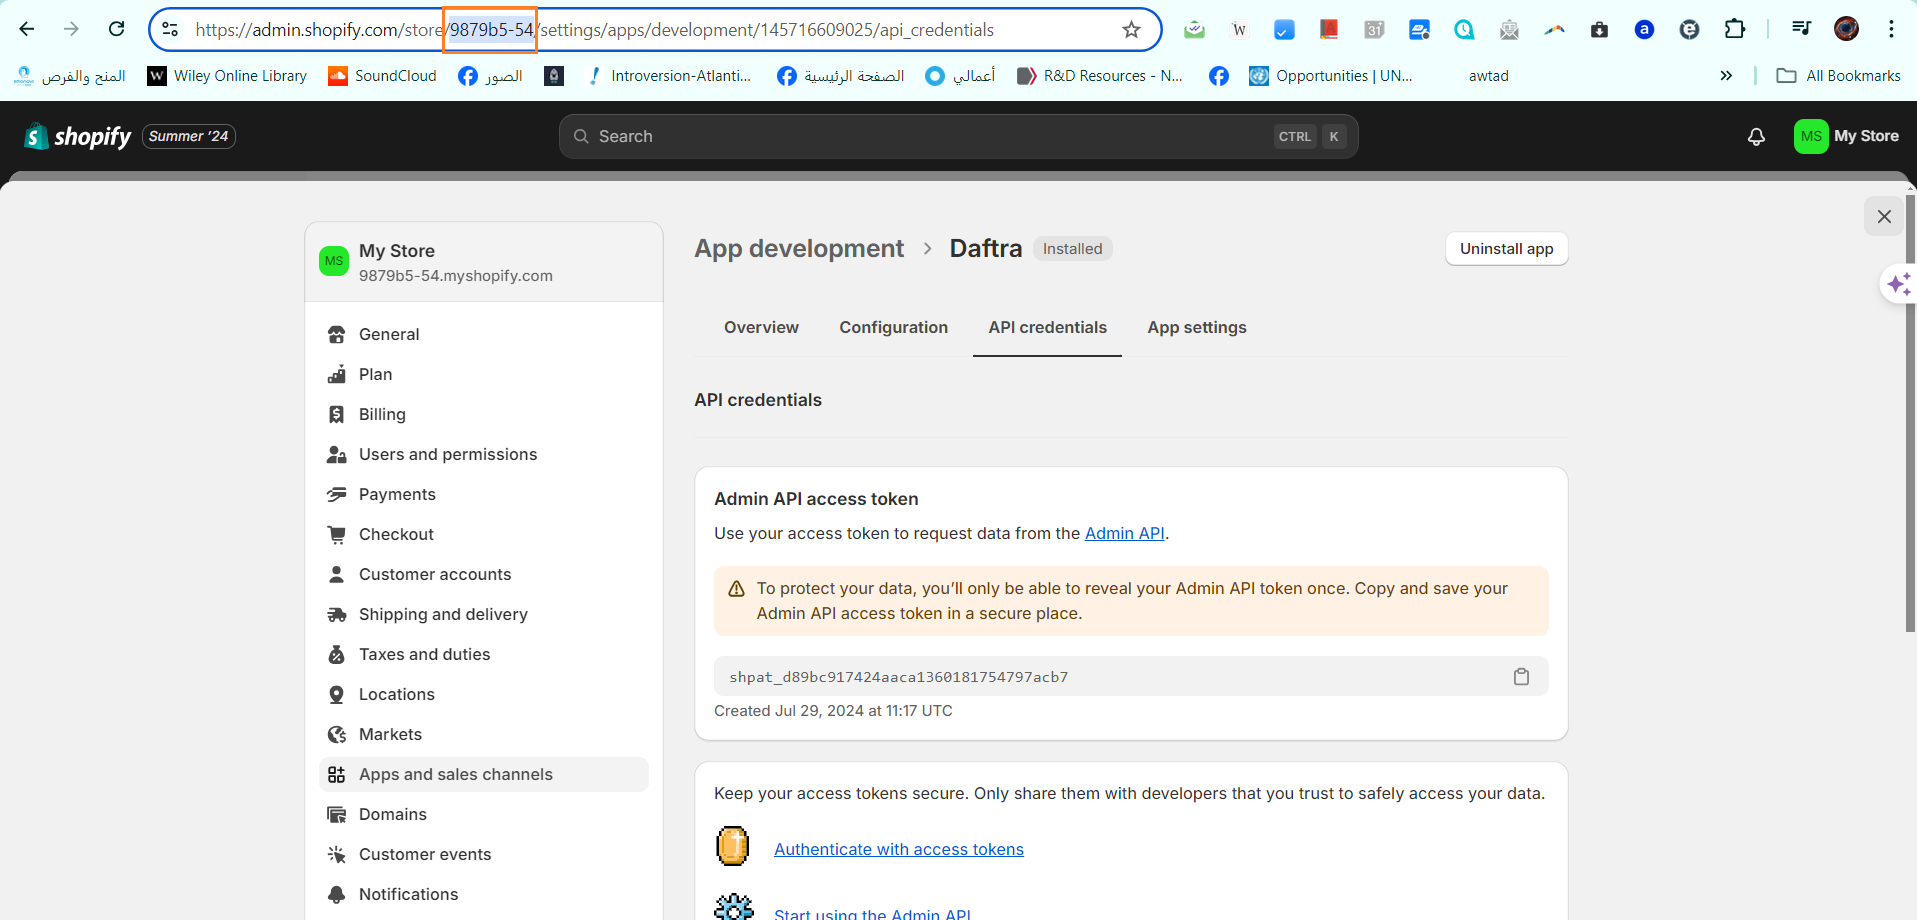
Return to your Shopify account and copy the store domain to paste it into the designated field in the system.
- The store domain is a small part of your Shopify account URL. Click the account link and copy the segment between “/store” and “settings/”.
In the current example, the store domain is:
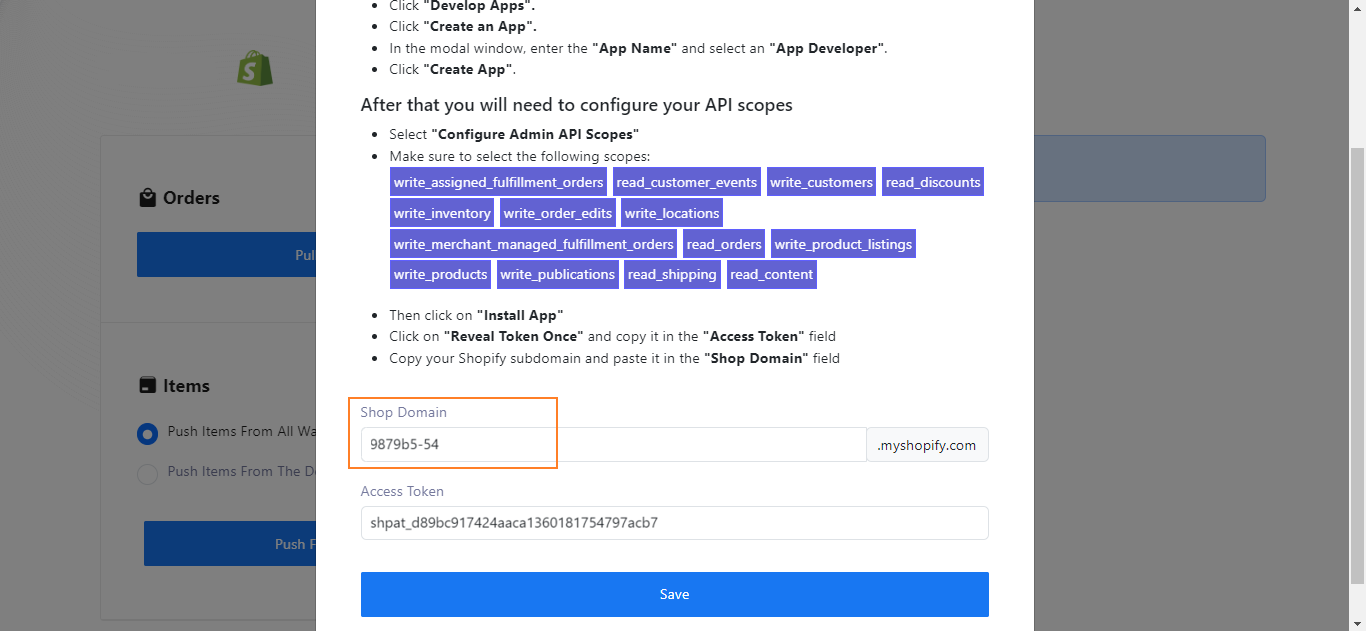
9879b5-54
Paste it into the “Store Domain” field.
Then, click the “Save” button.
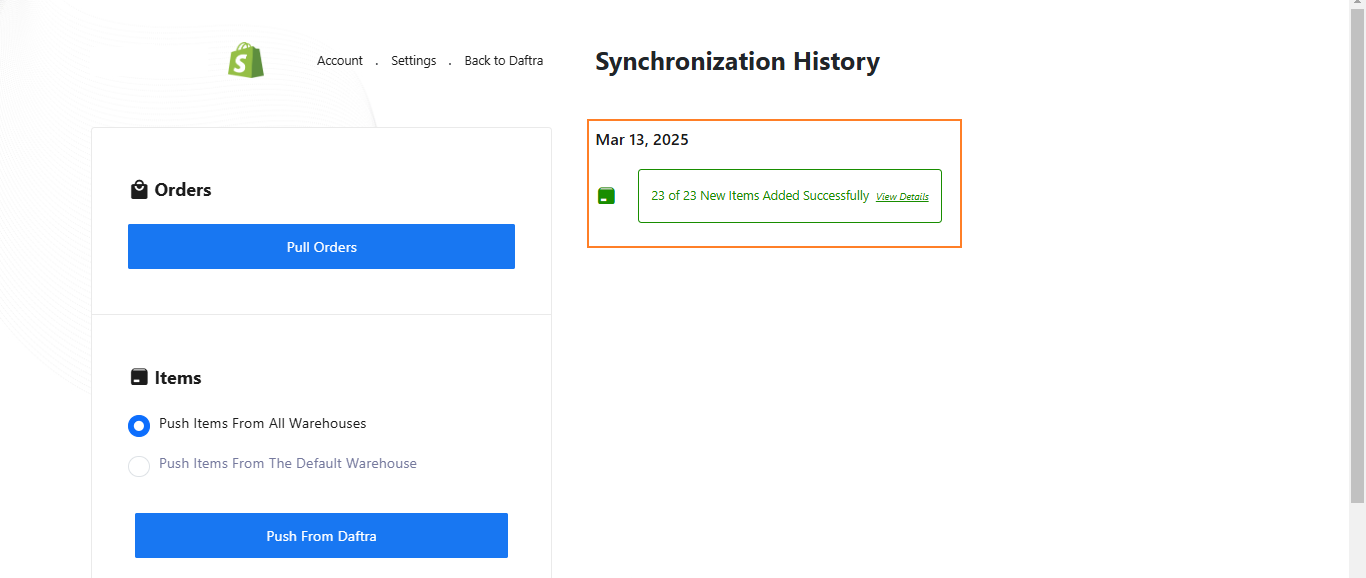
Sync Shopify Transactions to Display on the System
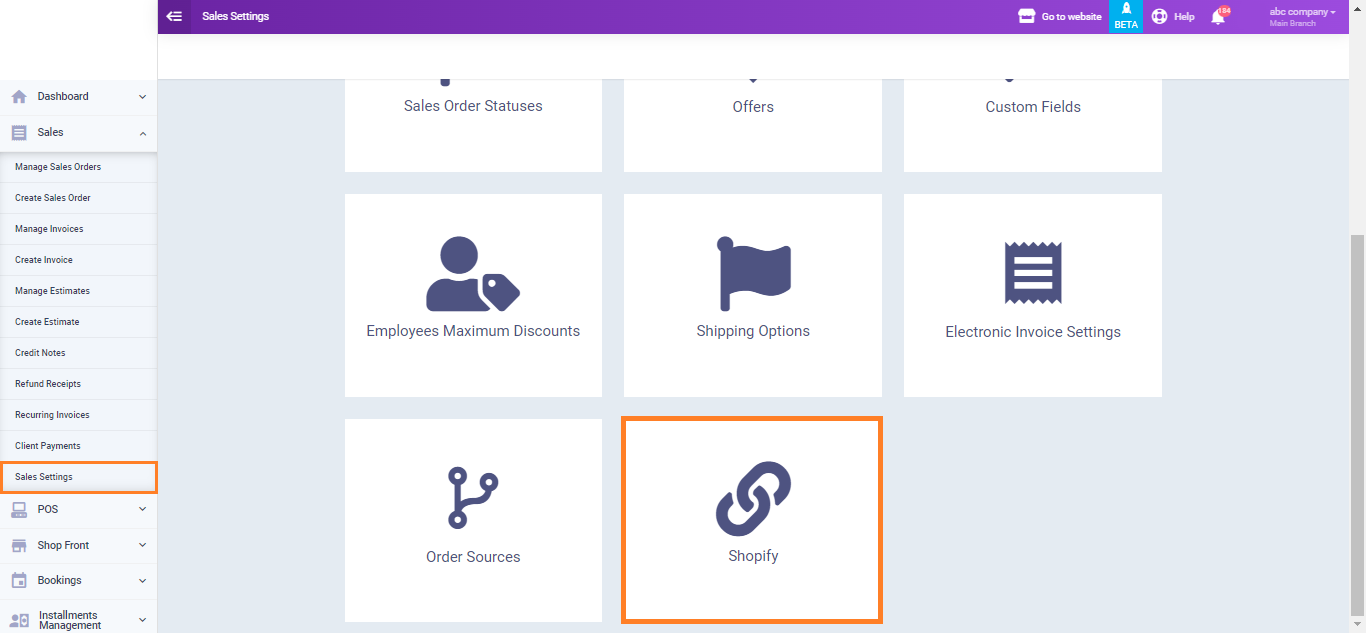
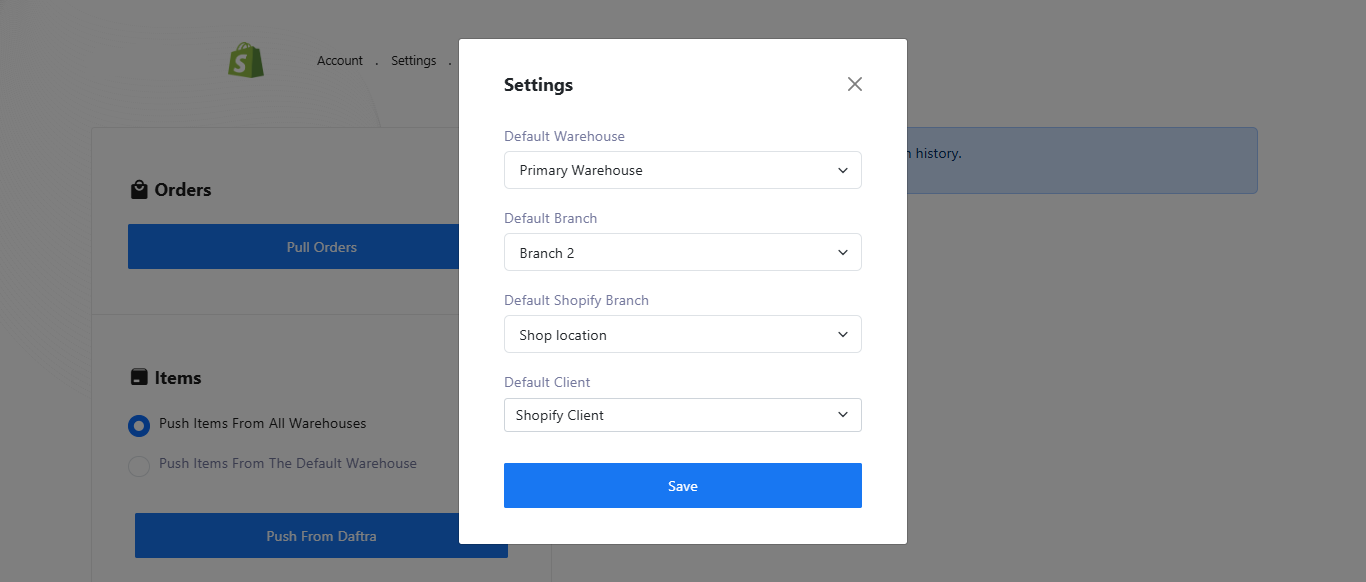
To manage the integration settings, click on “Settings.”
Select the default warehouse, default branch, and default customer to be recorded in your Shopify transactions.
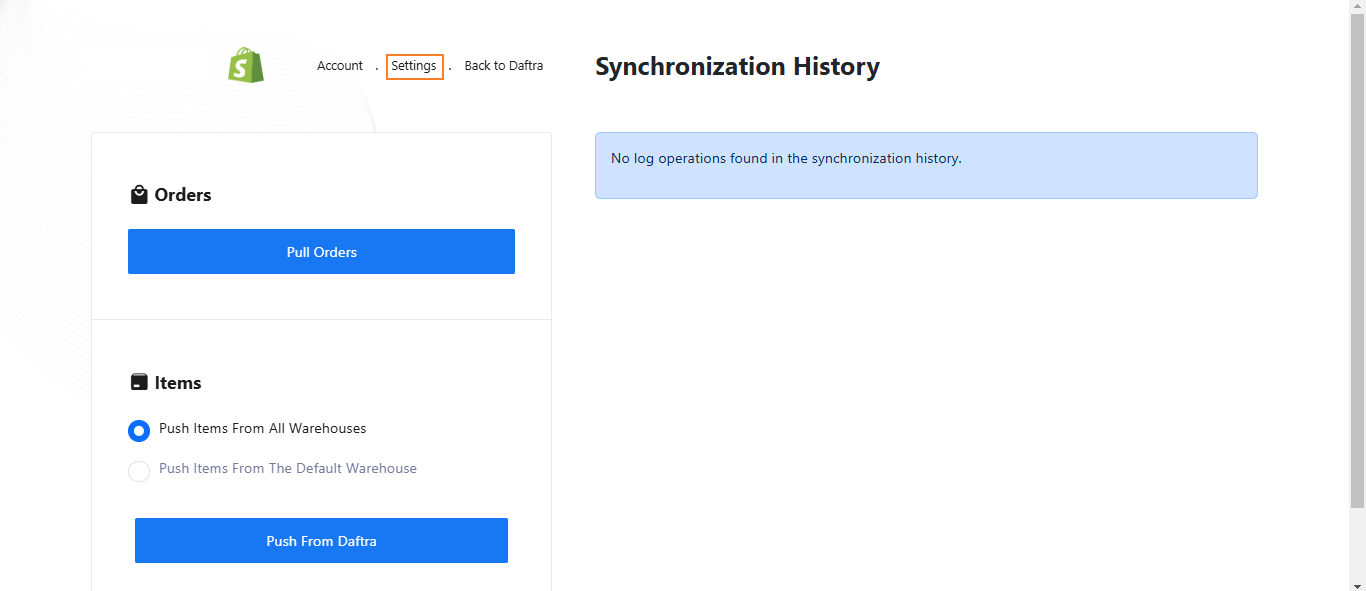
Click “Sync Invoices” to display your Shopify invoices on your account, and click “Sync Items” to match your products in the system with the latest transactions on Shopify.