


Auto Sending Rules Guide
Often, you need to message your clients to notify or confirm an appointment, deliver a copy of an invoice, a work order, or similar things. If you have a large number of clients, manually sending messages can be a tiring task that requires a lot of time and effort.
Therefore, the system provides the feature of automatically messaging clients without the need for manual sending each time. This is done through Auto Reminder Rules, which will be the subject of our explanation in this article, and its elements are as follows:
- Automated sending rules for appointments.
- Creating an appointment with a client as a practical example.
- Automated sending rules for invoices.
- Creating a sales invoice as a practical example.
Auto Sending Rules for Appointments
We perform this procedure when we have a specific appointment with a client and we want to notify them via SMS or email. In this case, we create a new automated sending rule for appointments and fill in its details to match the nature of the message we want to convey to the client. This will be clarified through the following explanation of the data of the sending rule.
To create an automated sending rule for appointments, we click on “Templates” from the main menu, then “Auto Reminder Rules“, and then click on the “Add” button at the top right of the panel, and choose “New Appointment Rule“.

The Appointment Rule Control Panel Data
In the control panel for the new appointment rule, fill in the data as follows:
- Name: Add a distinctive name for the new appointment rule.
- Appointment Type: Here, the system asks you to choose from four types of appointments: Client, Invoice, Estimate, Work Order; the system deals with each type according to the action determined in the following step.
- Appointment Action: According to the type of appointment, in this field, you can define the action to be taken at this appointment. The action options will appear based on what you have entered in your account. If you are not aware of the list of actions, you can refer to the guide Modifying the Actions List.
- Timing Field: Here, we define the time for automatic sending, not a specific hour or day, but choose between two types:
- Appointment Date: The date set during the registration of the appointment as shown in the picture.

-
- Created Date: The date on which the appointment is created, regardless of the date recorded in it.
- Send On: This point is related to the timing field, to be more specific, as follows:
- When selecting the timing field as “Appointment Date”, we can choose between:
- Instantly: As soon as the appointment date arrives, automatic sending occurs.
- Before: Sending before the appointment date by a certain duration, the system will ask you to specify this duration.
- After: Sending after the appointment date by a certain duration, the system will ask you to specify this duration.
- When selecting the Timing Filed as “Created Date”, we can choose between:
- Instantly: Immediate Sending: As soon as it is created, automatic sending occurs.
- After: Sending after the creation by a certain duration, the system will ask you to specify this duration.
- When selecting the timing field as “Appointment Date”, we can choose between:
- Send To: In this option, we determine the recipient of the message or email, whether it is the client (partner) or the assigned staff to this appointment.
- Channel: Here we define the form of the message: Text Message (SMS) or Email.
- Channel Template: Here we choose one of the templates we have for text messages (SMS) or emails. If we do not have one, it is necessary to add an email template or add an SMS template as required.
Adding an Email Template
Now follow the steps for adding an email template as described in the guide, and create a template as shown in the following image:

- Active: Activating the option (Active) means enabling the automatic sending rule and notifying the system to apply it automatically to appointments created according to this rule. Conversely, deactivating the (Active) option is a notification to the system not to activate this rule even if its settings match the appointment.
- Valid Until: The validity of the automatic sending rule is the duration within which the system attempts to deliver the message. If the message fails to reach within the specified time, and if it does not get delivered within the validity period, you will then need to communicate through other means.
Auto Sending Rule for Appointments
In light of the above, we have created an automatic sending rule for appointments, which is detailed as follows:

Practical Example: Creating a New Appointment with a Client
Now we create a new appointment with the client “John Doe“, in accordance with the settings of the automated sending rule we created in the previous step, to see how the system automatically sends an email without us having to do the sending.
To create a new appointment with the client “John Doe“, we click on “Clients” from the main menu, then “Manage Clients“, and then we choose the client “John Doe” as shown in the picture:

Now we click on arranging an appointment as shown in the following picture:

We add the details of the appointment as shown in the next picture, then click on “Save”.
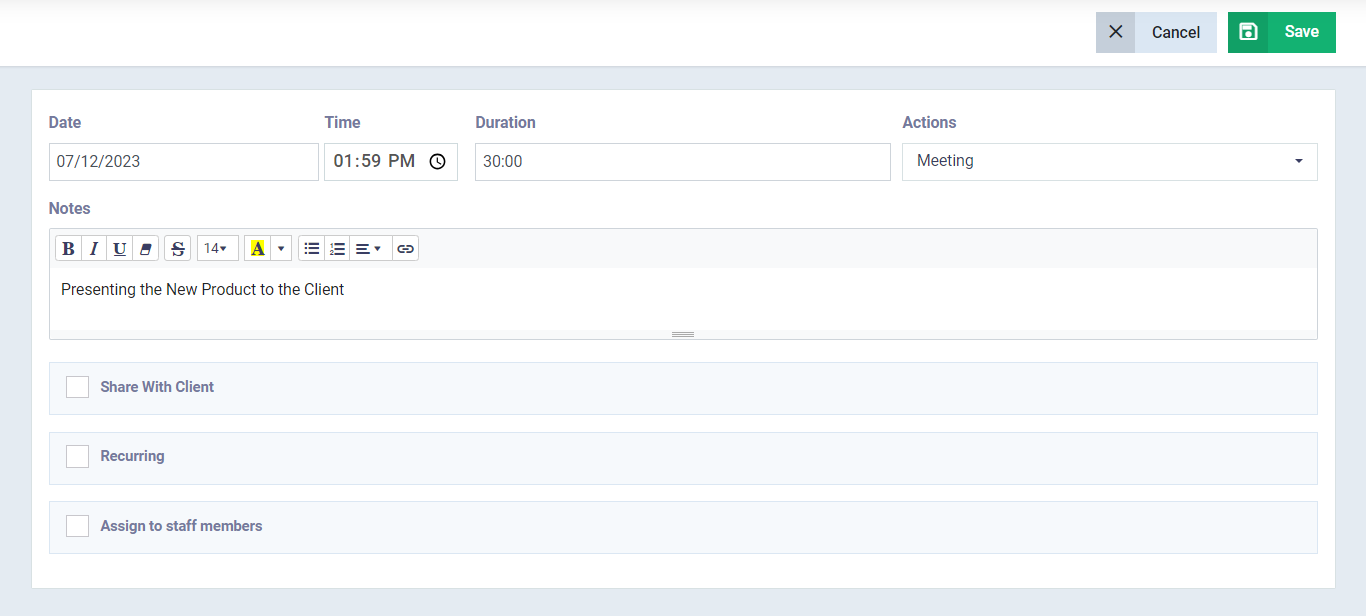
Since we set the sending time settings to be “Created Date” and Send On “Instantly”, as soon as the appointment is saved, the following email was received:

Auto Sending Rules for Invoices
To create an automatic sending rule for invoices, we click on “Templates” from the main menu, then “Auto Reminder Rules“, then we click on the “Add” button at the top right of the panel, and select “New Invoice Rule“.

Data of the Invoice Rule's Control Panel
In the control panel for the new invoice rule, we fill in its data as follows:
- Name: We choose a distinctive name for the new invoice rule.
- Payment Status: Here we can choose a payment status from: Paid, Partially Paid, Unpaid. Or we apply the sending rule to all invoices by clicking on “All“.
- Invoice Status: Invoices in the system acquire statuses for the purpose of categorizing and monitoring sales and purchase operations. In light of this, we can add invoice statuses and select them in the automated sending rule.
- Timing Field: In this field, we determine the time of automatic sending, from among:
- Invoice Date: This is the date set on the invoice as shown in the following picture:

-
- Created Date: This is the date on which the invoice is created, regardless of the date it is recorded on.
- Send On: Here we specify the time of sending more precisely.
- If “Invoice Date” is chosen, we can select from:
- Instantly: As soon as the invoice date arrives, automatic sending is done.
- Before: Sending before the invoice date by a certain period, and the system will ask you to specify this period.
- After: Sending after the invoice date by a certain period, and the system will ask you to specify this period.
- If “Invoice Date” is chosen, we can select from:
- However, if “Created Date” is chosen for the sending time, we can choose:
-
- After: Sending after creation by a certain period, and the system will ask you to specify this period.
-
- Channel: Here we determine the form of the message: Text message (SMS) or Email.
- Channel Template: Here we choose one of the templates we have for text messages (SMS) or email, and if we don’t have one, we must add an email template or add an SMS template as required.
Adding an Email Template
Now refer to the guide Adding an Email Template, and create a new template as shown in the following picture:

- Active: We have previously explained what ‘Active’ means, saying that it is the element through which we activate or deactivate the sending rule. Naturally, we will activate the option (Active) since we want to enable the sending rule.
- Valid Until: The validity of the automated sending rule is the duration within which the system attempts to deliver the message in case of difficulty in immediate delivery. If the message does not get delivered within this period, you should then send it through another method.
Data of the Invoices Automatic Sending Rule
In light of the above, we have created an automatic invoice sending rule, the details of which are as follows:

Practical Example: Creating a New Invoice
Now is the time for practical application on a new sales invoice to see how the system will automatically send it without our intervention. To create a new invoice, click on “Sales” from the main menu, then “Create Invoice“, and fill in the invoice data using the guide Creating a Sales Invoice.
We created an invoice for the client “John Doe” and filled in its details as shown in the following image:

Based on the notification we set in the system for sending the invoice, the client “John Doe” received the following email confirming the registration of a new invoice, attached with the invoice in PDF format as shown in the following image:

With this, we conclude our explanation of the automated sending feature in the system, having demonstrated how to create a sending rule for appointments and another for invoices, and we verified the operation of both rules by creating an appointment with the client John Doe, and an invoice for the same client.