



How to Work Offline and Sync Expenses Later
The “Quick Expense Scanner” app allows you to continue adding and editing expenses even without an internet connection, and automatically or manually sync them once a connection is available. This article explains how this process works and how you can manually sync your expenses when needed.
Steps to Work Offline and Sync Expenses Later
Step 1: Add or Edit an Expense Without an Internet Connection
Add or edit the expense as usual; the app works the same way whether you are connected to the internet or offline. If there is no connection, the expense is saved on your device with the Not Synced status until it is synced later.
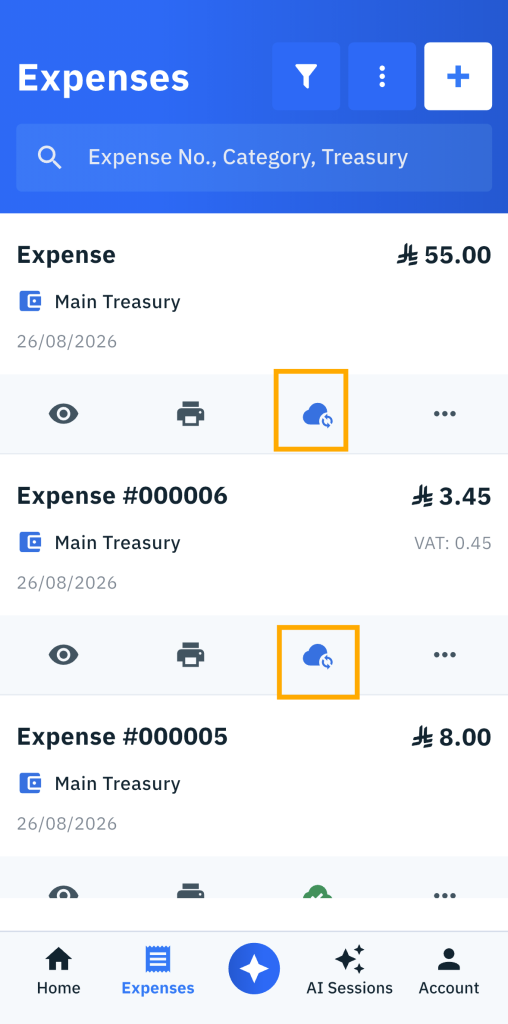
Step 2: Automatically Sync When the Connection Is Restored
As soon as the internet connection is restored, the system automatically takes all expenses with the Not Synced status and attempts to sync them with the online system without requiring any action from you.
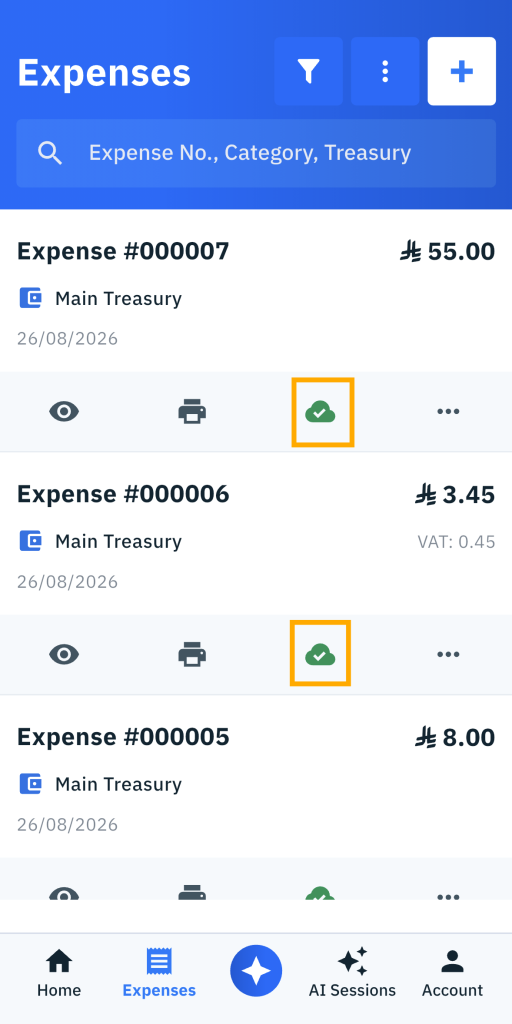
Step 3: Manually Sync All Expenses from the List
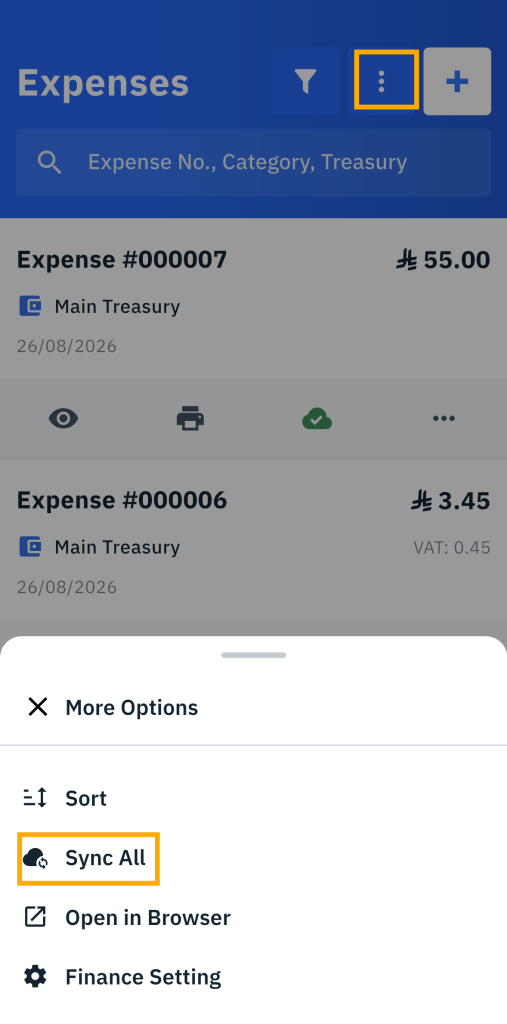
From the Expenses List screen, tap the More Options (⋯) icon in the screen header, then select Sync All to sync all expenses at once. This button does not include expenses whose synchronization previously failed; these expenses must be synced individually (see the next step).
Step 4: Sync an Individual Expense from the Expense View Screen
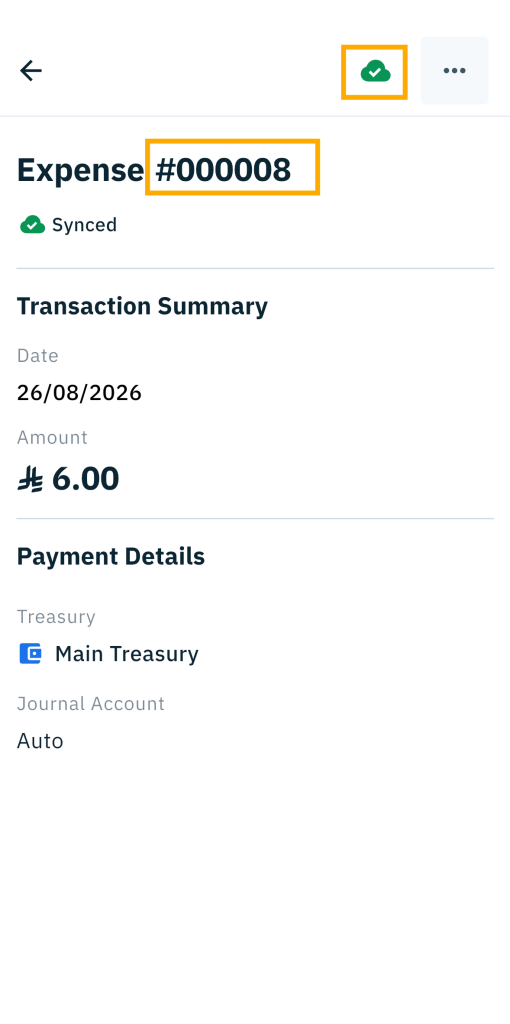
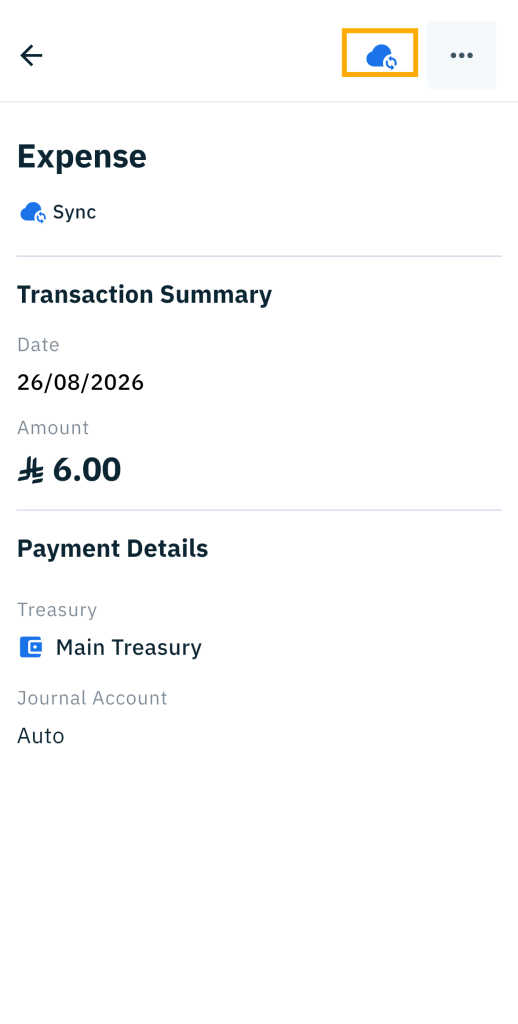
Open the view screen for the required expense. The Sync button appears only if the expense is Not Synced or if a previous synchronization attempt failed. Tap Sync icon to retry the synchronization.
Step 5: Review the Expense Status After Synchronization
After synchronization succeeds, the expense status changes to Synced, and an auto-generated number is assigned to it according to the automatic numbering settings in your account. You can view this number from within the app. If synchronization fails, the expense remains in the Not Synced status, and an error message explaining the reason for the failure appears on the expense view screen.