







Guide to Upload Multiple Files and Issue Them as a Single Expense
The Quick Expense Scanner Mobile App allows you to upload several expense files at once, and merge them together so they’re processed and issued as a single expense, instead of creating a separate expense for each file. In this article, we explain the steps to upload multiple files and issue them as a single expense.
How to Upload Multiple Files and Issue Them as a Single Expense
Step 1: Upload Multiple Files
From the AI expense upload screen, upload more than one file at once (via camera, gallery, or PDF/Excel files). All uploaded files appear in a list showing each file’s name and size.
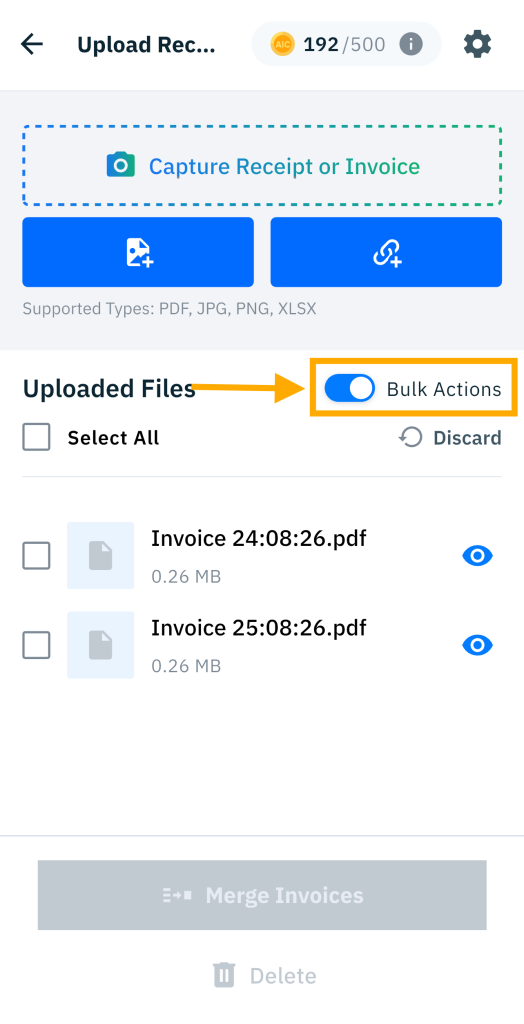
Step 2: Enable Bulk Actions to Merge the Required Files
Enable the “Bulk Actions” toggle above the uploaded files.
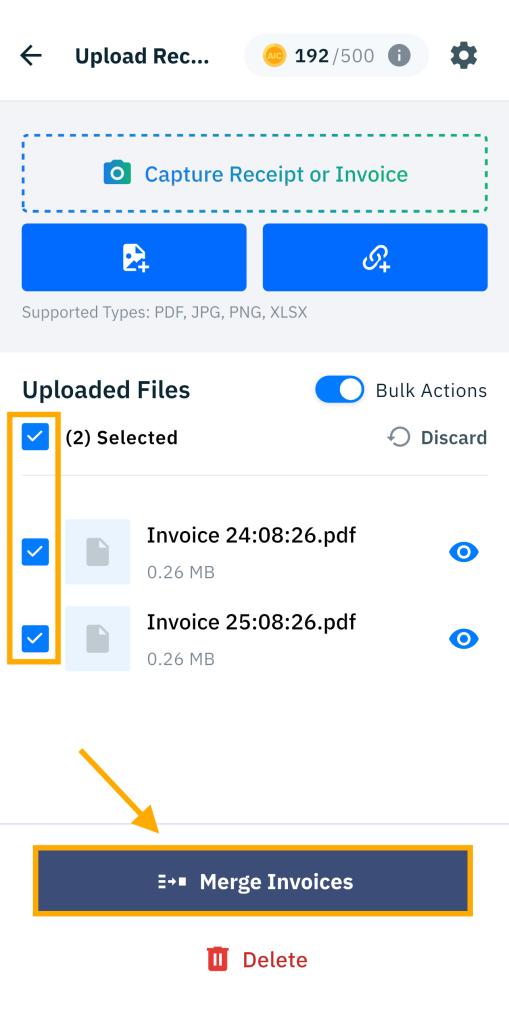
Step 3: Merge the Files into a Single Expense
Select the files you want to merge, then tap “Merge Invoices.”
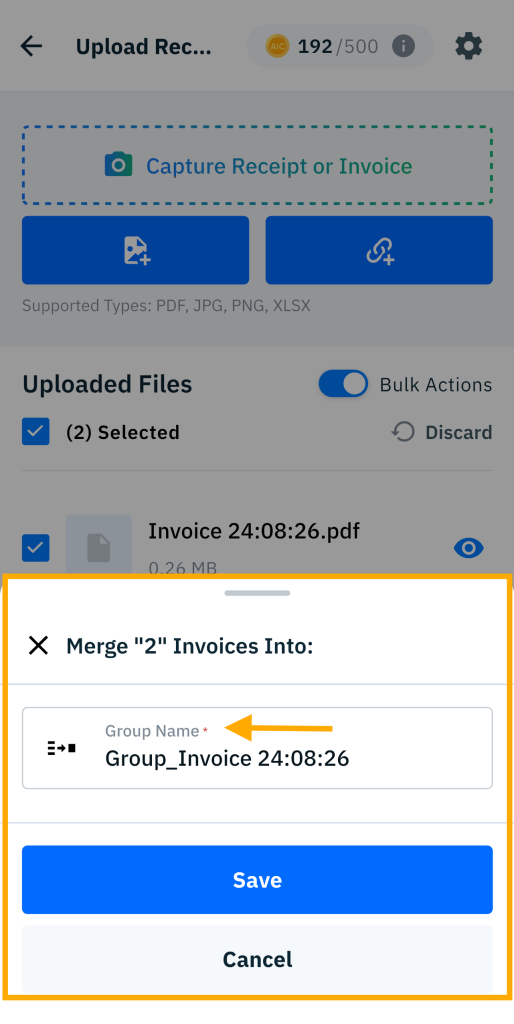
Step 4: Confirm the Group Name and Save
On the “Merge ‘[number of files]’ Invoices Into:” screen, the “Group Name” field (required) appears pre-filled with a suggested name, which you can edit manually if you’d like. Tap “Save” to confirm the merge, or “Cancel” to back out of the operation.
Step 5: Start Processing and Issue as a Single Expense
Once AI processing starts, all the grouped files are processed together, and a single expense only is issued from them, with all the selected files attached to it. The first file selected is used as the main reference file for extracting the expense data.