


Daftra’s POS Mobile App
The Daftra mobile POS app is a version of the embedded Point of Sale app on the Daftra website and also from the Desktop Point of Sale app, but it can be used via mobile so that sales representatives can record invoices at any time and from anywhere.
The application works online and offline without internet, providing a synchronization feature to transfer the invoices and transactions done on the mobile application to the main account in Daftra to ensure the safety and accuracy of your accounting and financial operations.
To download the Daftra Point of Sale App
The employee goes to the online store to download:
Daftra’s mobile Point of Sale program via Google Play Store.
Daftra’s mobile Point of Sale program via Apple App Store.
Or go directly to the application through the link, and click “Install” to download the program.
Setting Up the Mobile POS App before Starting Selling
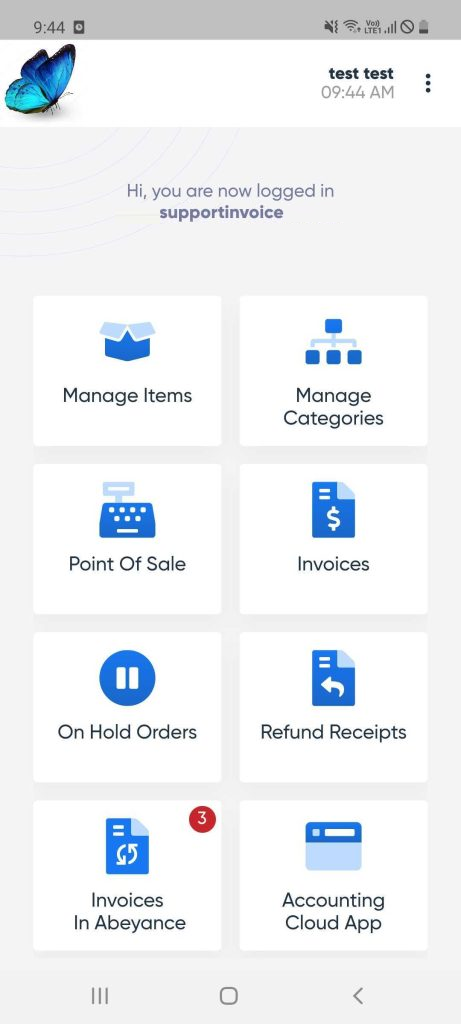
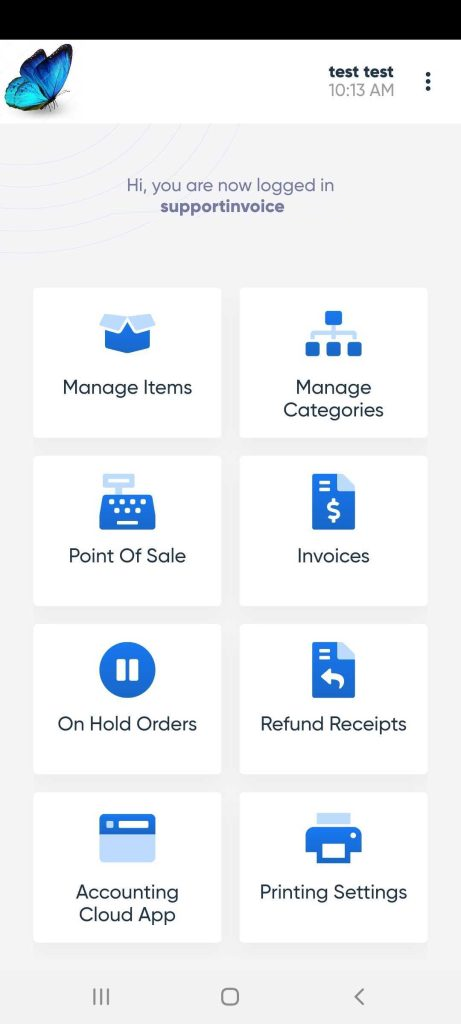
You or one of the users on your Daftra account can log into the app via email and password, or, by scanning the QR code from the QR code image available in the “POS App” under “Daftra Mobile Apps” below the main menu on your account under your name.
![]()
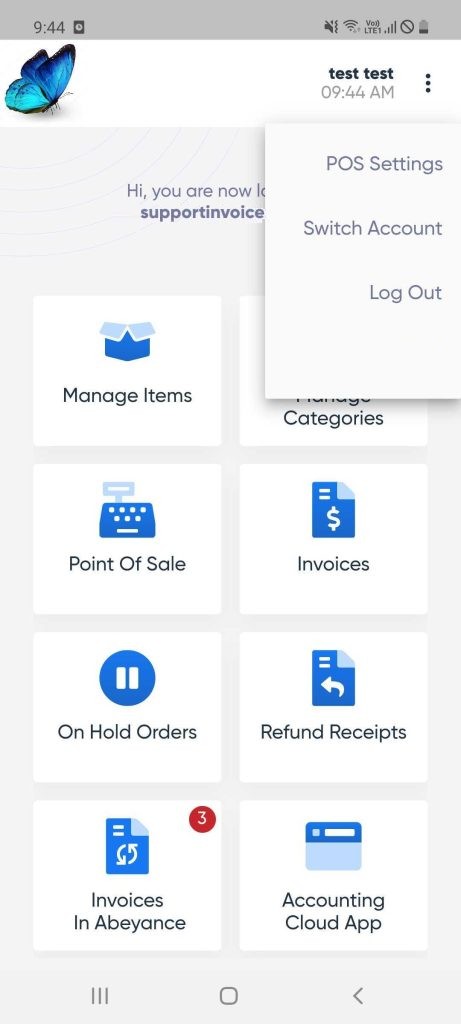
After logging in, click on the three dots in the upper right corner

And select “POS Settings” from the dropdown menu
Then choose the branch for which you want to issue point of sale invoices, then select the point of sale device from the points of sale devices registered on your Daftra account, and click “Save”.
![]()
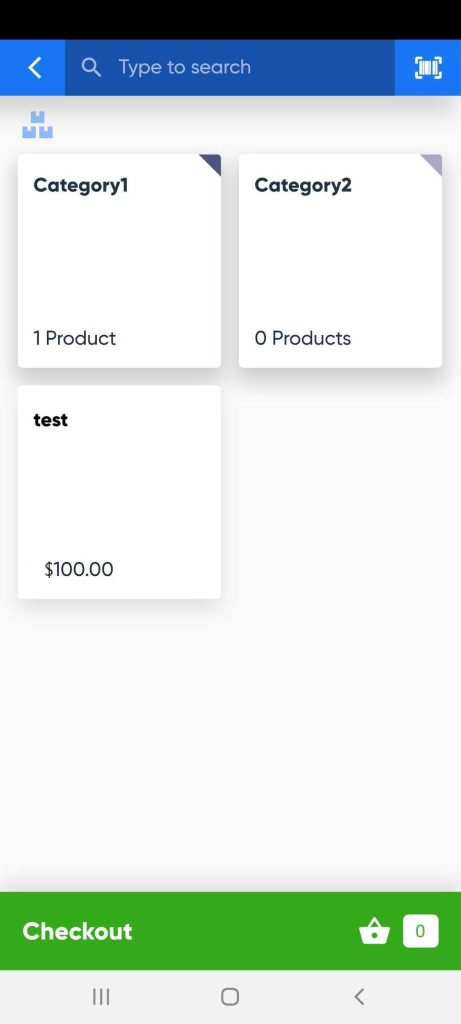
You can also easily browse product categories like “Grocery Products” by clicking on the “Manage Categories” card.
![]()
Similarly, you can browse products like “White Sugar” by clicking on the “Manage Items” card.
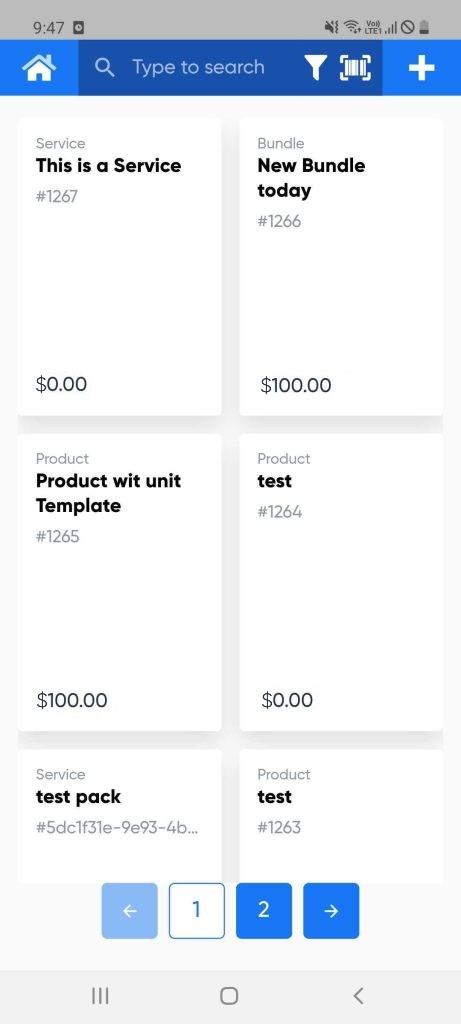
To edit or delete, click on the desired product or category and click on the “Edit” or “Delete” button.
How to use the Mobile POS App
To start selling, click on the “Point of Sale” card.

Click on the product category to view the products within it, then click on the products selected by the client for purchase.
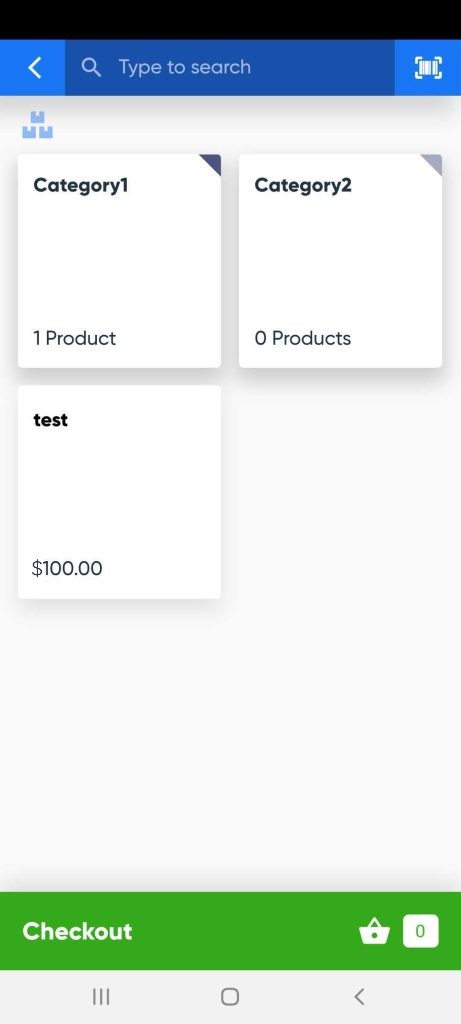
Example: If the product “Low-fat Cheese” is inside the category “Types of Cheese”, click on the category “Types of Cheese” then click on the product “Low-fat Cheese” to add the item to the client’s shopping cart.

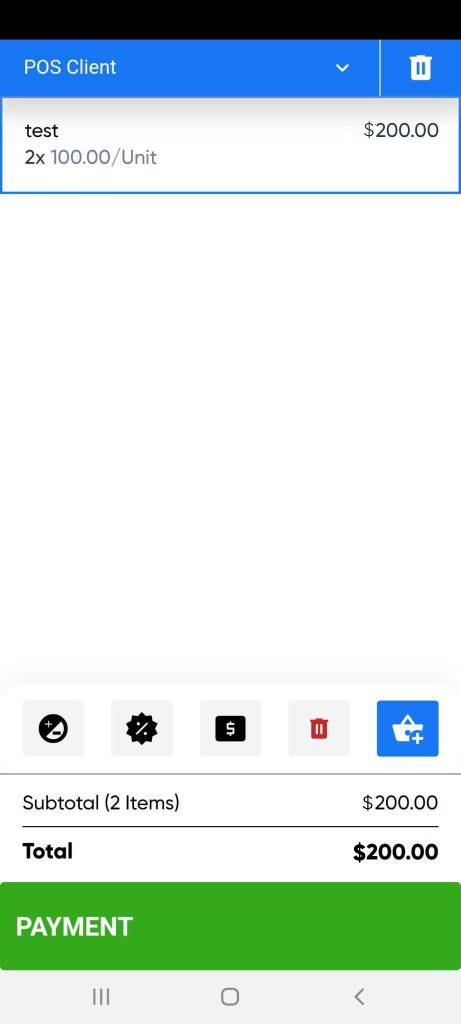
After adding all the products required by your client , click the “Checkout” button.
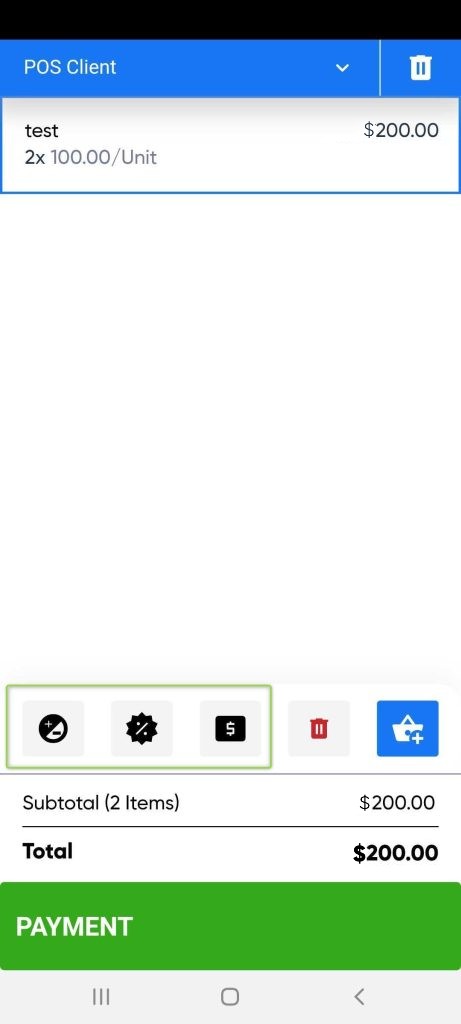
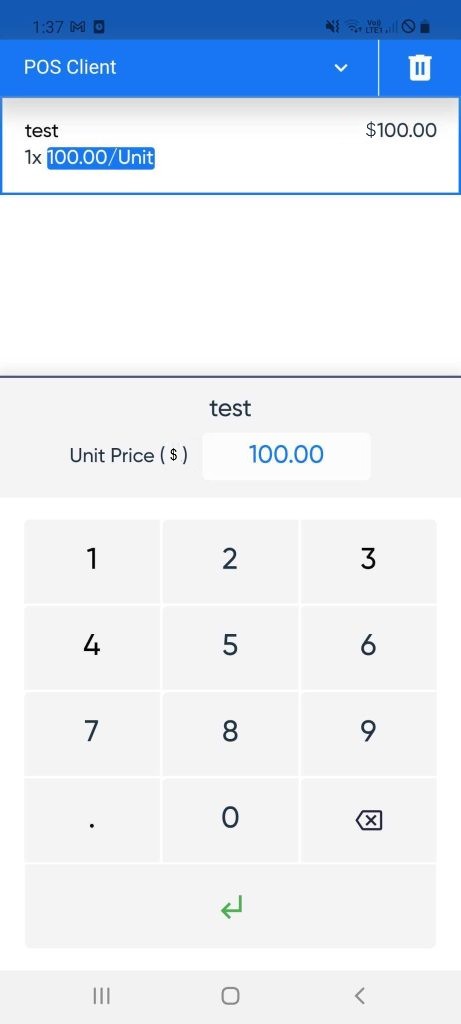
Adjust the product price by clicking on the $ button
 and the quantity
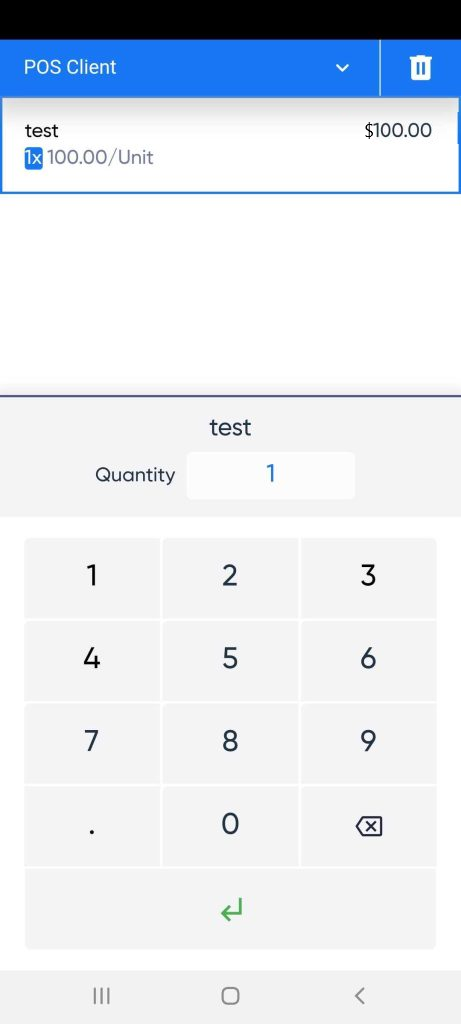 and the discount if any
 Then click the “Payment” button
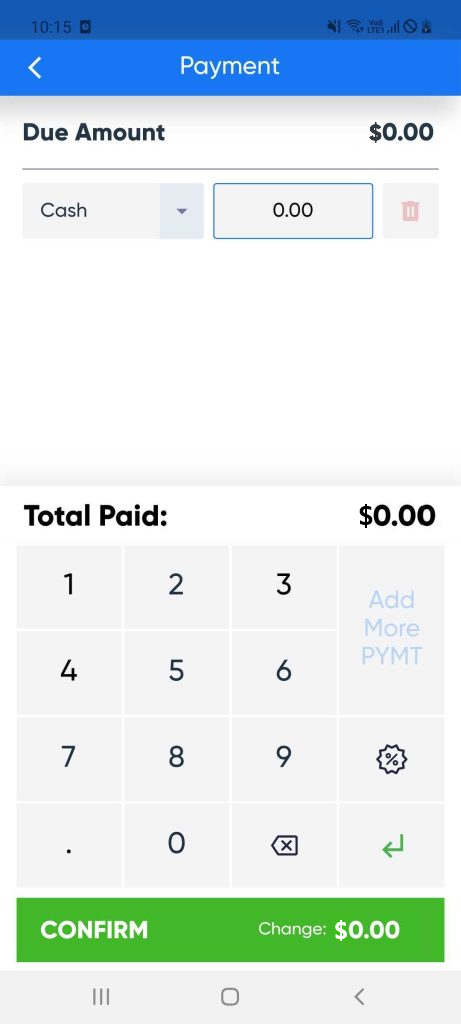
And select the payment method like “Cash” or “Credit Card” then click the “Confirm” button to issue the client invoice.
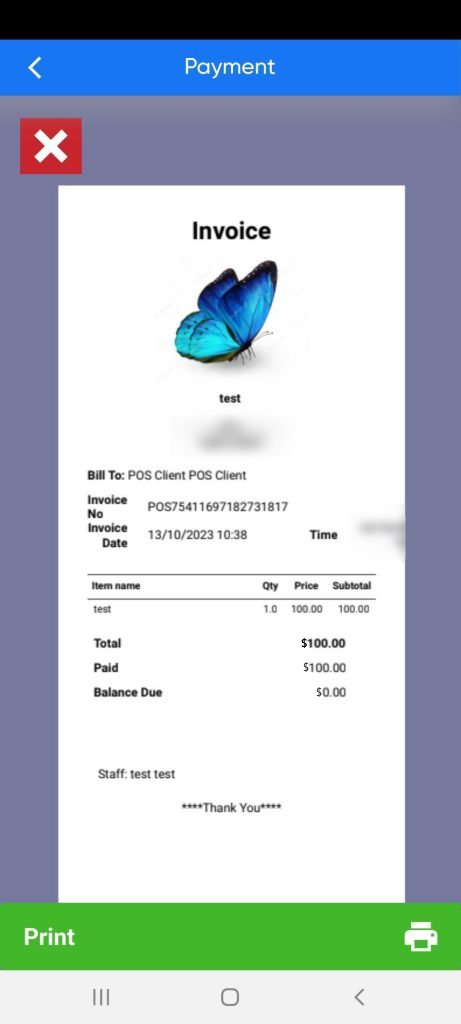
To print the invoice, click the “Print” button and to continue the selling process for other clients, click on the ❎ symbol, add products to the shopping basket and repeat the steps.
Syncing the Invoices of the Mobile App with your Daftra Account
In case the mobile is connected to the internet while using the POS app, the invoices are synchronized instantly and appear on your Daftra account immediately upon issuance from the mobile app. However, if the mobile app is used without internet access, you can synchronize when connected through the following steps:
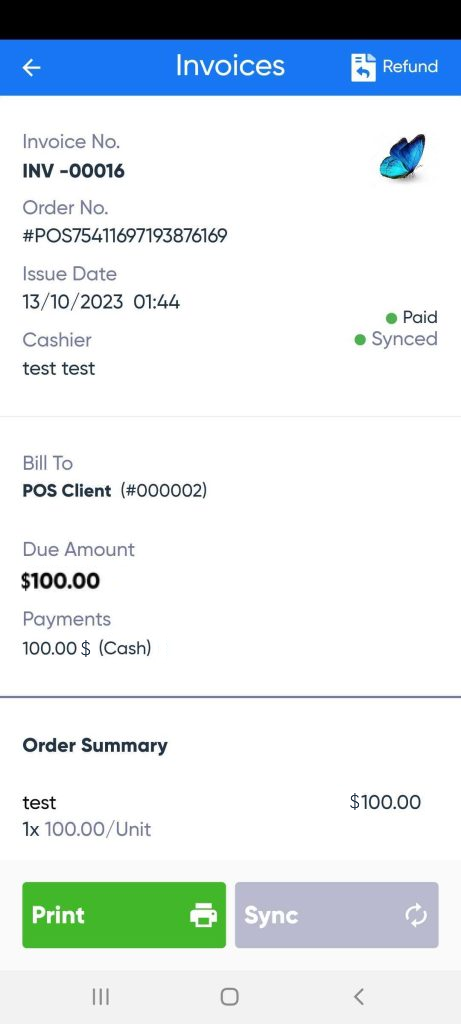
- Click on the “Invoices” card to view all invoices.
- Click on the “Sync All” button
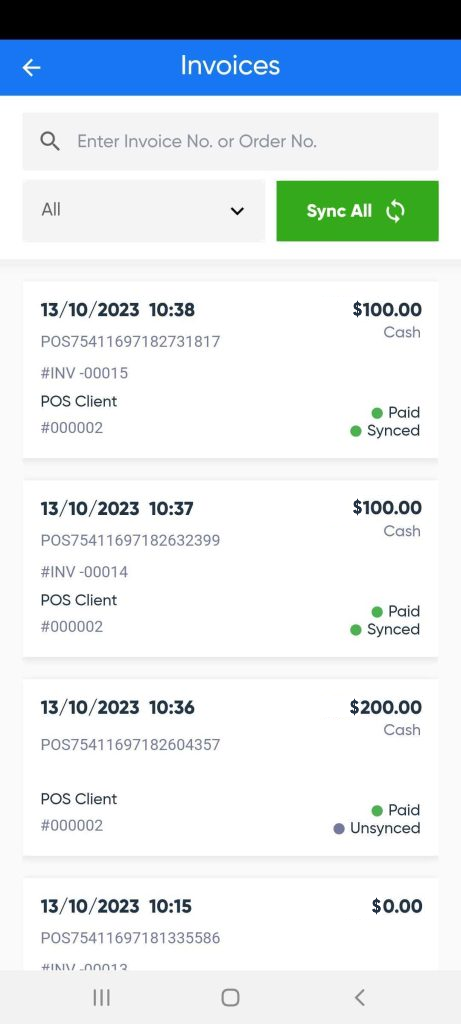
- Or click on the invoice you want to synchronize and press the “Sync” button.
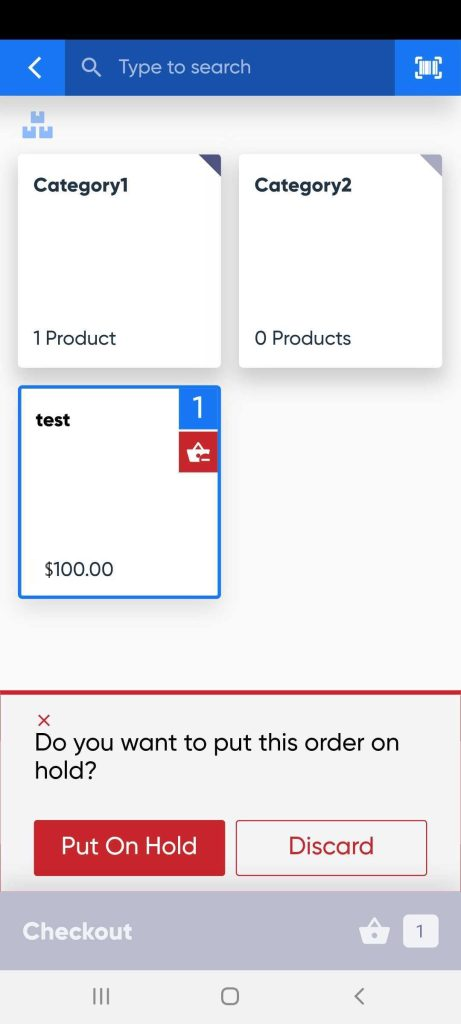
Temporarily Holding the Issuance of an Invoice
You can put sales orders on hold before confirming the invoices. Here are the steps:
- Click on the card labeled “Point Of Sale”.

- Click on the desired category.
- Select the product.
- Click on the “Checkout” button.
- Then click the back button on your mobile according to your operating system. A message will appear asking, “Do you want to put this order on hold?” Click on the “Put On Hold” button.
- To complete on hold- orders, click on the “On Hold Orders” card
- Then click on the order
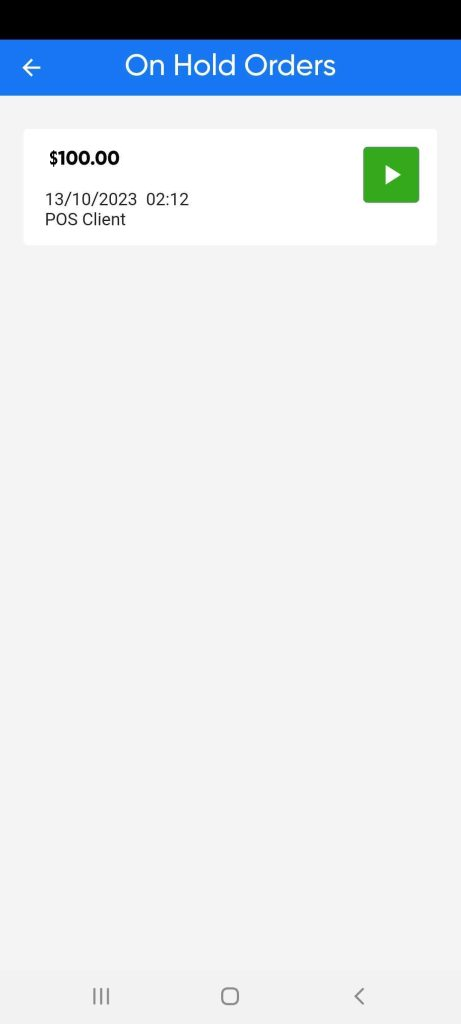
- and press the “Payment” button, then the “Confirm” button to issue the invoice.
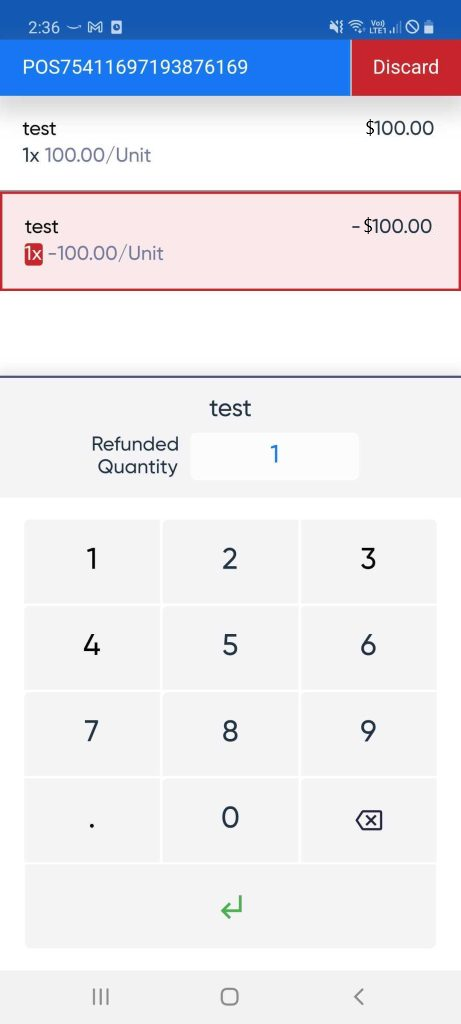
Creating a Refund Receipt for a Sales Invoice
You can issue returns on sales invoices either partially for some invoice items or for the full invoice by:
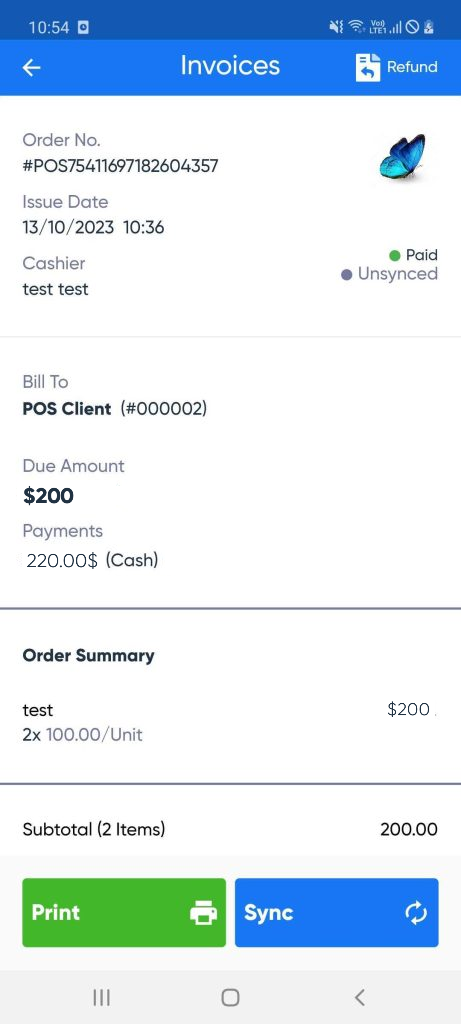
- Clicking on the card “Invoices”.
- Clicking on the invoice you want to issue a refund for.
- Click on the “Refund” button.
- Click on the arrow button, select the quantity to be returned from each item, then click on the arrow button again.
- Click on the “Refund” button.
- Select the refund amount and payment method.

- Click on the “Confirm” button.
- To print the refund receipt, click on the “Print” button.
- To go back, click on the symbol
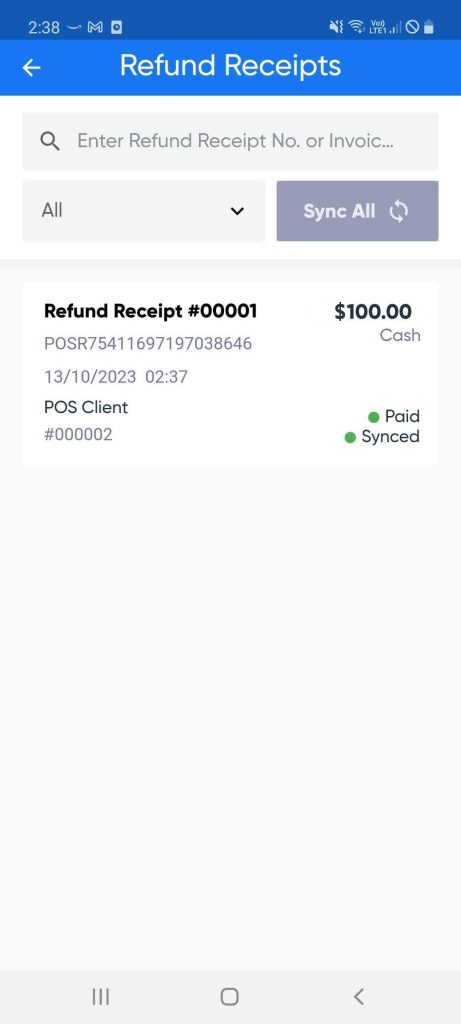
You can click on the card “Refund Receipts” to review all your returns.