




Guide to Adding an Expense with AI in the Quick Expenses Scanner App
The Quick Expense Scanner Mobile App allows you to add a new expense by uploading a photo or file of the invoice, so that AI automatically extracts the expense data, leaving you only to review and confirm it before saving. In this article, we explain the steps to upload the expense document, track its processing, review its extracted data, and then save the expense.
Steps to Adding an Expense with AI in the App
First: Accessing the AI Expense Scan Screen
Step 1: Open the Receipt Upload Screen
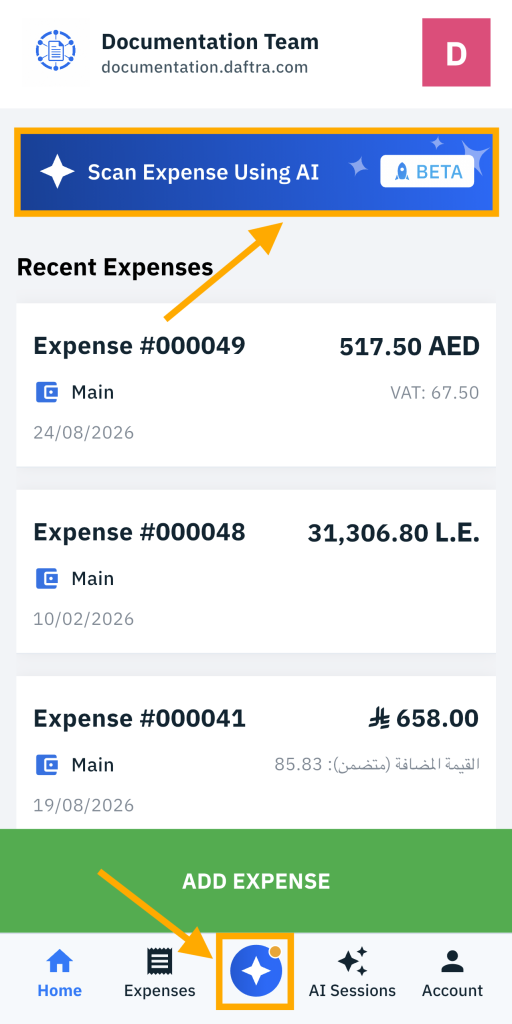
You can access the “Upload Receipts with AI” screen in one of two ways:
- From the home screen, tap the blue banner at the top titled “Scan Expenses Using AI.”
- From the bottom navigation bar, tap the blue icon in the middle (the glowing star icon).
Second: Uploading the Expense Document
Step 2: Choose the Upload Method
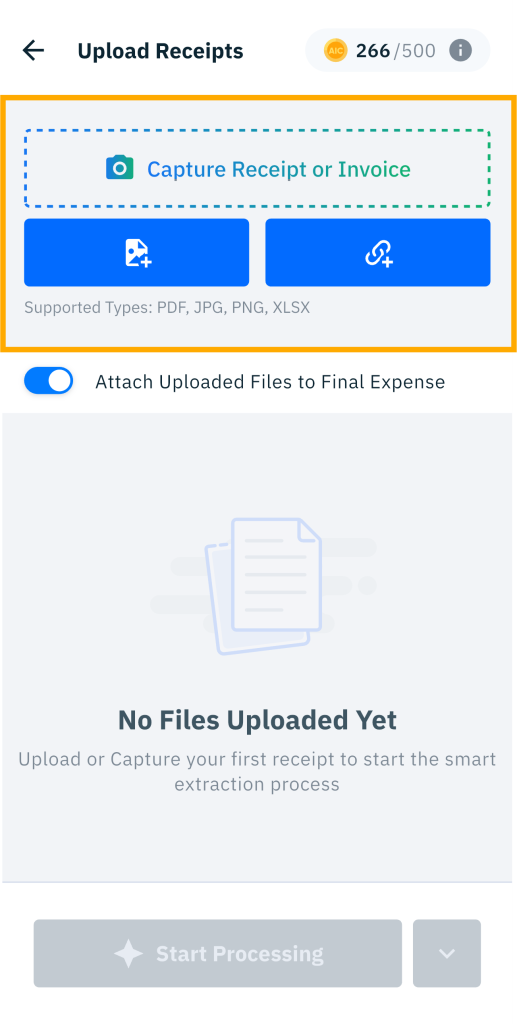
From the “Upload Receipt” screen, choose one of the available methods:
- Capture a photo (via camera).
- Select from gallery.
- Upload a PDF / Excel file.
Step 3: Select the Files
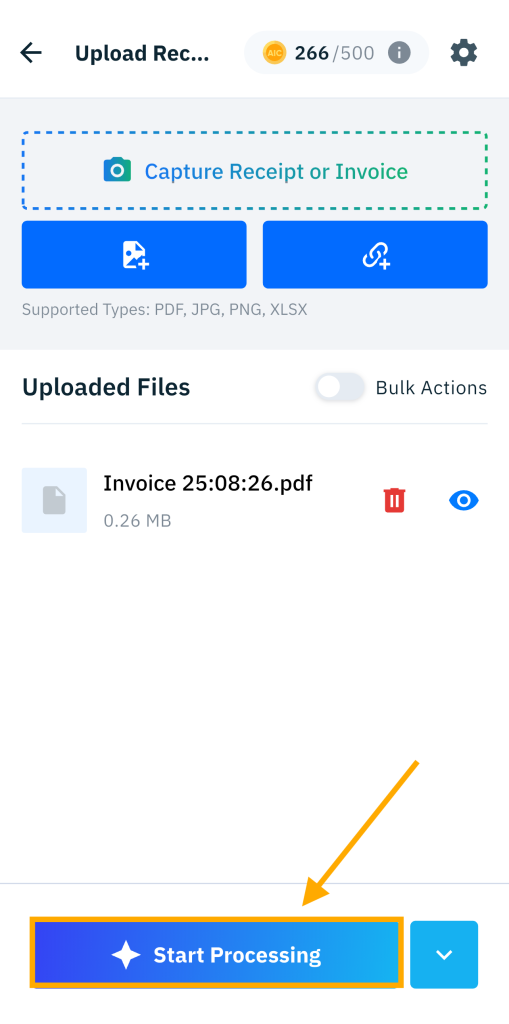
Select one or more files to upload. The system automatically validates the selected files, and valid files are added to the upload list, showing each file’s name, size, and a thumbnail preview.
Third: Starting AI Processing and Tracking Status
Step 4: Start Processing
After uploading at least one valid file, the “Start Processing” button becomes enabled. Tap it to submit all valid files to the AI processing system, and you’ll be automatically navigated to the expense processing screen.
Step 5: Track Each File’s Status
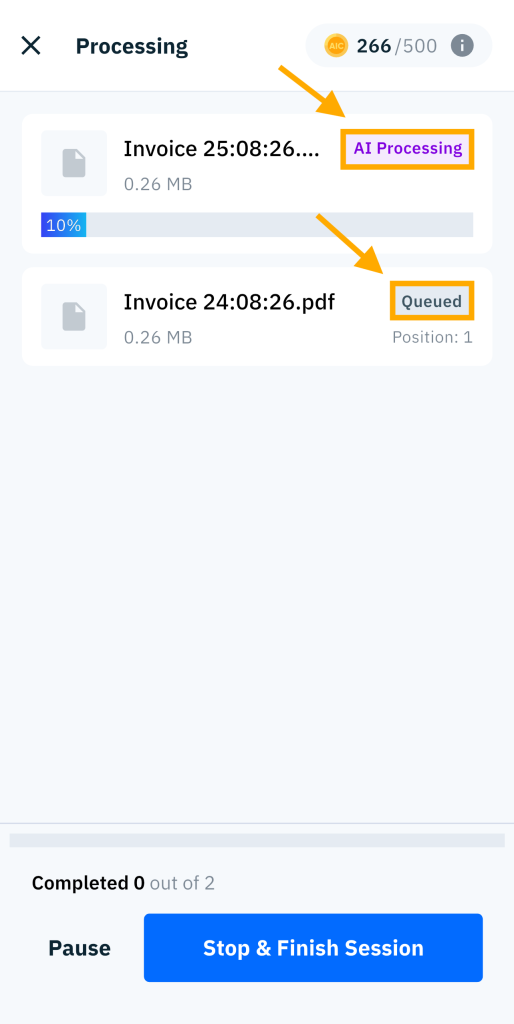
All files initially appear with “Queued” status, and the status updates automatically as processing progresses, becoming one of the following:
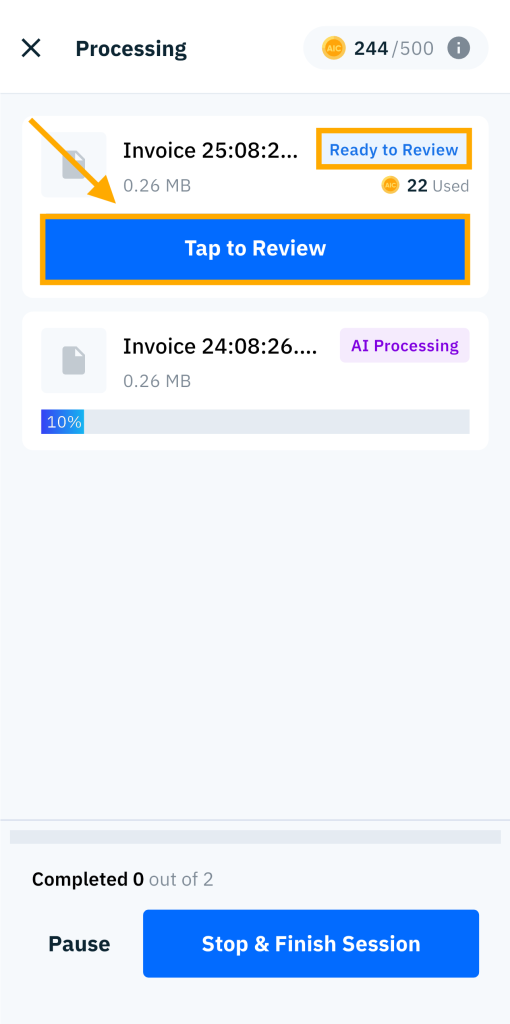
- Ready for Review: awaiting your review and confirmation.
- AI Processing: AI is currently extracting the data.
- Queued: waiting for its turn in the processing queue.
- Limit Reached: AI Coin balance depleted; requires a top-up.
- Failed: the file couldn’t be read or processed; a retry option is available.
You can leave the screen and return to it later to check the updated statuses, without losing any processing progress.
Fourth: Reviewing the Extracted Data
Step 6: Open the Review Screen
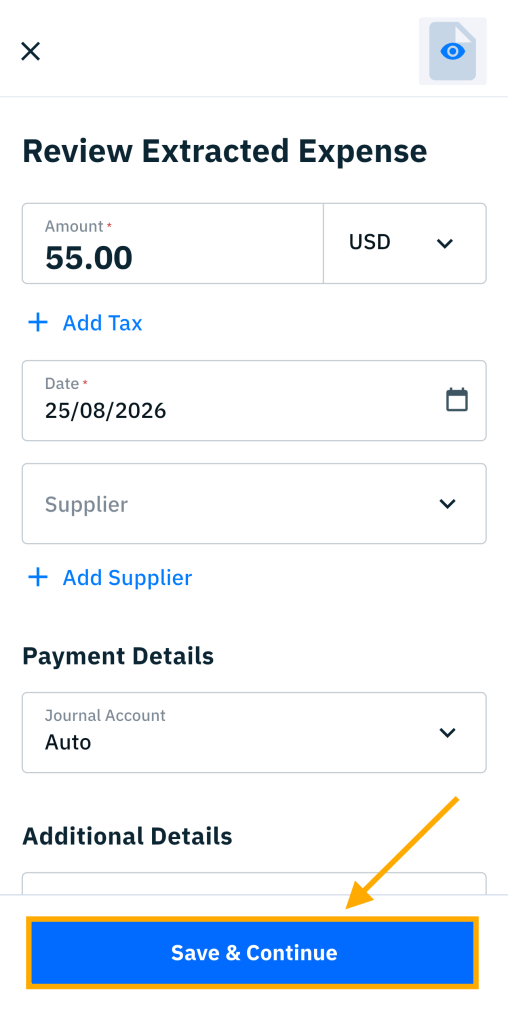
Tap any file with “Ready to Review” status to open the “Review Extracted Expense” screen, where the extracted data appears.
Step 7: Review and Edit the Fields
Review each section and edit any field if needed — including the Amount, Currency, Date, Supplier (with the option to add a new supplier), Category, Taxes, Treasury, Journal Account, and Description. You can also review the original uploaded document, and add or remove any attachments if you’d like, then tap “Save & Continue.”
Fifth: Completing the Session
Step 8: Complete the Session
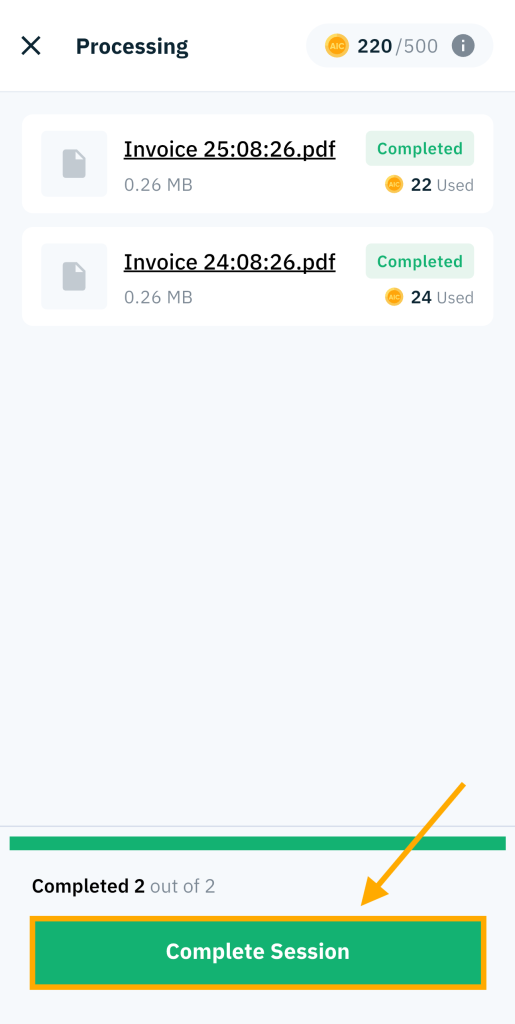
Once all files have finished processing, tap the “Complete Session” button at the bottom of the screen to close the current processing session. You’ll be automatically redirected to the home screen, and the expenses will have already been added to the expenses list.