Clients Operation & Management Guide
In this tutorial, we will explore the powerful features and capabilities that Daftra provides to help you optimize your client management processes while ensuring smooth operations and improved communication.
How to Add a Client
Adding a new client is a simple process on Daftra, to do so follow the below steps:
- Click on “Clients” from the main menu.
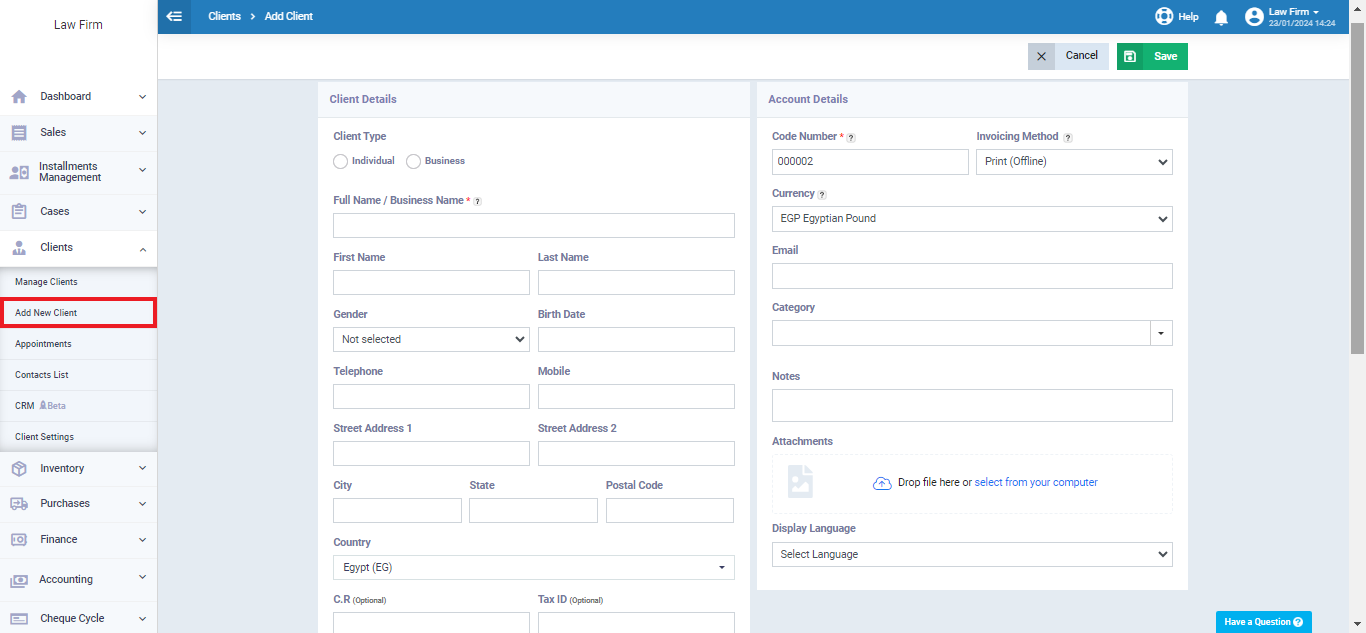
- Click on “Add New Client”.
- The client’s profile includes various sections each requiring different info and details about the client, these sections are:
- Client Type: In this section, you must choose whether the client is an individual or a business.
- Client Details: This section requires complete information about the client, including their name, gender, birth date, phone, address, country, credit limit, credit period limit, commercial register, VAT number, and other information displayed in the image below.
- Account Details: In this section, you have to enter all of the account’s information, including the code number, invoicing method, currency, email, category, display language, notes, and other details seen in the image below.
Client Operations
Client Profile Control
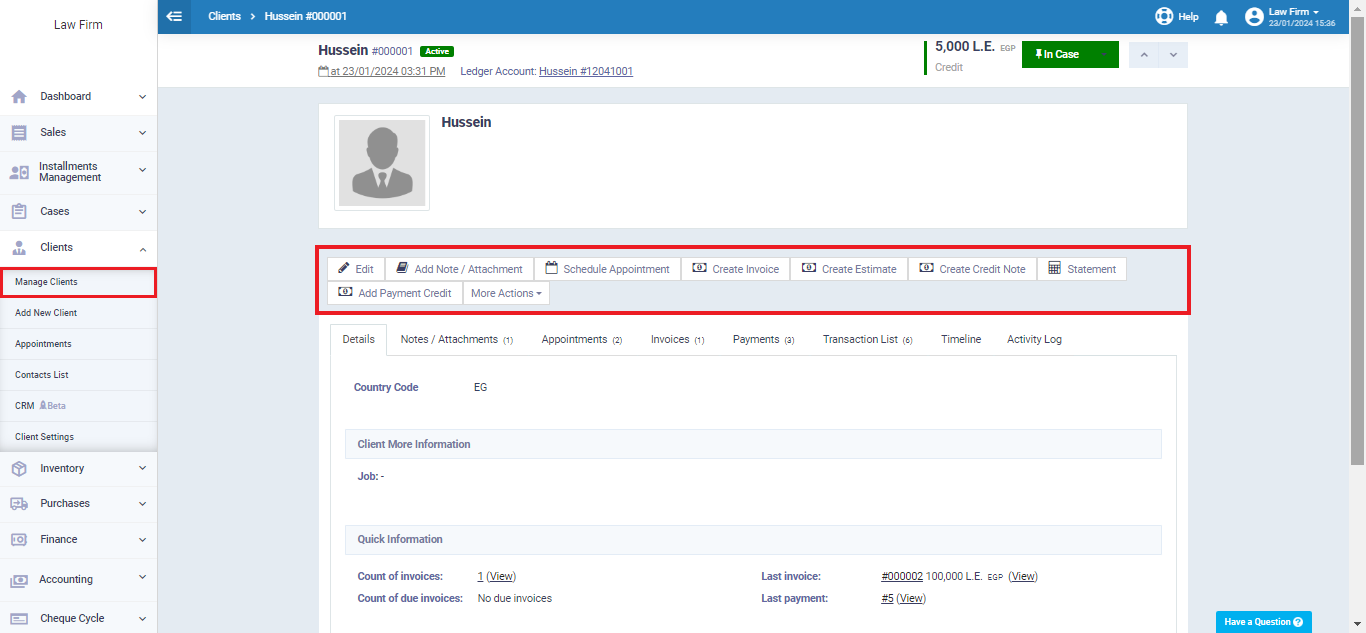
Through the client profile tab, you can choose between a set of actions that can be performed on the client such as Edit, Schedule Appointment, Send Email, Add Payment Credit, View Account Statement, etc.
Edit
Add Note / Attachment
You can attach any required document to the client profile or add notes specifying their status, performed action, time, and date.
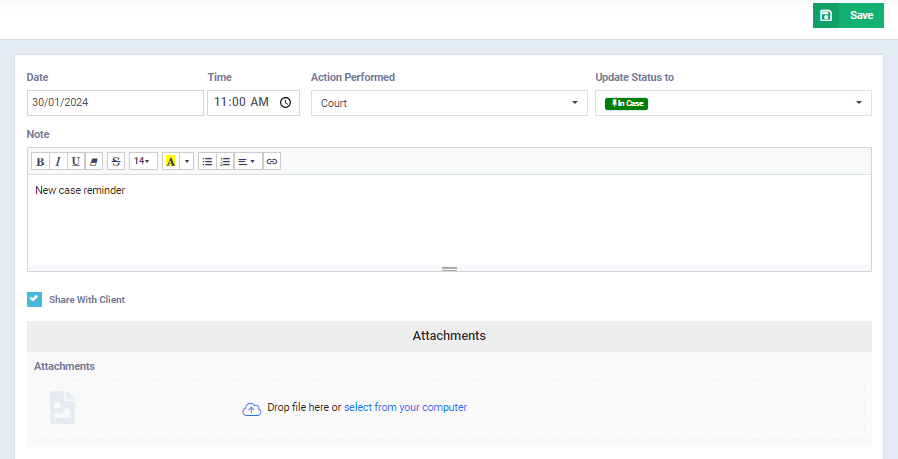
Click on the button “Add Note/Attachment” within the client’s file.
- Adjust the “Date” field by adding the date and time of adding the notes and attachments.
- Select the executed action from the list of actions performed.
- You can change the client’s status by adjusting the field value “Update Status to” and choosing the desired status from the status list.
- Type the required notes in the attached text editor with formatting tools.
- Click on the “Share with Client” checkbox if you want the client.
- To attach a set of files, click on the “Attachments” button.
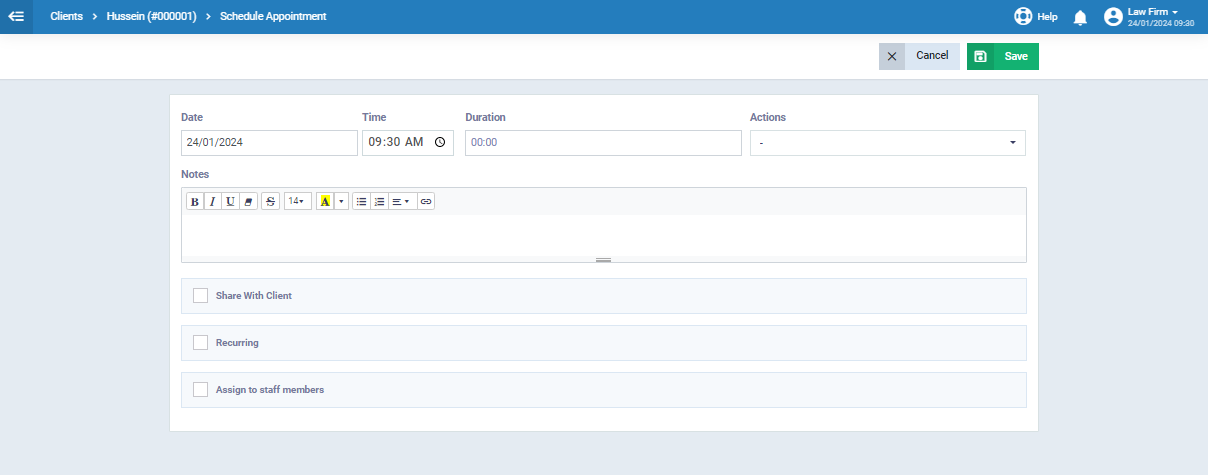
Schedule Appointment
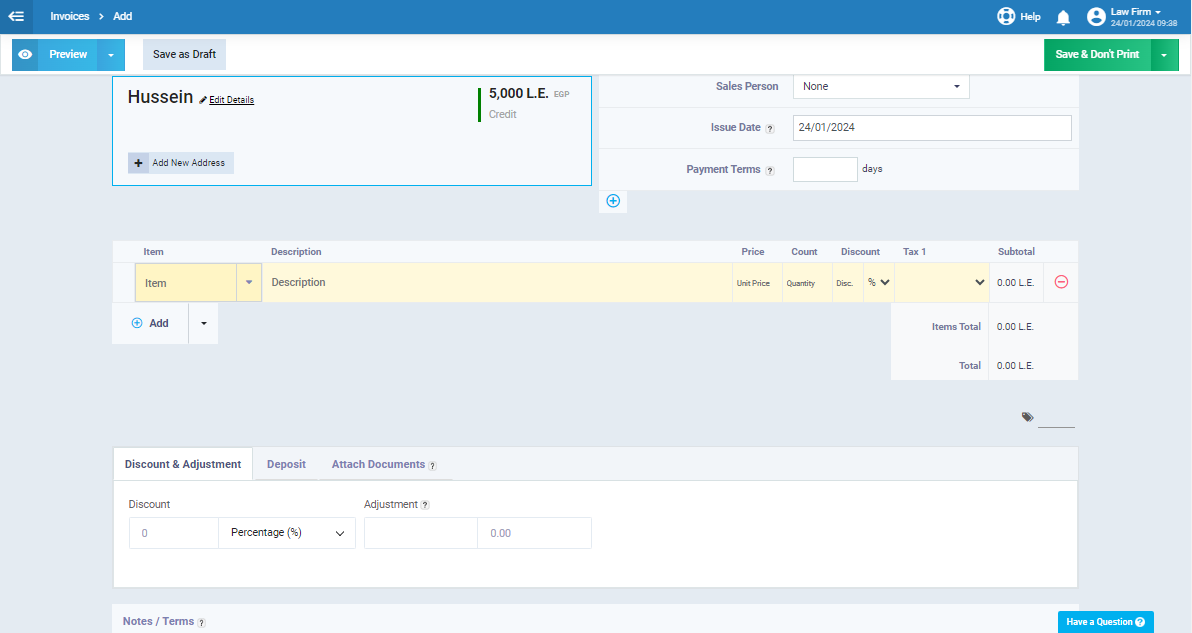
Create Invoice
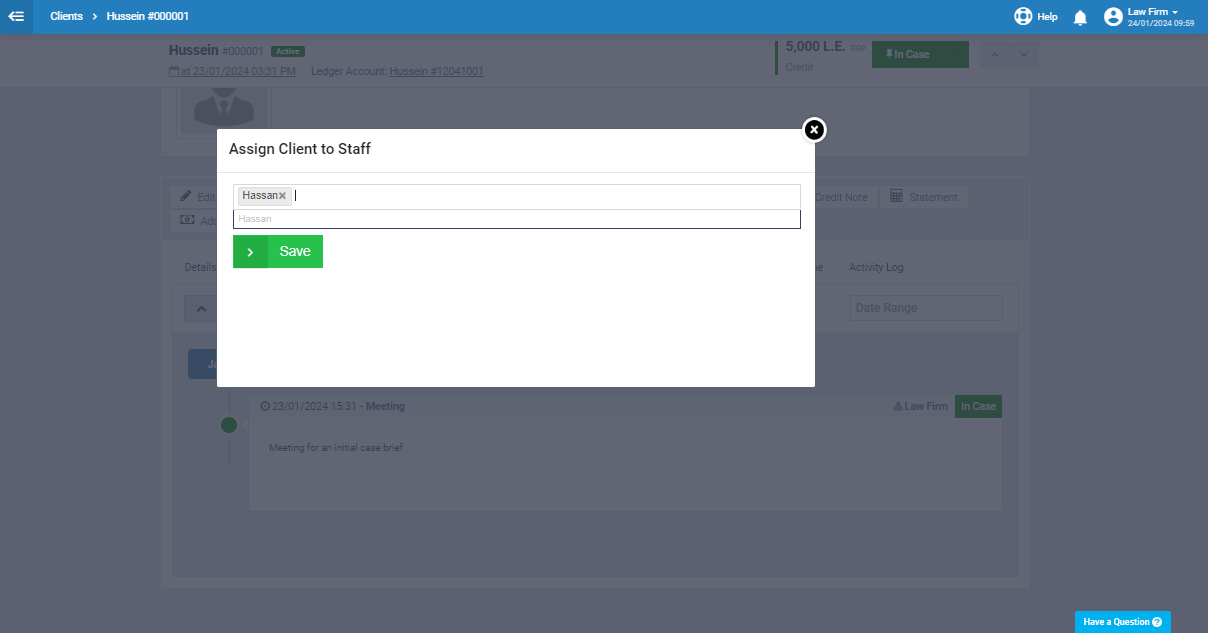
Assign to a Staff Member
When managing client relationships, it is beneficial to assign a dedicated lawyer/employee to cater to the specific needs and concerns of each client. To do so, click “More Actions” and select “Assign to a staff member” from the list. From the floating screen select the staff member.
There are other options that you can use if needed such as “Create Estimates, Credit Notes, Account statement, and Payment Credit”
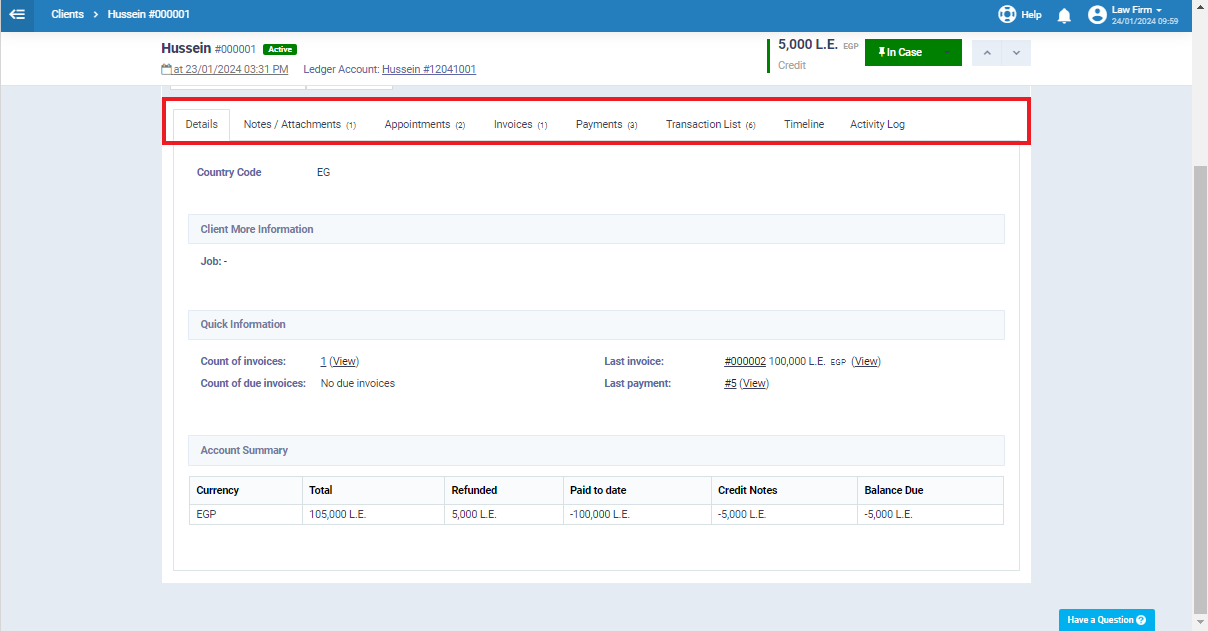
You can also view all activities done on the client’s profile using the tab below the client’s profile control tabs. This section displays all client data, including details, attached documents, notes, scheduled appointments, invoices, payments, transaction lists, timelines, and activity logs. Click on any of the items to access more information.
Auto Reminder Rules
Daftra software allows you to automatically send SMS text messages or emails by creating an automatic sending rule either for appointments or invoices with specific determinants as required.
First, if you’re going to use the SMS service make sure to “Activate the SMS app” and “Add an SMS template” before starting to create the automatic sending rule.
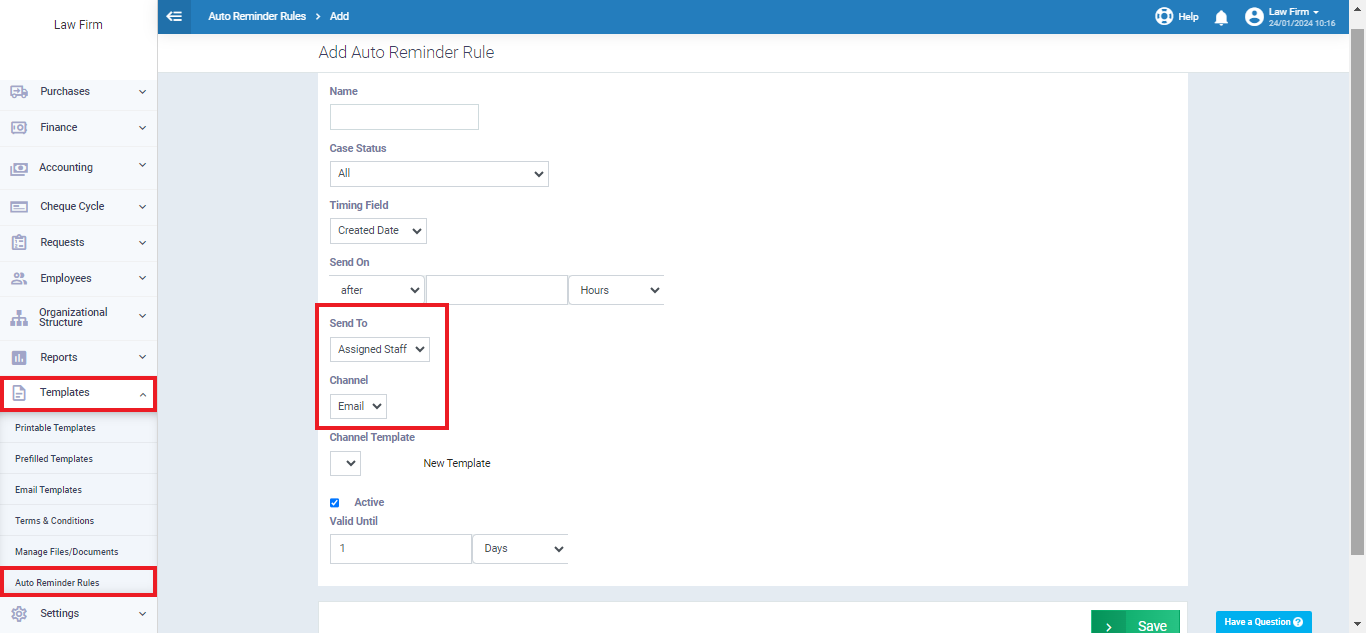
- From the main menu, click on “Templates“.
- Click on “Auto Reminder Rules“.
- Click the “Add” button and select from the dropdown menu “New Cases Rule“.
Fill out the reminder rule data, such as the reminder name, select the case status, and specify whether the auto reminder should be sent to the client or the assigned lawyer (Staff Member), as well as the channel through which you want to send out the reminder, which can be email or SMS.


