


Patient Profile
Daftra can help you manage your patients and keep accurate records of their information as well as a history of past check-ups, prescriptions, or surgeries. Add notes, attach patients’ documents, x-rays, and analyses, and share their updates with them. Conduct post-care check-ins to verify patients understand medical instructions.
Manage appointment scheduling and check-in schedules between patients and doctors. Send patient alerts to keep them up to date on any changes to their medical condition or prescriptions.
Let’s break down each feature mentioned in the introduction and guide you through managing patients:
Patient Details
To view a patient’s profile click on “Clients” in the main menu.
From the dropdown menu click on “Manage Clients” if the patient you need is already added to your patients’ list.
If not you’ll need to add the patient from the “Add new client” tab.
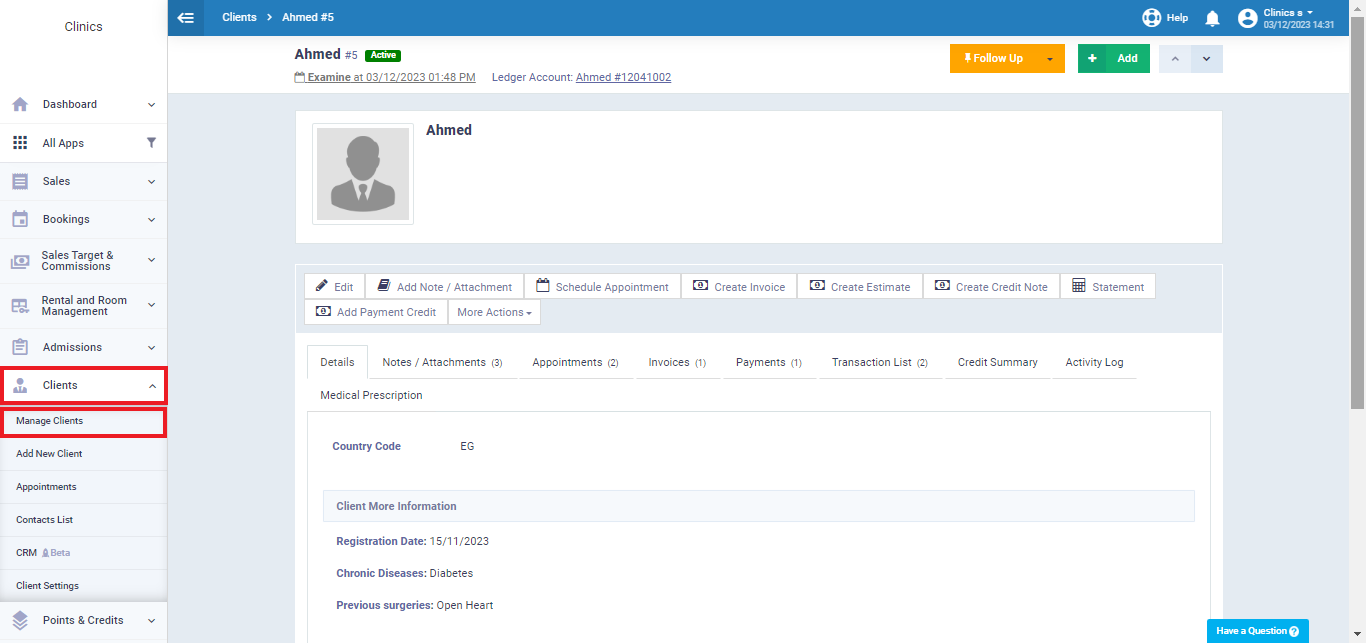
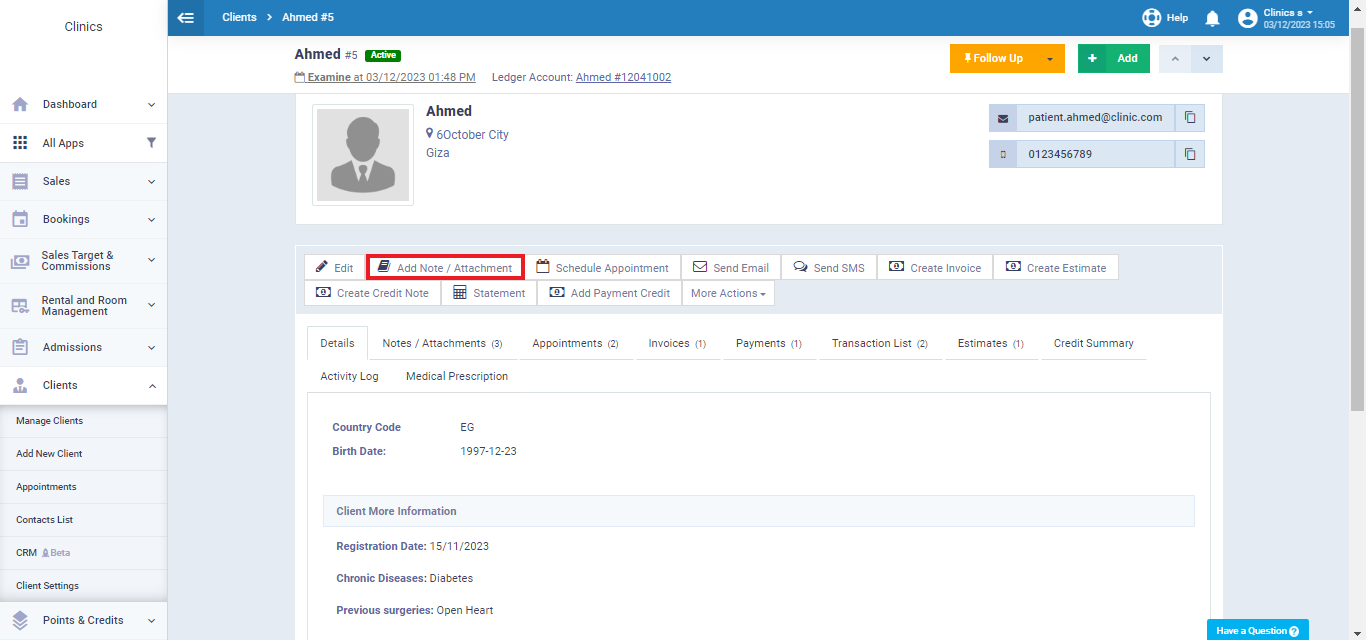
You’ll find, in the patient’s details, all the information that was entered in the ‘add new client‘ tab, such as patient info, account info, and additional details about the patient, such as the registration date, whether the patient has any chronic diseases or details about previous surgeries.
Add Notes / Attachments
Click on “Add Notes/ Attachments”
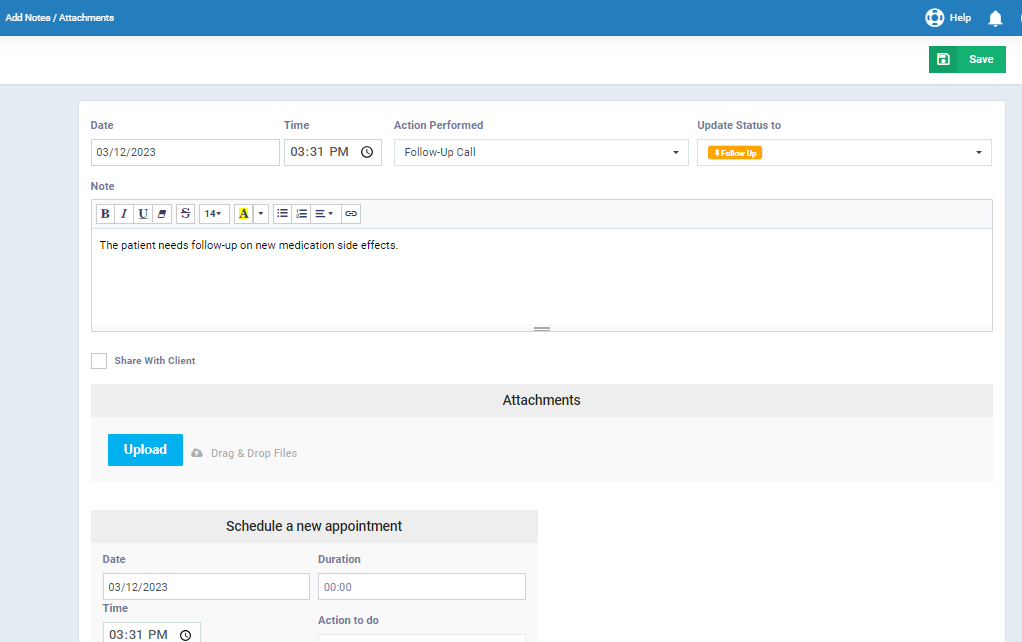
Fill in the following information to add a note to the patient’s profile:
- Date: Add the note date
- Time: Enter the time that the note was added.
- Action performed: Choose the desired action from the dropdown menu under action performed.
- Update status: Select the patient’s status.
In the note or the text box type the required notes with formatting tools. Click on the checkbox “Share with Client” if you want the client to be able to view the notes and attachments on their portal.
To attach files click on the “Upload” button, drag or choose from your computer any document or image you need to attach to the patient’s profile.
Click on the “Save” button on the top right of the screen.
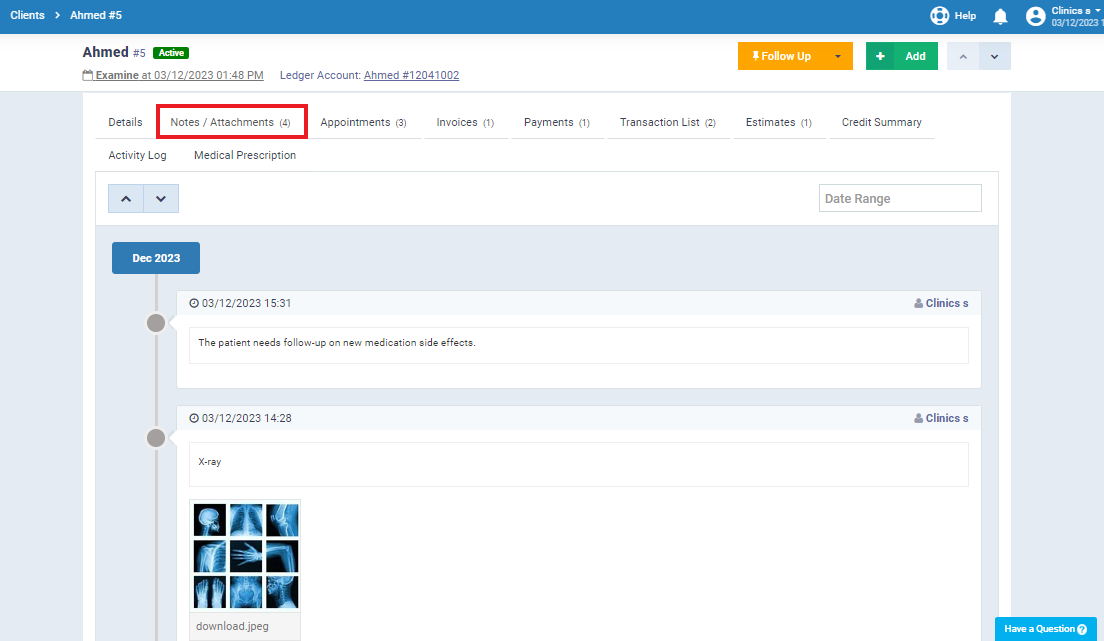
To view the notes or attachments that you have previously uploaded click on
“Notes / Attachments”
You’ll find all the attachments and notes here arranged from the newest to the oldest.
Schedule Appointment
Click on “Schedule Appointment”
As shown in the screen illustrated in the following photo, there are a few info about the appointment that you need to fill out to schedule the patient’s appointment these info are:
- Date: Select the date of the appointment in this field.
- Time: Set the appointment’s desired time.
- Duration: Specify the value to set the period the appointment will take.
- Actions: Select the required action from the “Actions” list
- Notes: Add notes for the appointment if needed in the attached text editor with formatting tools.
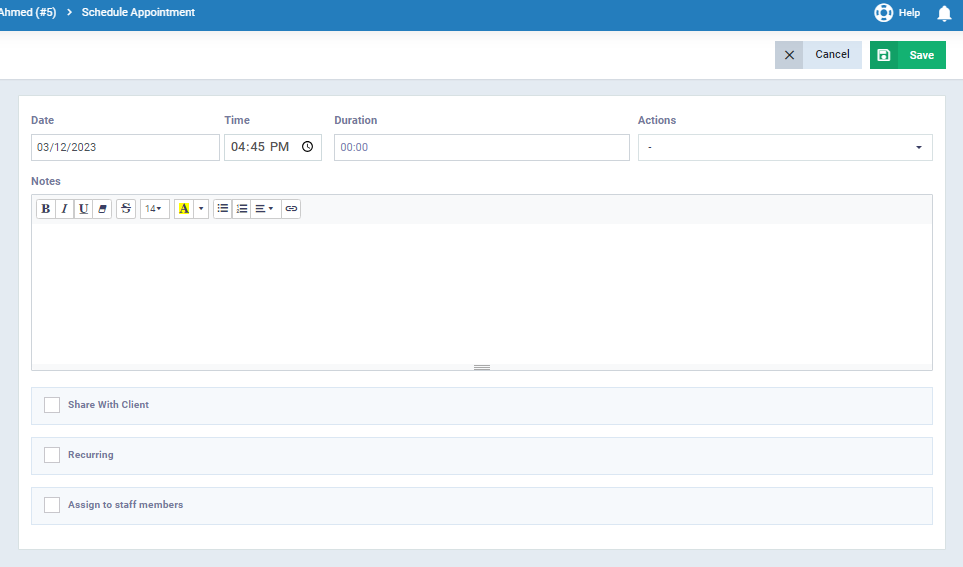
Share with Client: Send appointment details to the client.
Recurring: The appointment will be repeated at fixed intervals until a specified date.
Assign to staff members: One or more employees whether a doctor, nurse, or receptionist can be chosen to view and follow up on the appointment with the patient.
To view scheduled appointments
Click on “Appointments”
Send an Email to a Patient
Click on “Send Mail”
Fill in the requirements to send an email to a patient:
Subject: Add the email subject in the subject field.
To: Enter the recipient’s email address.
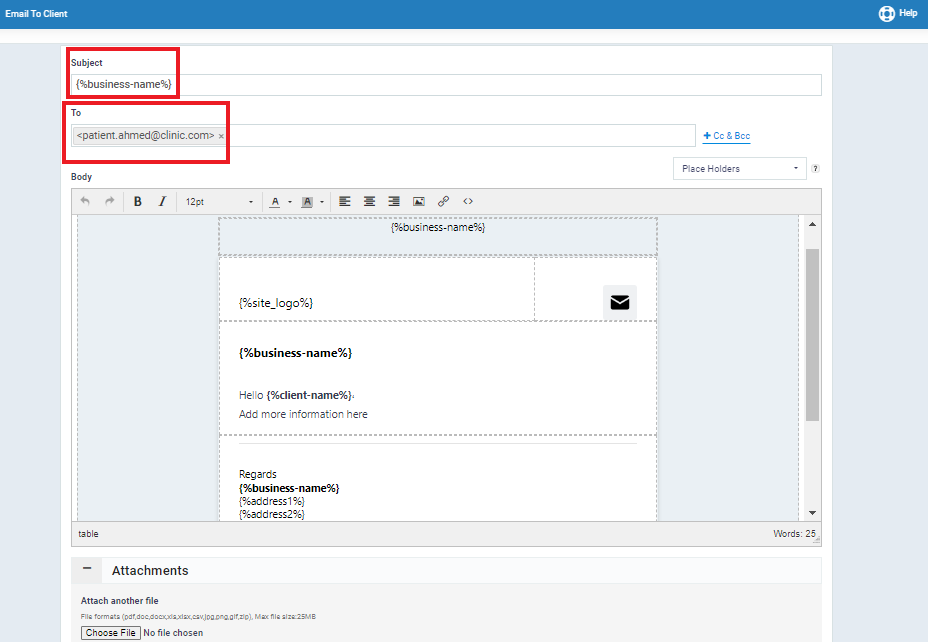
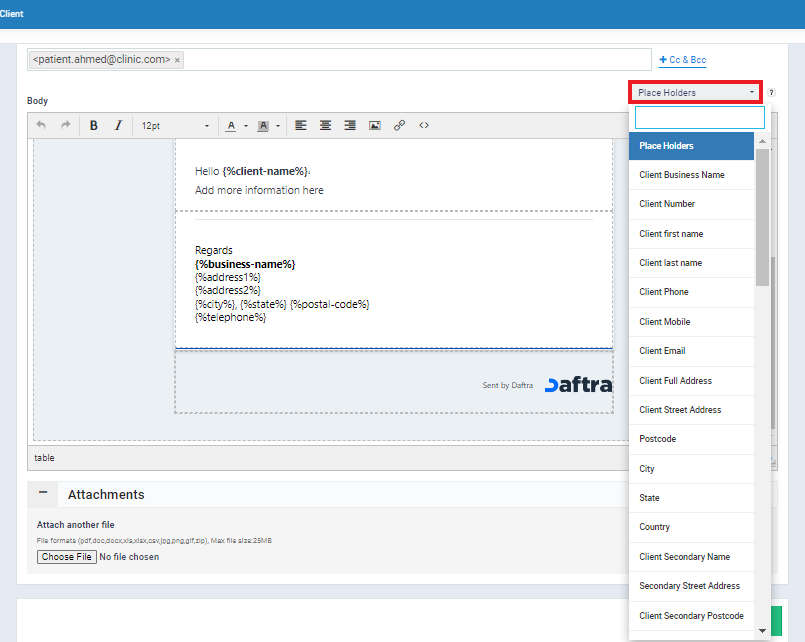
- Body: You’ll find the variables illustrated in the previous photo that will help you fill in the email with your clinic’s logo, name, address, and so on.
- Replace these variables with your info and enter the desired email content whether it is a confirmation or a reminder for an appointment, a medical prescription, or whatever is needed to be sent to the patient.
- Attachments: You can attach documents and images to the email. To do so click on “Choose File” and select the desired attachment.
Placeholder: Placeholders are used to be able to save a message as a template and send it to different clients without rewriting it for each client. Placeholders are automatically replaced by the correct value before sending the email.
Send an SMS
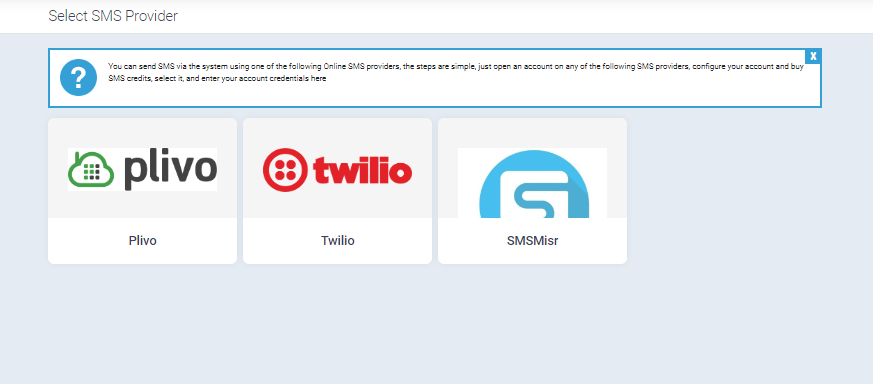
Daftra allows you to send SMS messages to the client that include notifications regarding invoices, appointments, or other matters.
- Important Notes:
- The SMS app must be activated from the Apps Manager. For more details, refer to the guide “Enabling the SMS App“.
- The account must be linked with one of the SMS service providers. For more details, refer to the guide “Setting up the SMS Service Provider”.
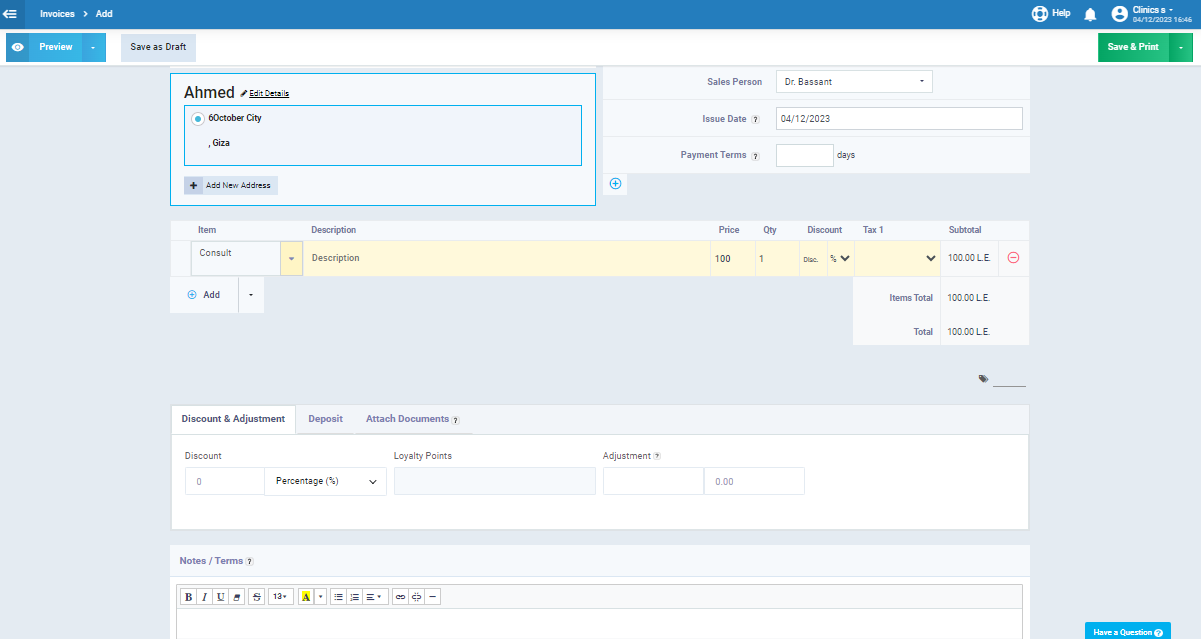
Create Invoice
Click on “Create Invoice”
You’ll be directed to the Invoice page to fill out the invoice data.
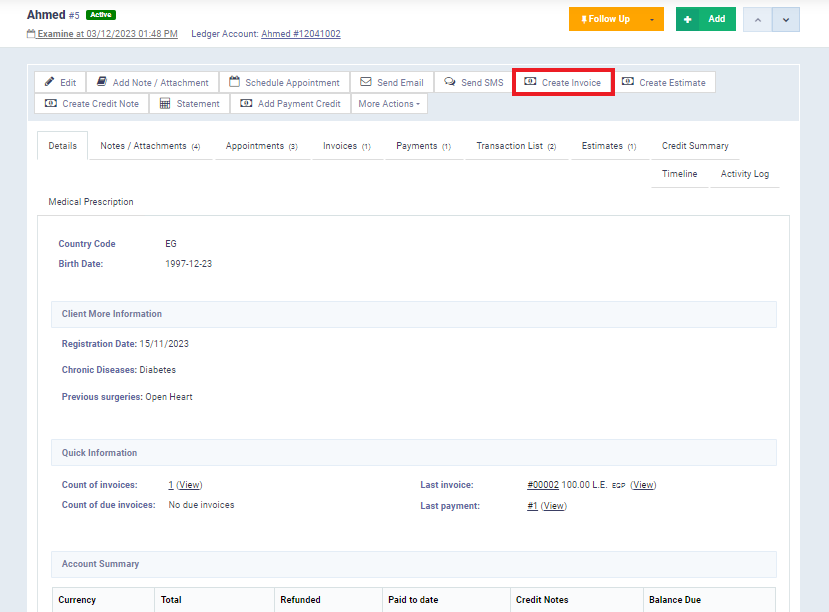
Enter the basic information, and the client for the invoice will be automatically added from the previously chosen client profile.
You can also add products/services, specify quantities, change the price if you need to change the default product price in your inventory, and select the tax applied to each product individually if needed.
Assign to a Staff Member
Daftra provides you with the ability to assign a dedicated doctor or staff member to the patient’s profile. This feature ensures seamless communication and personalized care plans.
Click on “More Actions”
From the dropdown menu select “Assign to a Staff Member”
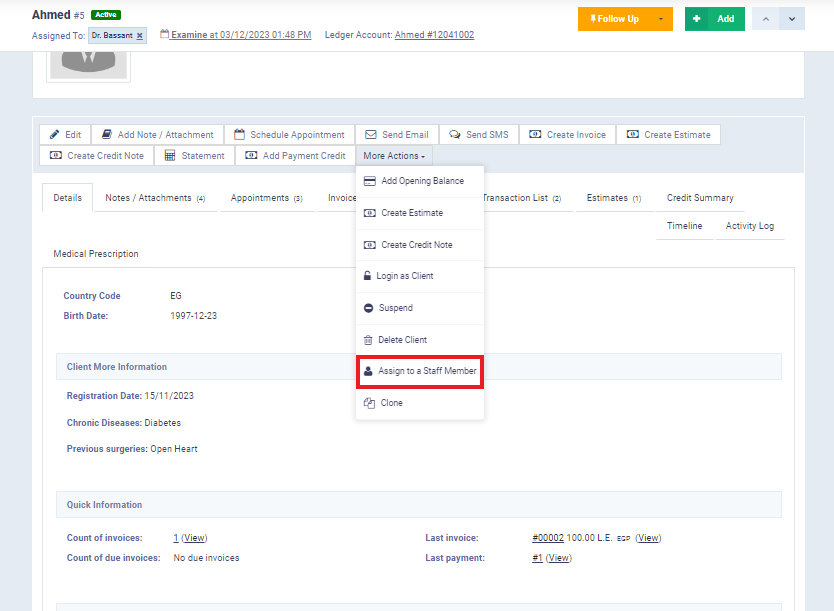
Select the responsible staff member for this patient then click “Save”
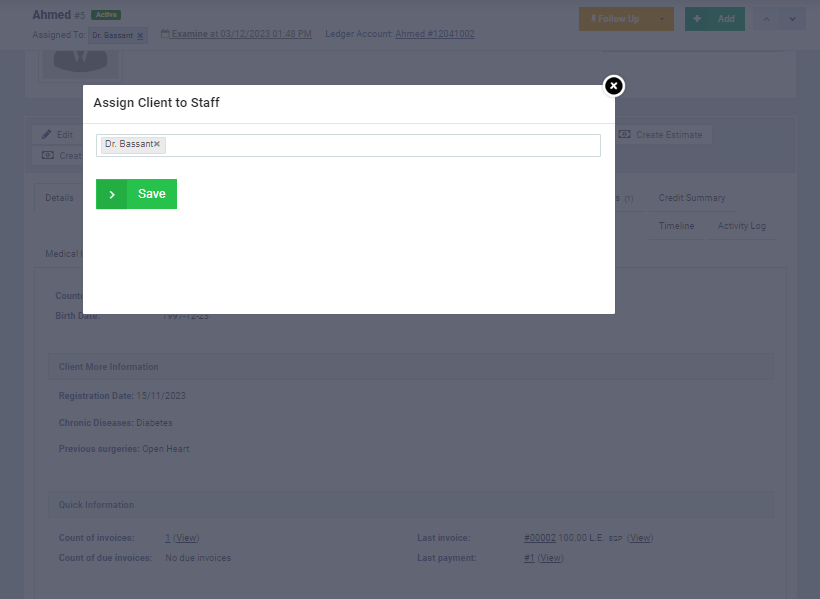
Then the staff member’s name will appear on the top left of the screen under the patient’s name.
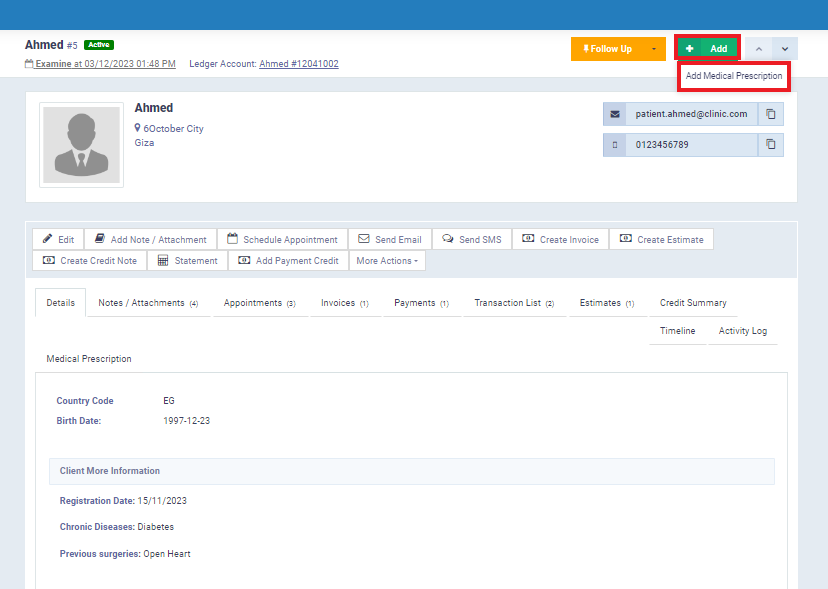
Add Medical Prescription
You can add the patient’s medical prescription to his profile so that doctors can easily follow up with him and access all of his data from one place.
Click on the “Add” button on the top right of the screen,
Click on “Add Medical Prescription”
To add a medical prescription, include some general patient information as well as the medical prescription information. Fill in the required data as shown in the following image:
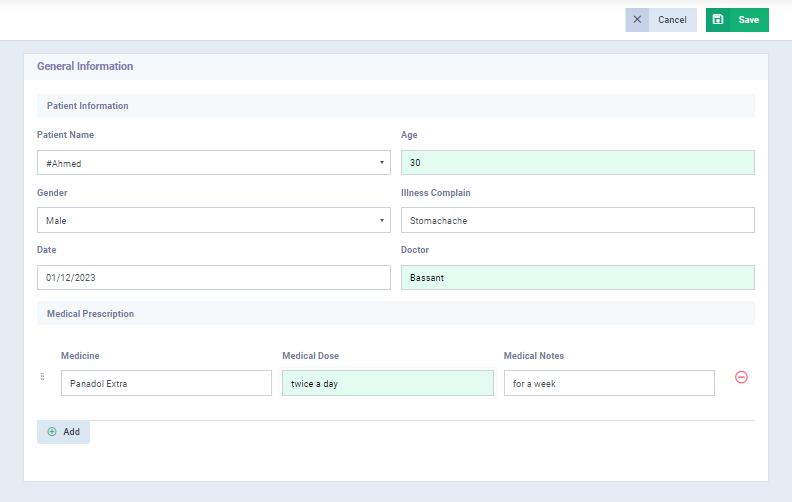
General Information
- Patient Name, Age, and Gender
- Illness Complain: What does the patient complain about or what is the patient’s disease?
- Date: The date the prescription was issued.
- Doctor: Select the doctor responsible for the case.
Medical Prescription
- Medicine: Enter the prescribed medicine name.
- Medical Dose: Specify how many times the patient should take his medicine.
- Medical Notes: Add any further notes needed.
Thus, we have covered all of the features of the Daftra software in patient management. Now, follow the steps provided in this tutorial for an effective patient management experience.