


Rental and Car Management
Daftra’s various features and services allow you to effectively manage your car rental company, from managing short and long-term rental contracts and determining their start and end dates to scheduling rental service bookings, assigning clients to one of the company’s representatives or drivers, and marketing for new deals and offers via email or SMS.
How to Add Rental Units "Cars"
To manage or add units “Cars”, from the main menu click on “Rental and Car Management“, then from the dropdown menu choose “Cars“.
All your preowned cars will be listed with their name, availability, and status as displayed in the following photo:
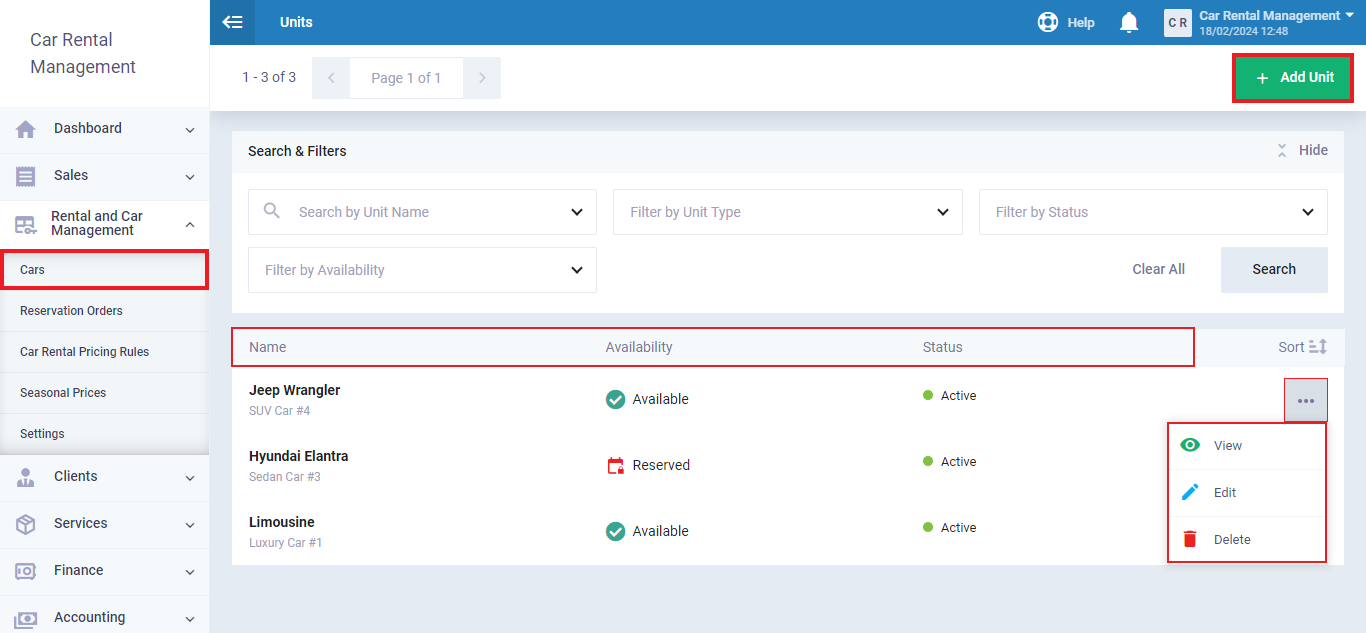
For more actions on the unit/car click on the “…” button a dropdown menu that includes view, edit, and delete will appear to choose your preferred action.
To add a new vehicle click on “+Add Unit” in the right corner of the screen.
You’ll be directed to a form where you should add all the car’s information and details as illustrated in the following photo:
Unit Information
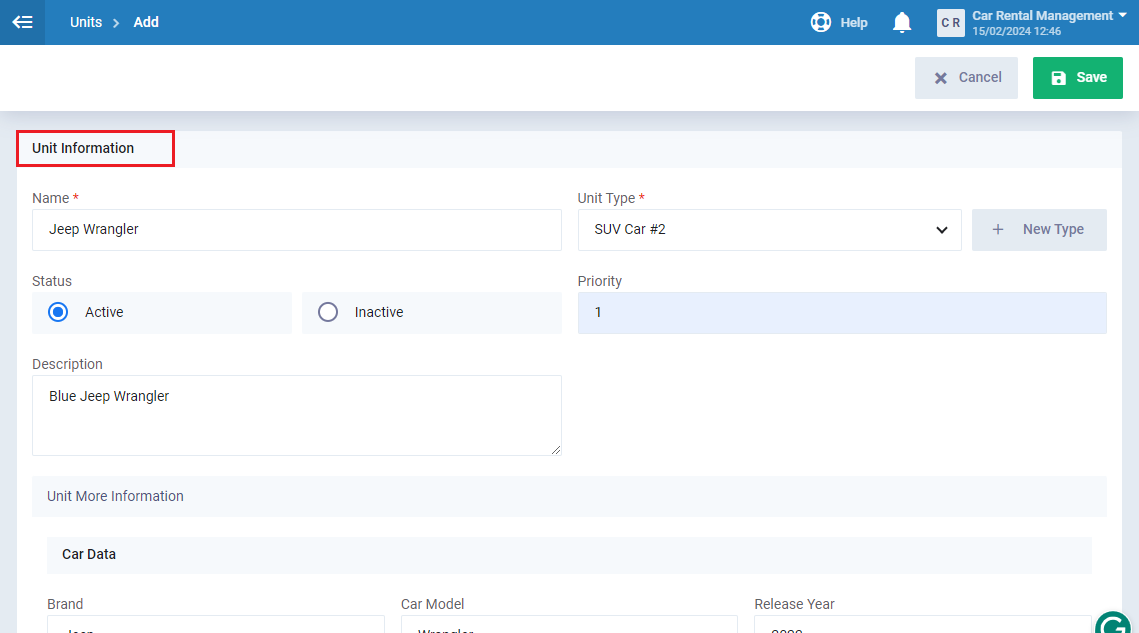
- Name: Enter the unit/car name.
- Unit Type: You should add a rental unit type so that each unit can be listed under its type.
- Status: Choose the status of the rental unit, either “Active” so you can use it in reservation/rental orders or “Inactive” to exclude it from use.
- Priority: When creating an (Automatic Reservation Order), the system selects the unit with the highest priority to rent out.
- Description: Add a description for the unit.
Car Data
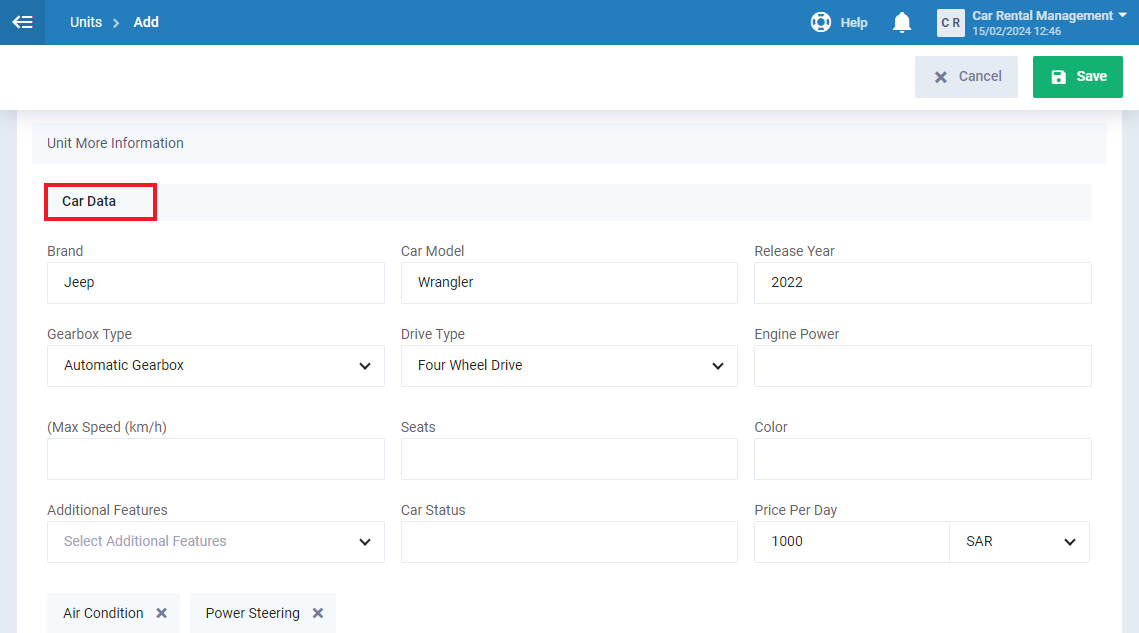
- Brand: Specify the manufacturer of the car, such as Toyota, Jeep, Honda, or BMW.
- Car Model: Indicate the specific model of the car, such as Camry, Wrangler, Civic, or X6.
- Release Year: Provide the year the car was manufactured.
- Gearbox Type: Choose the gearbox type, whether it’s automatic or manual.
- Drive Type: Specify the drive type, such as front-wheel drive, or four-wheel drive.
- Engine Power: Enter the engine power in horsepower (hp), indicating the strength of the car’s engine
- Max Speed: Note the maximum speed the car can achieve.
- Seats: Specify the number of seats in the car.
- Color: Indicate the color of the car.
- Additional Features: List any extra features the car may have, such as GPS navigation, air conditioning, sunroof, or power steering.
- Car Status: Specify whether the car is new, used, or certified pre-owned.
- Price Per Day: Enter the rental price per day for the car.
How to Add Reservation Orders
A reservation order is the action taken to reserve/rent any of your cars to any of your clients. In Daftra, there are two types of reservation orders: Automatic reservation orders and Manual reservation orders. Both are explained below.
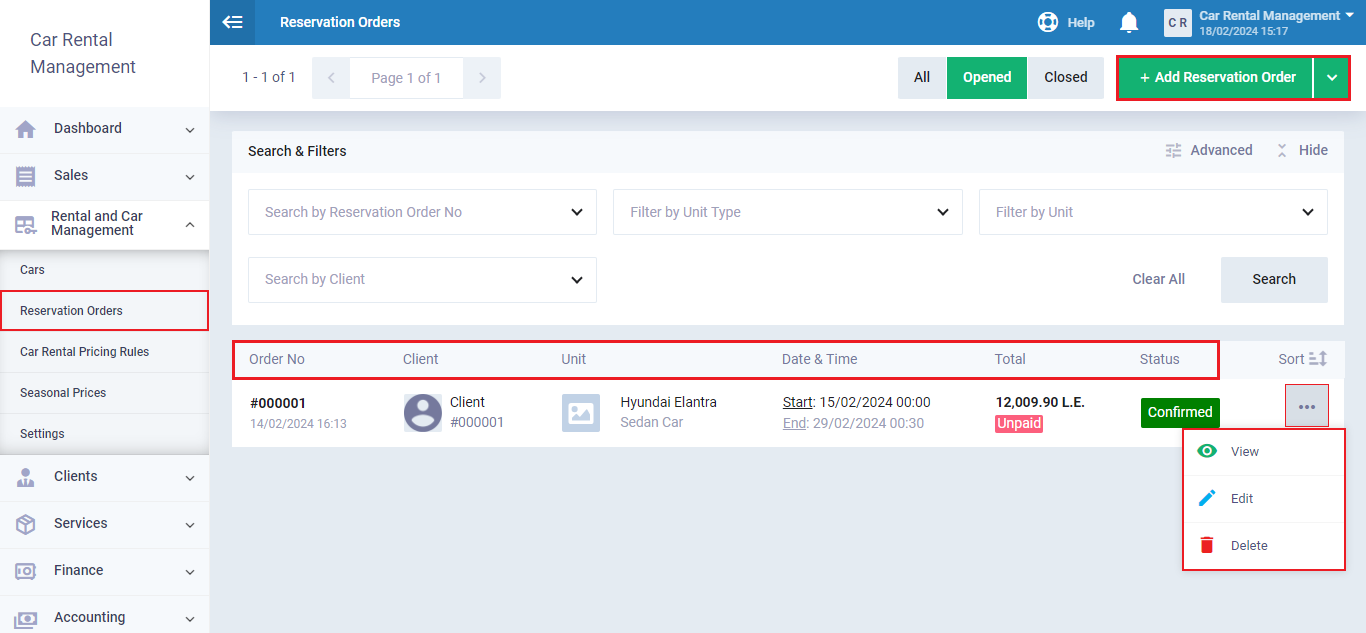
From the main menu click on “Reservation orders” in the dropdown menu under “Rental and Car Management“.
All reservation orders will be listed alongside the order number, client, unit, date & time, total, and status. To act on an already reserved order click on the “…” button and choose between (View – Edit – Delete).
Adding an Automatic Reservation Order
To create an automatic reservation order, follow the steps below:
- Select “Rental and Unit Management” from the main menu.
- Choose “Reservations Orders“.
- Click on the arrow next to the “Add Reservation Order” button and choose “Add Automatic Reservation Order”.
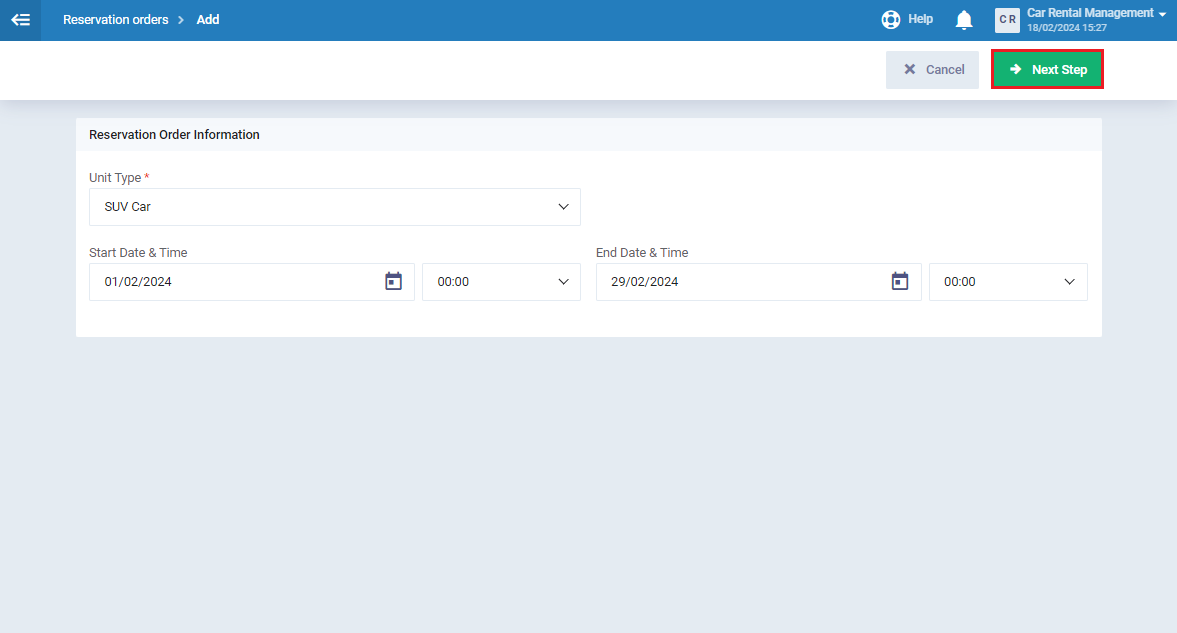
- Add the reservation order details as follows:
- Unit Type: Choose the unit type to be booked/rented.
- Start Date: Specify the start date of the booking/rental of the unit.
- End Date: Specify the end date of the booking/rental of the unit.
- Click on the “Next Step” button.
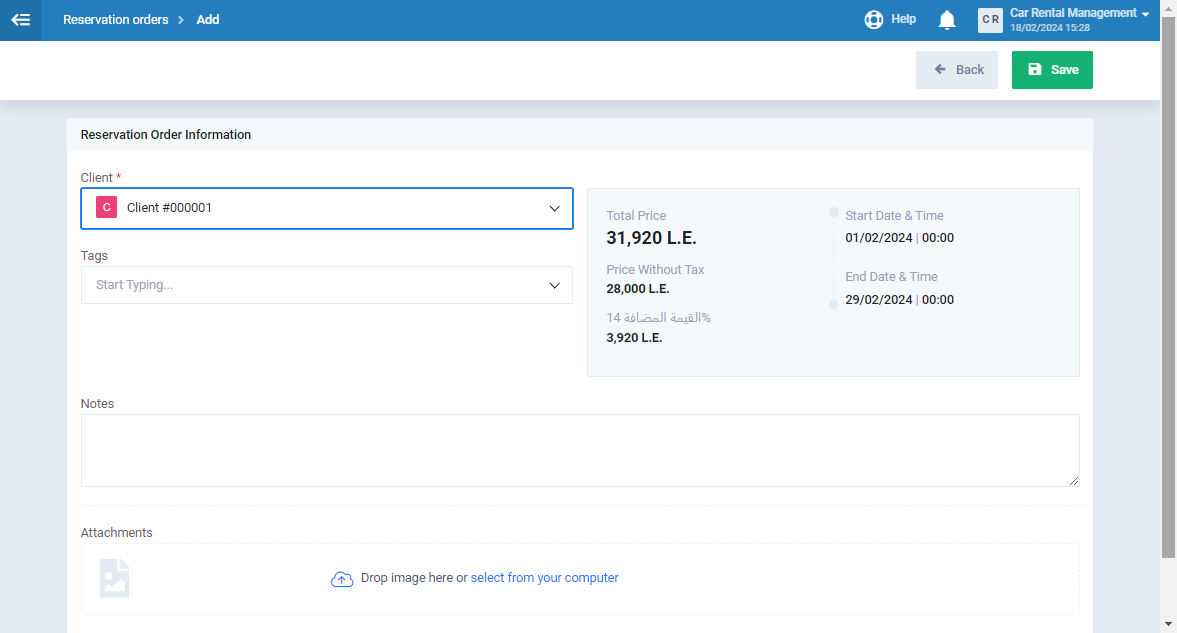
- Complete filling out the reservation order details:
- Client: Choose the client who will book/rent the unit.
- Tags: Add descriptive tags to facilitate access to the reservation order.
- Notes: Add your notes on the reservation order.
- Attachments: Add any attachments related to the reservation order.
- The total price of the booking order, the start date and time, and the end date and time will appear on your screen.
- Click on the “Save” button.
Creating a Manual Reservation Order
To create a manual reservation order, follow the steps below:
- Select “Add Manual Reservation Order“.
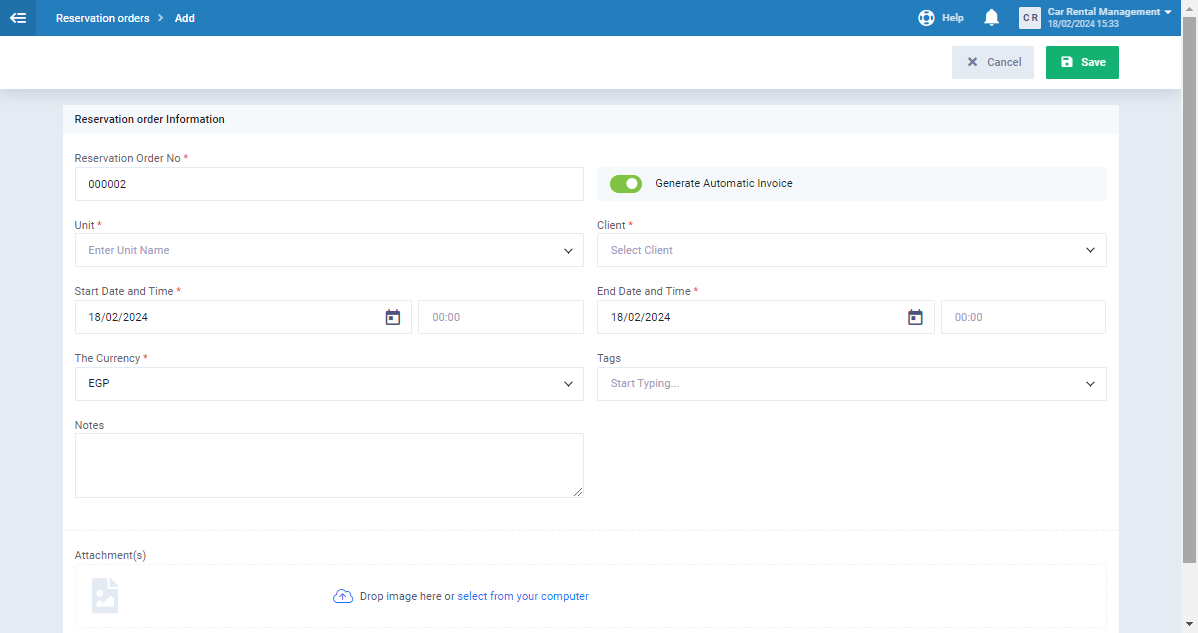
- Add the reservation order details as follows:
- Reservation Order Number: An automatic serial number is created for the reservation order.
- Generate Automatic Invoice: You have the option for the system to automatically generate an invoice upon creating the reservation order or not.
- Unit: Choose the unit to be rented.
- Client: Choose the client who will rent the unit.
- Start Date and Time: Specify the start date and time of the rental.
- The Currency: Select the rental price currency.
- Tags: Add tags that help you quickly access the booking order.
- Notes: Add your notes on the reservation order.
- Attachments: Add attachments to the reservation order, up to a maximum of 5 MB.
- Click the “Save” button.