


Point Of Sales Guide (POS)
Daftra stands out as a comprehensive solution, providing a versatile Point of Sale (POS) system that can handle both online and offline operations. The system was created specifically to streamline and improve the management of retail stores and shops, offering a robust and user-friendly platform for businesses of all sizes.
Opening a New POS Session
If you already have an opened session Click on “Start Selling” and you’ll automatically be directed to the opened session.
If you don’t have an opened one click on “Start Selling” and choose “Shift” and “POS Device” then click “Confirm”
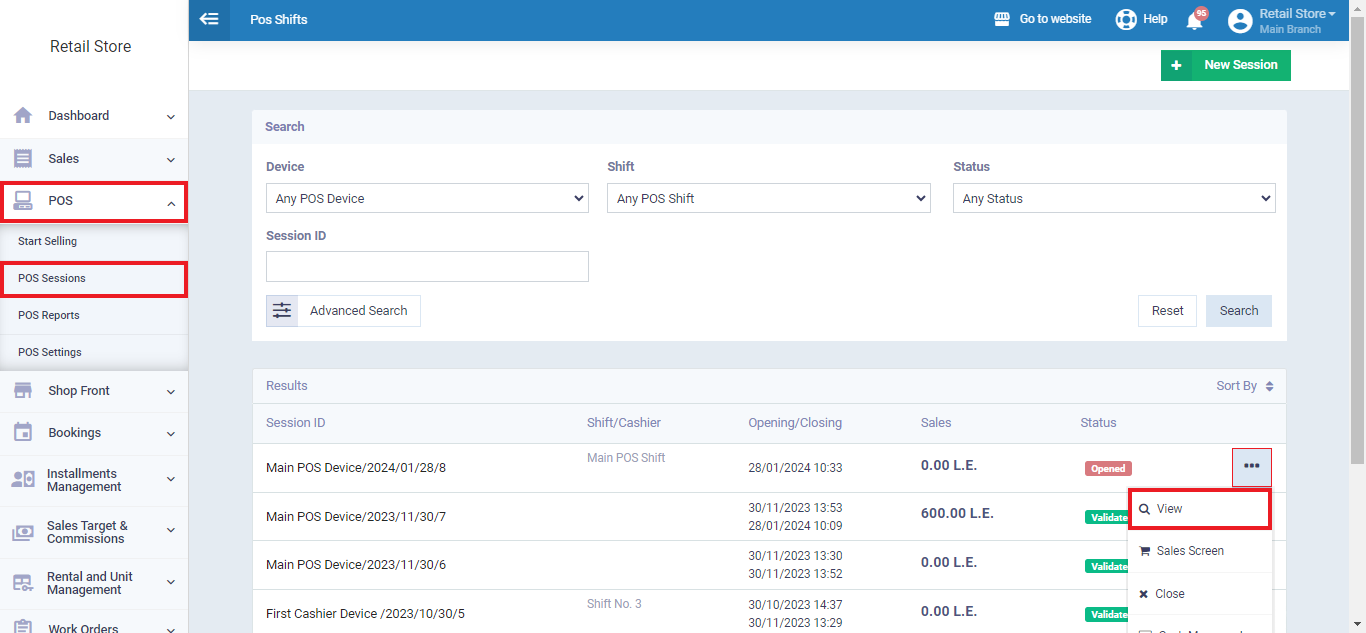
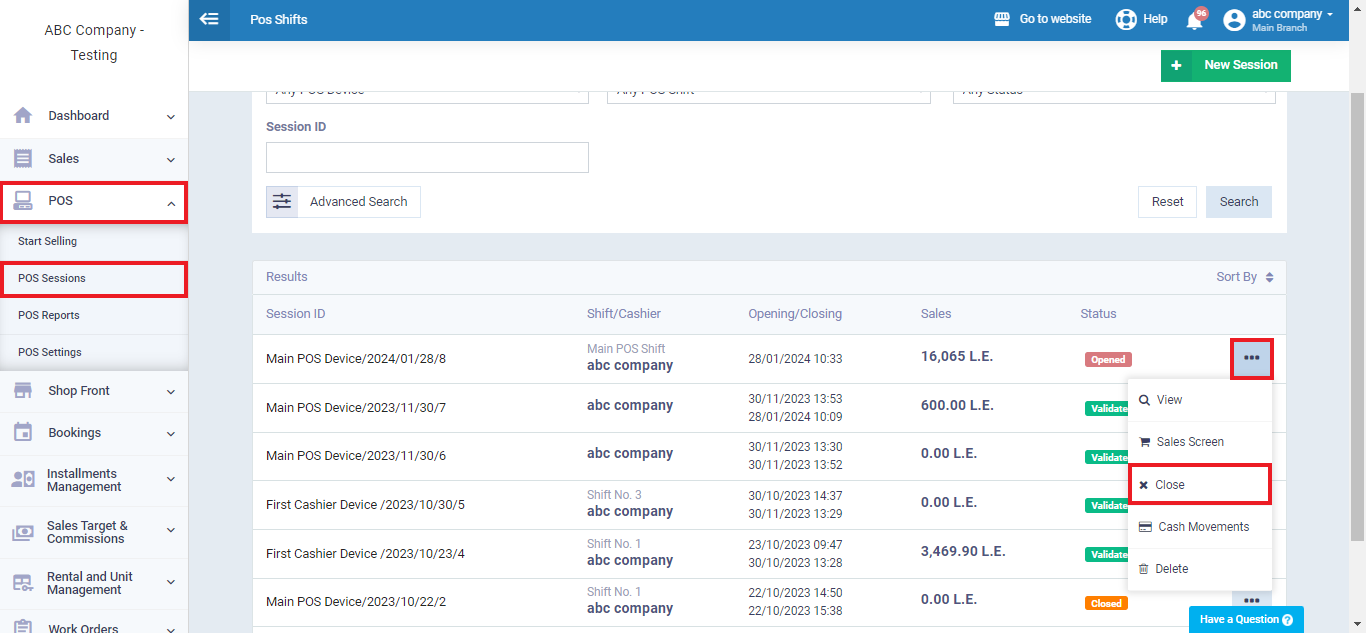
To view previous sessions list click on “POS Sessions” in the dropdown menu of “POS” in the main menu.
You’ll find all sessions listed with each one’s session ID, shift/cashier, opening and closing time and date, sales, and status.
To view the session’s details click on the box on the right side of the session then select “View“.

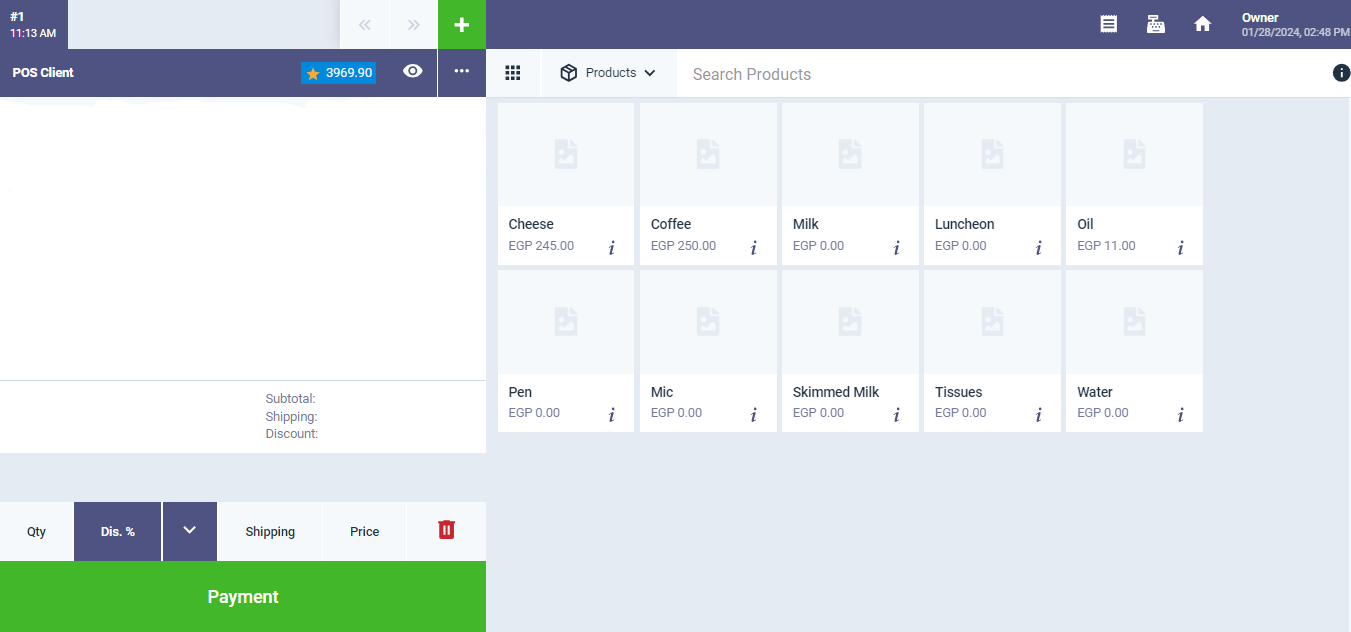
You’ll be directed to the sales screen.
You can choose any of the items displayed on the right side of the screen, regardless of the tracking type.
For example, suppose you own an electronics store and have a customer who wants to buy a mobile and headphones. Mobiles are tracked in the system by serial number, therefore when you pick a mobile item, a floating screen will display asking you to enter the serial number. While headphones are tracked by quantity, they will be added to the left side of the screen.
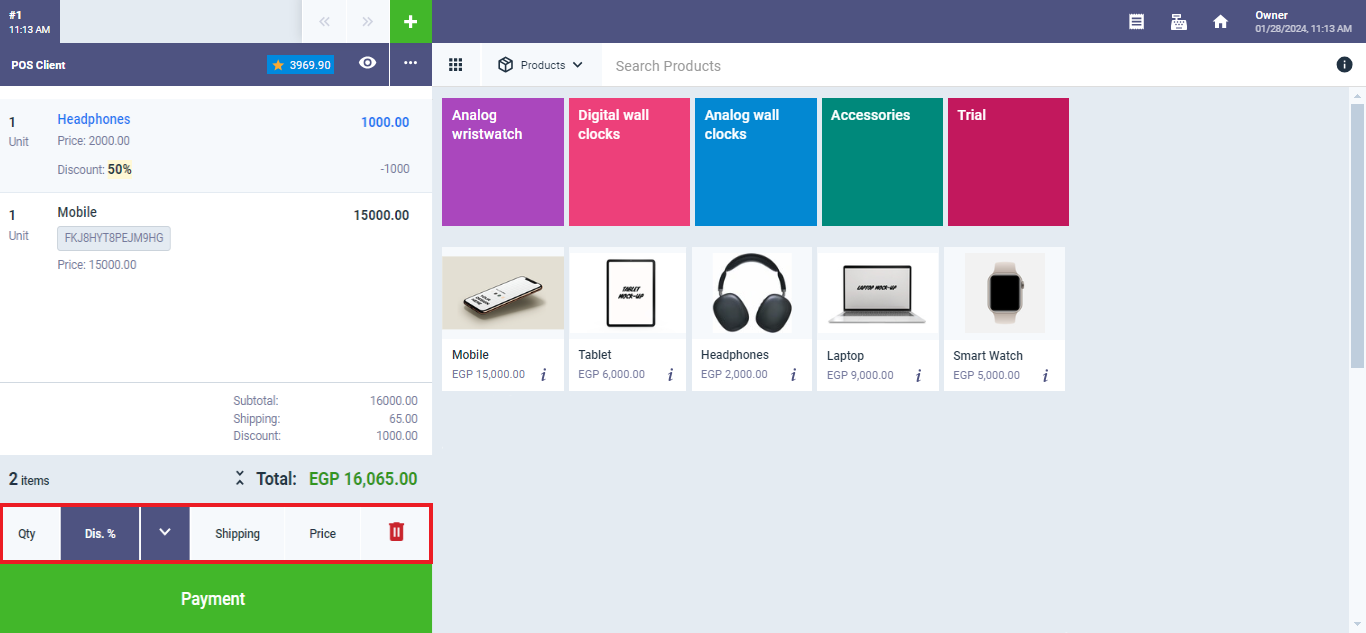
From the bottom of the page, there are four options which are:
- Quantity: To control the quantity of each item.
- Discount: Apply a discount to the invoice (specific amount or percentage).
- Shipping: Select a shipping method with costs.
- Price: The item’s pricing.
Payment
To complete the customer’s purchase click on “Payment“, you’ll then be directed to the payment screen.
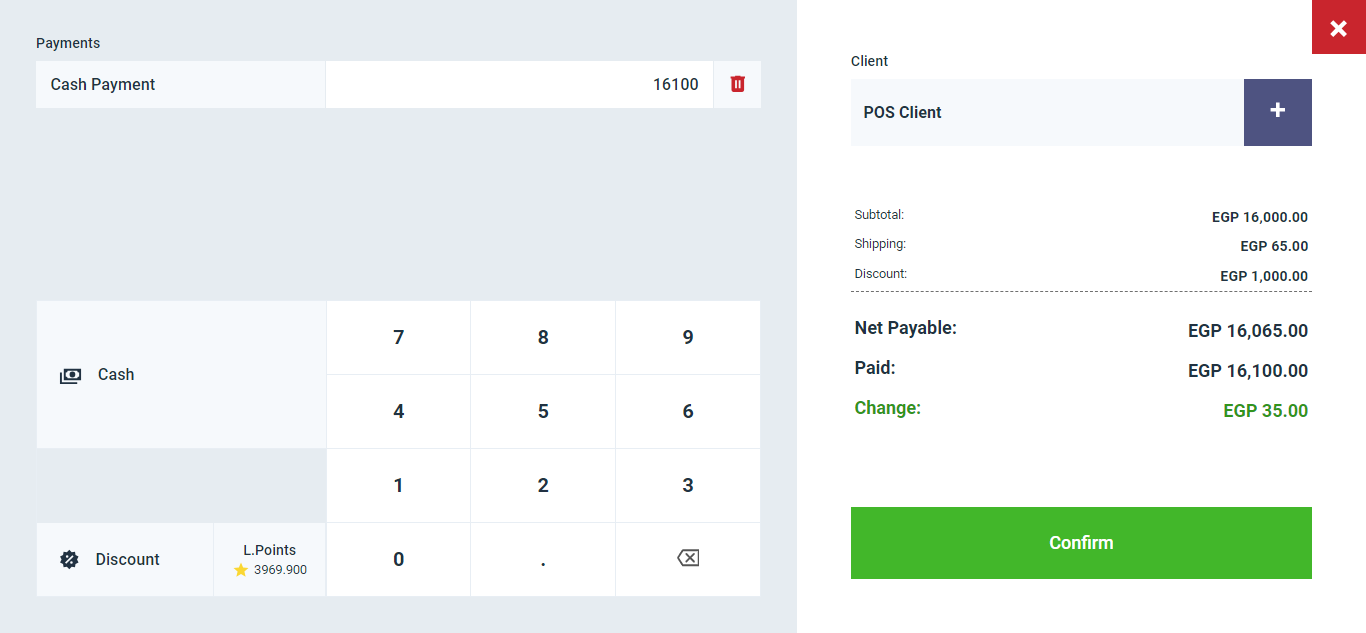
You’ll find the purchase details stated alongside the shipping fees and discounts
Enter the amount required from the customer and check if the customer paid accurately or requires a change
Then click “Confirm”.
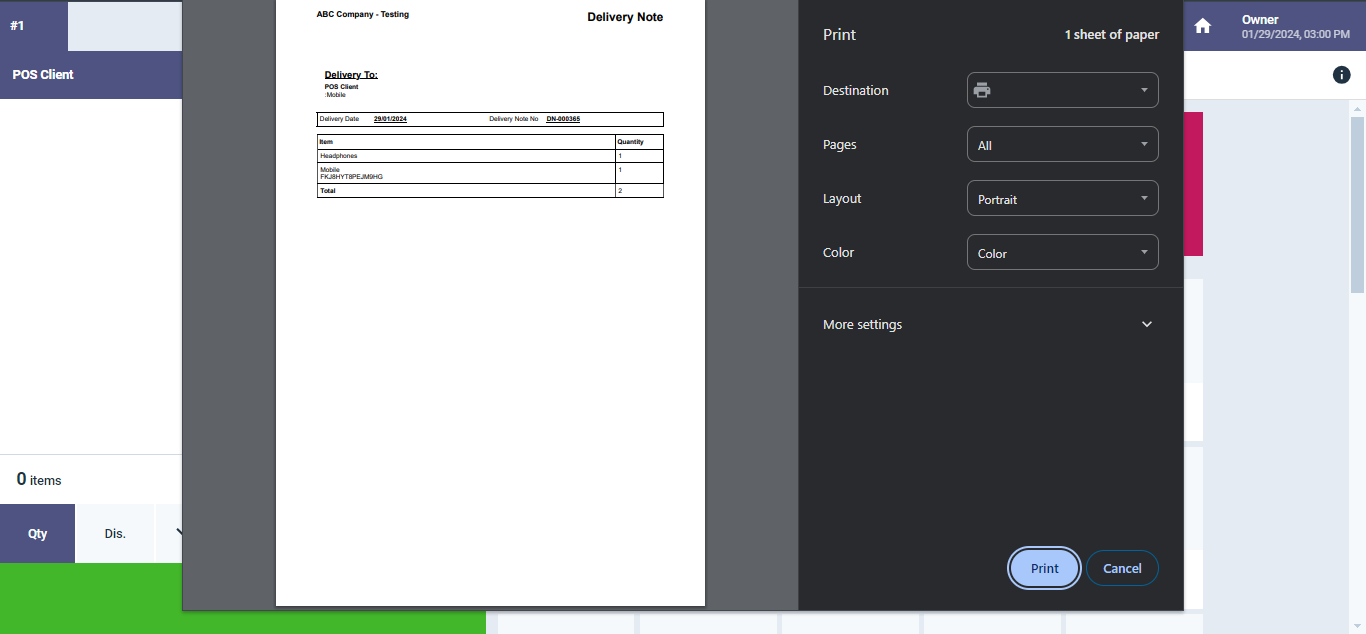
The last step in the purchase is to print the receipt through the following screen which will appear automatically after completing the payment process.
Close the POS Session
From the main menu click on “POS”.
Choose “POS Sessions” from the menu.
Click on the button on the right side of the session you wish to close.
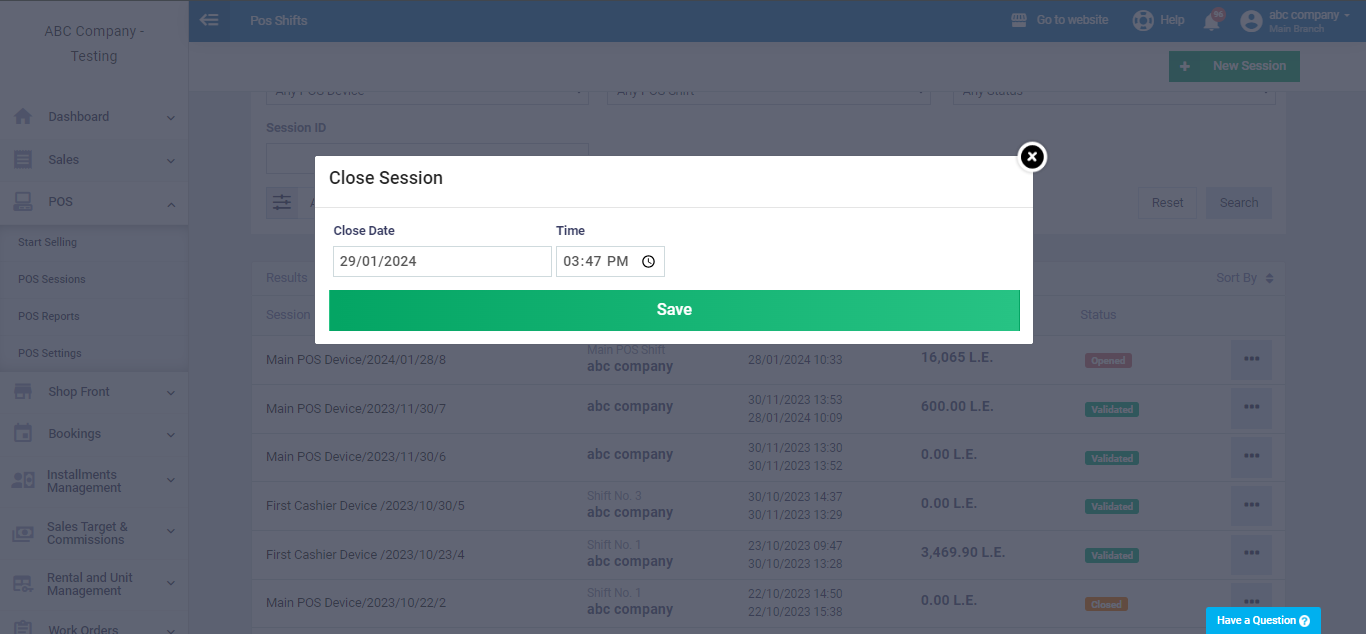
Set the date and time of closing the session as follows
-
- Close Date: set the closure date of the session.
- Time: set the closure time of the session in hours and minutes.
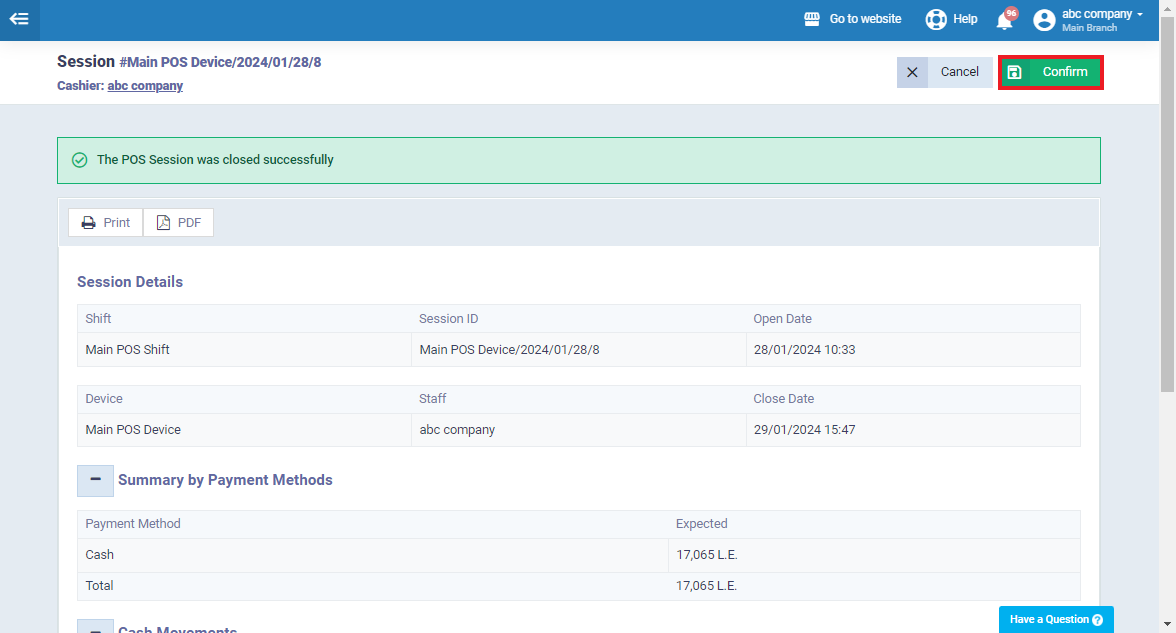
The software will display to you a summary of the session.
Click on the “Confirm” button.
Offline POS App
Daftra offers a desktop application that can operate without an internet connection. The application generates regular invoices and functions as a quick POS system. After returning to the main screen of the desktop application and reviewing your invoices, you need to transfer them to your cloud system in Daftra to adjust the records and document the sales transactions.
To download the app click on “POS Settings” from the dropdown under “POS” in the main menu,
Select “Desktop Application“, then click on “Download Software for Windows“.
