Routing a Treasury to a Specific Account in the Chart of Accounts
The system allows you to add a new account within the Chart of Accounts dedicated to specific cash treasury transactions. You can then link this treasury to the account you created earlier, helping you track all related cash transactions in an organized manner and ensure they are accurately recorded under the correct account.
Creating the Account in the Chart of Accounts
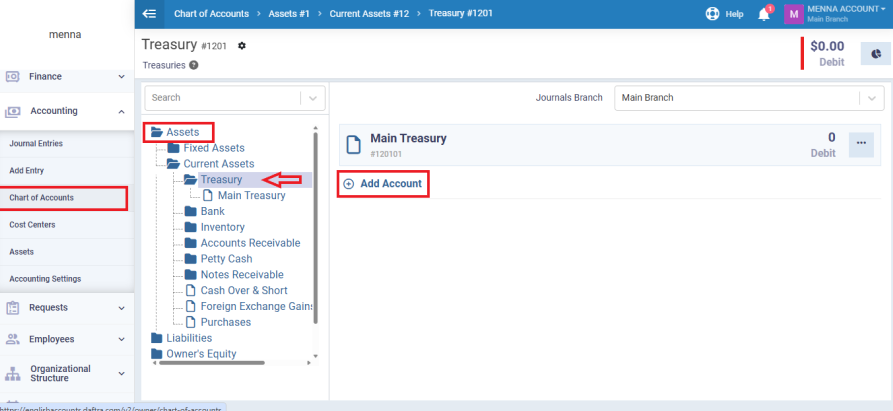
From the main menu, go to the “Accounting” section and select “Chart of Accounts”.
Select “Assets”, then press on “Current Assets”.
Under the main Treasury account, create a new sub-account for the desired treasury by clicking “+ Add Account”.
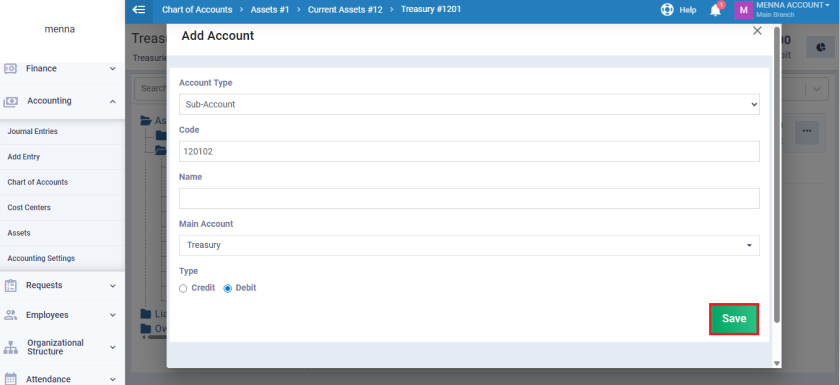
Enter the account details, then click “Save”.
Enabling Account Routing for Treasuries
Before creating the treasury, you must first enable Account Routing for each treasury individually so it can be linked to the correct account in the Chart of Accounts.
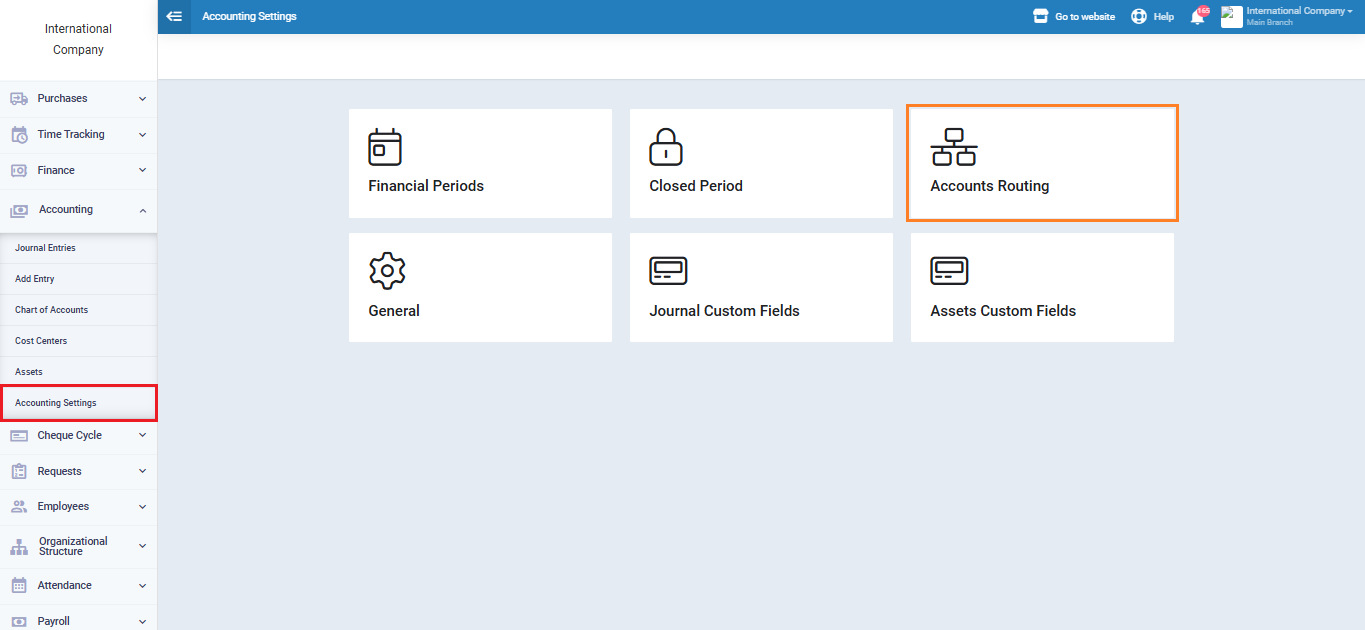
Go to “Accounting”, select “Accounting Settings”. From the settings list, press on “Account Routing”.
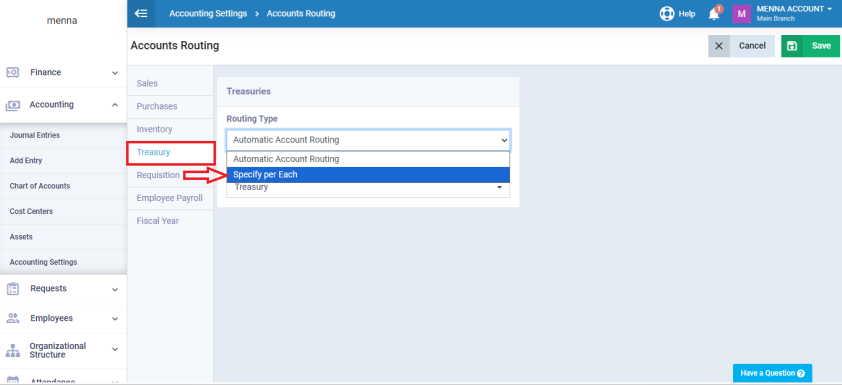
From the side menu, go to “Treasury” and choose “Specify per Each” option.
Click “Save” to enable the setting.
Adding the Treasury and Linking it to the Account
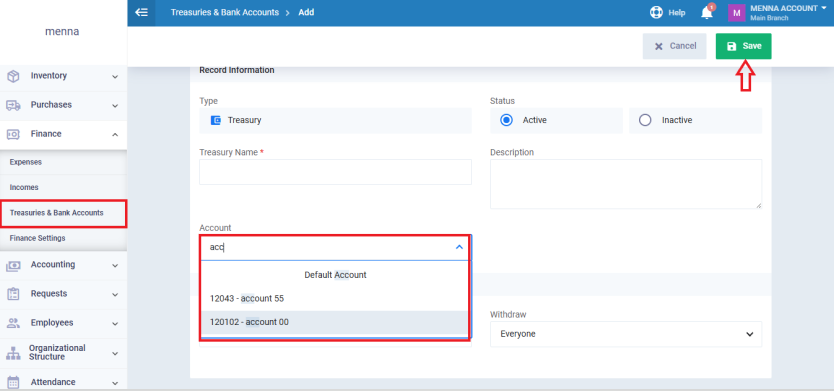
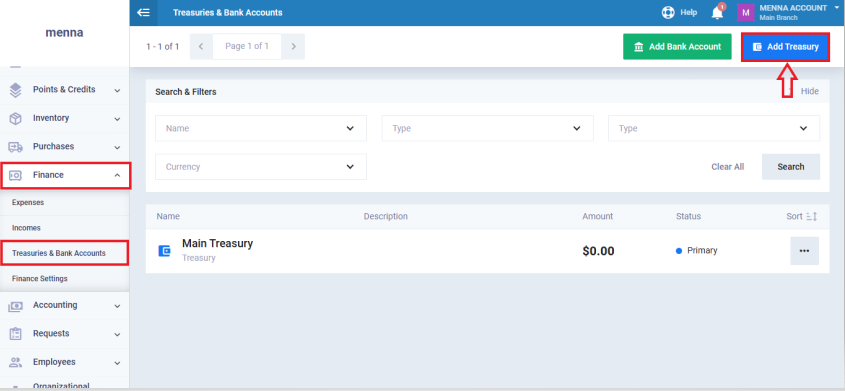
From the Main menu, go to “Finance”, then click “Treasuries & Bank Accounts”.
Click “Add Treasury”.
Enter the required treasury details, then in the “Account” field, search for the account you previously created in the Chart of Accounts and assign it to this treasury.
Once done, click “Save” to confirm adding the treasury.
