


Printing Orders
Daftra provides a workflow for printing and advertising orders that will assist you in managing and organizing each task by gathering all necessary information in one place and changing the status of the order for easy tracking of each job.
A printing order provides detailed instructions for each job. They facilitate clear communication, task assignment, and resource planning. Work orders also aid in production scheduling, quality control, cost estimation, and client approval. Additionally, they contribute to documentation and traceability, ensuring efficient workflow management and successful project outcomes.
How to add a New Printing Order
To add a new “Printing Order” follow these steps:
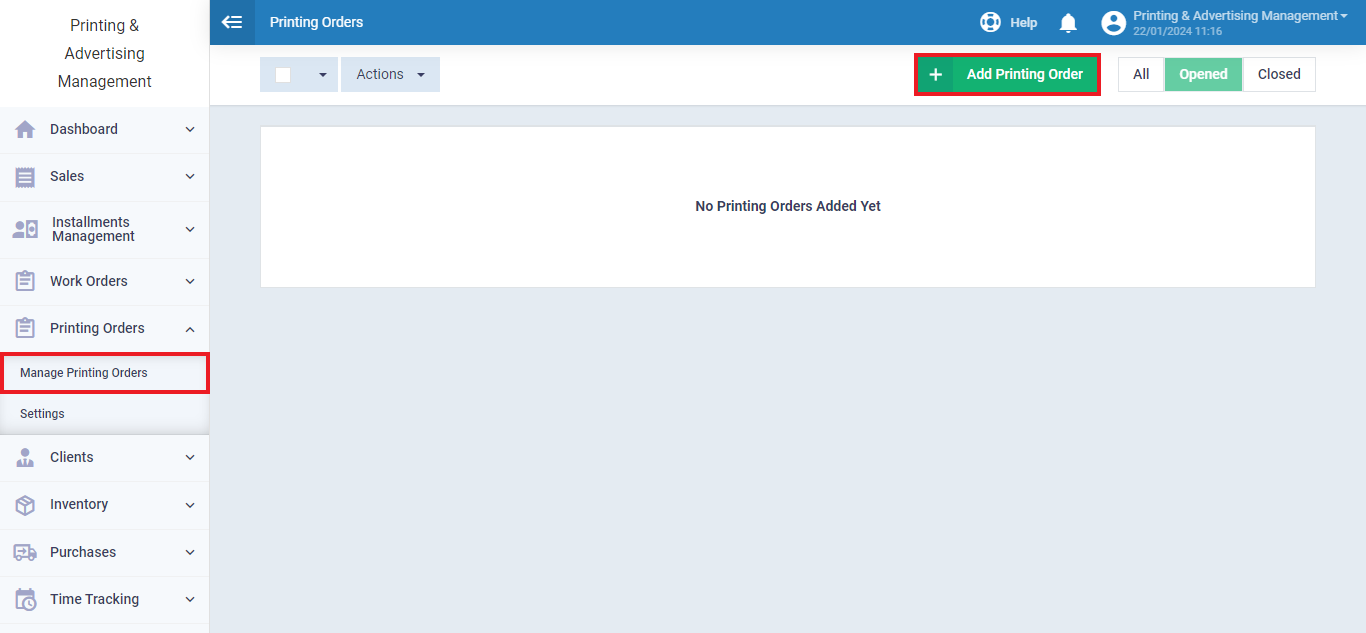
From the main menu click on “Printing Orders” then from the dropdown menu select “Manage Printing Orders”
You’ll be directed to the page shown in the following image, click on “+Add Printing Order“.
General Information
The printing order includes various sections each requiring different info. The first section is the “General Information” and it requires general details about the client, the order’s duration, and other info stated in the following lines.
The required information in this section is:
- Title: Order title.
- Order Number: A code that distinguishes the client’s order. It’s automatically set in sequence, but it can be edited or the sequencing method can be changed by adjusting the “Sequential Numbering Settings“ in the account.
- Start Date: The start date of the order.
- Finish Date: The end date of the order.
- Description: Provide a general description of the nature of the printing order.
- Tags: Enter keywords about the order to assist in searching within the software.
- Assigned Employee: The employee responsible for the client’s order.
- Client: Choose a client from the list.
- Budget: Client’s payments average.
- Attachments: Attach photos or any needed documents.
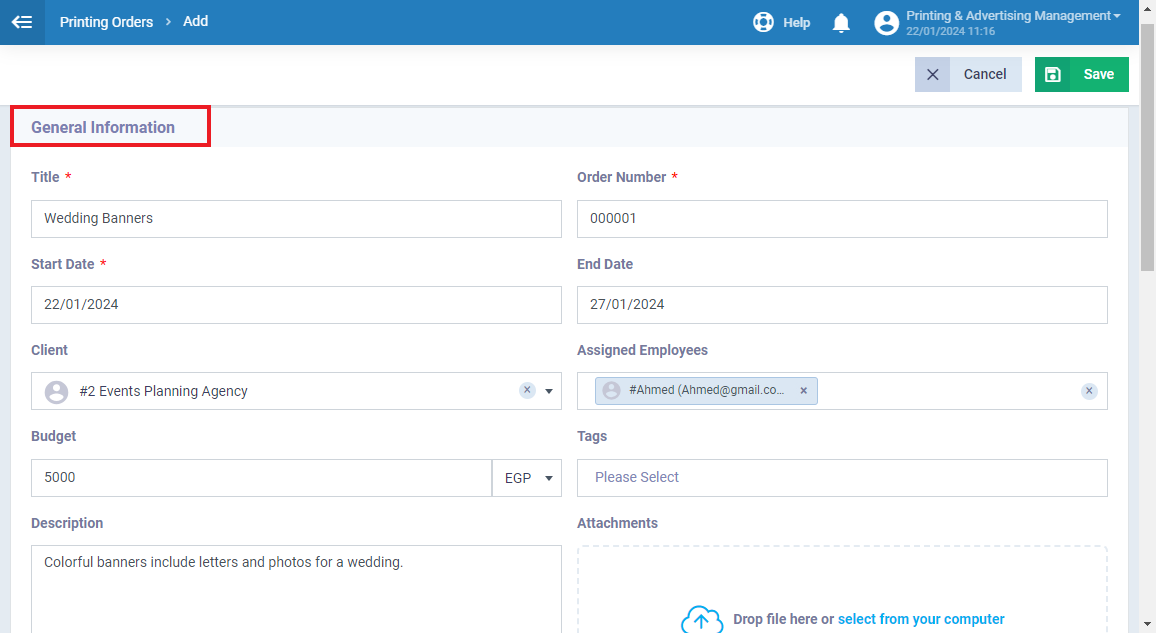
In the illustrated example the printing order is for an events planning client and their order is printed banners for a wedding with a budget of 5000 EGP. The order is assigned to the employee Ahmed.
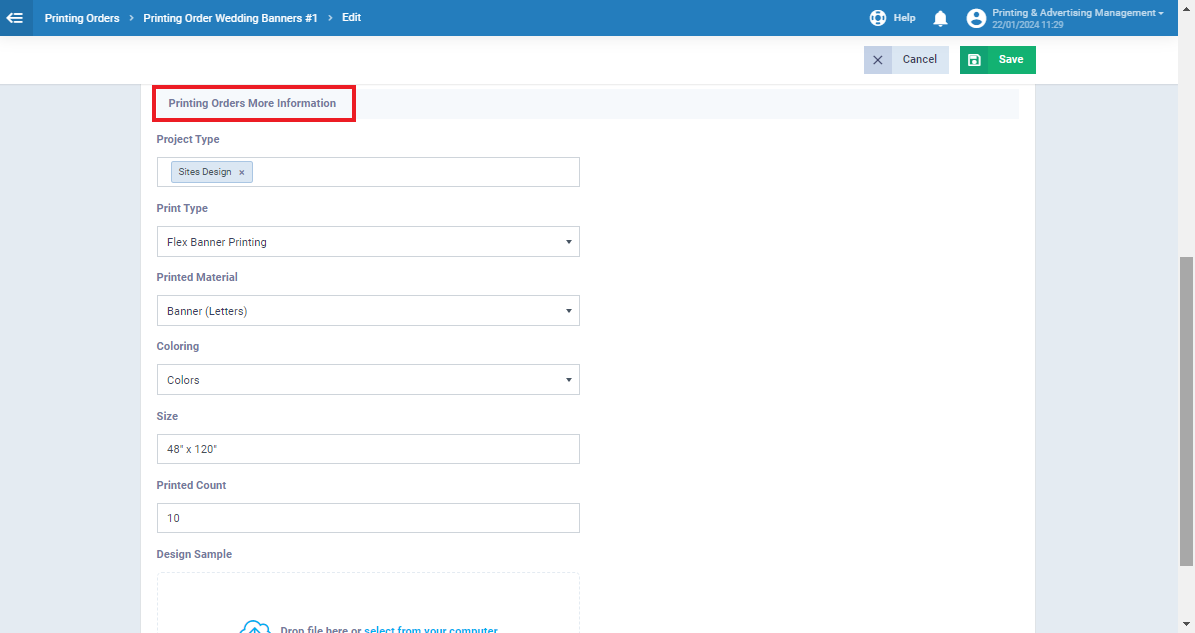
Printing Order Information
The order info involves identifying its type and preferred print method, setting the stage for effective communication. The choice of materials, coloring options, size specifications, required printed count, and a design sample collectively guide the creative process, facilitating a clear and cohesive execution of the project.
- Project Type: The type of the required project.
- Print Type: Specify the method or technology of printing.
- Printed Materials: Types of materials that will be used in the project.
- Coloring: Choose between colors or a black-and-white design.
- Size: Dimensions of the required design.
- Printed Count: Number of needed copies.
- Design Sample: Attach a preview of the final poster.
After filling in all of the required data click “Save“
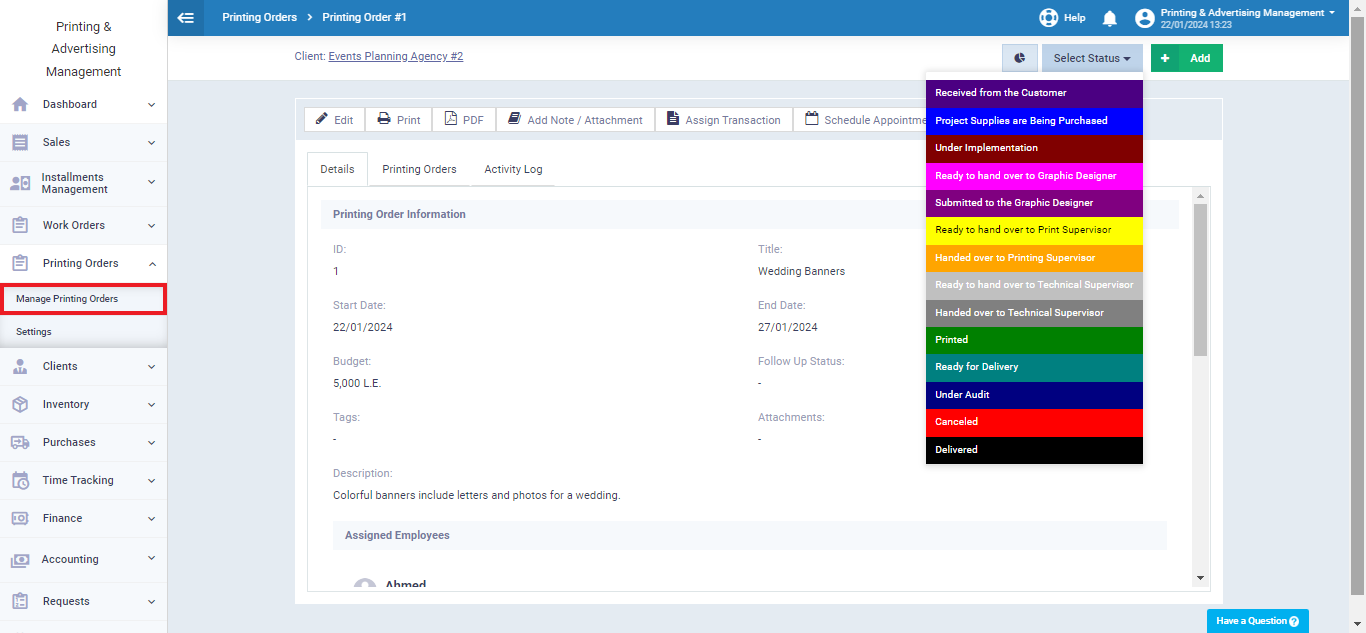
Edit Order Status
After saving the print order you can add or edit the status of the order and specify whether the order is received from the client, in progress, or printed, or you can add any status you need.
Click on “Manage Printing Orders“, then select the desired order.
On the top right of the page click on “Select Status” and choose the required status.
To edit the status list click on “Settings” from the dropdown menu of “Printing Orders“,
then click on the card “Workflow types” and then choose “Printing Orders“.
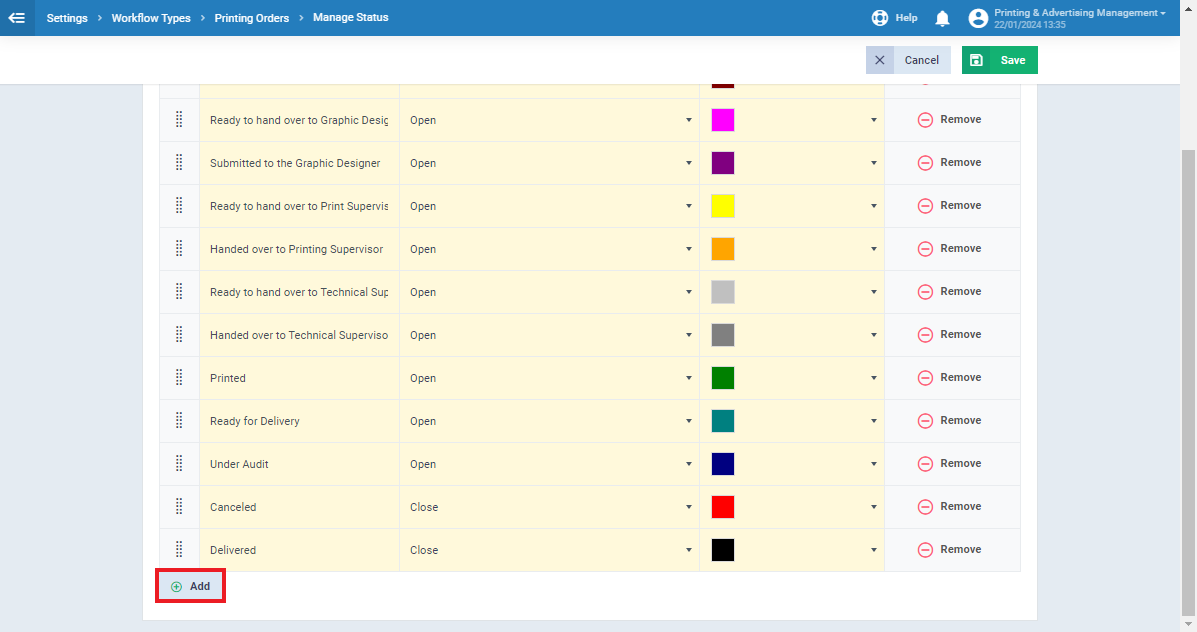
You’ll then be directed to the following page click on “Manage Statuses”
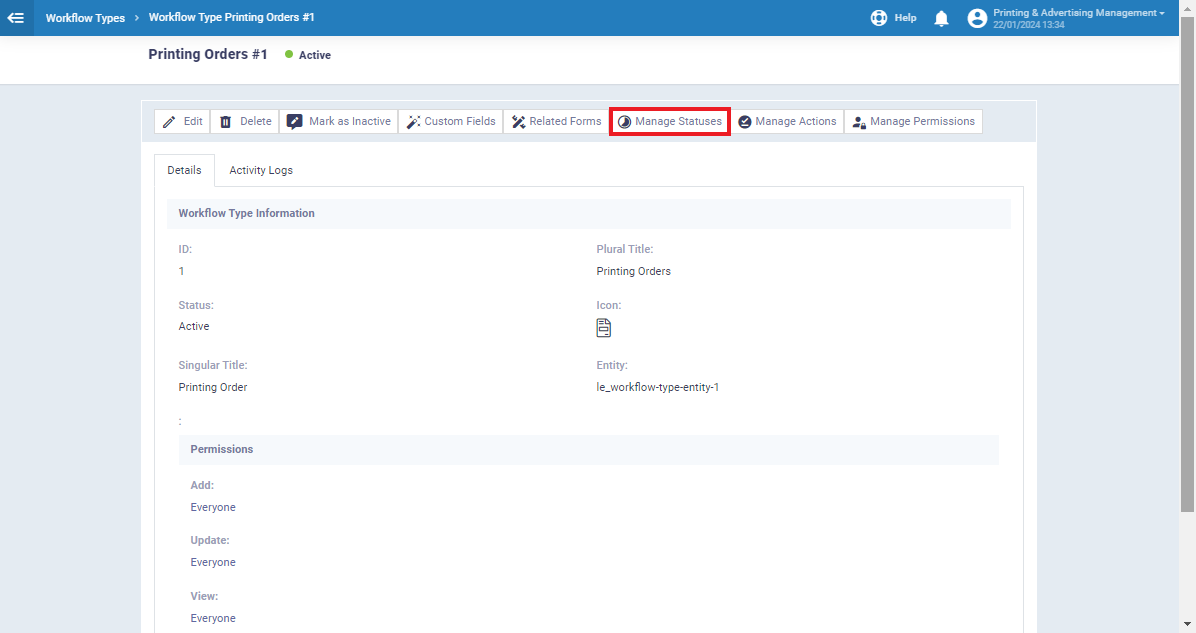
This page allows you to change the status name, color, type, or remove the status.
From the bottom of the page, click “+Add” to create a new status and select a name, type, and color from the columns.