


Installment Agreements
Daftra enables your clients to explore the convenience of installment payments when they shop online. They can break down their purchase into manageable chunks, making high-quality products more accessible to them. Daftra will also assist you in managing these installments easily using the Daftra Installment Management app.
After you create the sales invoice, follow the below steps to add an installment agreement.
How to Set-up an Installment Agreement
- From the main menu, click on “Sales”.
- Click on “Manage Invoices”.
- Click on the required invoice that you wish to add an installment agreement.
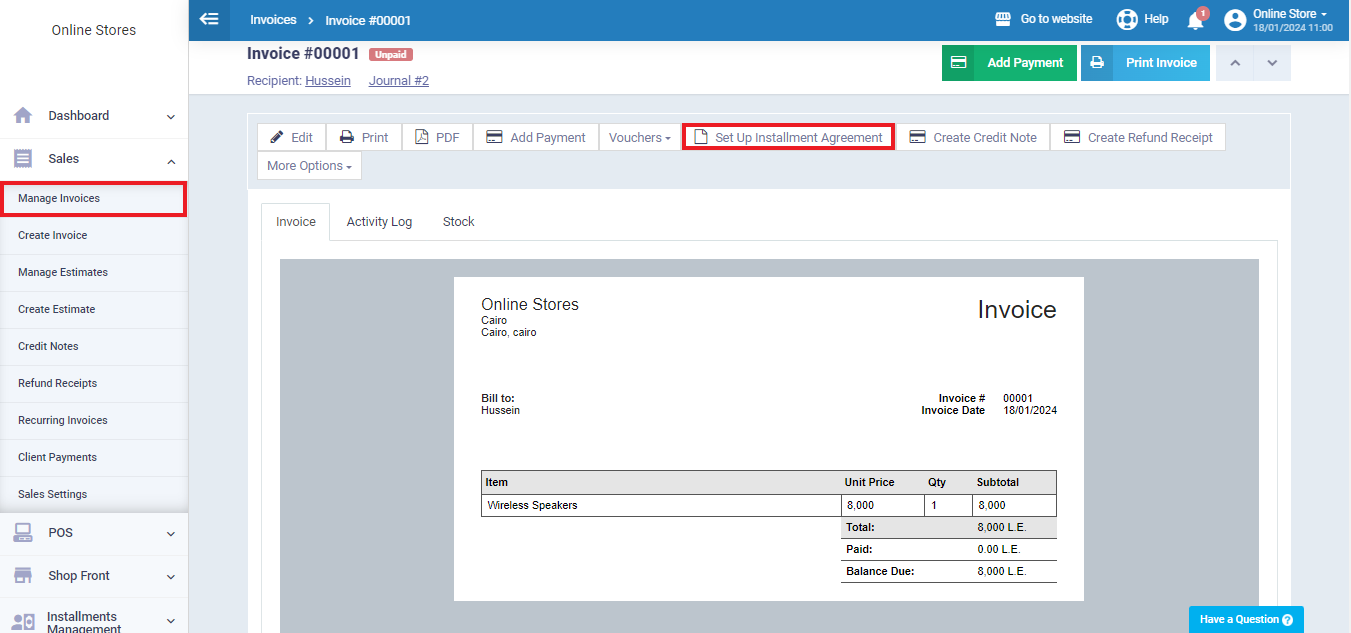
- Click the “Set Up Installment Agreement” button at the top of the invoice information.
- Enter the required data for creating the installment agreement as follows:
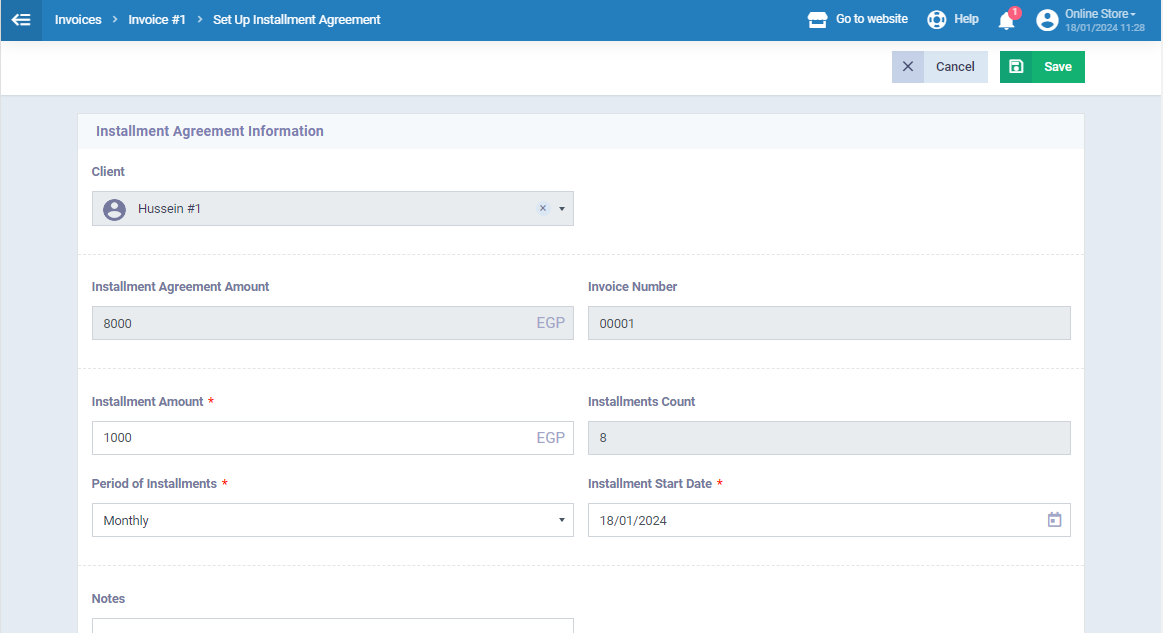
-
- Installment Amount: Enter the amount the client will pay for each installment period.
- Period of Installments: Select from the menu the installment period for the client.
- Installment Start Date: Select from the calendar when the client will start paying the installments.
- Note: the system will calculate the installment count automatically based on the installment amount and the total overdue amount for the client. At the same time, the end date will be set based on the auto-calculated installment count in addition to the installment period that you have selected.
- Notes: Enter any notes related to the installment agreement if there are any.
Click on the “Save” button.
Paying an Installment
- From the main menu, click on “Installments Management”.
- Click on “Installments”.
- Click on the installment that you want to pay.
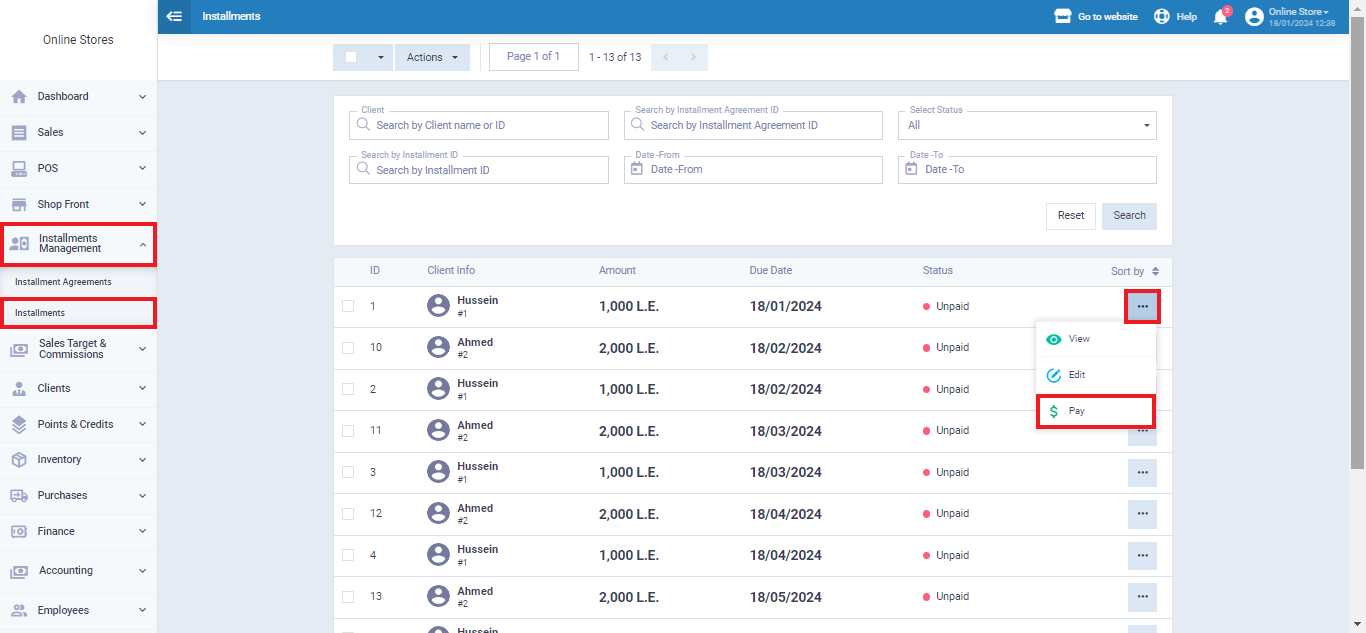
- Click on the “Pay” button.
- Enter the installment payment info as required.
- Note: for more details about adding a payment to an invoice, review the “Adding a Payment to an Invoice” guide.
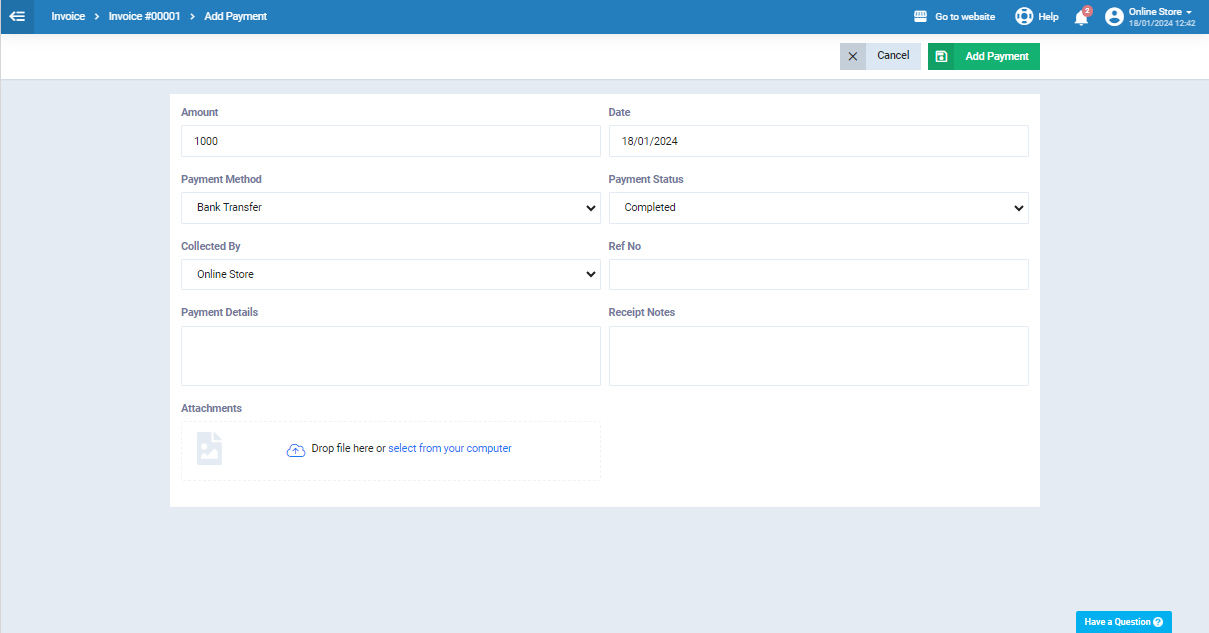
- Amount: Enter the installment amount
- Date: Add the payment date
- Payment Method: Choose from the list the client’s payment method
- Payment Status: Choose from the statuses list the current payment status
- Collected By: The amount receiver
- Ref. No.: Provide the reference number associated with the transaction.
- Payment Details: Specify any relevant payment information.
- Receipt Notes: Include any additional notes or comments related to the receipt for clarity and reference.
- Attachments: Attach any supporting documents that accompany the transaction.
Click on the “Add Payment” button.
The system will change the installment status from “Unpaid” to “Paid” add this paid amount to the invoice info and deduct it from the due amount.