Adding an Expense to a Purchase Invoice and Allocating It to Expenses
The system allows you to choose whether to record each item in the invoice under a separate account or direct the entire invoice to a single account. This flexibility helps you organize expenses and track revenues accurately, especially in businesses that include multiple types of products or services.
In this guide, we’ll go through the steps of setting up account routing, starting from creating accounts in the “Chart of Accounts”, linking them to services or products, and finally using them in purchase invoices.
Setting Up Account Routing
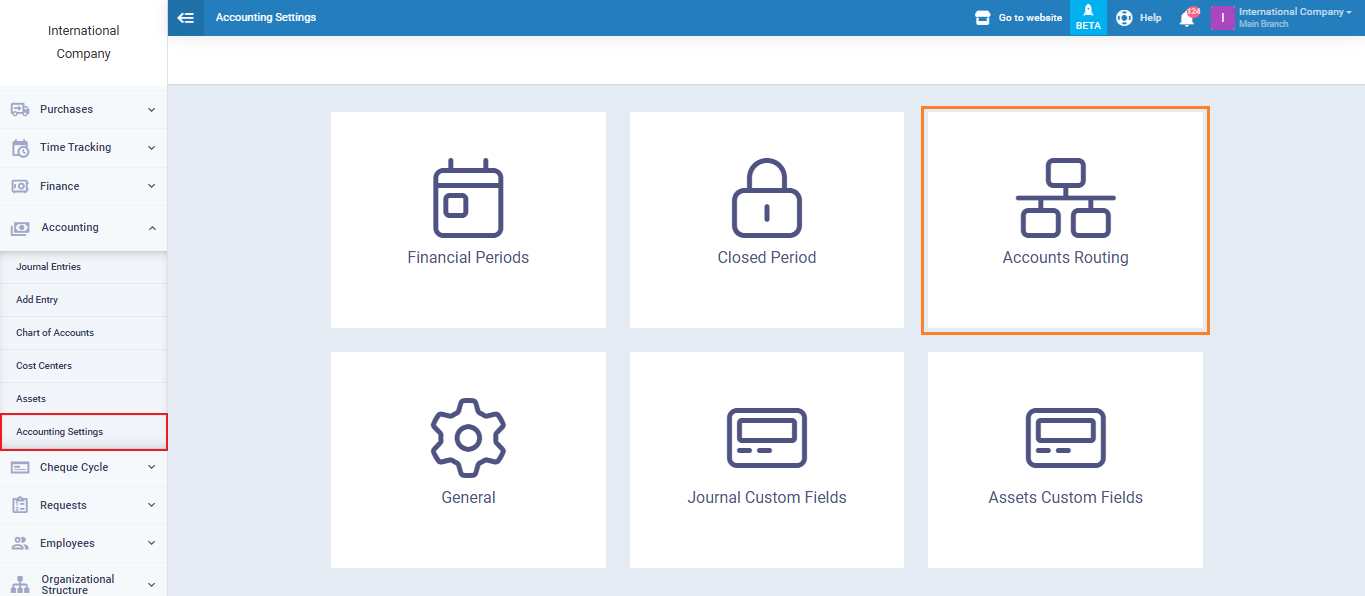
- From the main menu, click on “Accounting“.
- Select “Accounting Settings“.
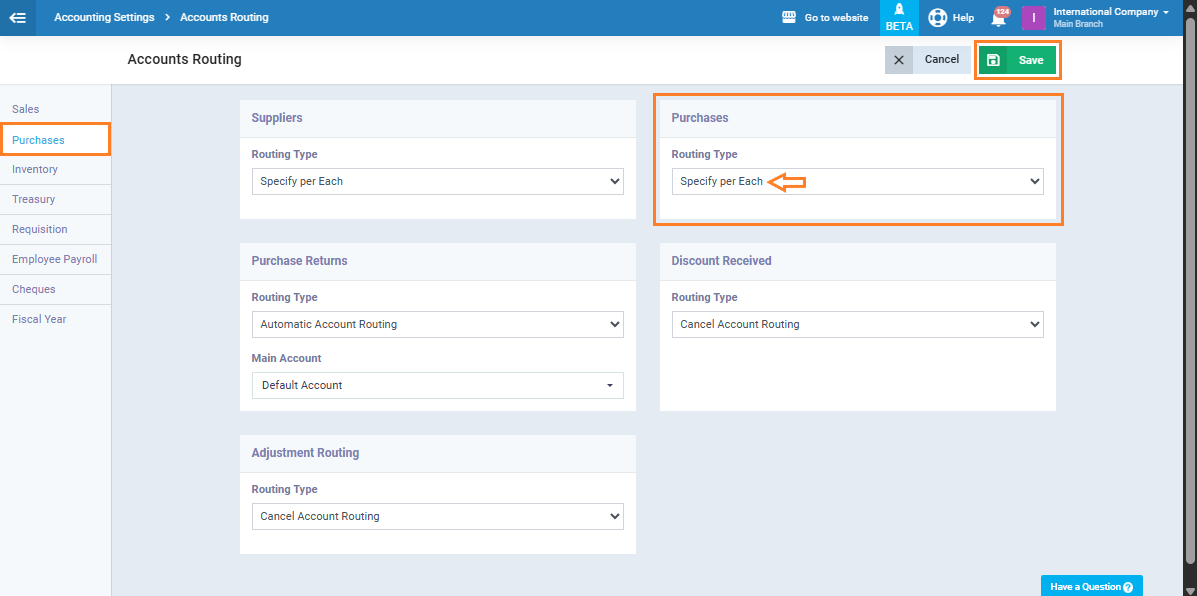
- Click on “Accounts Routing“.
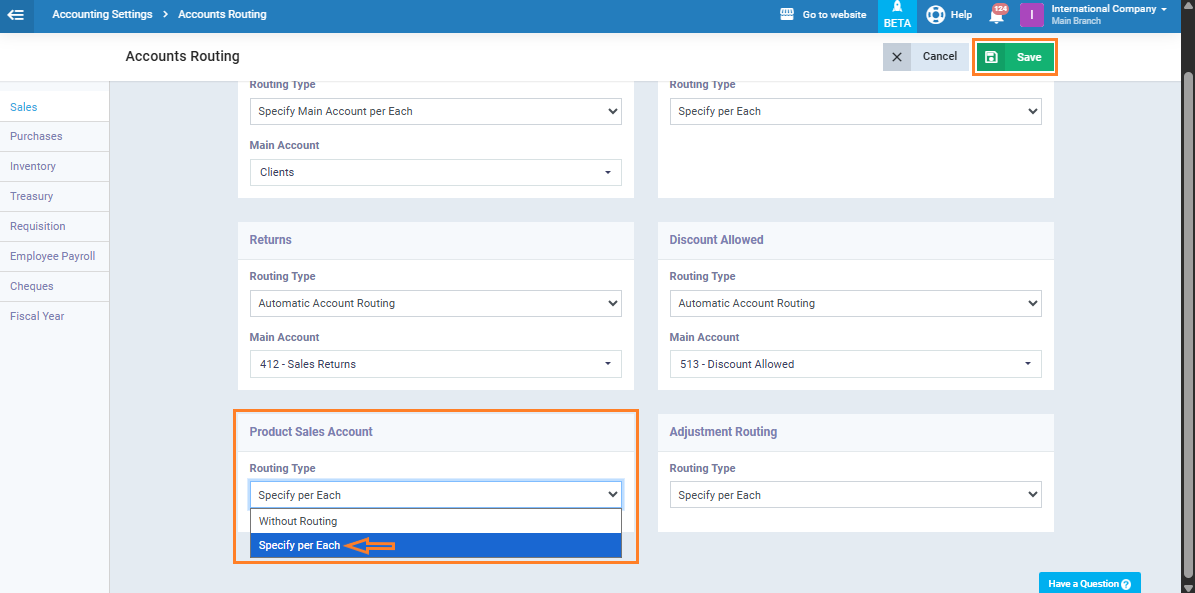
- In the “Product Sales Account” field, choose “Specify per Each” so you can specify a different account for each invoice item.
- Click on the “Save” button.
Creating an Expense Account in the Chart of Accounts
From “Accounting“, select “Chart of Accounts” to register the required expense account.
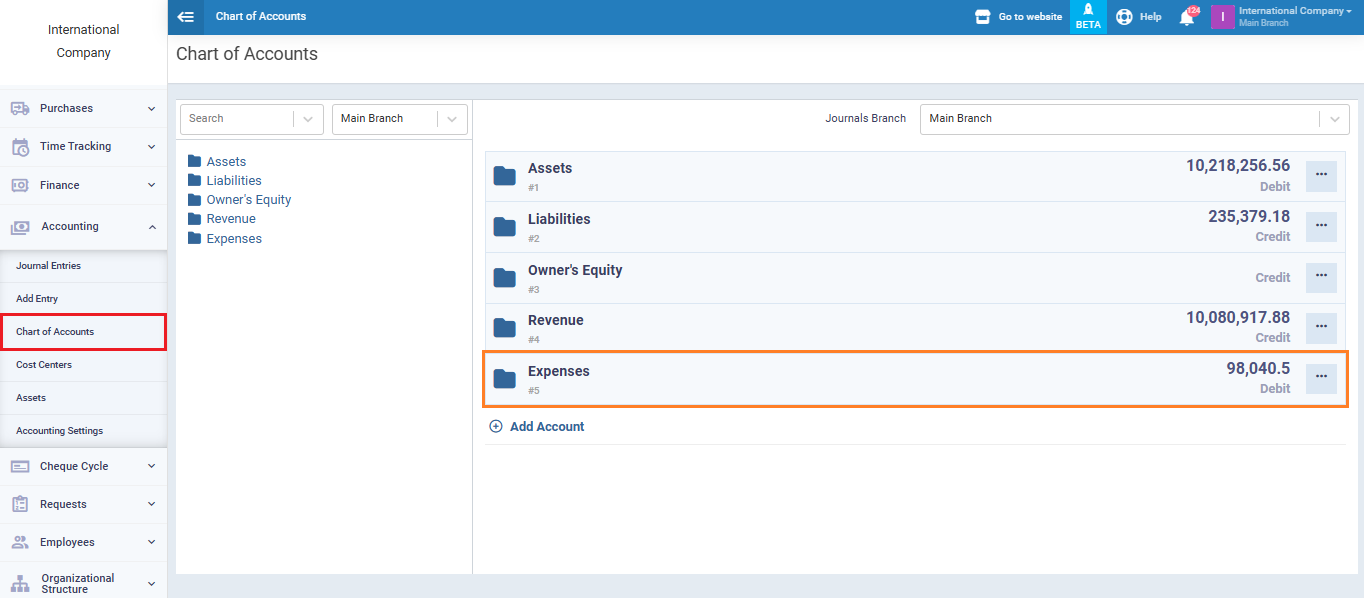
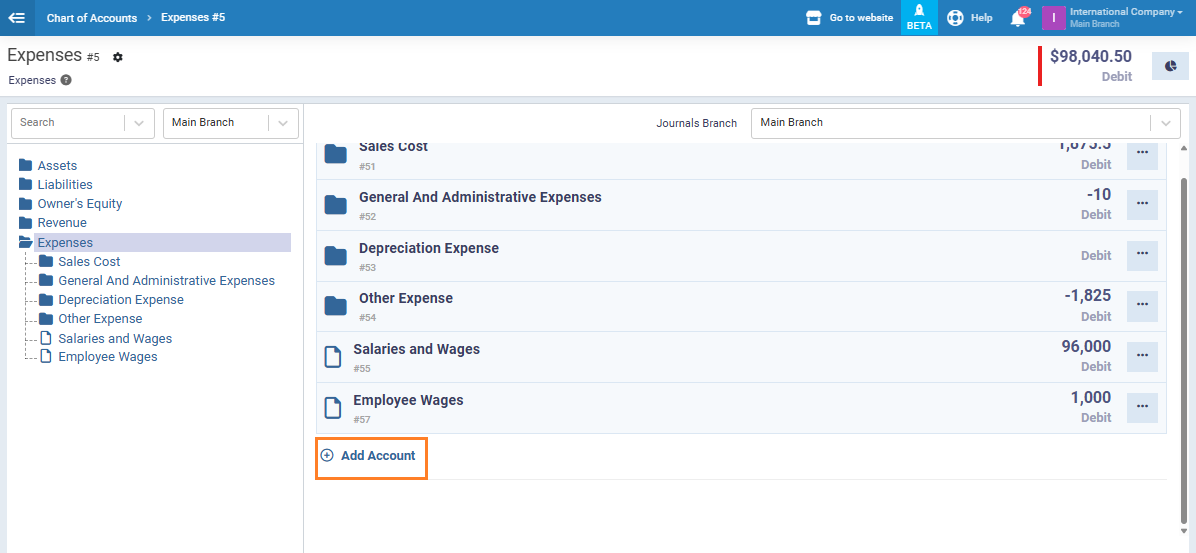
Create a new account under the “Expenses” category by clicking “Add Account“.
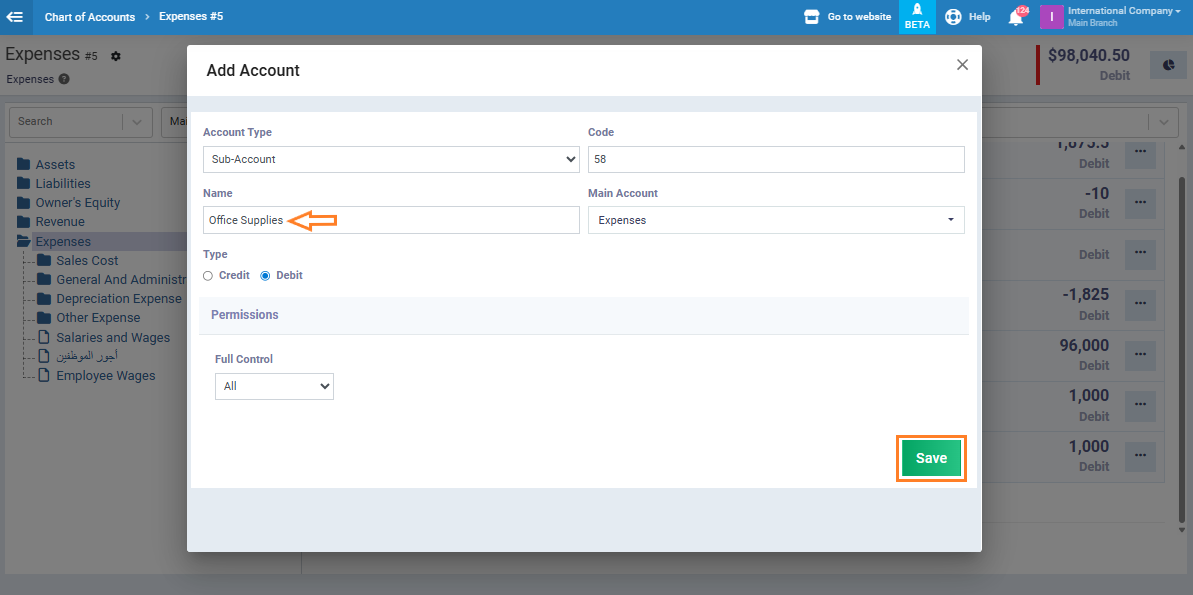
- Enter the account name, e.g., Office Supplies.
- Click “Save“.
For more details on creating a new account in the Chart of Accounts, check the “Adding a new account in the Chart of Accounts” guide.
Creating a Service Linked to the Expense Account
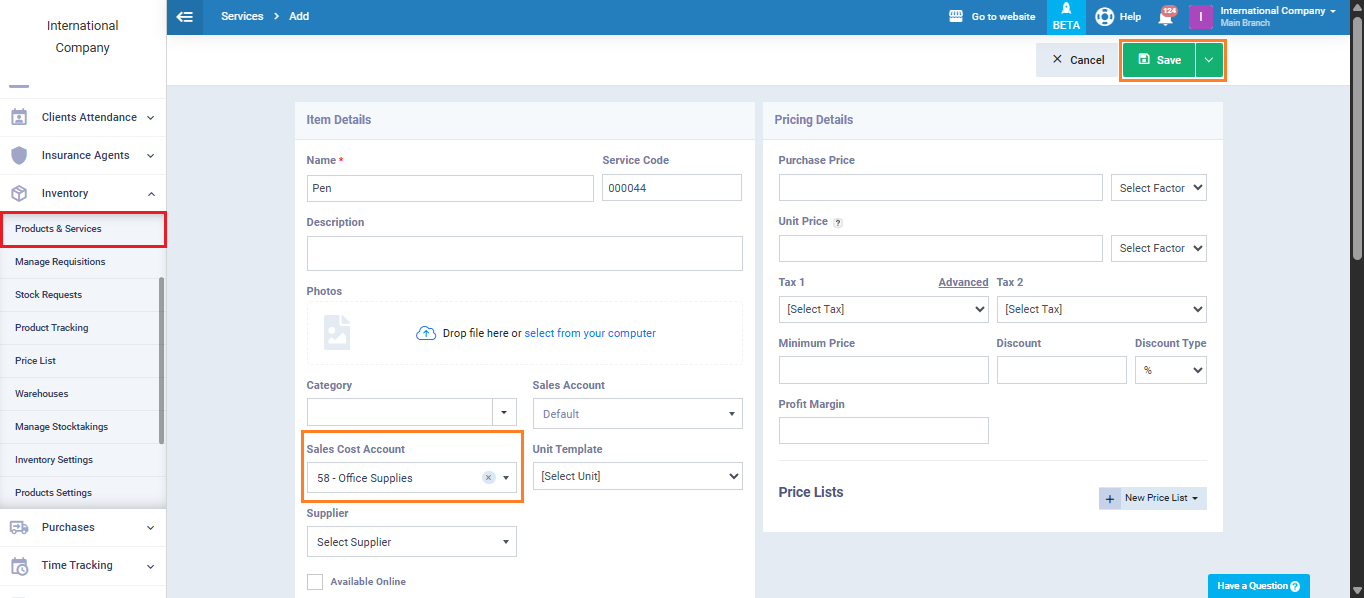
- If you want each invoice item to be directed to its own account, create a new service. (Check the Add New Service guide for reference.)
- In the “Sales Cost Account” field, select the account you created earlier “Office Supplies“.
- Click on the “Save” button.
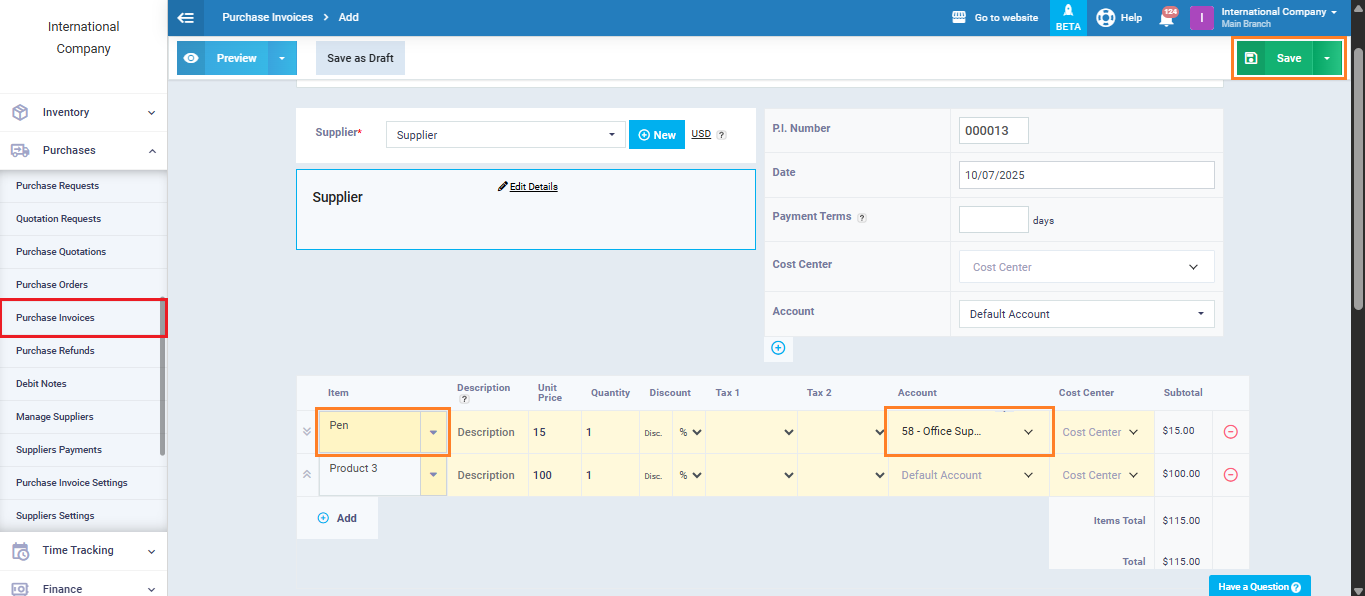
Creating the Purchase Invoice and Adding the Item
- Go to “Purchases” and create a new purchase invoice.
- Fill in the required details (check the Add New Purchase Invoice guide for assistance).
- In the Items section, add the item you created and linked to its expense account.
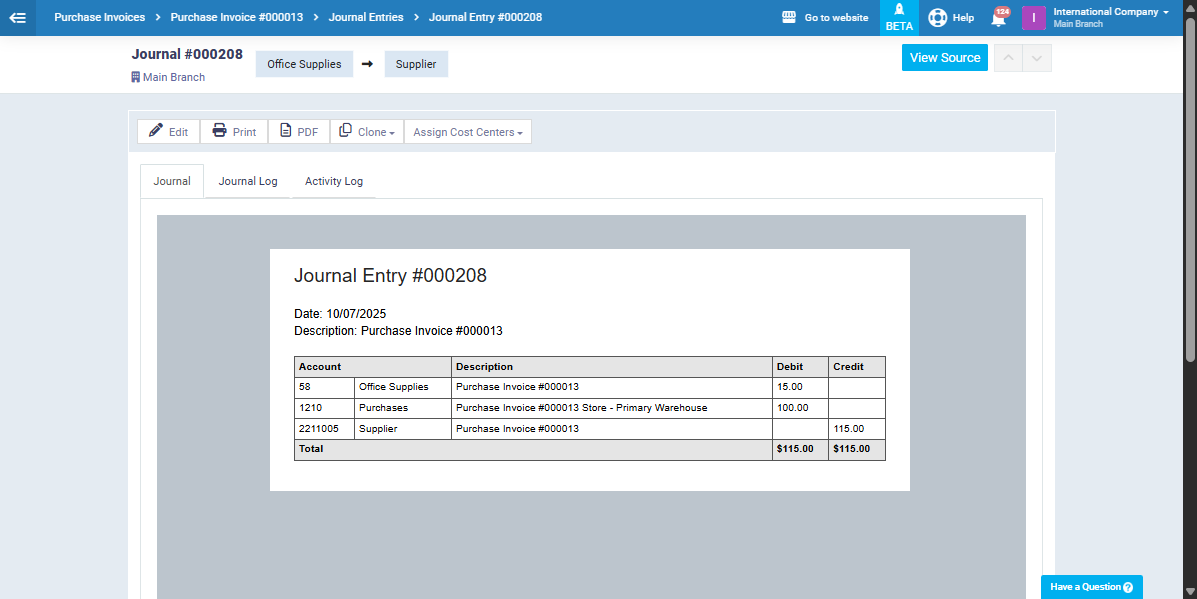
- The assigned account will appear in the invoice table.
- Click on the “Save” button.
Routing the Entire Purchase Invoice to a Single Account
If you want to route the whole invoice to one account instead of assigning each item separately:
- Go to “Accounts Routing” from the “Accounting Settings“, in the “Purchases” field select “Specify per Each“.
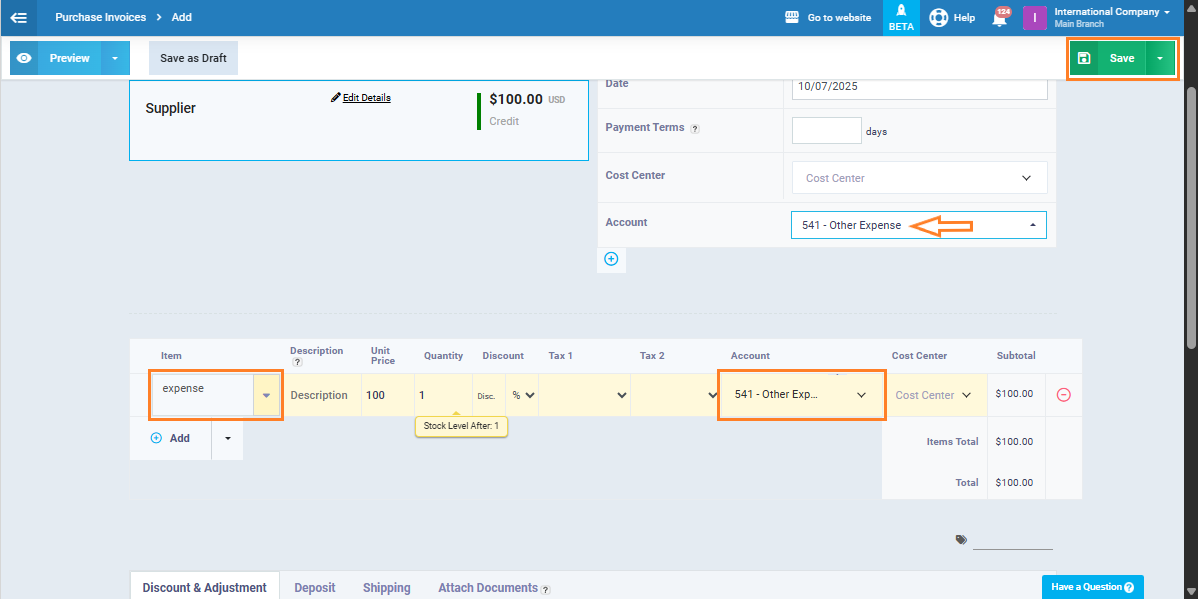
- Create a new purchase invoice.
- While filling in the invoice details:
- Manually add the item “Expenses“.
- In the Account field, select the account you want “Other Expenses“.
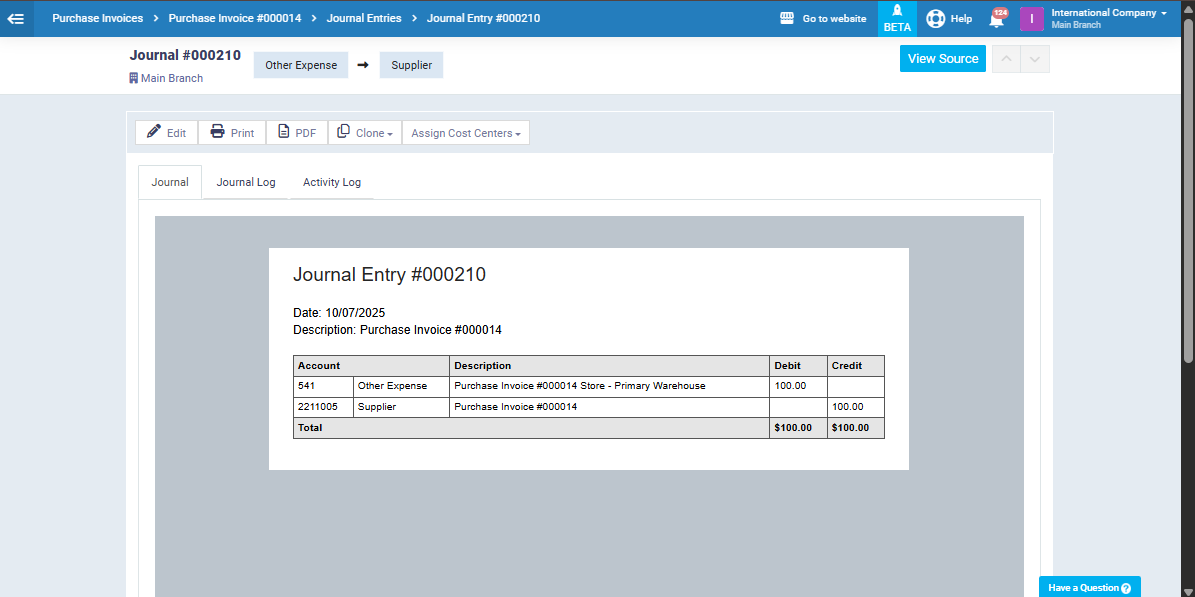
- Save the invoice.