Creating a Warehouse Manager and Branch Manager
The system helps you distribute tasks among employees by assigning precise permissions to each user, ensuring smooth workflow within warehouses and branches. In this guide, we’ll go through the steps of setting up a Warehouse Manager and a Branch Manager to create and follow up on stock requests.
Setting up Employees and Roles
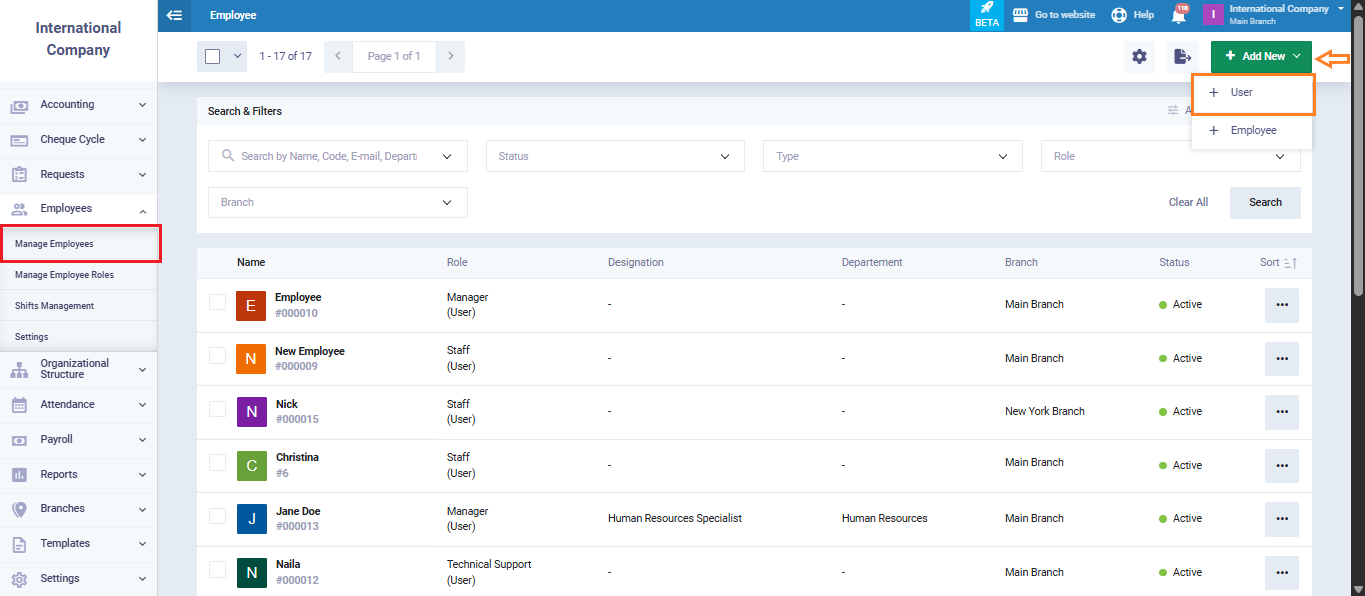
From the main menu, go to “Manage Employees.”
Click “Add”, then select “User.”
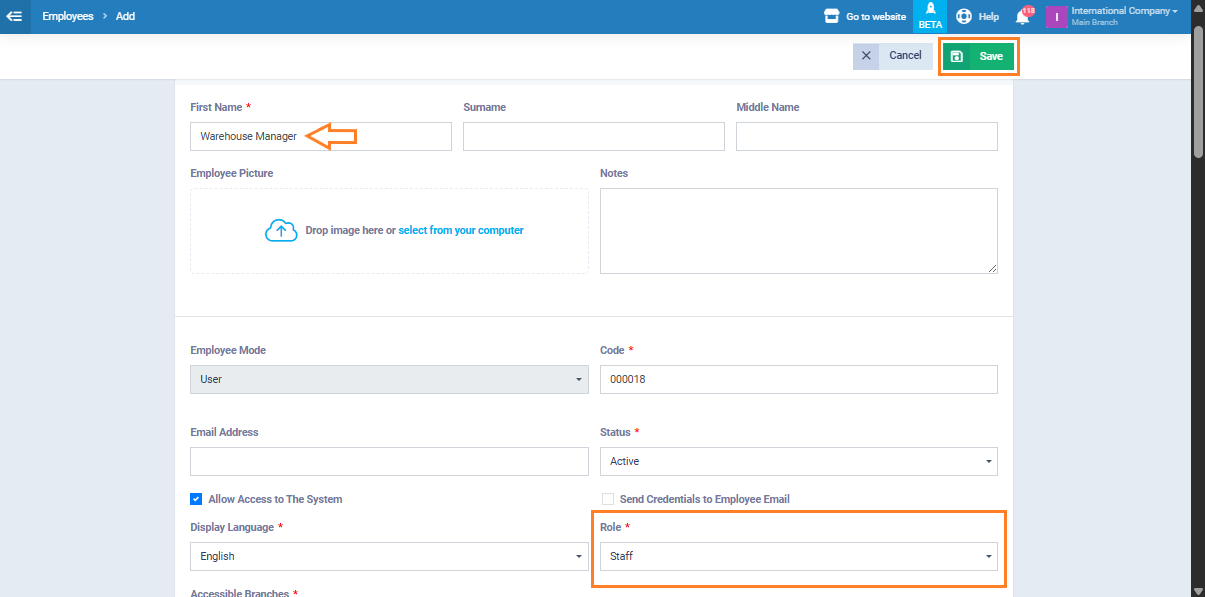
Create a new user named “Warehouse Manager,” then assign the user to an employee role, which you can later edit from the “Employee Roles” section.
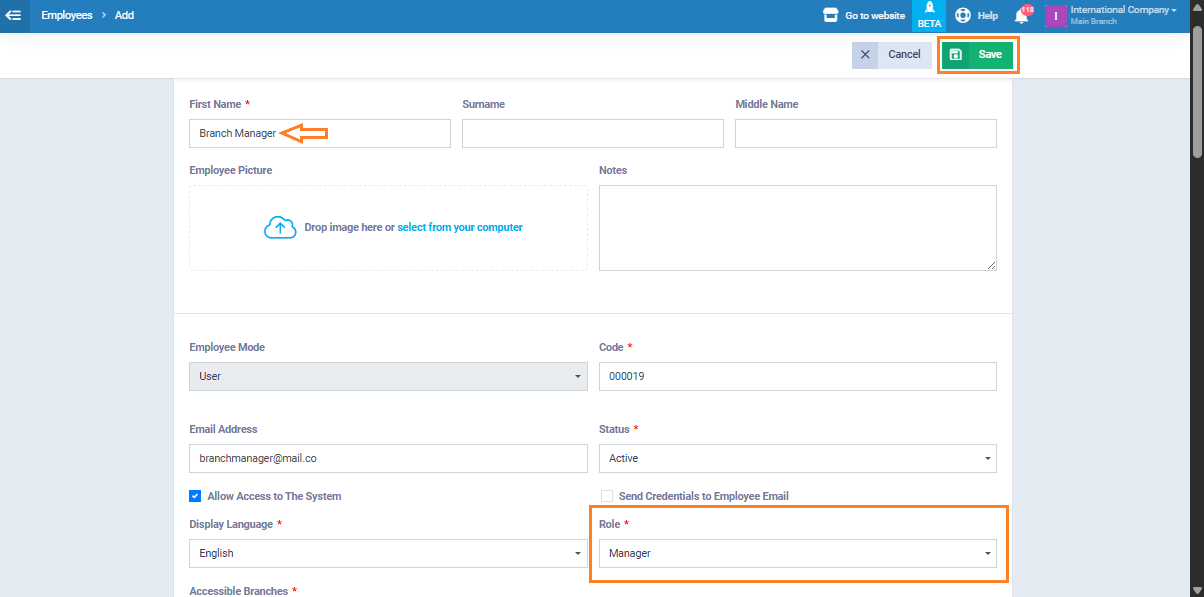
Then, create another user named “Branch Manager.”
Now, assign permissions to each as follows:
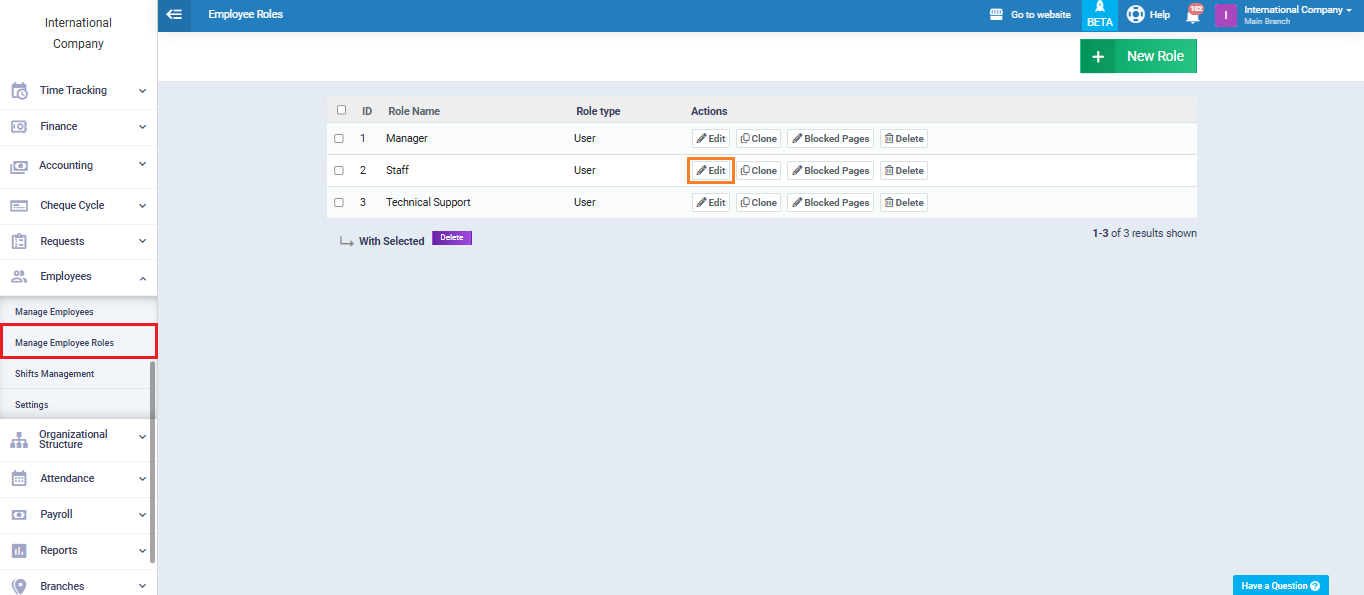
Go to “Employee Roles” from the employees dropdown menu.
For the role assigned to the warehouse manager, click “Edit.”
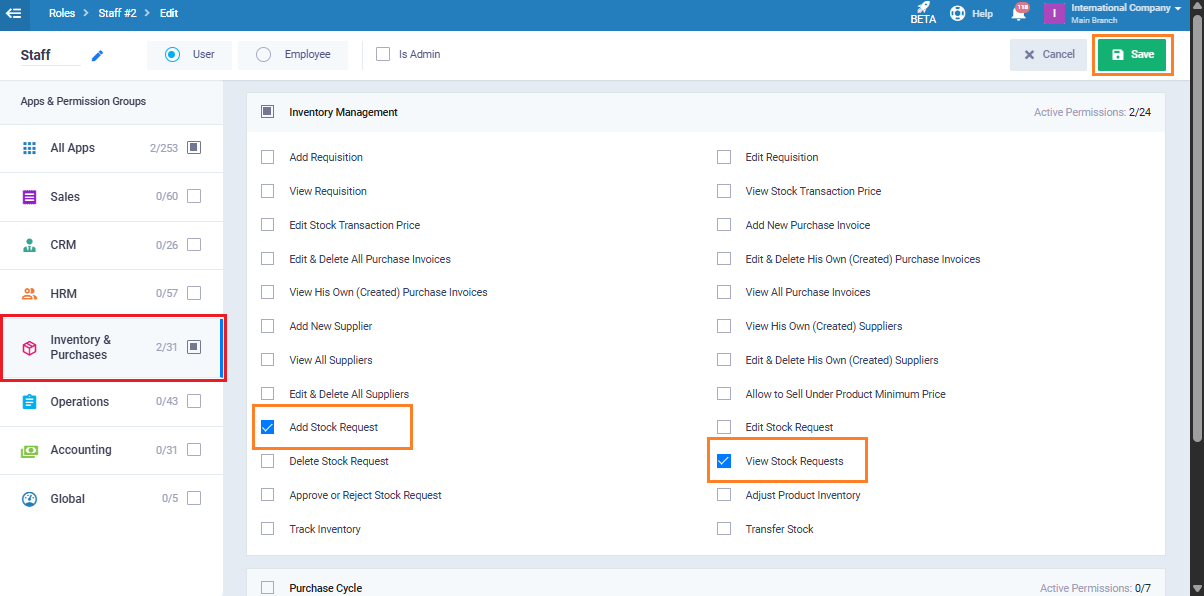
Warehouse Manager Permissions
- Add Requisition.
- View Requisition.
Now, move on to the next step, where we configure the permissions for the “Branch Manager“.
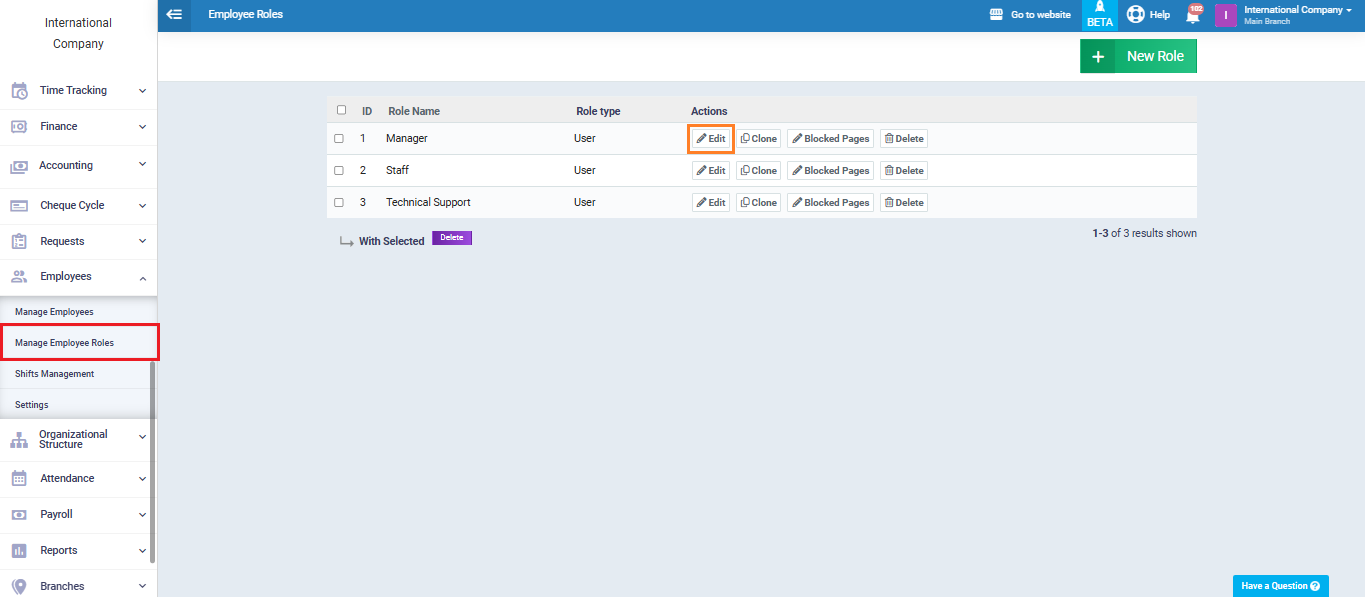
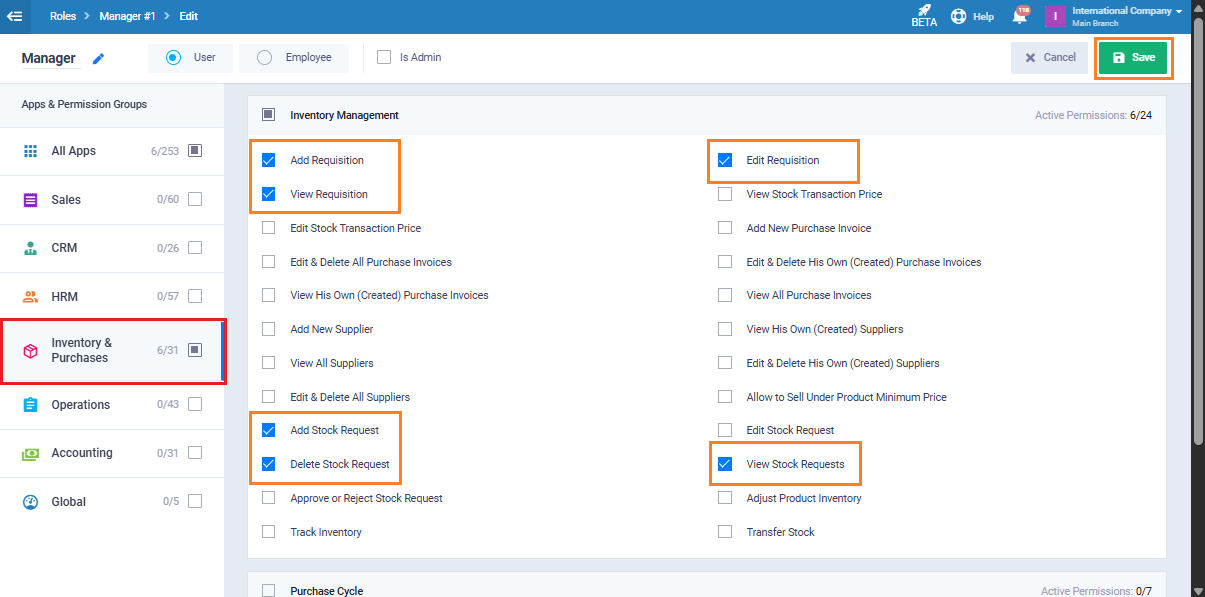
Branch Manager Permissions
Assign the following permissions:
- Add Requisition.
- View Requisition.
- Edit Requisition.
- Add Stock Request
- Delete Stock Request.
- View stock requests.
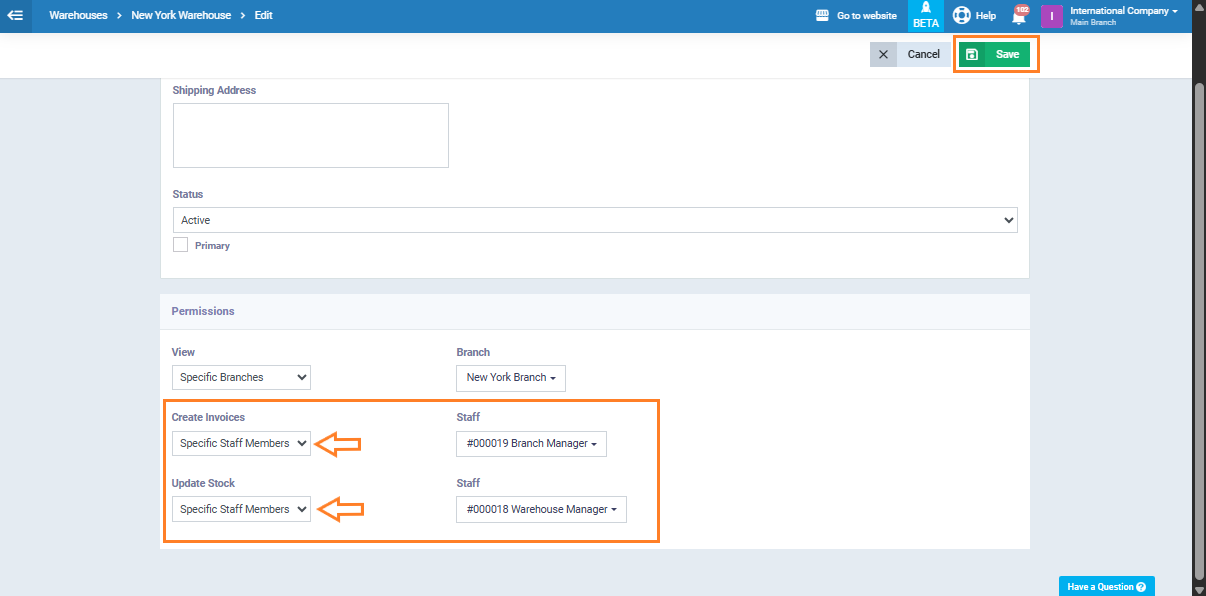
Setting up Warehouses
Go to “Warehouses” and select the required warehouse.
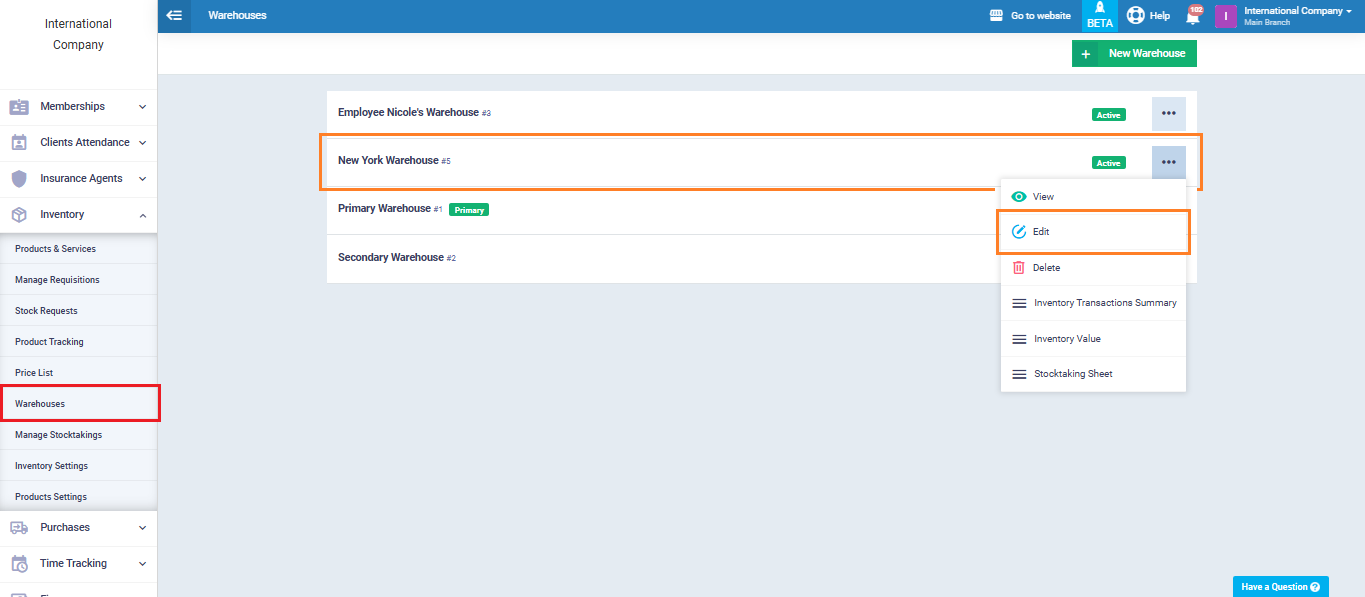
Within the warehouse settings, adjust access permissions as follows:
- Grant the Warehouse Manager permission to edit the warehouse.
- Grant the Branch Manager broader permissions, including editing, viewing, and creating invoices.
Click “Save” to apply the settings.